Nail Designs · The nail edit
23 Lip Gloss Nail Designs with a Glossy Finish
The main difference of a good lip gloss nail designs is that it does not reveal the color right away. The first thing you will...
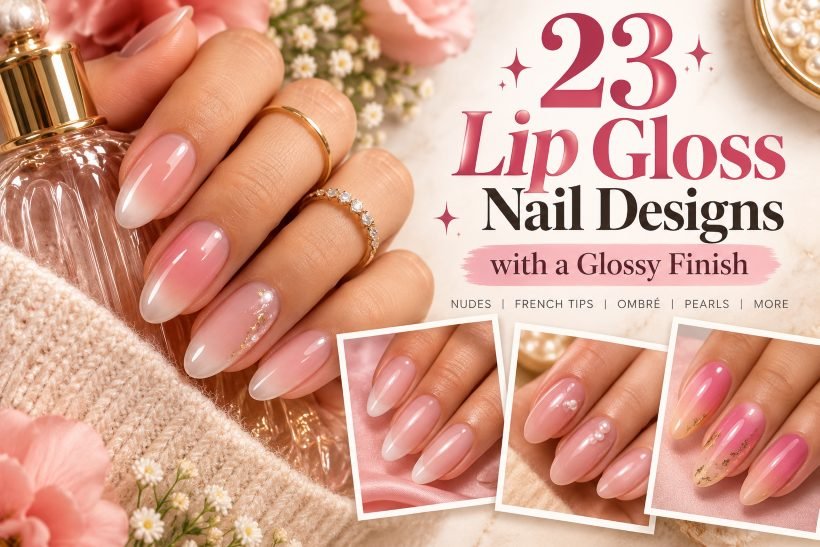
The main difference of a good lip gloss nail designs is that it does not reveal the color right away. The first thing you will notice about this manicure is the shine, then the slight hint of pink or nude, and, lastly, the border of your own nails appearing through the color. These are the features that differentiate the manicure from a usual polish.
Here are 23 lip gloss nail ideas that range from simple single colors to French tips, fades, foils, pearls, and other salon-exclusive techniques. There are short ovals, squares, long almonds, coffin and stiletto shapes. Also included in this gallery are the ideas of what to do by yourself and what needs to be done in a salon, as well as when to choose press-on nails.
1. Classic Rosy Pink Lip Gloss Nails on Short Ovals
This is the best option if you desire the most clear look. The short oval nails have one light layer of rosy pink that colors the nails but does not cover them, thus the light free edge is visible at the tip of the nail. The five fingers are identical. There is one narrow space between the nails and the cuticle, and there is one unbroken line of glossiness from the base to the tip.
Choose a rose shade similar to that of your nail bed since the chalky pastel shades become dull when covered by the top coat. In case the first coat leaves streaks, do not apply the second coat thicker but wait until it dries and apply another thin coat.

How to Apply
- Shape short ovals, wipe the nails clean, and brush on a thin base coat.
- Paint one thin coat of sheer rosy pink, stopping a hair away from the cuticle.
- Add a second thin coat only after the first is dry, and only if you want a deeper tint.
- Finish with a high-shine top coat and run it over the tip edge.
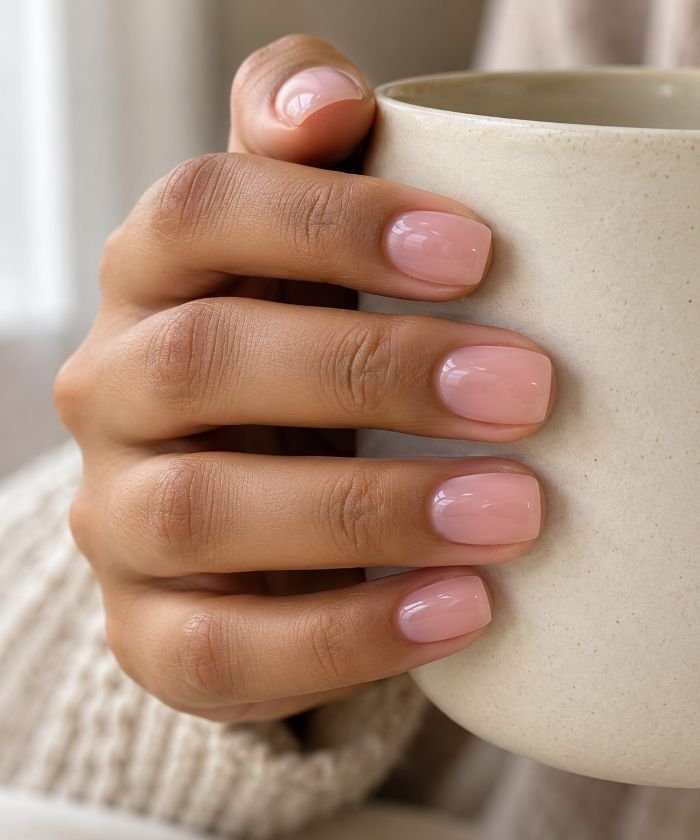
2. Milky Blush Gloss on Soft Square Nails
A milky blush works a little differently. It softens the nail instead of tinting it, so the natural edge looks like a faint shadow under the color. Here it covers short, soft square nails, with the corners eased just enough to lose the sharp points. The shade sits somewhere between baby pink and clear, and the gloss does the brightening. If a thin white tip still peeks through, even better.
Look for a polish labeled “buildable” so you can control the milkiness. One coat reads clearer, two coats read creamier, and you can test both on a single nail. If you like this pale-pink family, the Bubble Bath nail ideas show more ways to wear it. Skip the art here so the soft square shape stays the focus.
How to Apply
- File short soft squares and brush on a thin base coat.
- Paint one even coat of sheer milky blush with light strokes from cuticle to tip.
- Add a second thin coat once the first has dried if you want a creamier veil.
- Seal with clear top coat, wrapping it gently over the free edge.
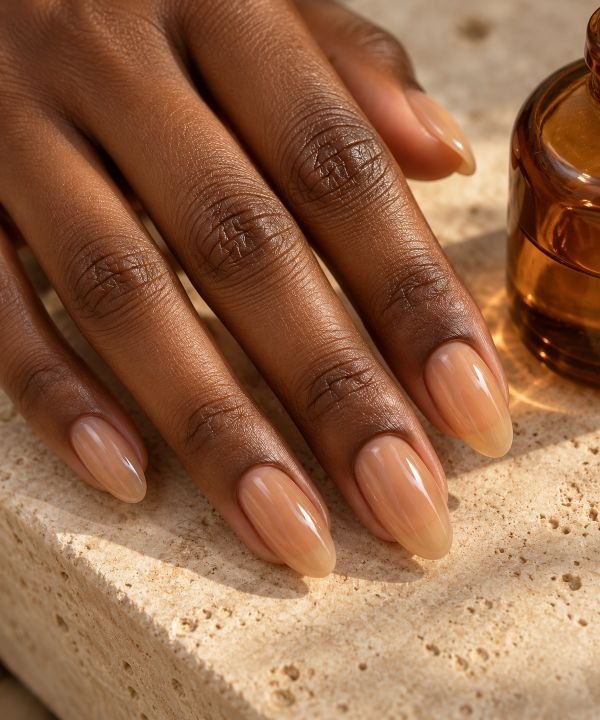
3. Honey-Nude Lip Gloss on Medium Almond Nails
Honey nude adds warmth without covering the nail. Think of a see-through beige with a drop of amber in it, not a dense tan cream. On medium almond nails, the tapered tips lead the eye along one smooth line of shine. In direct light the color turns golden. In shade, a little of your natural pink comes back through.
Test honey shades on one nail before you buy a bottle. A beige that looks neutral on a white swatch can pull orange on your skin. If your nail beds run cool, a softer caramel-beige gives the same warmth with less shift. Browse almond nail ideas if you want to compare tip shapes first, then ask your technician for a thin, even tint instead of extra opaque layers.
How to Apply
- Shape medium almond tips and apply a clear base coat.
- Brush on one thin coat of see-through honey beige and check it by a window.
- Add a second thin coat across all five nails only if you want more warmth, then cap each tip with a reflective clear top coat.
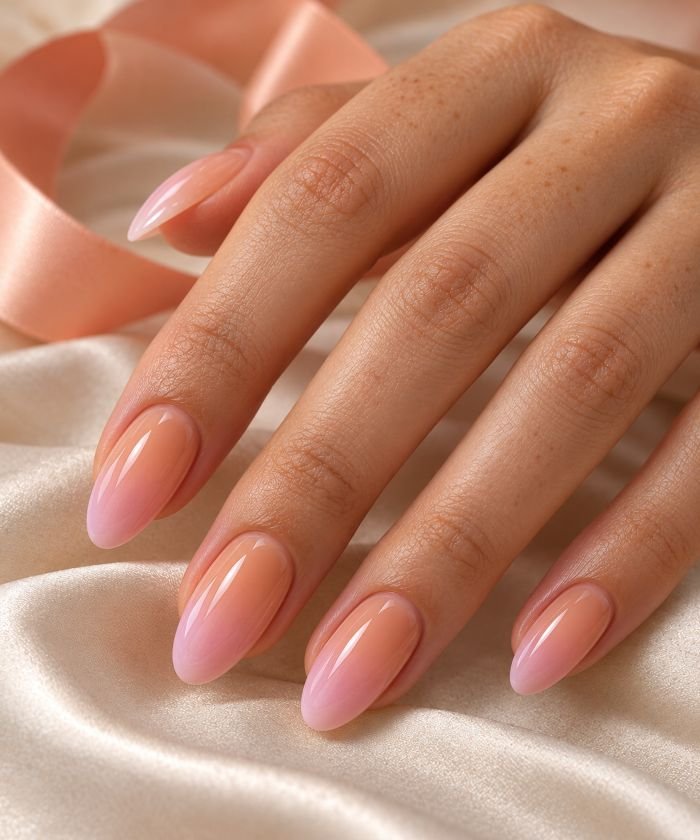
4. Peach-to-Pink Gloss Gradient Nails
Here, sheer peach sits at the cuticle and melts into pale pink at the tip on medium oval nails. The change should be gentle enough that you can’t point to where one color stops. The nail still shows through, and one smooth top coat sits over the blend. It looks like tinted gloss catching two kinds of light, not a bold ombré.
Dab a little polish on a makeup sponge, tap off the extra, then pat the colors together. Too much sponging makes the surface rough and cloudy, so build the fade in light passes and clean the sidewalls before you seal. For stronger fades and bolder color pairs, see these ombré nail ideas. Keep this version sheer if you want it to stay on the lip gloss side of the line.
How to Apply
- Apply base coat, then one sheer peach coat over the whole nail.
- Tap sheer pink onto the outer half with a barely loaded sponge.
- Feather the join with a clean corner of the sponge, and wipe the skin around each nail.
- Let it settle, then smooth everything with a high-gloss top coat.
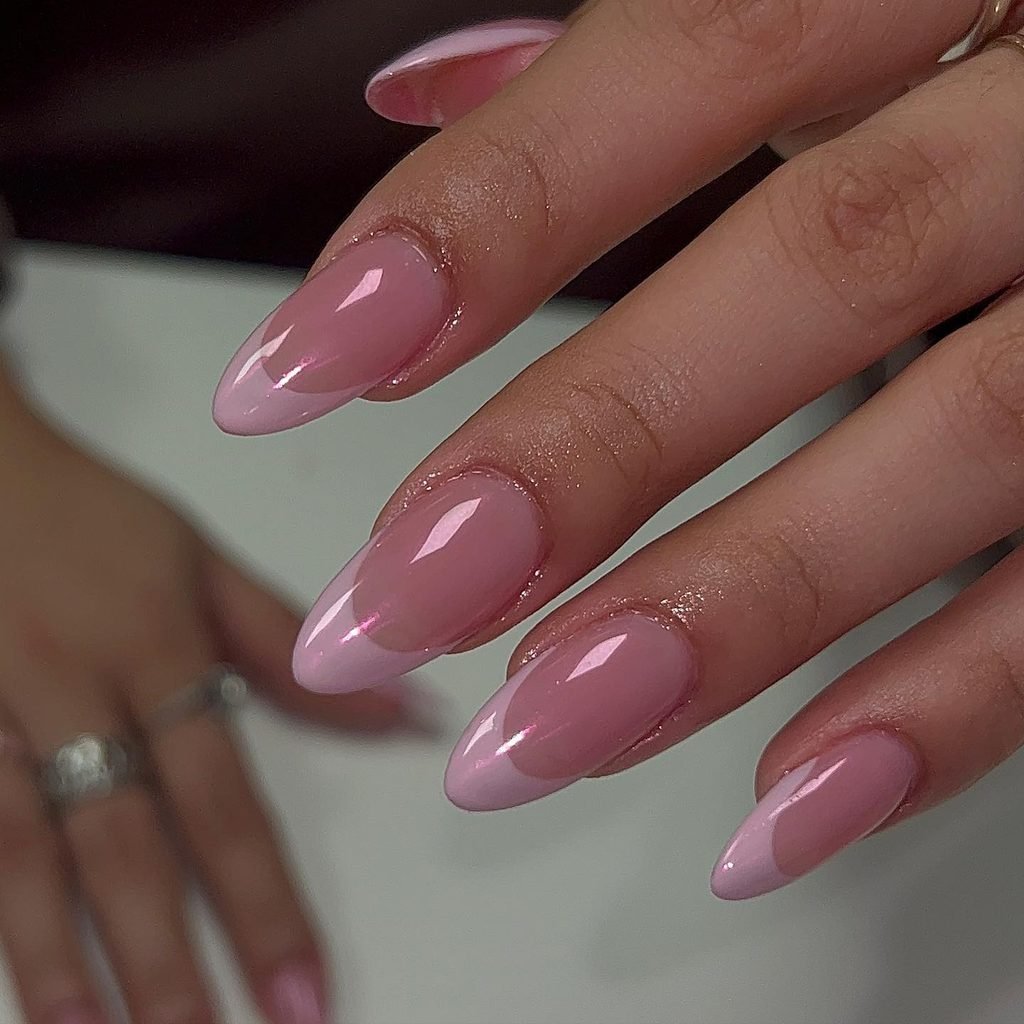
5. Pink-on-Pink Micro-French Lip Gloss Nails
The barely shaded pink polishes the medium oval nails. Each of the cuticles features a line of rose color which is somewhat darker but still not too thick and manages to follow the curve of the nail. The two different tones of pink look alike under gloss and the French accent comes into view either by moving your hand or under the light.
This is a kinder option when bright white tips feel too sharp against a sheer base. Choose a tip color a few shades deeper than the base, and no more. A fine liner brush helps on short nails, so wipe most of the polish off the bristles before you draw. When you want stronger contrast, the French tip nail designs cover thicker, whiter versions.
How to Apply
- Paint two thin coats of pale sheer pink on medium oval nails and let them dry.
- Draw a narrow rose arc along each free edge with a fine liner brush.
- Fix any wobbly curve with a small cleanup brush dipped in remover, then finish with a smooth clear top coat.
6. Blurred White French Tips Beneath a Rosy Glaze
The soft white transitions into rosy glaze on medium oval nails. Soft white is only applied to the free edge, and the inner border of the nail is blurred, not outlined with a sharp smile line. The sheer rose is spread thinly along the edge from the nail bed to create connection between nail bed and tip; one coat of clear gloss unites everything in a single reflection. This hazy tip is applied to all five nails.
Use a minimum amount of white polish on a small sponge, keeping most of it along the border. Allow the tips to dry off before applying the rose shade, otherwise the brush will pull some of white back. It is a nice choice for those who don’t like the line of French manicure, but would like the concept of it. Make sure the rose is translucent enough to preserve the haze effect.

How to Apply
- Brush clear base coat on medium ovals and let it set.
- Dab a little soft white onto each tip, feathering the inner edge with a sponge.
- When the white is dry, float one thin coat of sheer rose over the whole nail.
- Seal with a high-gloss top coat.
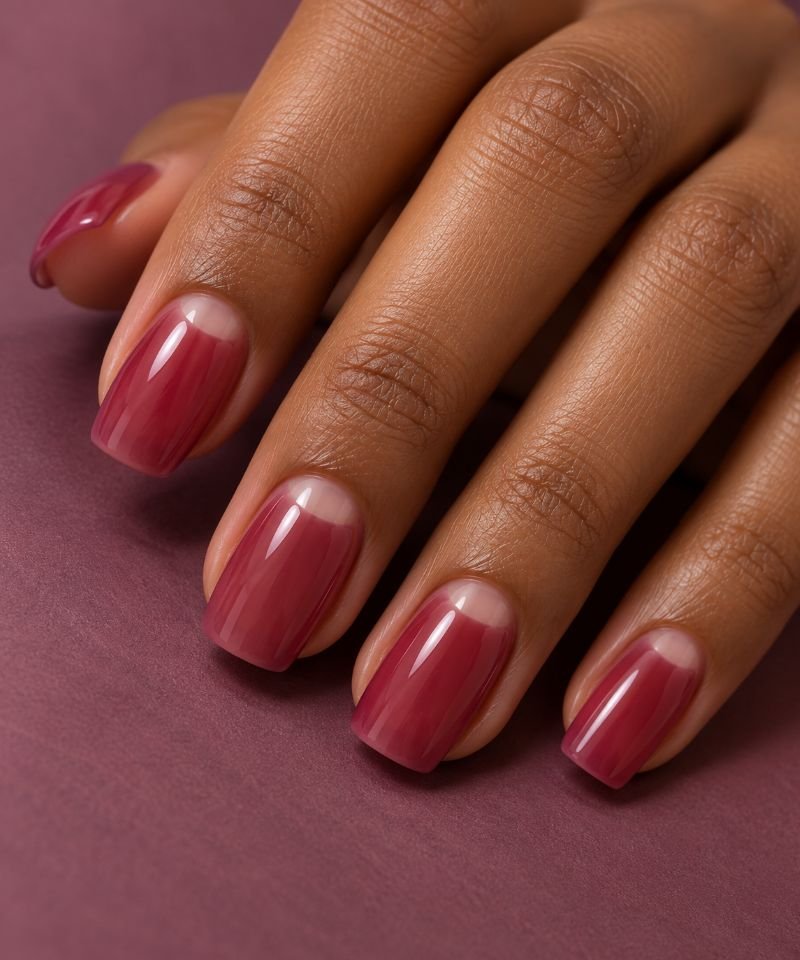
7. Clear Half-Moon Windows in Sheer Berry Gloss
Medium squoval nails receive deep rose-berry coating, apart from small clear crescents located at the cuticles of all nails. The berry remains transparent, which means that the natural nail and the half-moon are visible through the color. There is only one clear top coat used for unifying all the elements into one glossy surface. The crescents appear on all five fingers, becoming the pattern itself.
It is a more saturated variation of lip gloss nails for those who desire a bit more of color but not a full coverage look. Firmly press the curved stencils on the completely dry base coat so that the edges do not bleed. You can use freehand as well, using a cleanup brush to make the curve sharper. A small gap should be left between the color and your skin at the cuticle.
How to Apply
- Apply a clear base coat to medium squoval nails and let it dry.
- Press a curved guide at each cuticle to protect a small crescent.
- Paint one thin coat of sheer berry-rose over the open area, then peel the guides off slowly.
- Tidy the arc with a cleanup brush and cover everything with clear gloss.
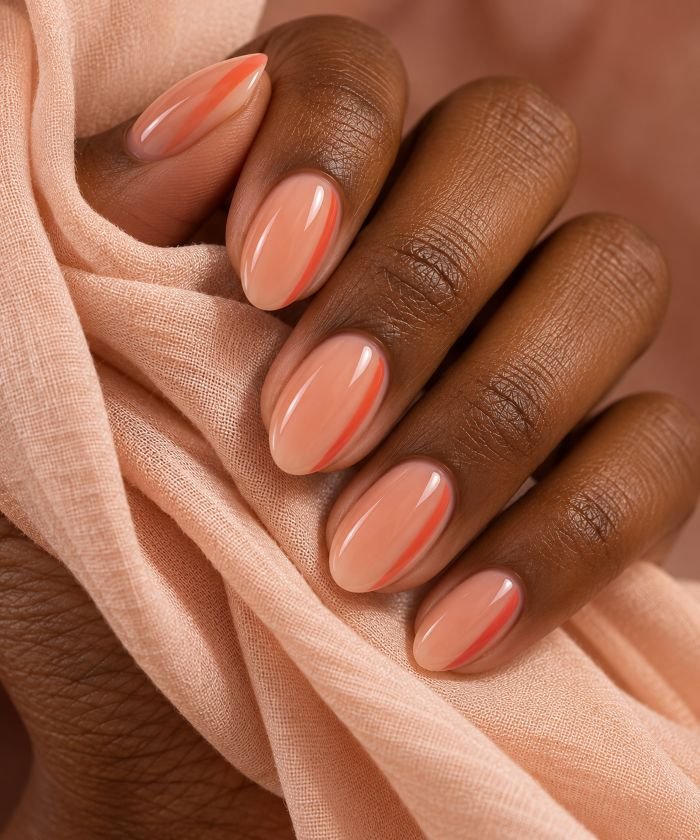
8. Sheer Peach Gloss with a Slim Coral Side Stripe
Sheer peach polish covers the short almond nails, with a single thin coral line painted down the right side of each nail. The line begins slightly above the cuticle and ends before reaching the tip, meaning that a peach border surrounds the line. The coral polish is sheer enough to appear as a darker color, and the topcoat makes both colors smooth and shiny.
Keep the line away from the sidewall for easier clean-up. If the coral polish is opaque, mix a little of it with clear polish on the palette and test it first. Painting a thin vertical line will elongate the short nails without any extensions. A long and flexible striping brush helps keep the line thin and straight; a wobbly first nail is expected, so wipe it off and start again.
How to Apply
- Apply base coat and one thin layer of sheer peach to short almond nails.
- Load a fine striping brush lightly with sheer coral.
- Draw one slim line down the right side of each nail, starting above the cuticle and stopping before the tip.
- Let the lines dry, then seal with a clear top coat.
9. Long Almond Lip Gloss Nails, the Red-Carpet Version
The length affects the way that this nail trend appears. On almond-shaped nails, a sheer, light pink manicure turns into a ribbon of polish extending across the nails, and the point where the almond is narrow creates reflections wherever you go. The color remains subtle and close to the nail bed. With the larger surface area, even a sheer tint takes center stage with the reflection.
As Byrdie reported, these long almond-shaped nails were seen on Hailey Bieber, and they had a very shiny finish in light, sheer pink (Byrdie’s report on her lip gloss nails). Long nails such as these require extensions in the form of either gels or custom press-ons. For the best results, you’ll need to visit the salon to achieve an even surface.

How to Apply
- Book gel extensions in a long almond shape, or order custom long almond press-ons sized to your nails.
- Ask for a sheer pink gel color in thin, even layers, cured as that system directs.
- Have the surface smoothed before the final high-gloss coat goes on.
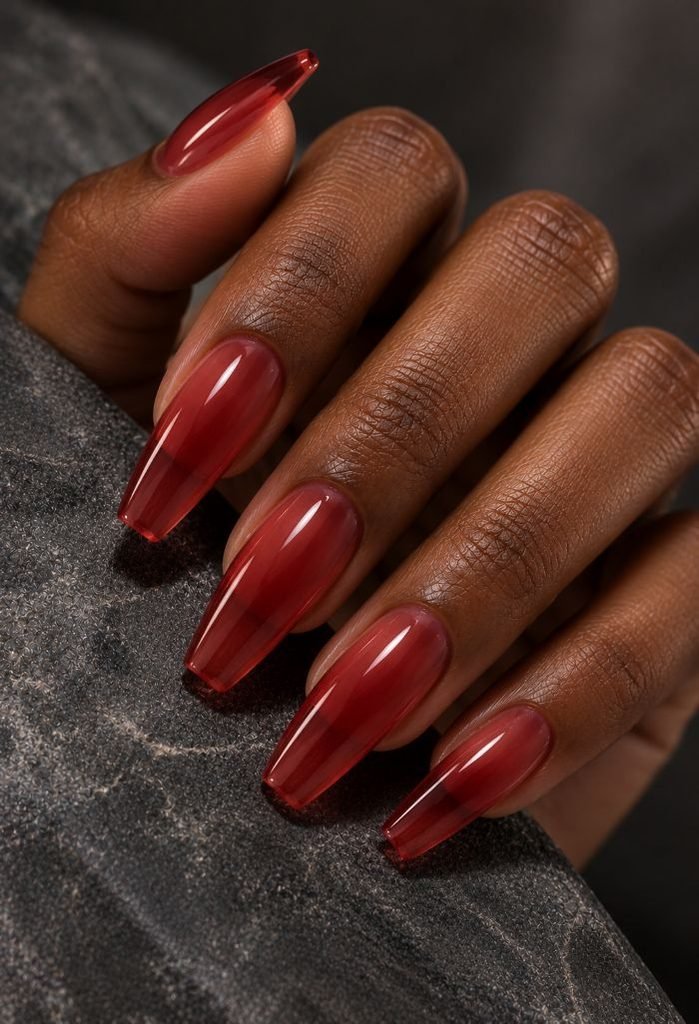
10. Sheer Cherry Gloss on Long Coffin Press-Ons
This particular color adds the element of color while retaining its translucent quality. Long coffin nails are painted with a fine layer of cherry red, much like a stained lip and not lipstick, in tapered form and a square-shaped tip. The nail underneath is visible through the layer of red, with a high gloss top coat giving the red a wet appearance, something which opaque red can’t offer. All fingers have the same treatment.
It is best to go for press-ons in this case. Take some clear nails, match each to the size and curve of your own nail, and then apply fine layers of red. Ensure that the top coat you use is compatible with the press-on and remove according to the manufacturer’s instructions. The red color will highlight any imperfections in the nail, so use it in two thin coats.
How to Apply
- Size clear press-ons to each nail and file the tips into long coffin shapes.
- Wipe off the dust and paint one very thin coat of sheer cherry red on each press-on.
- Add a second thin coat only if the first looks watery.
- Seal with a glossy top coat, let the set dry fully, then attach it with the adhesive from the kit.
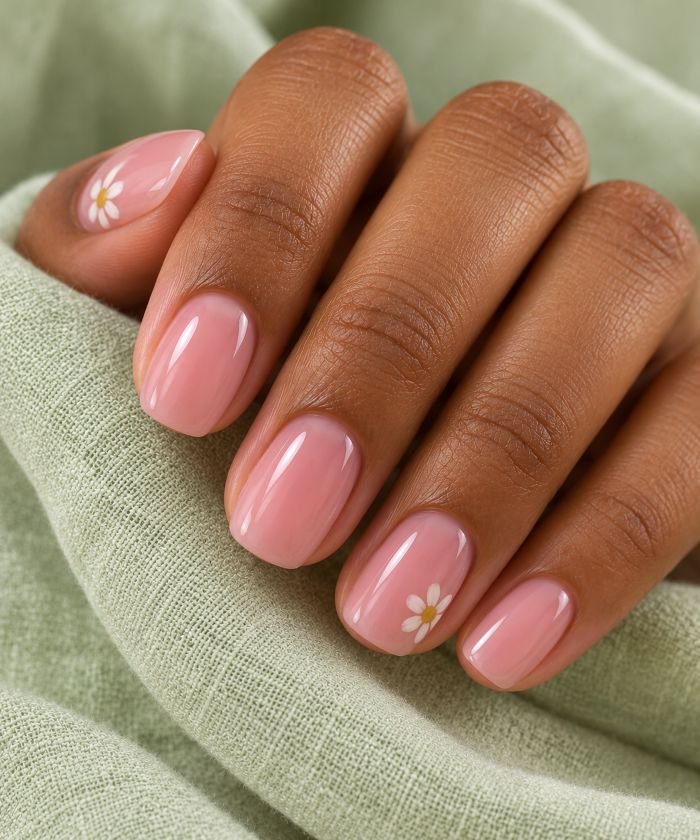
11. Pink Lip Gloss Nails with Tiny Daisy Corners
Petal-pink gloss covers short, rounded-square nails. On the thumb and ring fingers only, a tiny daisy sits near the lower outer corner: five thin white petals around a muted yellow center. The flowers stay small, so most of the pink is still open. The other three nails stay plain, and the top coat keeps the daisies flat against the nail.
A low corner placement keeps a flower from taking over the nail. Paint the petals with a fine brush instead of a big dotting tool, which tends to leave thick, lumpy blobs. Skip bright yellow for the center and keep the white strokes light. For bigger or bolder flower layouts, our daisy nail designs show how much scale changes the mood.
How to Apply
- Coat short rounded-square nails with clear base and one or two thin layers of petal pink.
- On the thumb and ring nails, paint five small white petals near the lower outer corner with a fine brush, then dab a muted-yellow center in each.
- Let the art dry, then top-coat all five nails evenly.
12. Rosy-Nude Gloss with a Fine Gold Foil Corner
Sheer rosy nude coats the medium oval nails while a narrow tear of gold foil rests in the corner of the tip of the index and ring fingers. The foil almost lies flat underneath the clear glossy coat. The foil’s uneven edge contrasts with the smooth sheen of the coat surrounding it. The other three nails remain bare; hence, the rosy nude continues carrying the design.
It is essential to choose the thinnest foil possible since thick or crumpled foil usually lifts through the top coat. Also, the pieces should be kept away from the cuticles as they would be the first area where the regrowth shows. It is easy to match one gold foil with rings, and the rosy nude color also complements it well.

How to Apply
- Apply base coat and one or two sheer rosy-nude coats to medium ovals.
- Touch a dot of clear polish at the outer corner of the index and ring nails, lay a small foil sliver on it, and press it flat.
- Brush a thin layer of clear polish over the foil edges to lock them down.
- Finish all five nails with glossy top coat once the foil is secure.
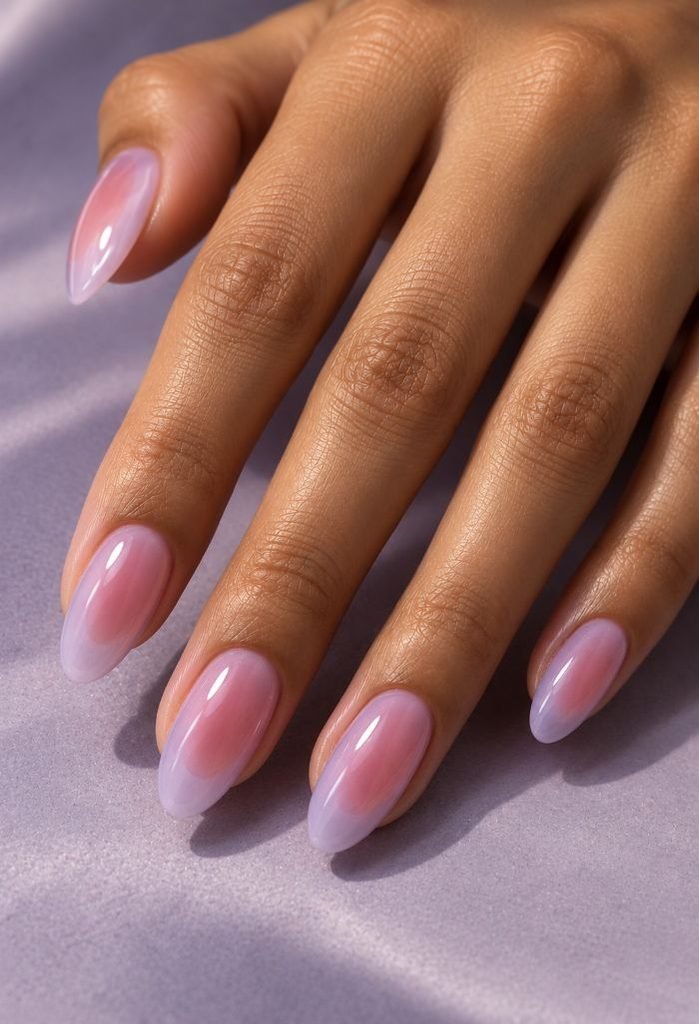
13. Lilac Gloss Nails with a Diffused Rose Aura
A whisper of lilac covers medium almond nails, and a blurred rosy oval glows in the middle of each one. The rose is strongest at its center and fades out before it reaches the edges, leaving a lilac border all around. These are aura nails in placement, but the colors stay light and see-through, so the natural nail shows faintly underneath. Clear gloss pulls the soft layers into one surface.
Tap the rose on with a barely loaded sponge after the lilac has dried. Start with a small oval, then feather its edge with a clean part of the sponge. Too much pigment at once hides the transparency. Aim for the same position on all five nails, but let the edges differ a little so the glow looks diffused, not stamped.
How to Apply
- Cover medium almond nails with base coat and one thin lilac layer, then let it dry.
- Dab sheer rose into the center of each nail with a small sponge.
- Feather the oval outward, leaving a lilac border.
- Seal with a high-gloss top coat.
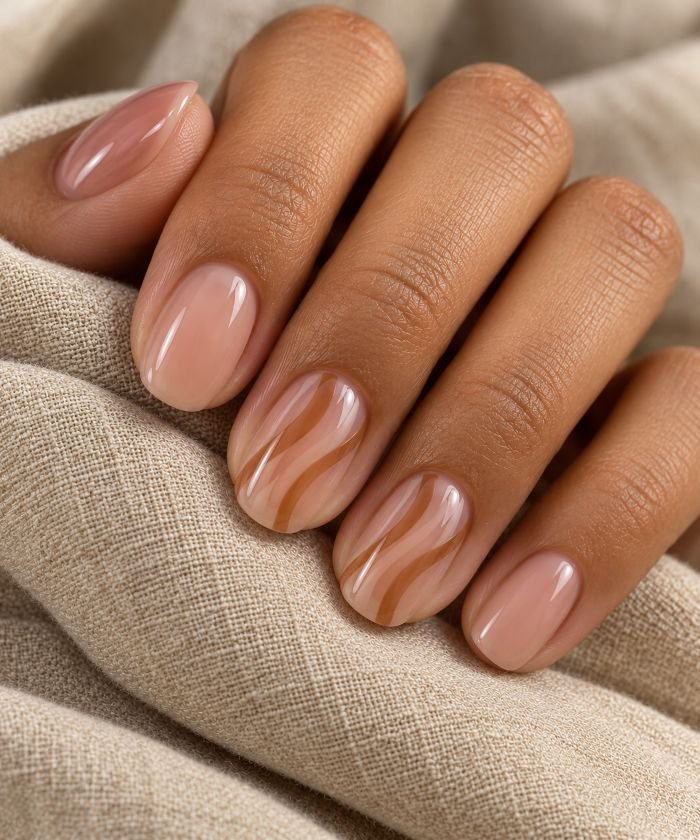
14. Warm Nude Gloss with Negative-Space Swirls
On short oval nails, the thumb, index, and pinky wear a sheer warm nude wash. The middle and ring nails keep a bare, clear-coated base and carry two thin caramel ribbons that curve across them. The gaps between the ribbons are real negative space, not painted-in nude. The contrast between open nail and soft color stays gentle, and one glossy top coat connects all five fingers.
Use translucent caramel for the ribbons and a beige-pink wash for the plain nails, so the contrast isn’t harsh. Draw each ribbon with a slim liner brush, a touch wider at one bend and thinner toward the edge. Let the first curve dry before you add the second. Stop at two ribbons per accent nail. The empty space is half the design.
How to Apply
- Prep short ovals with base coat and tint the thumb, index, and pinky in sheer warm nude.
- On the clear middle and ring nails, draw two separate curved ribbons in translucent caramel.
- Leave the gaps between the ribbons bare, then seal all five nails with top coat.
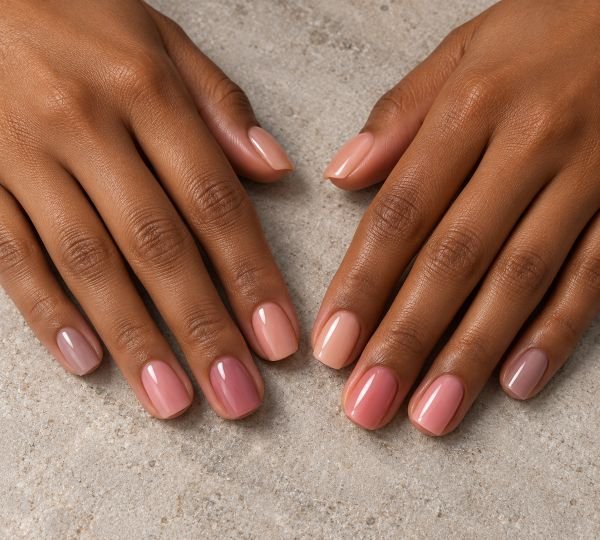
15. Five-Tone Pink and Nude Lip Gloss Skittle Nails
Each nail wears a different sheer tint: peachy nude on the thumb, warm blush on the index, rose on the middle finger, cool pink on the ring finger, and soft mauve nude on the pinky. The shape is short squoval, and coverage is equal on every nail. The shades are close enough to look like one family. The fun comes from small undertone shifts, not color contrast, and one top coat gives the whole hand the same glassy finish.
Line up your bottle swatches in finger order before you paint. Similar pinks can look farther apart than expected once they sit side by side. If the mauve looks too dark, use only one coat or swap in a lighter tint. Keep every nail at roughly the same transparency. One opaque pink in the middle breaks the rhythm of the set.
How to Apply
- File five short squoval nails and apply a clear base coat.
- Paint thumb through pinky with one thin coat each: peach nude, warm blush, rose, cool pink, mauve nude.
- Add a second coat only where a shade looks weaker than its neighbors.
- Use the same high-gloss top coat on all five nails.
16. Sheer Pink Gloss with Tiny Pearl Accents
A sheer, cool pink covers medium almond nails. A single small half-pearl sits near the cuticle of the index and ring fingers, and the other nails stay plain. The pearls are tiny, like punctuation on a clean line. Leave open pink space around each one so the shine across the rest of the nail still wins. Their creamy tone adds texture without changing the color story.
Pearls sit on top of the nail, so use an adhesive or gel made for nail charms and seal around the base as the directions say. A heavy layer of clear polish over the whole bead dulls its glow. Want something flatter for daily wear? Use pearl decals instead. Our pearl nail ideas show fuller layouts, but this pair keeps most of the hand clean.

How to Apply
- Apply base coat and one or two thin coats of sheer cool pink to medium almond nails.
- Dab nail adhesive near the cuticle of the index and ring nails.
- Set one half-pearl in each spot and hold it until the adhesive grips.
- Top-coat the rest of each nail, stopping at the base of the pearl.
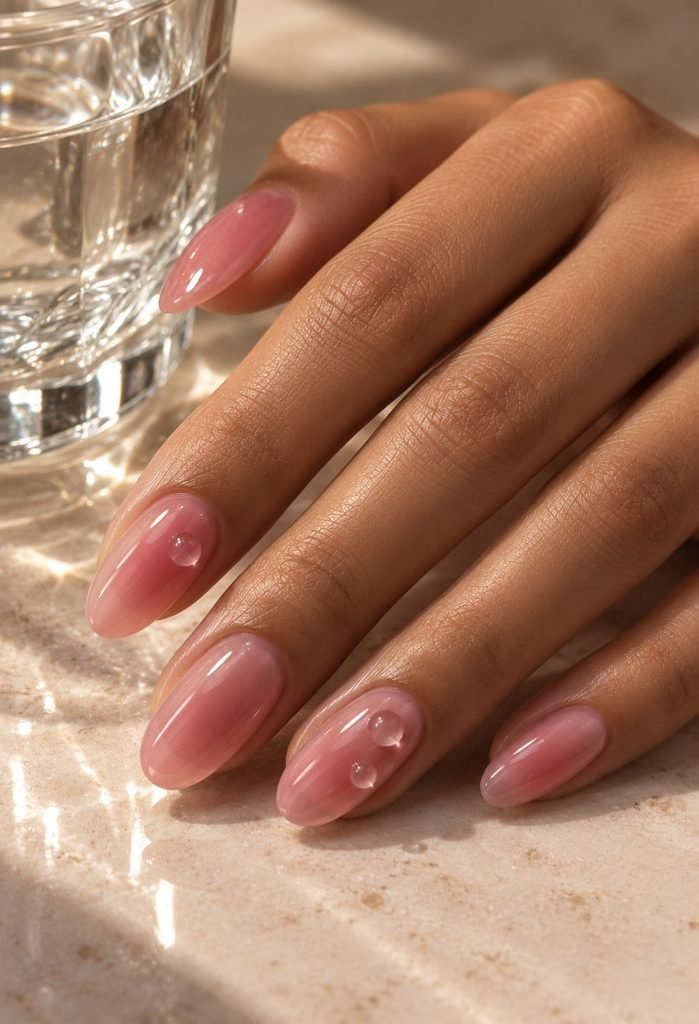
17. Rosewater Gloss with Clear Dewdrop Accents
Medium oval nails wear a transparent rosewater pink. Two tiny clear raised drops sit on the ring nail and one on the index nail, while the thumb, middle, and pinky stay smooth. The drops catch their own highlight above the shiny base, like water beading on tinted glass. Keep each drop small and round so the pink wash still takes up most of what you see.
This one belongs in a salon. A technician sculpts the drops from clear 3D gel and cures them under a lamp, following that product’s directions, and the result needs a steady hand. Ask for placement away from the free edge, because raised drops can catch on hair, sleeves, and bag straps. For a no-lamp route, ask a nail tech about custom press-ons with the drops already added.
How to Apply
- Ask for a sheer rosewater pink gel color on medium ovals, cured in thin layers.
- Have the technician finish a clear gloss coat across all five nails.
- Request two small clear 3D gel drops on the ring nail and one on the index nail, set away from the free edge, and cured as that product directs.
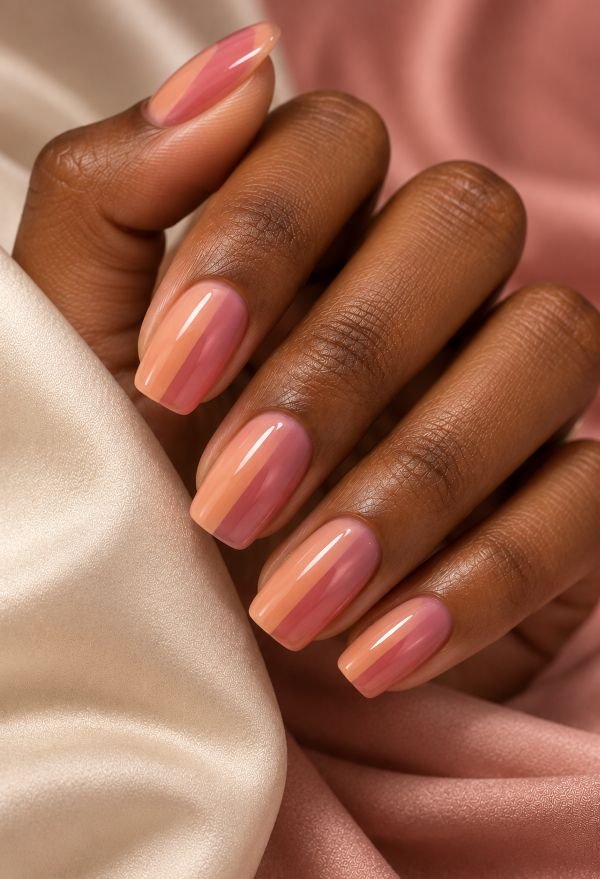
18. Peach and Pink Translucent Color-Block Nails
Each medium squoval nail splits down the middle. Warm peach covers the left half and soft rose covers the right, with a straight vertical meeting line. Because both shades are see-through, the nail stays faintly visible beneath, and clear gloss softens the edge without blurring it. The same layout repeats on all five nails. Keep the two colors close in strength so the split reads gentle instead of graphic.
Lay a thin striping guide down the center of a dry clear base and paint the peach half first. After it dries, remove the guide and paint the rose half with a small brush. The colors deepen where they overlap, so stop at the center line instead of brushing over it again. Matching the boundary on all five nails is what makes it look planned.
How to Apply
- Shape medium squoval nails and apply clear base coat.
- Place a narrow guide down the center of each nail, paint the left half with sheer peach, then peel the guide off.
- When the peach is dry, paint the right half in sheer rose, keeping the dividing line neat.
- Seal with glossy top coat.
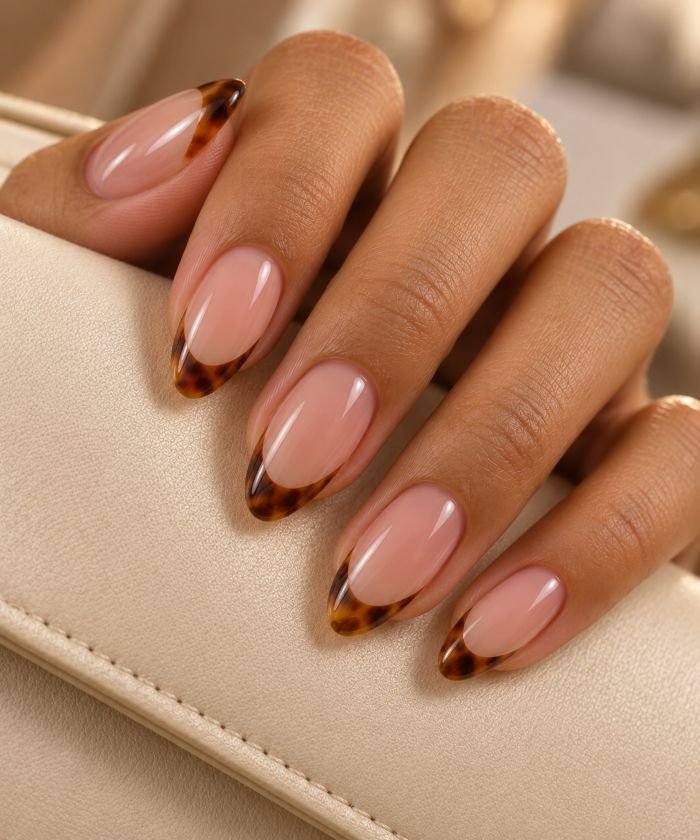
19. Amber Tortoiseshell Tips over a Nude Gloss Base
A sheer pink-beige base covers medium almond nails, and only the tips carry a see-through amber tortoiseshell pattern. Small irregular patches of honey and brown sit inside the amber, and the line where the pattern starts follows a shallow French curve. The pattern stays in the last few millimeters of each nail, so most of the surface still reads as nude gloss. A clear top coat gives the warm tips the depth of polished resin.
Start with diluted amber or sheer honey polish for the tip, then dot in uneven brown spots sparingly and let them overlap only a little. This is harder than a standard French. Use a fine brush if you’re confident, or book a technician for medium length. Don’t paint the whole nail in opaque brown. The contrast between a clear nude bed and an amber tip is the whole idea.
How to Apply
- Apply base coat and one or two sheer pink-beige coats to medium almond nails.
- Paint a narrow amber tip along a shallow curve.
- Dot small honey and brown patches inside the tips, keeping the nude bed clear.
- Let the pattern dry or cure as your system directs, then finish with a leveling gloss coat.
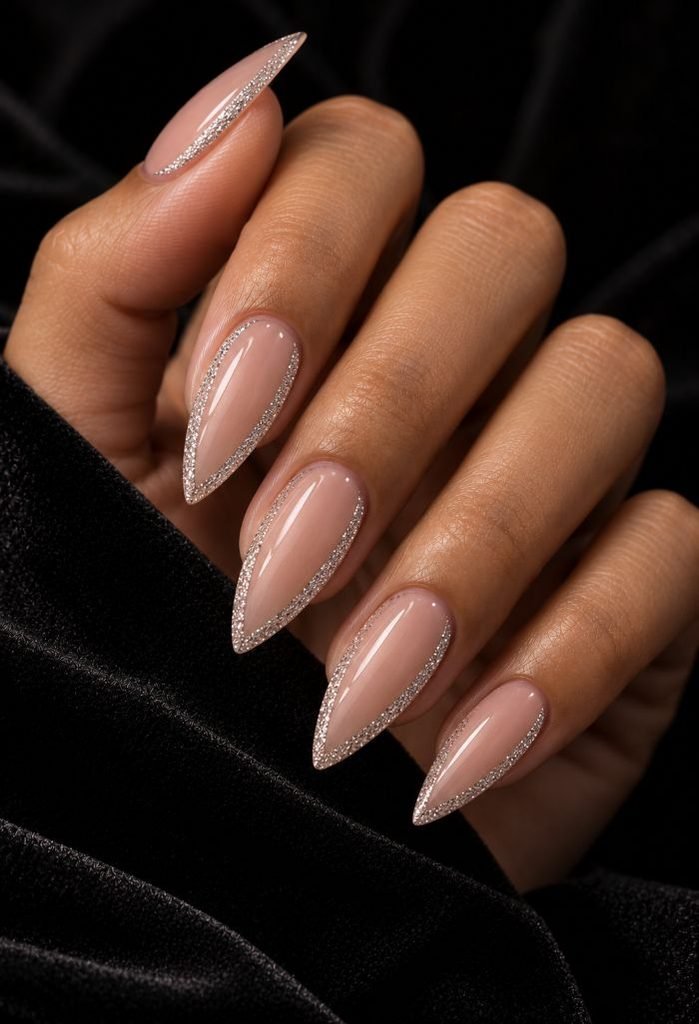
20. Sheer Nude with a Silver Glitter Outline on Medium Stilettos
Medium stiletto nails wear a semi-sheer nude with a thin silver line tracing the outer edge of each nail, from cuticle to tip. The outline is fine and slightly reflective, and the middle of every nail stays clean and glossy. The tapered tip gives the silver a long, sharp path to follow. In a dim room it nearly disappears. Under bright light it flashes like a glossy rim.
Jennifer Lopez wore a version of this, a semi-sheer, high-gloss nude outlined in silver reflective glitter, according to this breakdown of her manicure. Outlines this precise, on stilettos this long, are salon work. For a lighter take at home, use a metallic liner polish on a shorter oval and draw just inside the nail edge, leaving a sliver of nude between the line and your skin.
How to Apply
- Book a technician to build medium stiletto extensions, or order custom stiletto press-ons.
- Apply a semi-sheer nude gel in thin layers, cured as the system directs.
- Draw the outline with silver reflective glitter gel, staying just inside the nail edge.
- Cure the outline and finish with a high-gloss top coat.
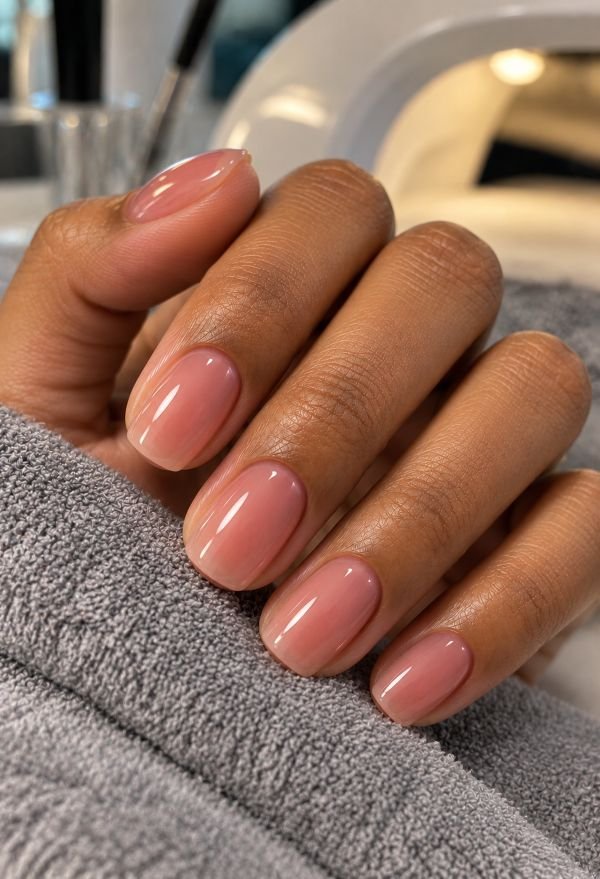
21. Sheer Rose Builder Gel Overlay on Short Natural Nails
Short natural nails get a thicker, glossier coat in sheer rose, and each nail ends up with a soft dome. The color is light enough to see your own nail beneath, but the surface looks fuller and smoother than ordinary polish. Edges are rounded, with no visible ridges, and every finger shares the same slightly plump shine. It’s lip gloss without the constant top-coat touch-ups.
This look is usually done with a builder gel, including the “builder in a bottle” formulas, applied and cured by a technician. The extra layer can make short nails feel sturdier, and the smooth surface helps hide natural ridges. Ask for a thin, tinted overlay so it doesn’t turn opaque. Gel overlays take time and care to remove, so have a professional soak or file yours off instead of peeling it.
How to Apply
- Ask a technician to prep and shape short natural nails, then apply a thin builder gel overlay.
- Request a sheer rose tint in the overlay or in a thin color layer over it.
- Cure each layer as the system directs and finish with a high-gloss gel top coat.
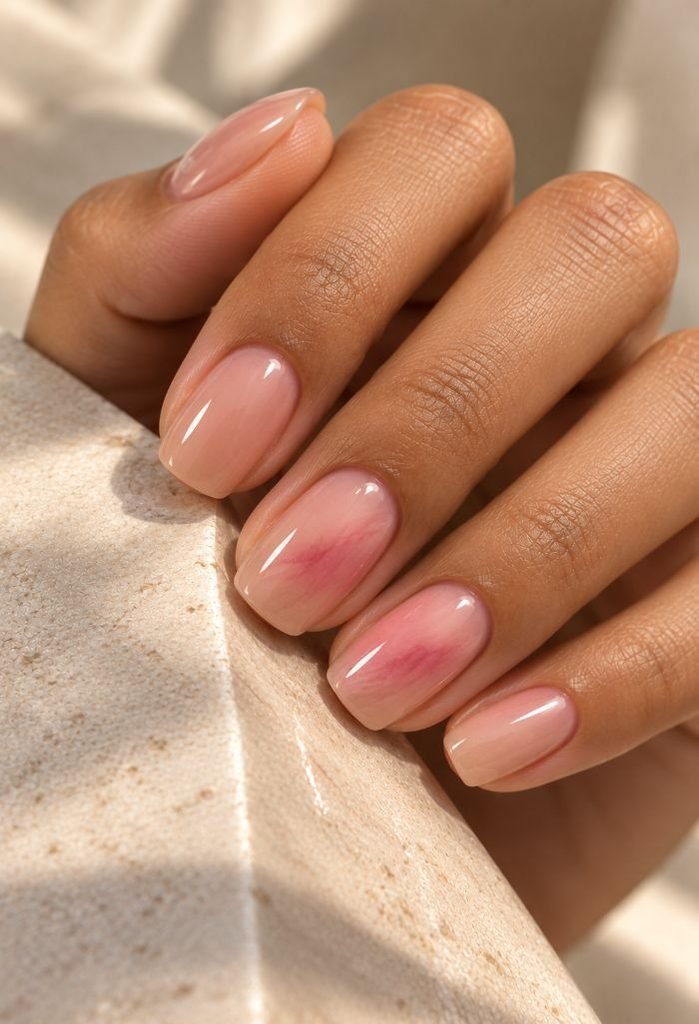
22. Beige Gloss with Watercolor Pink Clouds
The thumb, index, and pinky wear a clear-looking beige on short squoval nails. The middle and ring fingers get faint pink clouds drifting across the same base in loose diagonal patches. The pink fades into the beige and leaves bare nail around it, so the clouds look like watercolor under glass. A clear gloss coat finishes all five.
On regular polish, dot a little sheer pink onto a dry beige coat, then soften the edges with a clean brush dipped in clear polish. For a more fluid, marbled look, ask a salon about a clear blooming gel. It’s applied uncured, color is dropped into it, and the whole thing is cured afterward, according to each product’s directions. Keep the clouds pale so the base still reads as beige.
How to Apply
- Apply base coat and a thin layer of sheer beige to all five short squoval nails.
- On the dry middle and ring nails, place a few small wisps of sheer pink along a diagonal.
- Soften only the edges with a small brush dipped in clear polish.
- Seal all five nails with a clear high-shine top coat.
23. Pink Lip Gloss Nails with a Micro-Shimmer Veil
A see-through neutral pink covers medium oval nails, with an almost invisible veil of very fine champagne shimmer on top. You only catch the particles when your hand tilts toward the light. At rest, the manicure looks like glossy pink. There’s no mirror coating and no chunky sparkle. Clear gloss supplies the wet look, and the shimmer adds a small flicker underneath.
Look for a sheer shimmer with sparse, fine particles, or brush a thin topper over your pink. Test it on one nail first. If it hides the pink or leaves a frosty film, it won’t read as lip gloss anymore. When you want more visible sparkle, our glitter nail ideas go further. This finish pairs well with a plain outfit or delicate jewelry because it shifts as you move.

How to Apply
- Apply base coat and one or two thin coats of sheer neutral pink to medium ovals.
- Brush one very thin layer of fine champagne shimmer topper over the pink.
- Check the nails in direct and indirect light to confirm the pink still shows.
- Finish with a reflective clear top coat.
What Makes Lip Gloss Nails Different from Jelly, Soap, and Glazed Donut Nails?
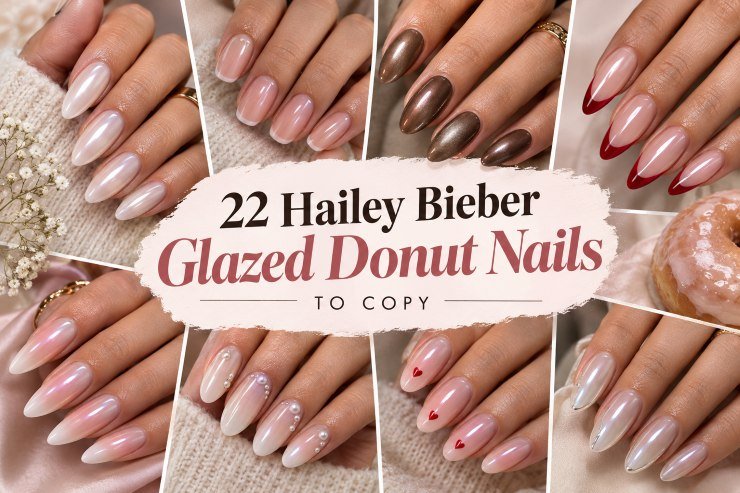
These terms coincide as both involve sheer polish application, making it hard to distinguish. Below is an easy way to separate the terms. Lip gloss nails use soft pink or nude shade with glossy sheen, allowing your natural nail color to shine through. Jelly nails move the color to the next level, as seen in design 7. Soap nails have the look of fresh wash, milky and slightly tinted. Donut nails add a pearl or chrome-like sheen, while lip gloss nails achieve their glossy look with clear gloss over sheer polish.
To get a closer look at your neighbors, check out our jelly nails and glazed donut nails guides. A shimmery veil like design 23 may fit here if the pink color is noticeable. Consider the terms as visual descriptions rather than product categories. In the salon, show your picture and explain how see-through and reflective the finish should be.
How Do You Choose a Sheer Pink or Nude Shade?
Do the swatch by holding the bottle to your unpolished nail during daytime and never under fluorescent store lighting. Warm roses will complement golden or peach undertones, whereas cool pinks will suit better for rosy and neutral undertones. Remember that it is just an idea and doesn’t have to be followed; your preference will be more important.
The biggest surprises happen when choosing a nude shade. These colors could look gray, yellow or even orange after drying, therefore do the swatch first. Choose how much natural nail you want to keep showing. One coat will leave the free edge visible, and the second coat will make it less visible while preserving the depth. The guide about nude nail colors offers some shades. When there are different nail colors on your hands, cover them evenly.
How Can You Keep a Sheer Gloss Manicure Smooth and Shiny?
A glossy, shimmery sheer polish begins with clean nails with a thin base coat to ensure that the tint applies evenly. Apply the polish in thin layers according to the drying time in the specific polish you have purchased. Too thick a layer on one nail or the flow of polish under the cuticle will cause streaks which become visible with clear gloss. It is important to apply the gloss to get the effect of lip gloss since the top coat does the most.
For regular polish, clean the nozzle and cover the tip edge with top coat as soon as the shine becomes dull. Sheer manicures become worn out starting with the tips, thus do not peel from them if the edge lifts up. Gel polish has its specific base, lamp, and top coat, therefore, do not follow the air dry instructions to cure it. Special pearls and drops require different removal process as indicated by the manufacturer.
Do Lip Gloss Nail Designs Work on Short Nails and Press-Ons?
Yes. Smaller ovals and softer squares give ample space on a sheer tint for an image of a clean reflection, and designs 1, 2, 5, 8, and 21 have short nails in mind. Proportions are better than lengths. Maintain your micro French line slim, and surround your daisy with a hint of pink. The proper form and even surface make a short manicure look well-completed from any angle.
Press-ons do just fine. Look for the ones that match the natural nail length and curve at first; then pick colors and patterns. Sets with pre-colored sheers are the easiest way to create classic look, and clear press-ons can be decorated with polish and varnish similarly to design 10. Be sure to use appropriate adhesives and finishes for specific press-on material and apply according to instructions. Raised pearls and drops have a higher risk of sticking on something; therefore, flat designs like tips, dots, or shimmer veil may fit as first options.
Final Thoughts
Even the simplest lip gloss manicure must have a unique angle, although the color will not be very expressive. The famous rosy oval requires uniform coloring and a single highlight. A honey nude brings a twist in warmth. A micro French manicure or a small daisy makes the same glossy background emphasize the single accent. You can try the fading from peach to pink or a gentle aura and use thin layers to see your nail through.
Think about the nail shape, amount of natural nail to leave, and a single detail to draw attention to it for your future session. It will be useful to show the photo of the tint and the photo of the shine.
Love the look of naturally glossy nails with just a hint of color? From sheer rosy pinks and warm nude tones to soft French tips, delicate pearls, and subtle shimmer, discover lip gloss nail designs that suit your style. Save your favorite and preview how it looks on your hands before your next DIY manicure or salon visit.
Use our AI Nail Generator
Bloomie
Bloomie (I) is the founder and author of Nail Blooms, a nail inspiration website dedicated to manicure ideas, nail art, colors, shapes, and emerging beauty trends. My interest in nails began with a simple habit of collecting beautiful manicure ideas and exploring different styles, from timeless nude shades and French tips to creative nail art and seasonal looks. What started as a personal interest gradually grew into Nail Blooms, a space created to make discovering nail inspiration easier and more enjoyable. At Nail Blooms, My goal is to help readers give new ideas, find different possibilities, and feel inspired when choosing their next manicure.
About the editor ↗