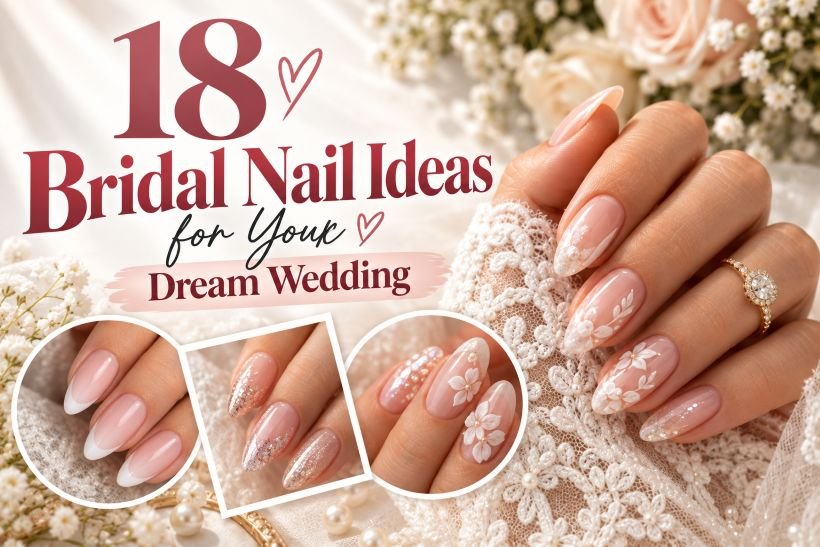
18 Bridal Nail Ideas for Your Dream Wedding
Your hands are already part of the wedding photographs even before the ceremony starts through handling the bouquet, putting on the bracelet, holding the veil, and wearing the ring. This means that bridal nail art ideas are more concerned with selecting colors, shapes, finishes, and details that suit all these events rather than just following the current trends of one manicure style.
Some brides might go for sheer nail polish that will make the nails appear as they are, but there are others who would rather have pearls, metallics, flowers, lace patterns, glitter, or an intense night time nail shade. The nail art styles featured here range from short natural nails, medium nails with extensions, press-on nails, to artistic salon nail designs.
1. Sheer Milky Nails for the No-Manicure Bride
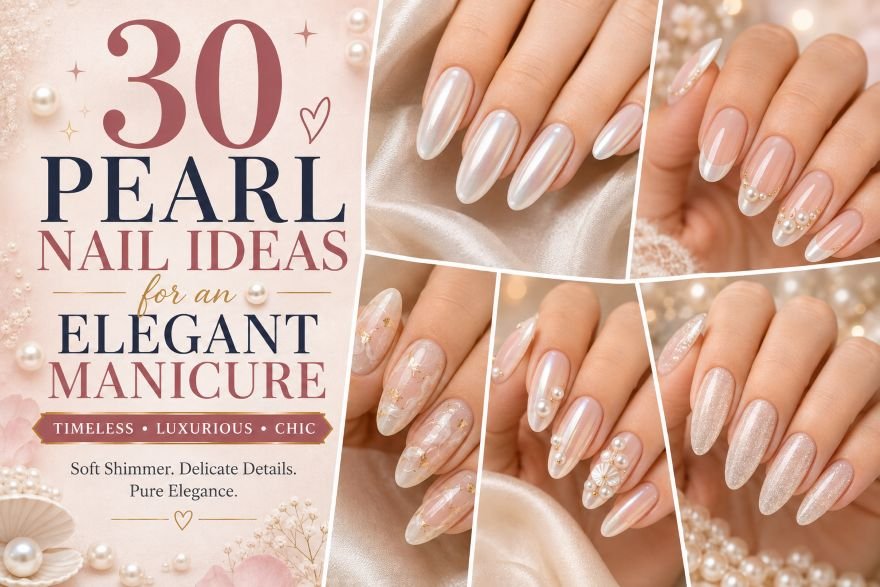
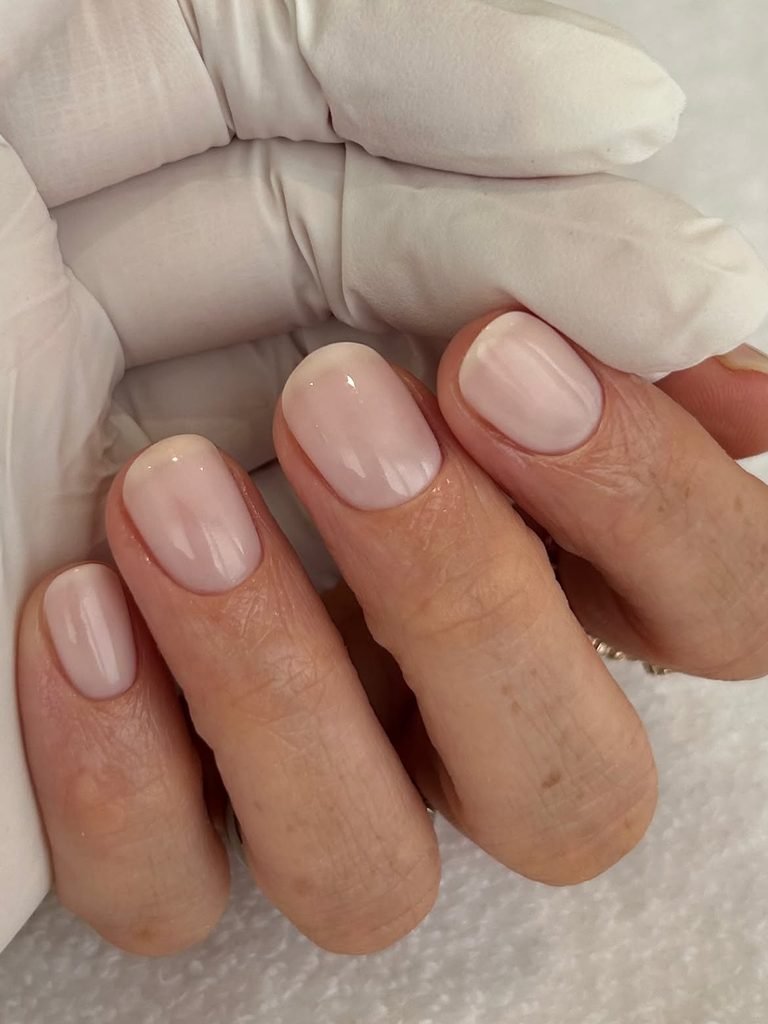
Short oval nails are decorated in translucent ivory-white polish, which has the milky appearance. The natural nail line stays almost invisible, mostly at the tips, whereas the shine smoothes out the color. There are no glitter elements, artwork, and hard edges. It is just one even layer of creamy white, which gives an effect of freshly manicured nails.
It is the right choice if you wish your nails look elegant without any effort. It is compatible with lace, crepe, satin, and highly decorated dresses since the color matches the dress but does not contrast. The short oval shape looks convenient for bouquet holding and ring photos. This finish can be created as a custom press-on nails as well. In case you feel like the white is too bright against your skin, order ivory-milky shade, which has hints of beige.
How to Apply
- The natural nails should be shaped in short oval and filed smooth on the free edge.
- Apply a thin clear or milky rubber base, and cure the gel base.
- Apply two thin layers of translucent ivory-white polish, curing each layer.
- Top it with a glossy coat and file the edges.
2. Classic French Tips on Medium Almond Nails
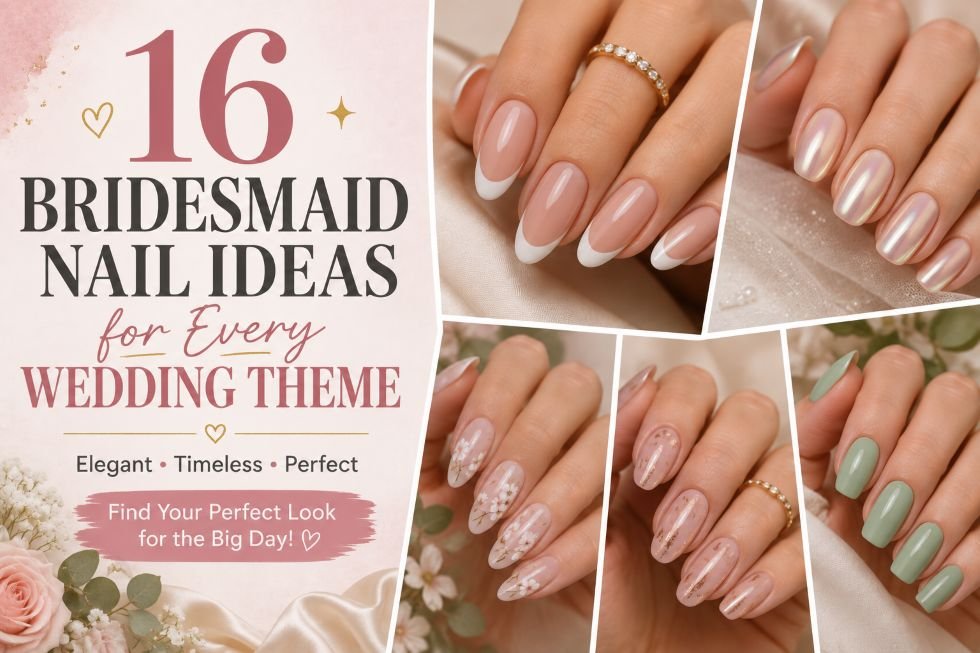
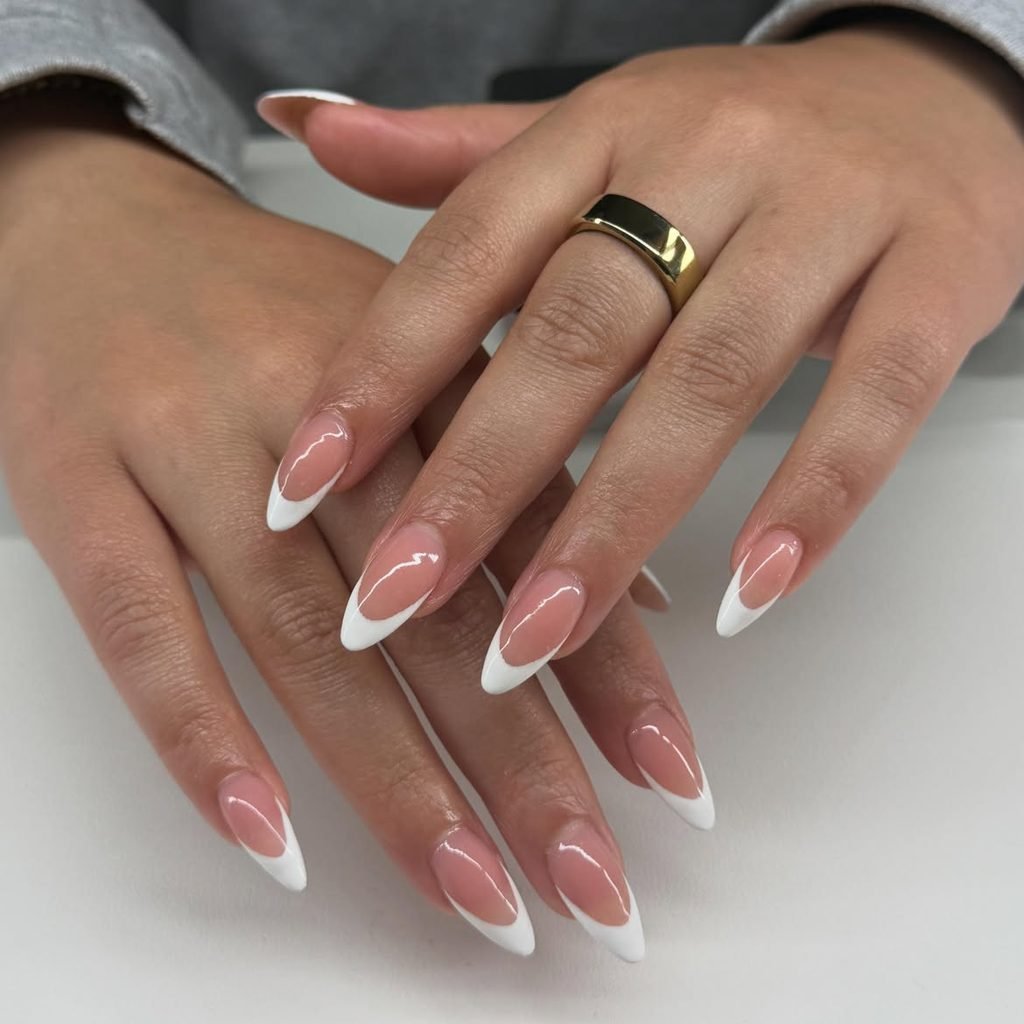
Medium almond nails provide the familiar foundation for a traditional French manicure: a sheer rosy-beige base, softly curved white tips, and a high-gloss finish. Keep the smile line moderately shallow, following the natural curve rather than extending too far down the sidewalls. The white should be clean but not chalky, with enough translucency in the base to keep the hand looking soft.
There is a reason this remains one of the most requested bridal French tip styles. It frames the fingers, leaves the engagement ring as the focal point, and continues to look appropriate when the dress, bouquet, or jewelry is more elaborate. Medium length gives the almond shape enough taper without becoming difficult to live with. If you rarely wear extensions, ask for a soft almond overlay instead of jumping straight to a very long tip.
How to Apply
- Prepare medium almond nails and apply one or two coats of sheer rosy-beige polish.
- Map the smile lines with a fine brush or French guides.
- Paint the white tips evenly, keeping the sidewalls symmetrical.
- Apply a glossy top coat and seal the free edges.
3. Blush-to-White French Ombré
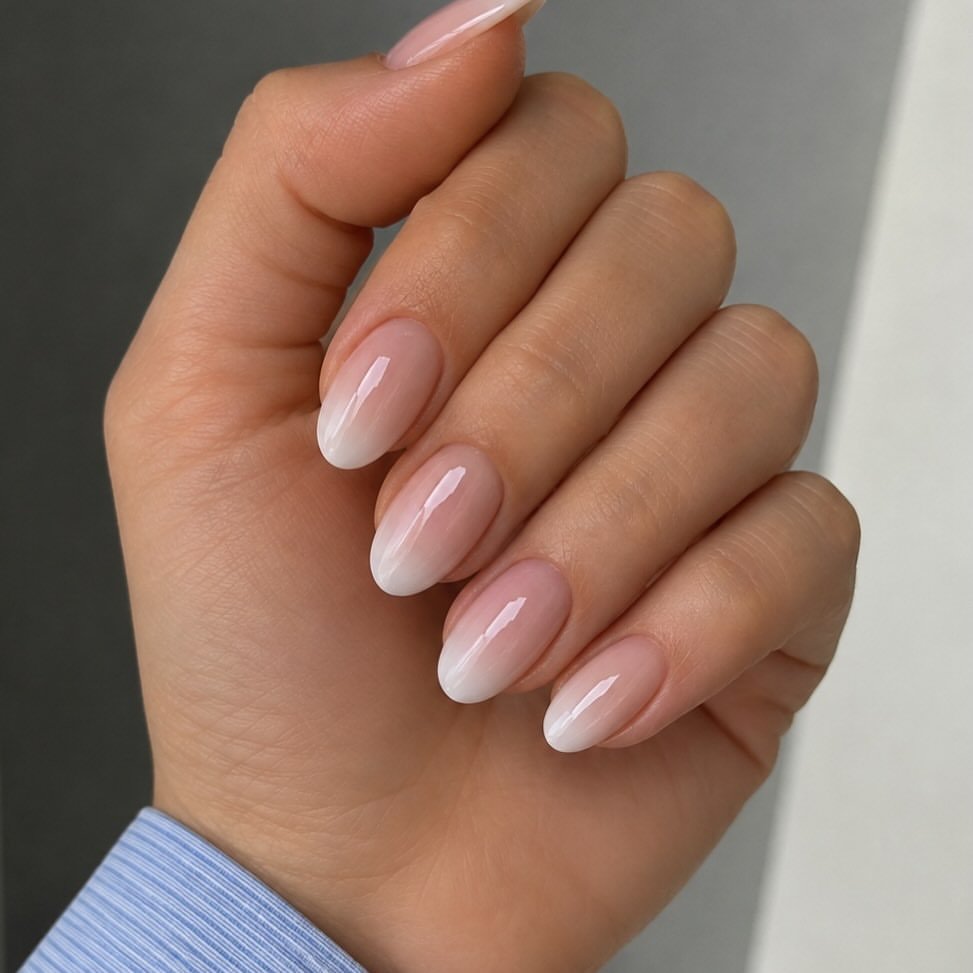
The color starts out as sheer blush pink near the cuticle and smoothly fades to creamy white by the free edge. Medium almond nails do not have the smile line; rather, the white seems to float over the pink in the French fade effect. The look is shiny and luminous, with the brightest point preserved at the tips to avoid the opacity of the gradient.
Use if you love the concept of the French manicure but don’t want such a harsh line. Photographs stunningly against blush, champagne, and ivory fabric; works great with a plain crepe dress or simple jewelry. Airbrushing yields the best results, and applying with a makeup sponge will give you a plausible imitation at home. On short nails, minimize the amount of white to avoid fading all over the nail bed.
How to Apply
- Apply sheer blush pink base on prepared medium almond nails.
- Use sponge to apply creamy white from tips towards the center.
- Create the gradient in thin layers, smoothing the line between the colors after every application.
- Top with a glossy finish.
4. Pearl-Chrome Rose Quartz Nails
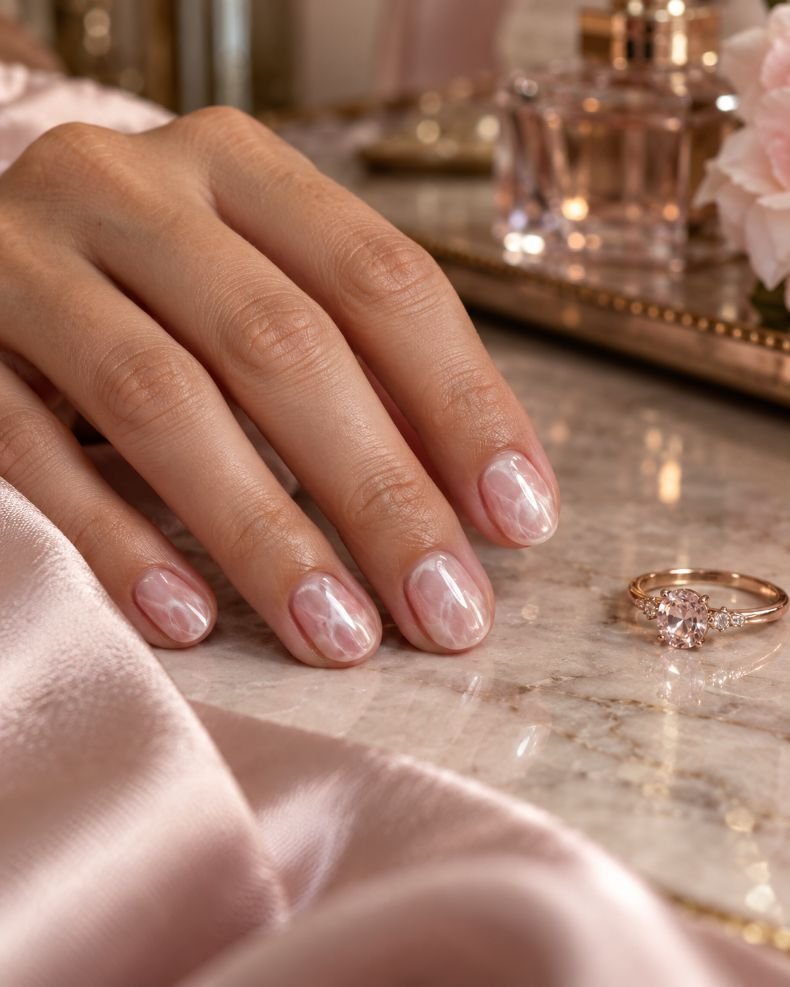
Short oval nails carry a translucent cool-blush base with a few cloudy white wisps that resemble polished rose quartz. A soft pearl-chrome powder sits over the surface, shifting from pink to ivory to a faint silver reflection as the hand moves. The veining remains sparse and irregular, leaving transparent areas visible instead of creating a dense marble pattern.
The finish gives you visual interest without relying on obvious bridal symbols. It works with rose-gold jewelry, blush makeup, and a simple silk dress, while the short oval shape stays practical through the rehearsal dinner and honeymoon. Chrome application is best handled by a technician because the surface must be smooth before the powder is rubbed in. For more luminous wedding finishes, see these pearl nail ideas.A pre-designed press-on set can recreate the look with more consistent marbling.
How to Apply
- Shape short nails into a smooth oval and apply a translucent cool-blush base.
- Add thin cloudy-white wisps with a fine brush, leaving plenty of pink visible.
- Cure the gel layer, then rub pearl-chrome powder over the cured surface.
- Seal with a compatible glossy top coat and cap each edge.
5. Champagne Cat-Eye French Tips
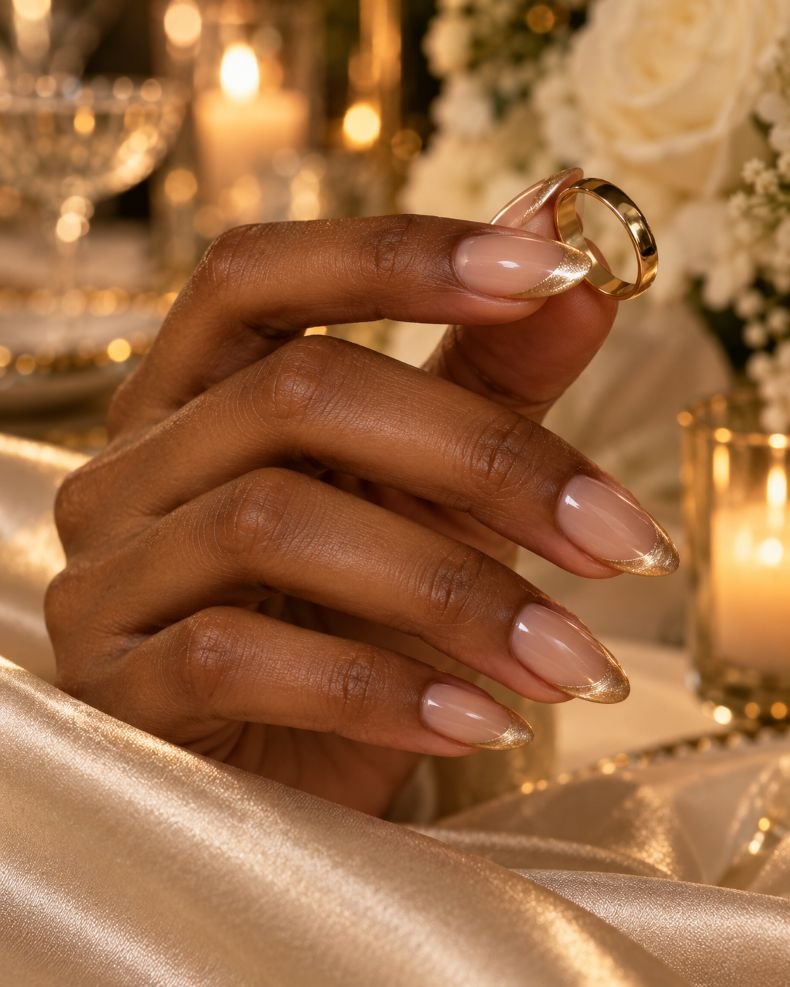
A sheer warm beige base keeps the nail beds quiet while magnetic champagne pigment is concentrated only along the tips. On these medium almond nails, the reflective band curves with the free edge and shifts from pale gold to honey as the hand changes position. The rest of the nail remains transparent and glossy, so the cat-eye effect feels like light caught at the edge rather than metallic polish covering the whole nail.
This is a thoughtful choice for a bride wearing ivory, champagne, or warm gold accessories. The movement shows beautifully in candlelit reception photos, but the narrow placement keeps the manicure formal in daylight. A magnetic gel system is necessary; ordinary shimmer will not create the same floating stripe. Ask your technician to keep the tips slim, especially if your nail beds are short. More magnetic finishes can be compared in these cat-eye nail ideas.
How to Apply
- Apply a sheer warm beige gel base to medium almond nails and cure.
- Paint a thin champagne magnetic French tip on one nail at a time.
- Hold the magnet along the tip until the reflective pigment gathers evenly, then cure immediately.
- Finish with a glossy gel top coat.
6. Pearl Cuticle Details on Short Squoval Nails
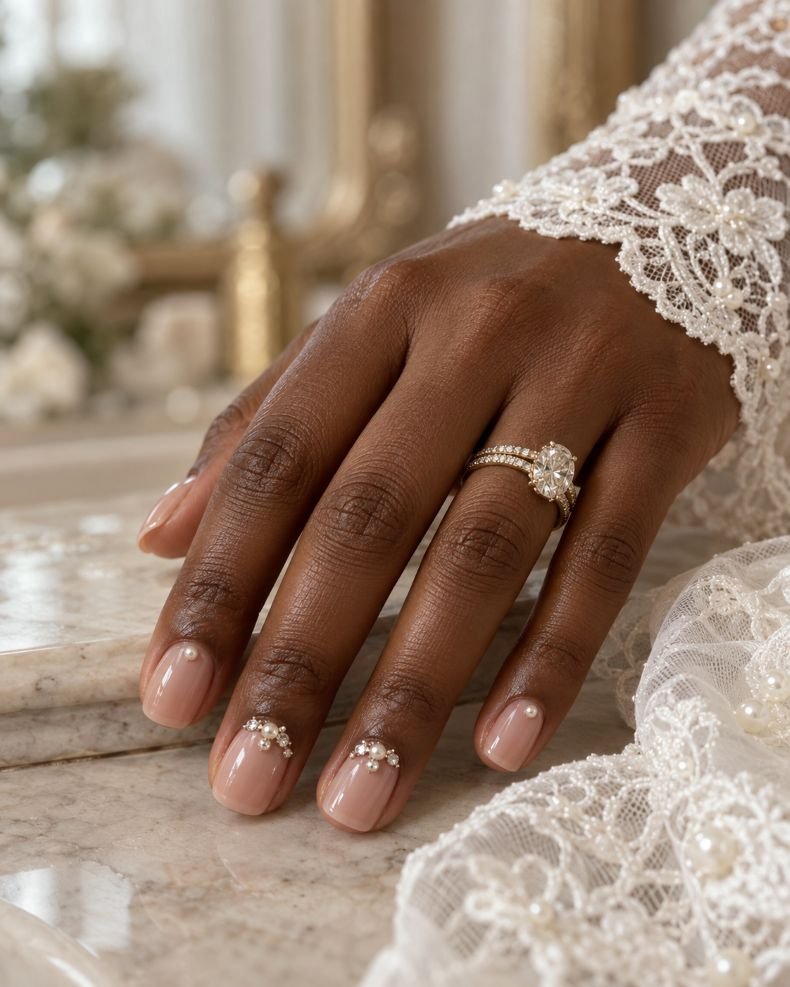
Short squoval nails are coated in a transparent pink-beige wash that keeps the natural nail visible. Each nail receives one tiny ivory pearl near the cuticle, while the ring and middle fingers carry slightly fuller clusters of pearls and clear micro-crystals. The embellishments stay low and close to the surface, more like delicate jewelry than raised charms.
This is one of the most wearable short bridal nails options for someone who wants a detail in ring photographs without adding length. Squoval edges give the pearls a neat frame, and concentrating the larger clusters on two nails reduces snagging on lace, gloves, or bouquet ribbon. Flat-back pieces can be applied to custom press-ons, making this a practical option for a bride who cannot visit a salon during wedding week. For more crystal-placement ideas, browse these rhinestone nail designs.
How to Apply
- Apply two thin coats of transparent pink-beige polish to short squoval nails.
- Place one small pearl near the cuticle of each nail.
- Build fuller pearl-and-crystal clusters on the ring and middle fingers.
- Secure the pieces with compatible nail adhesive or gem gel, then seal around their bases.
7. Gold-Outlined French Tips
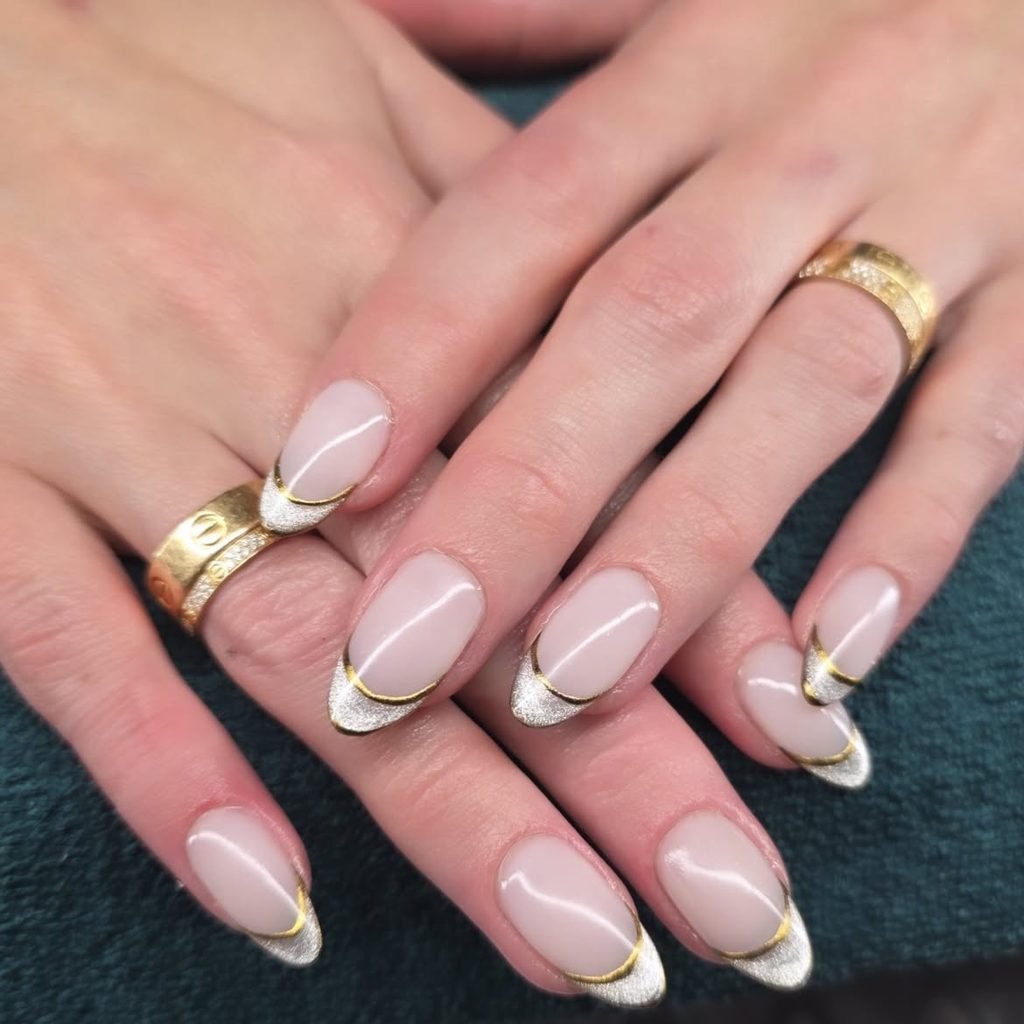
Medium almond Nails begin with a creamy ivory nail base with a classic white French tip. A delicate line of gold metal follows along the bottom curve of each smile line, outlining it without adding an additional metallic tip. The gold line must be kept relatively narrow, making sure that the white remains the dominant nail art element with a glossy finish.
This straighter edge makes the manicure very architectural and therefore ideal for a structured gown or a square neckline, as well as yellow gold jewelry. The look will be distinctive enough but will not require any elaborate designs to be applied to all nails.
Liner brush will give you the best results, however, a metallic striping tape can help to make the process easier at home. If you wear a platinum or white gold ring, use a silver metallic line instead.
How to Apply
- Shape the nails into medium almond and paint a creamy ivory base.
- Add French tips to all free edges using pure white color.
- Paint a very thin line of gold metal underneath each French tip with a liner brush.
- Cure/dry the design and add a glossy top coat.
8. Something-Blue Baby-Blue French Tips
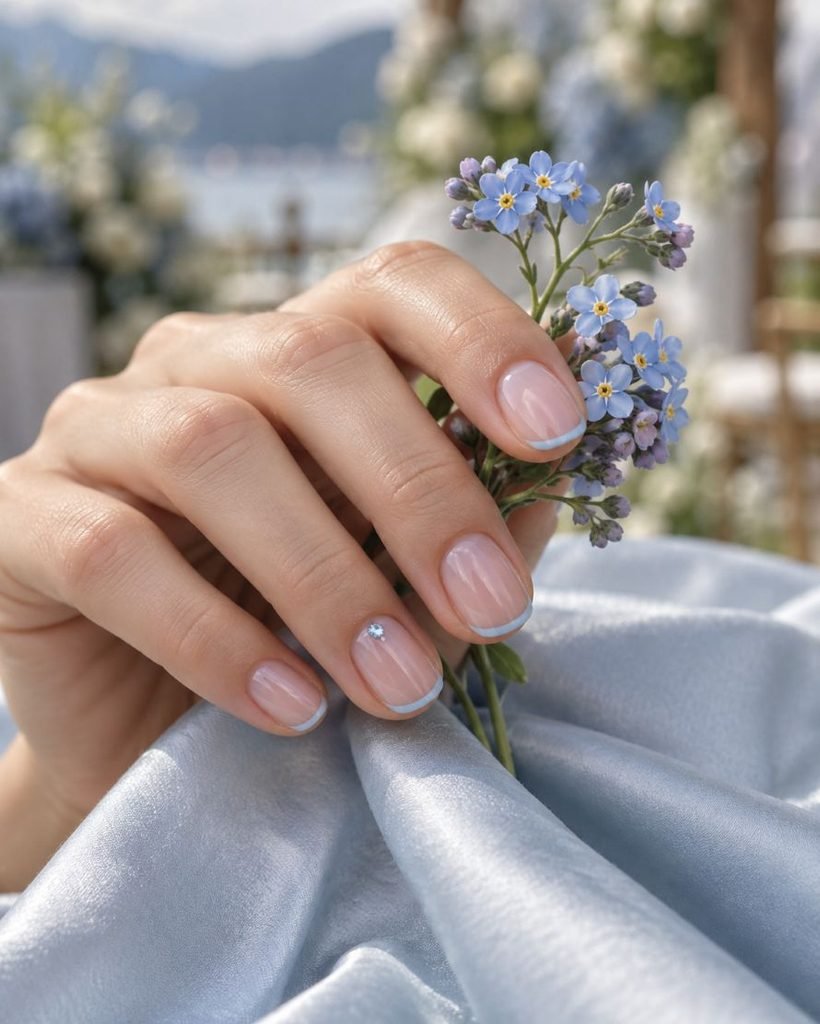
Short oval nails use a translucent neutral-pink base with extremely fine powder-blue French tips. The blue is softened with a gray undertone, so it looks delicate rather than bright or childish. On the ring fingers, one tiny pale-blue crystal or hand-painted forget-me-not sits near the cuticle, while the other nails remain free of extra decoration.
This gives the traditional “something blue” detail a place in the manicure without making the whole look themed. It suits silver jewelry, cool white gowns, outdoor ceremonies, and brides who want a small personal reference visible only in close-up photographs. The compact shape is easy to maintain, and the blue can be swapped for the wedding palette on bridesmaid sets. Use a fine brush for the micro tips or choose custom press-ons if you need identical curves on both hands.
How to Apply
- Shape the natural nails into a short oval and apply a translucent neutral-pink base.
- Paint a very thin powder-blue French line across each free edge.
- Add one tiny pale-blue crystal or forget-me-not detail to each ring finger.
- Seal the manicure with a glossy top coat, keeping the sidewalls clean.
9. Sculpted White Floral Accents
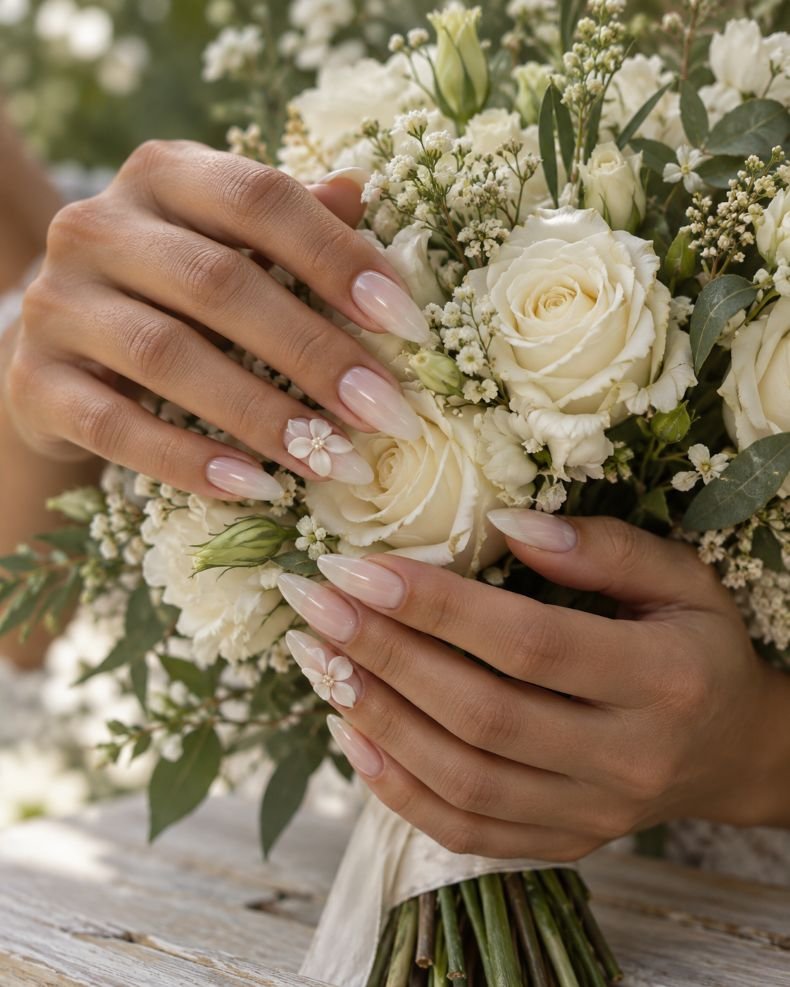
Long almond extensions are coated in glossy milky nude, leaving two feature nails for raised white flowers. Each flower has five rounded petals and a tiny pearl or clear crystal center. The other nails stay plain, allowing the raised details to feel deliberate rather than like a full garden spread across the hand. Place the flowers slightly off-center so the almond taper remains visible.
This design makes sense when flowers already appear in the bouquet, embroidery, or ceremony setting. The long shape gives the petals room to stay recognizable, but the added height can feel awkward if you normally wear short nails. A trained technician should build and cure the 3D gel or acrylic petals; flat floral decals are a more realistic alternative for home application. Additional sculpted inspiration is available in these 3D floral nail designs.
How to Apply
- Apply a glossy milky-nude gel base to long almond extensions and cure.
- Build five rounded white petals on each feature nail with 3D gel or acrylic.
- Place one tiny pearl or clear crystal in the center of each flower.
- Cure the raised artwork fully and seal only the surrounding flat surface.
10. Lace-Trim French Bridal Nails
Almond-shaped medium-sized nails have a translucent base color of ivory-pink with lace artwork done on the tips only. The outline is scalloped in shape with small floral loops and open crosshatching with spaces where the base shows through. It is important that the lace design on each nail be different since the look is meant to seem individually painted and not striped across all nails.
This would work great on a lace wedding gown or a vintage lace veil, but could also be worn on an ordinary dress as the texture. The lace pattern can either be hand-painted by the manicurist, stamped using a special plate, water decals, or even custom-made press-ons. The lace design should be limited to the tips of the nails in order for the design not to look overcrowded in wedding photos.
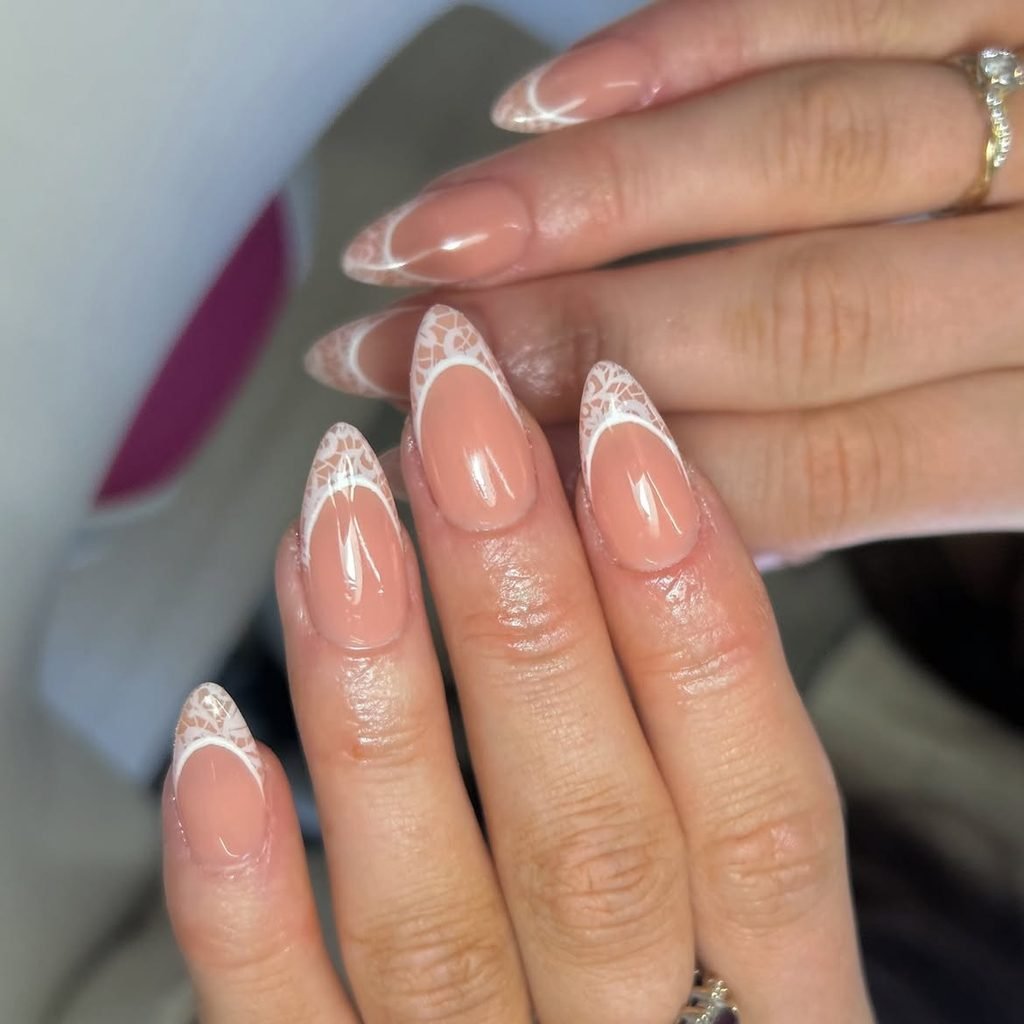
How to Apply
- Apply one or two thin coats of sheer ivory-pink polish to medium almond nails.
- Paint or stamp a narrow scalloped white lace border along each tip.
- Add tiny floral loops and open crosshatching to two accent nails.
- Let the artwork dry or cure completely, then seal with a smooth glossy top coat.
11. Champagne Glitter Fade
The medium oval-shaped nails are covered with the warm nude beige-pink color and glittered with champagne glitter from the upper third. There are more sparkles at the tips and less towards the middle of the nail, leaving the part near the cuticles absolutely clean.
This manicure helps the bride get more shine without pearls, charms, or crystal placements. The manicure is perfect for a candlelight ceremony, champagne-colored dress, or gold jewelry. It is suitable because the oval nails help keep the glitter soft. Small cosmetic glitter is simpler to cover with a top coat compared to big sparkles that may cling to the fabric. A makeup sponge is used to do the fading on your own, while a professional can make the density of the glitter the same on both hands.
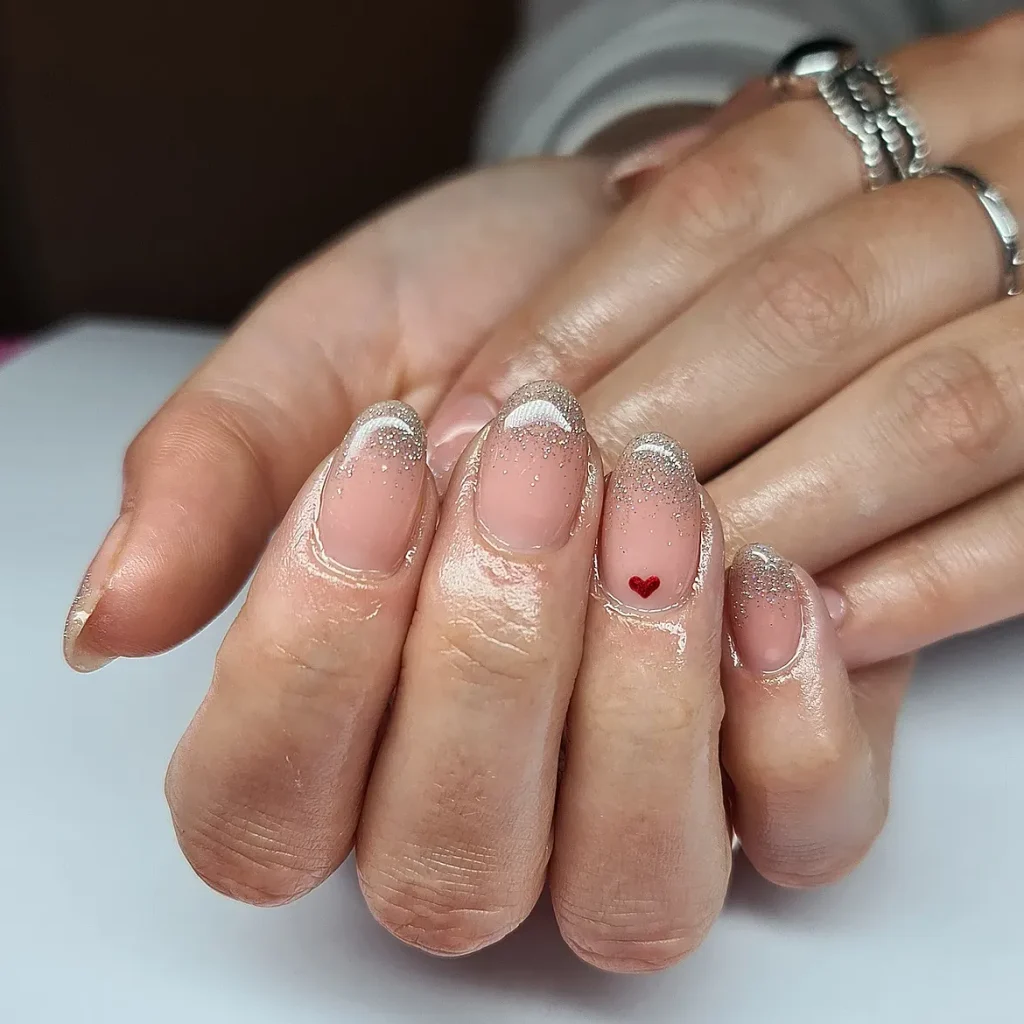
How to Apply
- Apply two thin coats of warm beige-pink polish to medium oval nails.
- Dab fine champagne glitter onto the upper third with a small sponge.
- Soften the center edge with a lighter scattering of glitter.
- Apply a leveling glossy top coat and cap each free edge.
12. Silver Reverse-French Cuticle Arcs
Short squoval nails have a sheer coat of cool blush on them with slimmer silver chrome crescents on the cuticle line. There are two accent nails which will have another narrower arc of metallic color on the side wall of the nail in order to create an off-center moon shape instead of the usual symmetric shape.
It is a trendy way of getting ready for a city wedding ceremony with a plain dress and if you wear platinum or silver jewelry. Short squoval nails will give sharp lines and help you be more comfortable while dressing up and dancing at the party. Chrome powder can be applied only on a specific cured base, but silver striping tape will allow you to make a lacquer version. Crescent nails should not be wide as it may make your short nail look shorter.
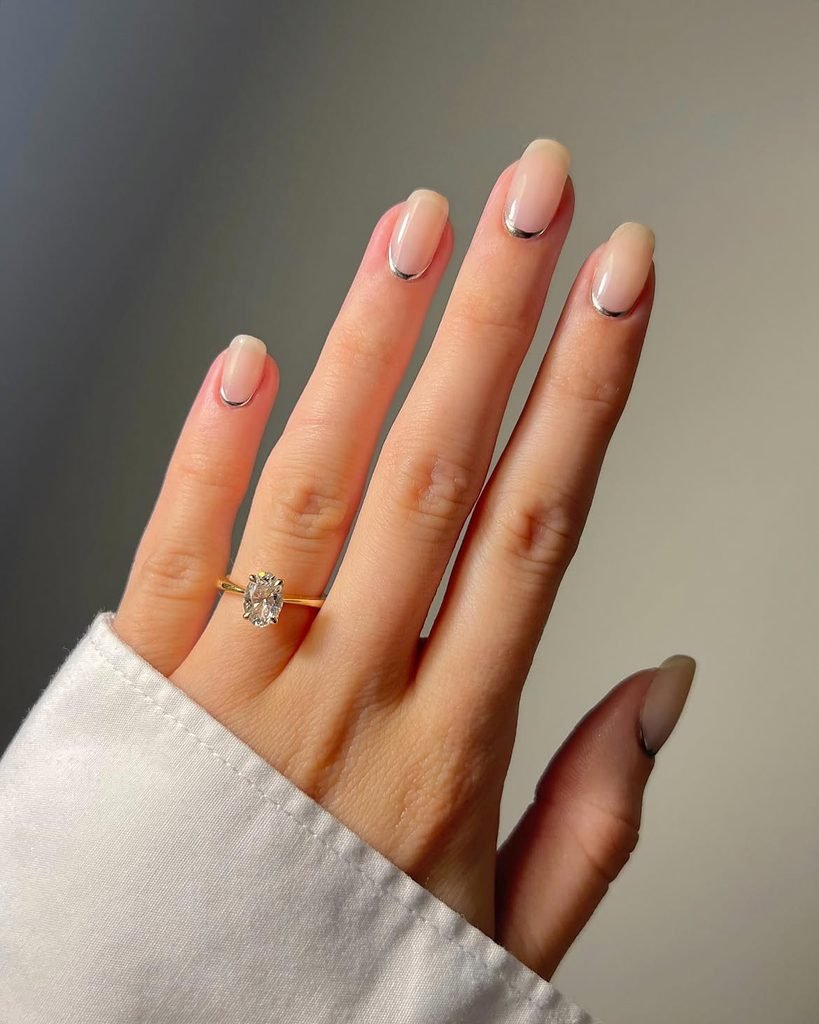
How to Apply
- Shape short natural nails into a neat squoval and apply a sheer cool-blush base.
- Paint slim silver crescents tightly around each cuticle.
- Add one offset sidewall arc on two accent nails.
- Cure or dry fully, then apply a glossy top coat without flooding the cuticles.
13. Tiny Bow and Pearl Details
Medium almond nails are covered in translucent blush-nude polish. Two accent nails carry tiny white bows with narrow loops and short tails, each centered by a miniature pearl. The remaining fingers receive only one small pearl near the cuticle, keeping the set from becoming a collection of identical decorations. The bows should follow the nail’s taper rather than stretching across its widest point.
This has a romantic ribbon quality that works with satin gowns, pearl earrings, bow shoes, or a soft updo. It feels more personal than a plain French manicure but remains restrained enough for formal photographs. Flat-painted bows are easier to wear than thick charms and less likely to catch on hair or lace. If you want perfectly matched loops, custom press-ons or decals are more reliable than attempting the entire set yourself with a detail brush.
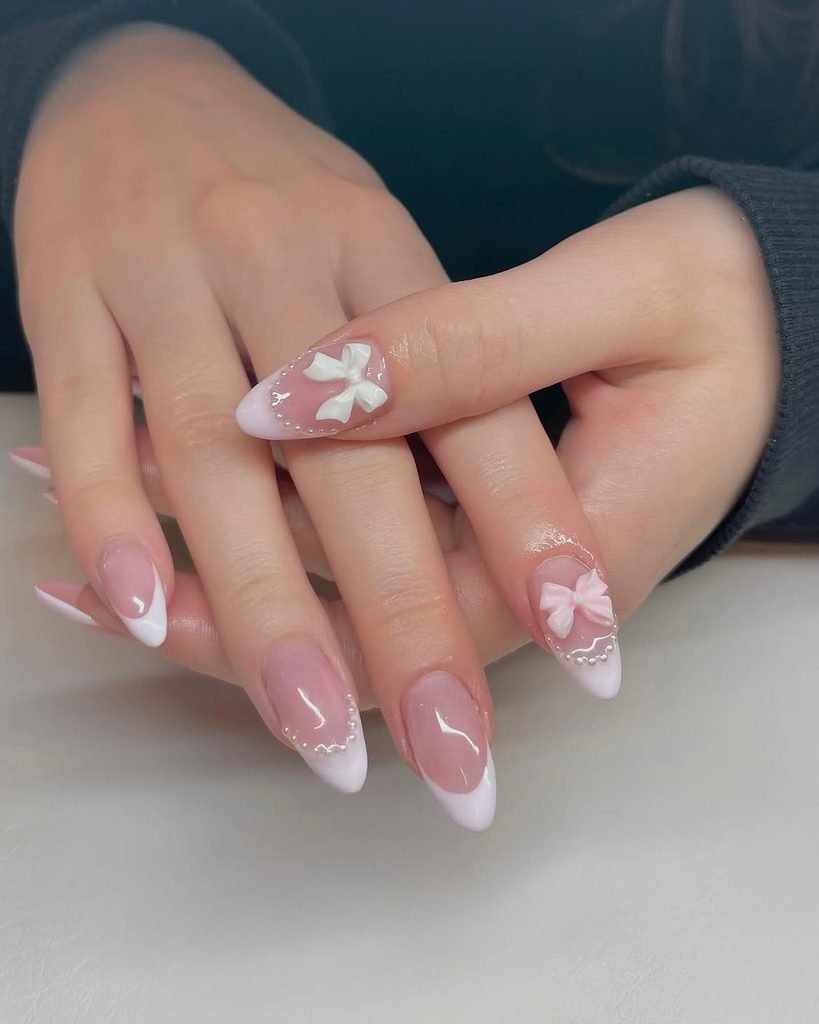
How to Apply
- Apply two coats of translucent blush-nude polish to medium almond nails.
- Paint small white bow loops and tails on the ring and middle fingers.
- Place one tiny pearl at the center of each bow and near selected cuticles.
- Secure the details with a glossy top coat, avoiding thick pooling around the pearls.
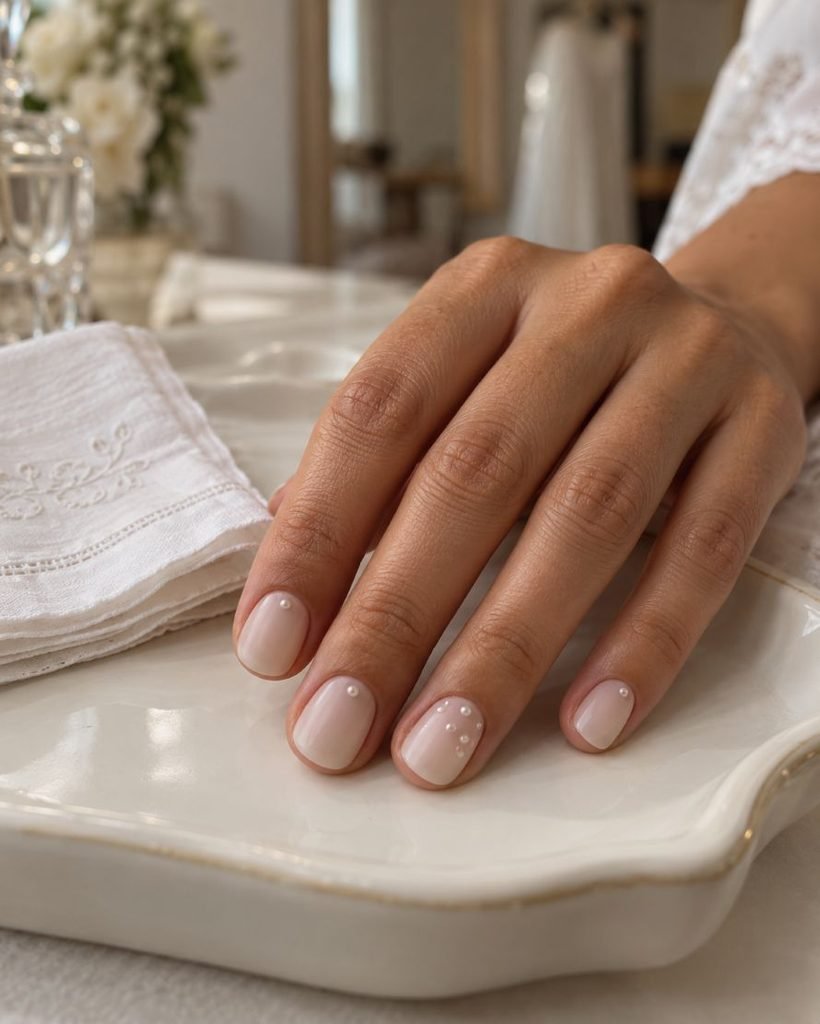
14. Matte Ivory With Glossy Dot Details
Short round nails use a soft milky ivory polish finished in satin matte. Tiny glossy dots sit near the cuticles, with two slightly larger dots placed on the ring fingers. The contrast is subtle: from across the room the manicure looks plain ivory, but in a close-up the raised dots catch light like small drops of glass.
This suits a bride who wants texture rather than sparkle and prefers a manicure that feels clean, modern, and quiet. Short round nails are easy to maintain and do not require an extension of unfamiliarity during the wedding weekend. Matte surfaces show oils more quickly, so apply hand lotion well before photographs rather than immediately before them. A technician can create perfectly rounded dots with gel, while a home version can use a dotting tool and a glossy detail polish.
How to Apply
- Shape the natural nails into a short round silhouette and apply two coats of milky ivory color.
- Finish the full manicure with a satin-matte top coat.
- Add tiny glossy dots near each cuticle and two larger dots on the ring fingers.
- Cure the dots separately if using gel, keeping the matte background untouched.
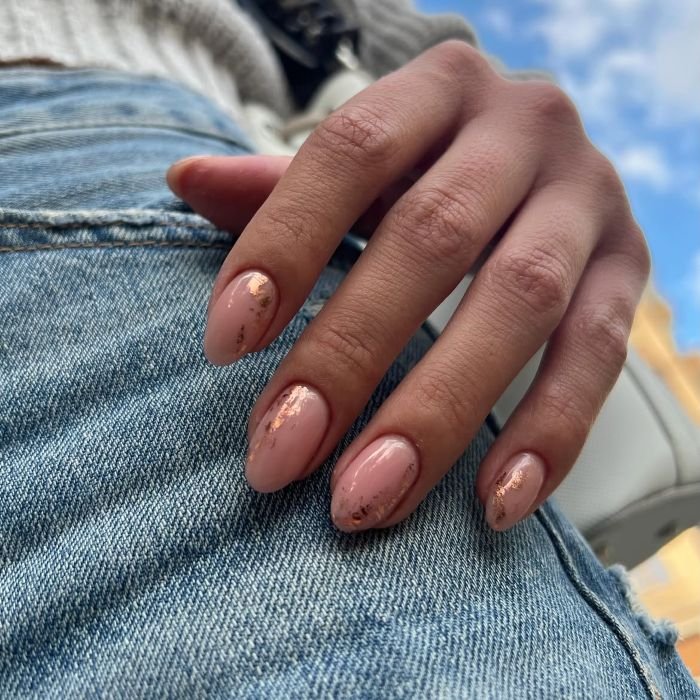
15. Rose-Gold Foil Negative Space
Medium tapered-square nails use a translucent peach-nude base with irregular rose-gold foil pressed along one side of each nail. Some pieces angle toward the tip, while two accent nails feature a wider diagonal panel separated from the rest of the nail by a slim strip of exposed base. The foil remains fragmented, allowing the peach tone to stay visible.
This feels current without becoming dependent on a single trend because the design is built around proportion and negative space. It suits blush wedding palettes, rose-gold jewelry, modern architecture, and satin fabrics. Loose foil is more reliable in a salon, where the surface can be leveled without burying the reflective pieces in a bulky top coat. Custom press-ons are useful if you want the diagonal placement repeated exactly. Keep the metallic detail on the side rather than across the entire tip so it does not overwhelm the ring.
How to Apply
- Apply a translucent peach-nude base to medium tapered-square nails.
- Press irregular rose-gold foil pieces along one sidewall of each nail.
- Add a wider diagonal foil panel to two accent nails, preserving a slim nude gap.
- Smooth the foil beneath a glossy leveling top coat and cap the free edges.
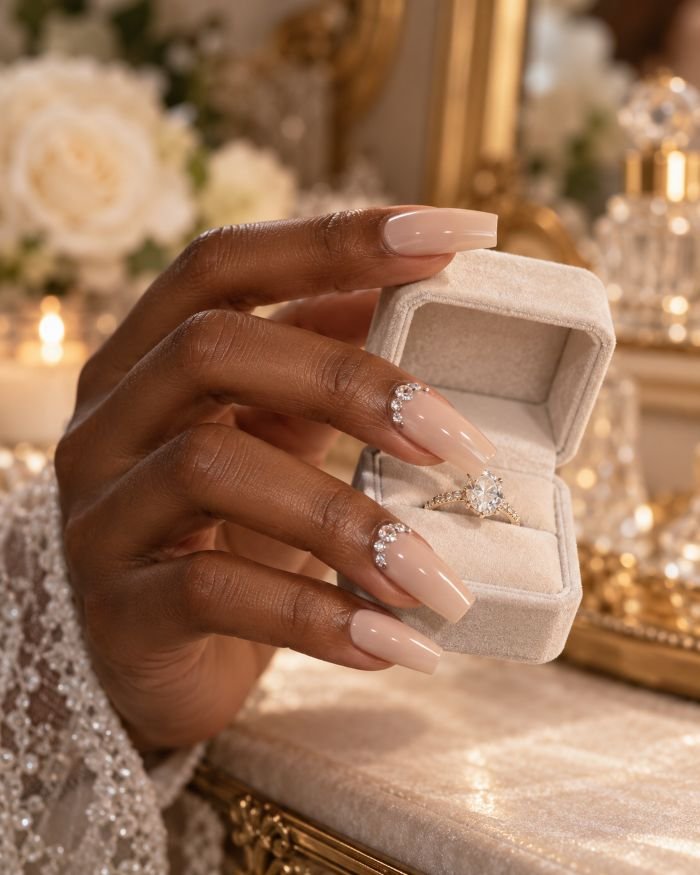
16. Crystal Ring-Finger Clusters
Tapered square nails are stained translucent neutral beige to make sure that the nail line will be delicately discernible. While rings and middle fingers have a low profile clear crystal cluster applied near the cuticle area, other nails remain nude and shiny. One slightly bigger center stone along with small surrounding stones must be used. All the gems should be placed within the sidewalls not to snag on clothes.
The design repeats jewelry style but at the same time doesn’t intend to overshadow the engagement ring. A generous tapered square shape provides the space for the cluster to look elegant but because of length the design needs more maintenance and is worth testing prior to wedding week. It would be appropriate only for professional nail tech or a custom press-on artist. A less glamorous variant would be applying just one crystal on each ring finger instead of the whole cluster.
How to Apply
- Prepare long tapered-square extensions and apply two thin coats of translucent neutral beige.
- Place compatible gem gel near the cuticles of the ring and middle fingers.
- Build each cluster with one larger clear stone and smaller crystals around it.
- Cure the embellishments fully and seal around their bases without covering the stone faces.
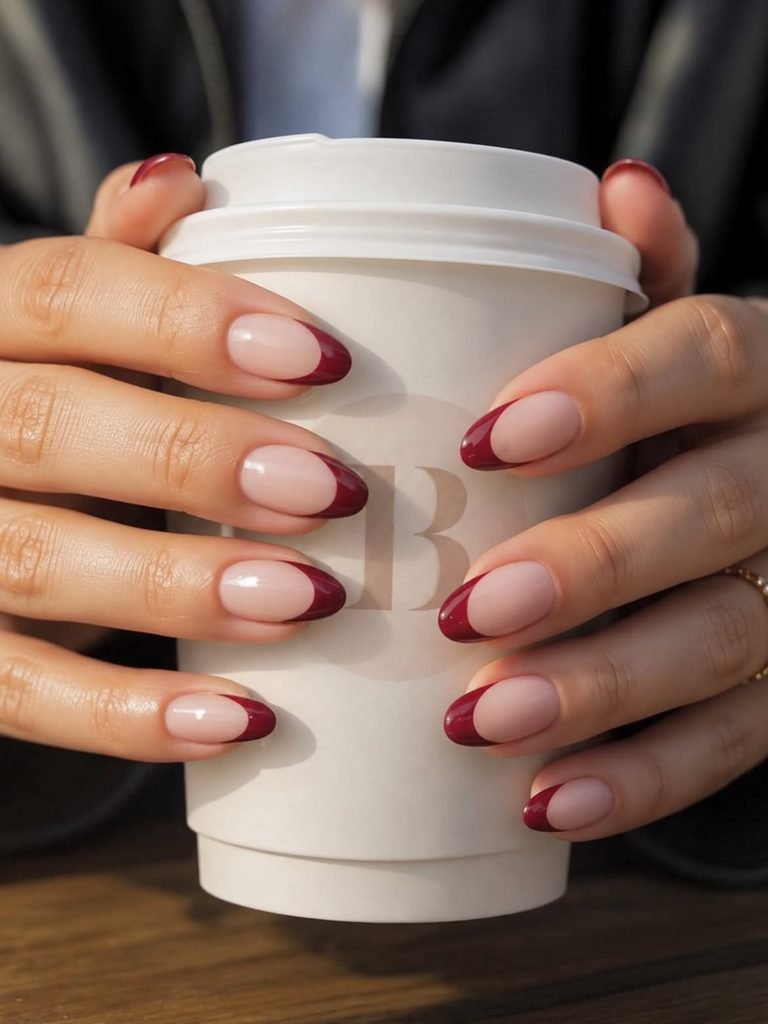
17. Cherry-Red French Tips for a Modern Bride
The short almond nails start off with a sheer warm pink base with cherry-red tipped nails which are a little bit higher in their outer corners. Two nails have a thin line of red that stretches from one corner to the cuticle on the nail, incorporating art deco elements without making the whole hand look like graphic art. The red color is glossy and opaque, not transparent nor glittering.
Having a little touch of red makes the look seem more bridal than having your whole nails crimson. This makes it perfect for an evening wedding, a winter wedding, a woman with red lip color, red earrings, or someone who doesn’t wear light nail polish. However, the short almond nails are good at keeping the vibrant color practical. You only need to match the red color with your lip color and bouquet if the undertones coincide.
How to Apply
- Shape short nails into a neat almond and apply a sheer warm-pink base.
- Paint deep cherry-red French tips with a shallow, even curve.
- Add a narrow cherry side line on the ring and middle fingers.
- Seal with a high-gloss top coat and clean the sidewalls before it sets.
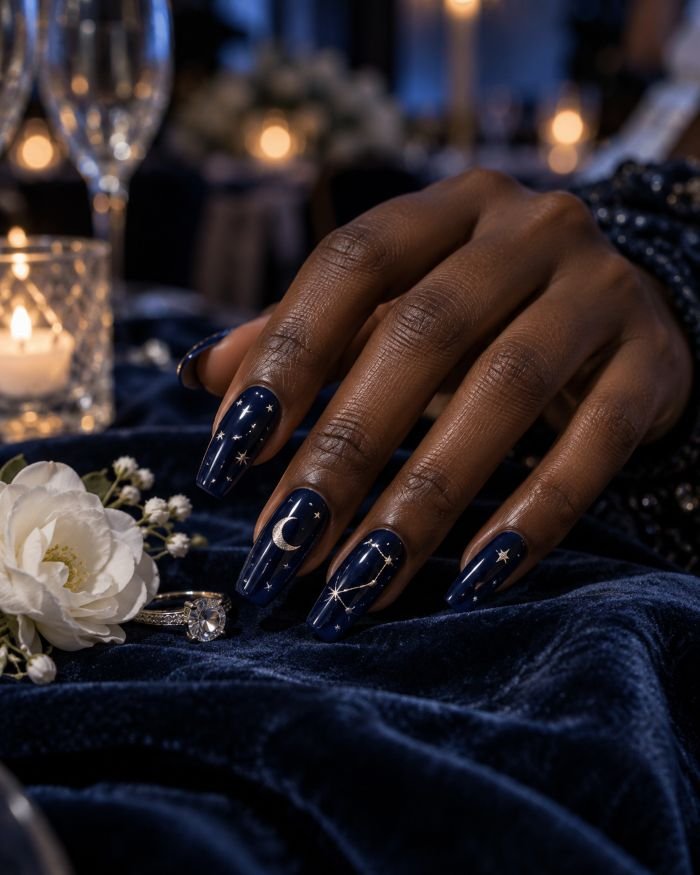
18. Midnight Navy Celestial Wedding Nails
Coffin medium nails have a translucent deep navy jelly base with the bluish-black tones and a glossy finish. The small metallic stars, crescent moons, and constellation lines are painted on selected nails, creating negative space around each element. This design needs to be kept subtle; your set should resemble the night sky but not replicate a galaxy wallpaper.
This design is meant for the bride who is getting married in black-tie, evening style, or in the style that is not traditionally pale. The coffin shape provides the straight edges for constellation lines, whereas the jelly coating prevents the navy color from being too one-dimensional. Silver jewelry and basic dress provide the background for this manicure to stand out as an intentional accent. This kind of design can be achieved either by the professional or using decals. In case of using press-on nails, take an extra nail with you on your wedding day.
How to Apply
- Prepare medium coffin nails and apply a thin black base followed by translucent deep navy jelly.
- Cure each layer, adding a second jelly coat only if more depth is needed.
- Place tiny silver stars, crescent moons, and fine constellation lines on selected nails.
- Seal beneath a glassy glossy top coat and cap the straight edges.
What Bridal Nail Designs Work Best on Short Natural Nails?
It is not necessary for shorter natural nails to look like extensions in order to look purposeful. The best looks leave some of the nail showing and the detailing either at the end or at the cuticle area. A milky base coat, sheer blushing, micro-French, reverse French crescent, a single pearl, and even a small blue dot can be seen clearly without overcrowding the surface. Shapes like oval, round, and squoval shapes are particularly forgiving because of the soft edges.
If you have a career that involves using your hands frequently, play an instrument, type a lot, or never use long nails for some reason, going by your natural length could make you feel more comfortable on your wedding day. Gel overlays can add structure without changing your silhouette drastically, while custom press-ons allow you to try out different shapes and lengths first. These oval nails provide useful examples of shorter to more intricate oval looks.
Which Nail Shape and Length Keep Wedding Ring Photos Balanced?
Photographing your ring looks good on medium almond and oval nails because of the taper that leads the viewer to the center. This type of nail shape perfectly suits French lines, ombré, lace, and elongated details because of its soft taper. Squoval and round nails can look elegant as well, but there needs to be a minimalistic design and evenly cut free edge. Long coffin and tapered-square nail extensions create more space for crystals and sculpted flowers, however, the straight edge becomes more noticeable.
The hand should remain your own one. Try the new length of extensions during the trial session and test holding a ring, bouquet, phone, and champagne glass to make sure the shape will suit your life. An elegant nail shot will not help you much if you are spending your reception protecting the tips from damaging.
How Do You Choose a Bridal Nail Color for an Ivory, White, or Champagne Dress?
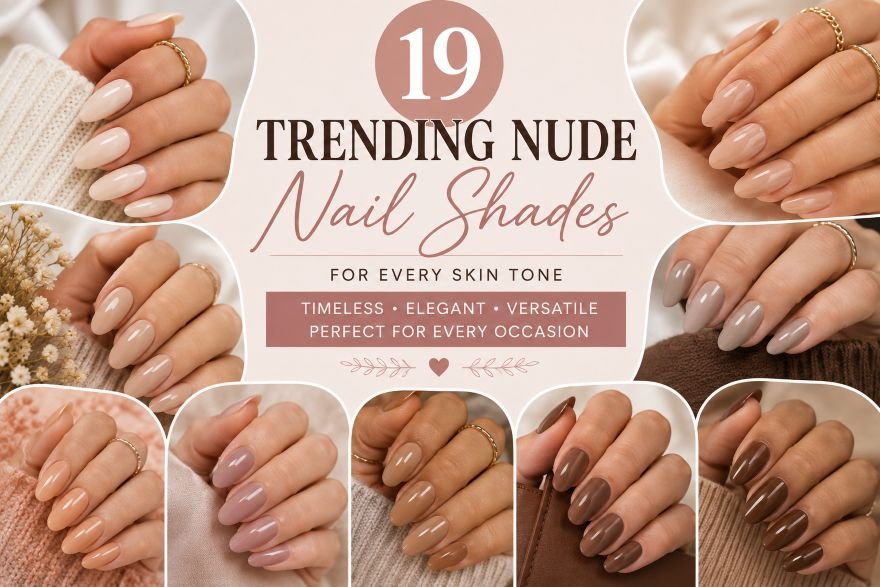
Begin with the material of your dress, not the word “white.” For a brilliant white dress, you may apply a sharp white French tip manicure or a cool pearl finish. Ivory, cream, and champagne shades would better match beige-pink, milky ivory, peach nude, or warm champagne shimmering. If your dress contains blush colors, a rosy base color will help to coordinate your manicure with the dress without duplicating it.
The second source is the jewelry. The yellow gold looks perfectly fine with champagne, honey, and rose-gold nail colors; silver and platinum fit well alongside cool blush, ice white, blue, and silver chrome colors. It also depends on your skin undertones, but it should only give a hint to the nail polish shade, not define it completely. You can compare swatches of polish next to your dress and ring under natural daylight, and then under reception lights, if it is possible.
When Should You Test Extensions, Gel, or Press-Ons—and Book the Final Set?
Approach the fitting as a real test and not a mini-version of the actual appointment. Wear the shape recommended for a couple of days, have it photographed with your ring, and observe if its length makes any inconvenience in dressing, typing, cooking, or picking up tiny things. This is particularly applicable when using extensions, 3D embellishments, chrome, and long tapered nails. Press-ons need to be tried on as well; measure each nail, try out the application system, and apply at least one hand without rushing.
When you go for the final manicure appointment, bridal experts recommend having gel, dip, or other resistant polish around one to two days prior to the wedding day, while normal polish can be used on the day itself as it is more prone to breakage. (www.brides.com) Have at least one extra press-on, file, adhesive, and cuticle oil in your emergency kit.
Final Thoughts
The most impressive manicure for brides is often the one that fits into the overall concept. A translucent milky overlay can be even more elegant than an overloaded design against a fancy gown. A single pearl, blue-tinted tips, or a simple gold line can say more than crystals on each finger. Shape and comfort are just as important as color, because your hands are going to be photographed from different angles.
Take inspiration from these nail designs for brides, but alter the length, base tone, shine, and level of nail art to make them work for your fingers. Provide full-hand examples to your manicurist instead of one close-up photo, and ask her what should be airbrushed, stamped, sculpted, or made as press-on nails. You do not need to rock the most elaborate manicure on the wedding day. What you need to have is a nail look that would look great on the pictures and feel good throughout the celebration.
Choosing your wedding manicure? Preview a bridal design on your own hand before saving the image to discuss with your nail artist.
Try It On Virtually