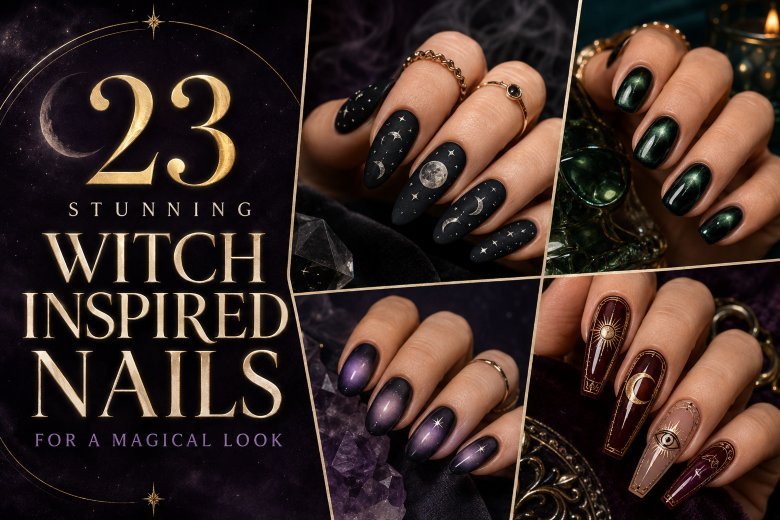
23 Stunning Witch Inspired Nails for a Magical Look
The best witch-inspired manicures feature not just a crescent of moon placed on the black polish but have a certain mood created with shadows, reflective surfaces, fine details, and shapes that make them look either mysteriously ethereal or stunningly theatrical. The following beautiful witch inspired nails combine such elements as black French tips with pearl gloss, smoky aura art, gemstone serpents, velvet magnetic powder, and more.
Use these manicure ideas to select the most adequate nail shape and pattern for your nail length, plans, and the amount of effort you are prepared to invest. Some of the witch nail art ideas can be easily implemented with short nails, while others will look more attractive on almond, coffin, or stiletto shapes.
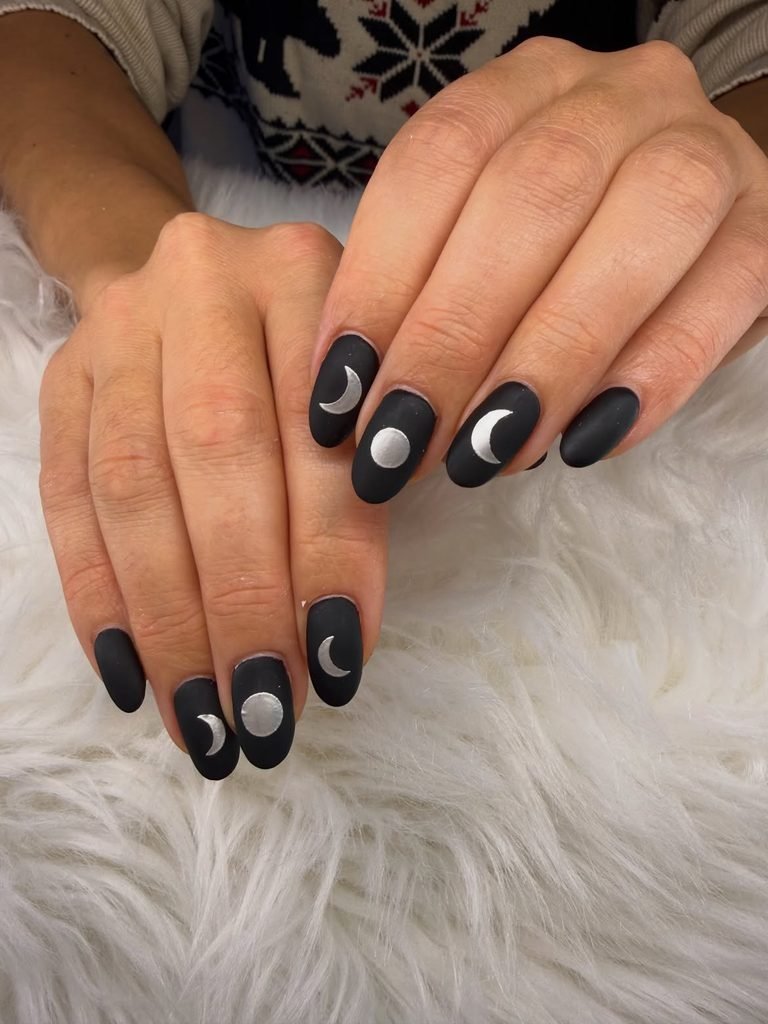
1. Matte Black Moon Phase Nails
The velvety matte black nail polish turns into a small-scale lunar calendar with thin silver moon phases from thumb to pinkie finger. The rounded tips of the medium almond nails correspond to the arcs of the crescents, and several tiny silver stars ensure that the design does not look too stiff. The design looks very elaborate up close but remains a black nail look from afar.
It is one of the easiest witchy nail art ideas to wear on a daily basis because the color scheme is quite simple. The look suits fall and winter perfectly, even though the idea of the celestial design is not confined to Halloween. Just ask for fine and evenly weighted lines at the salon, or use the moon decals at home if drawing symmetrical crescents with the other hand seems impossible.
How to Apply
- Shape the nails into a medium almond and apply base coat followed by two thin coats of opaque black polish.
- Paint a different moon phase on each cured or fully dry nail with a fine liner brush and metallic silver nail color.
- Add a few tiny star dots, keeping open black space around each lunar symbol.
- Seal the complete design with a smooth matte top coat.
2. Emerald Crystal Ball Cat-Eye Nails
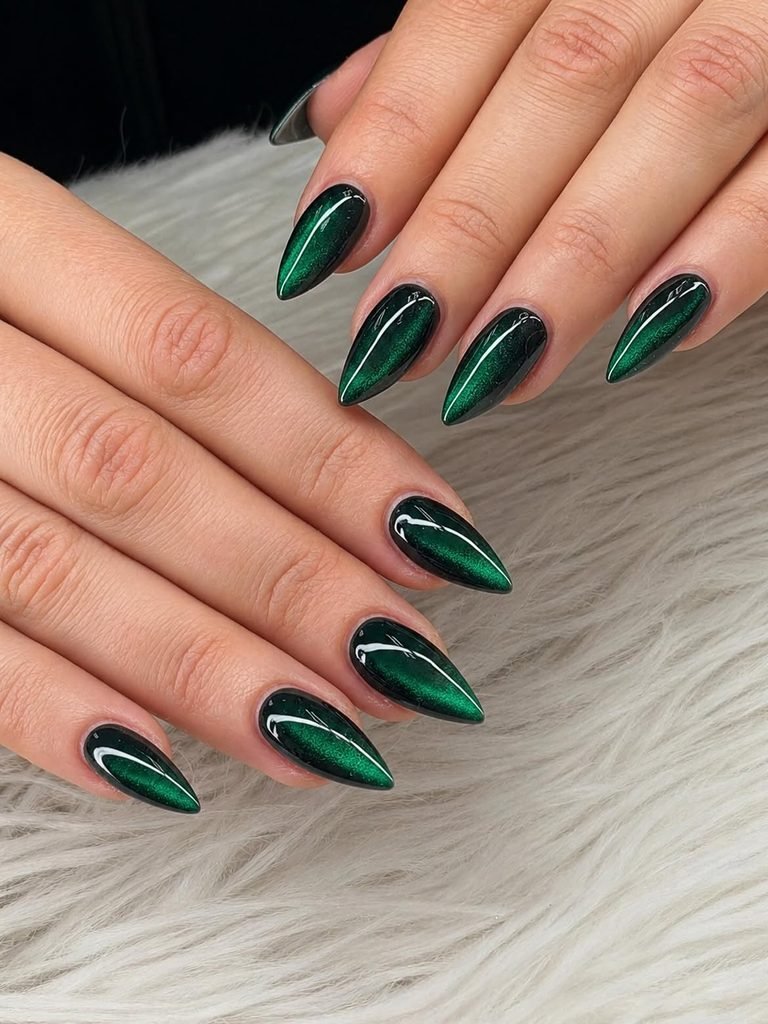
Deep emerald magnetic cat-eye gel creates a floating halo of light that resembles a crystal ball glowing in a dark room. A black base intensifies the green magnetic pigment, while a rounded oval highlight is centered on each short almond nail. The finish should stay glassy and dimensional rather than glittery, with the brightest reflection shifting as the hands move.
The compact shape makes this design practical even when you type or work with your hands, yet the changing light gives it more presence than a standard dark manicure. Emerald pairs naturally with black, chocolate brown, cream, and antique gold jewelry. This is best done with gel and a strong nail magnet; ordinary shimmer polish cannot reproduce the same suspended depth.
How to Apply
- Apply base gel and a thin coat of black gel color, curing each layer according to the gel system.
- Cover one nail with emerald magnetic gel and hold the magnet around the center to form a rounded luminous halo.
- Cure immediately to lock the pigment in place, then repeat one nail at a time.
- Finish with a high-gloss gel top coat and cap the free edges.
3. Smoky Amethyst Aura Nails
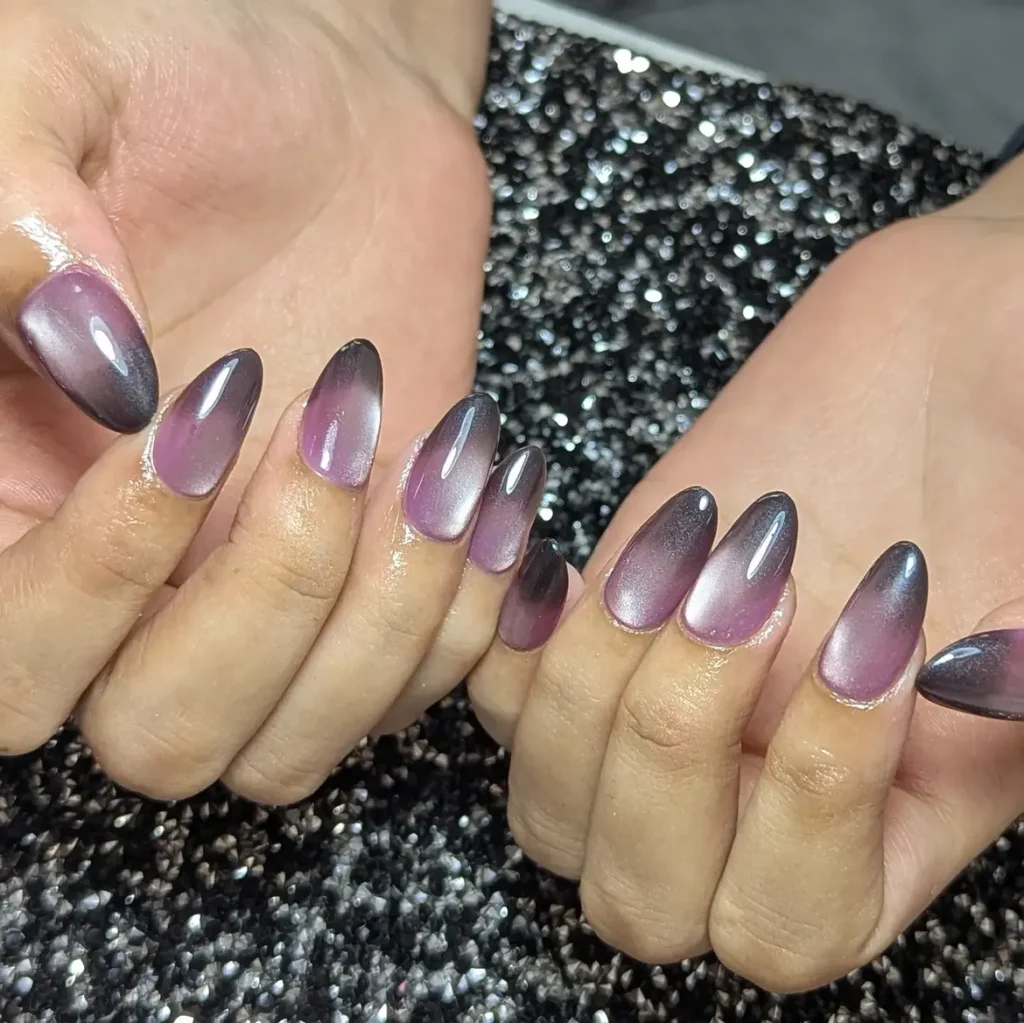
These amethyst aura nails begin with a translucent smoky nude base, then build from a soft lavender center into deep plum and charcoal edges. Tiny white starbursts are placed off-center on only two nails, allowing the blurred color to remain the focus. A glossy top coat makes the purple haze look as though it is suspended beneath glass.
The gradient gives medium oval nails more visual depth without relying on literal witch motifs. It is a strong choice for concerts, evening dinners, or transitional fall outfits in grey, black, lilac, and wine tones. A salon airbrush produces the softest fade, but a small cosmetic sponge can create a convincing version at home if each layer is applied lightly.
How to Apply
- Apply a sheer smoky-beige base to clean medium oval nails and let it set.
- Sponge or airbrush lavender into the center, then add plum and a trace of charcoal around the perimeter.
- Paint two delicate white starbursts and a few pinprick dots on selected accent nails.
- Smooth the gradient with two thin layers of glossy top coat.
4. Black French Tips With Gold Constellations
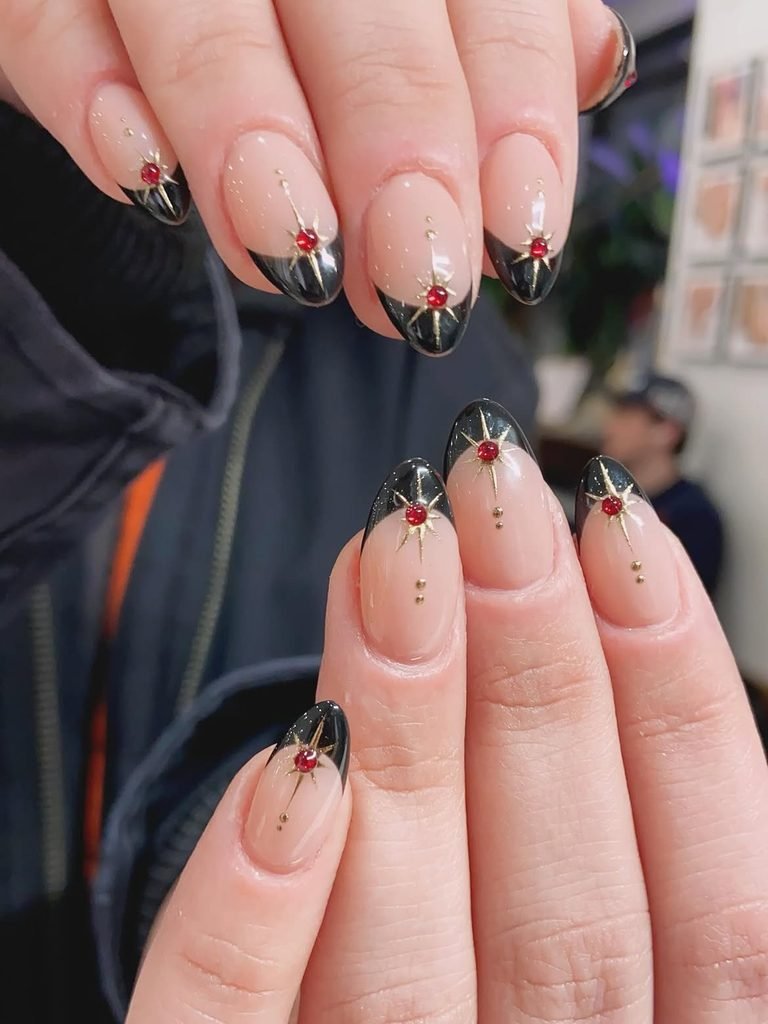
A sheer pink base keeps these short squoval nails clean and natural, while slim black French tips add a crisp graphic edge. Tiny gold dots and hairline connections form loose constellations across two accent nails, with enough negative space for the manicure to stay light. The gold should be warm and fine, not chunky glitter.
This is the understated option for someone who likes the witchy aesthetic but does not want a full dark set. The short length works for workdays, weddings, and dinners, especially with a black slip dress or simple gold rings. Nail stickers can handle the constellation details at home, although a salon will give the micro-French line a more balanced curve.
How to Apply
- Apply one or two coats of sheer blush polish to short squoval nails.
- Draw a narrow black French tip, following the natural curve of each free edge.
- Place tiny gold dots on two nails and connect selected points with an ultra-fine liner brush.
- Seal with glossy top coat, making sure the tip edges feel smooth.
5. Tarot Card Nails
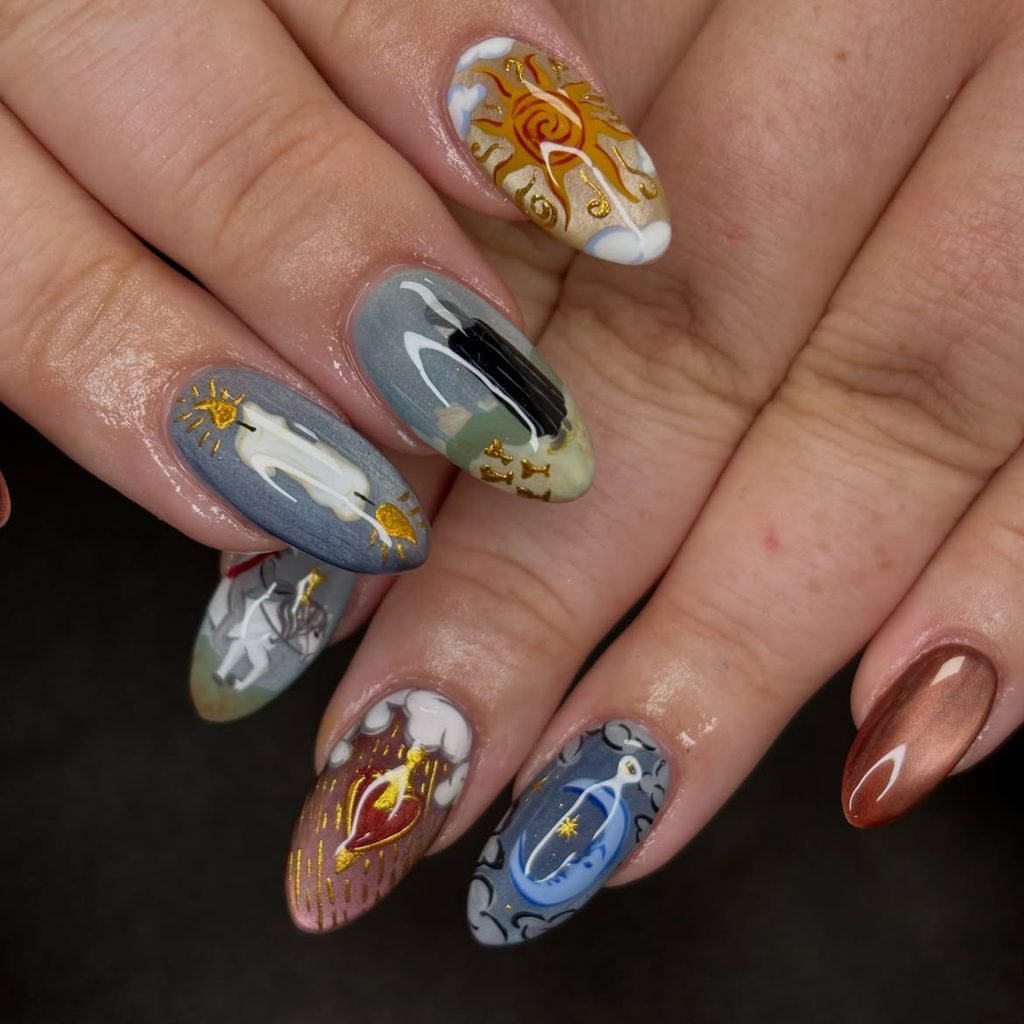
Rich burgundy covers most of this medium-long coffin set, while three sheer nude accent nails resemble miniature tarot card illustrations. Fine gold frames surround a sun, a crescent moon, and an open eye, all drawn with restrained linework rather than dense cartoon detail. A glassy finish deepens the wine color and gives the illustrated nails the look of lacquered cards.
The design has enough storytelling for a costume party or October event, but the oxblood palette also works with winter tailoring and eveningwear. Coffin nails provide a straight-sided canvas for the framed art; on shorter nails, limit the set to one simplified card. Because clean borders and miniature symbols expose every wobble, this is a salon-friendly choice for anyone who wants a precise result.
How to Apply
- Paint the solid nails with two coats of burgundy and cover the accent nails with a sheer beige-nude base.
- Outline slim rectangular gold frames on the accents using a long detail brush.
- Add one centered symbol inside each frame, choosing a sun, crescent moon, and eye.
- Apply a leveling glossy top coat to protect the detailed linework.
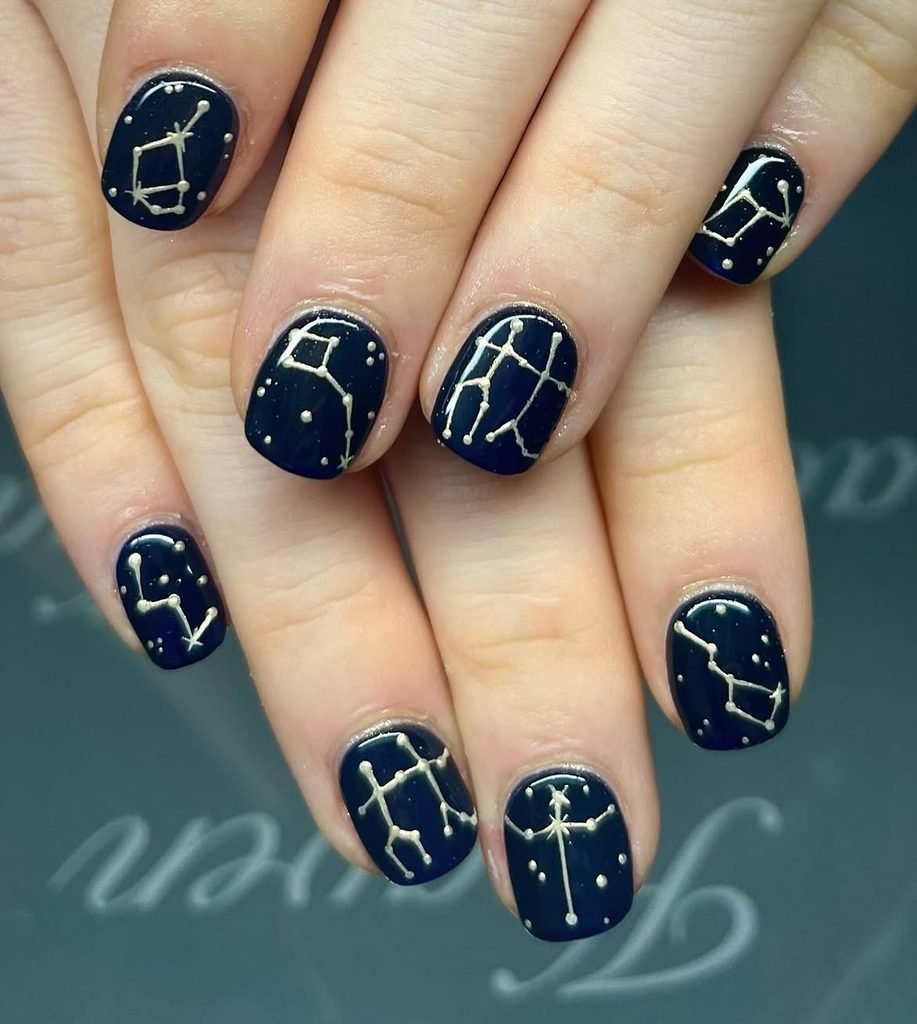
6. Midnight Constellation Nails
An inky navy base scattered with microscopic silver specks gives these medium oval nails the depth of a clear night sky. Fine silver lines connect small stars into different constellation nail art patterns, while one nail carries a single crescent moon near the cuticle. The shimmer stays subtle so the hand-painted sky map remains readable.
Navy is softer against the skin than flat black, making this a versatile manicure for late summer through winter. It pairs particularly well with denim, silver jewelry, velvet, and cool-toned evening dresses. Oval nails offer enough width for recognizable star patterns without requiring extensions, and the look can be simplified for DIY use with a dotting tool and a very fine brush.
How to Apply
- Coat medium oval nails in two thin layers of midnight navy polish with fine scattered shimmer.
- Place uneven silver dots for stars, varying their size slightly to avoid a printed appearance.
- Join only a few dots with delicate lines and paint one small crescent near a cuticle.
- Finish with a clear glossy top coat that does not drag the artwork.
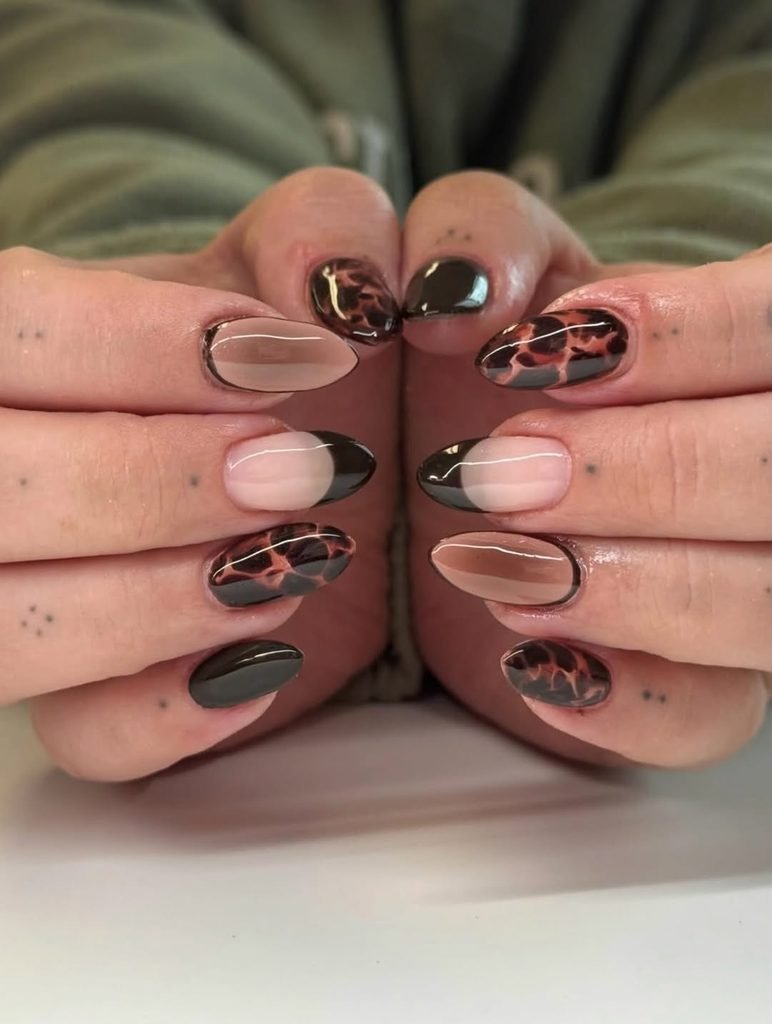
7. Amber Tortoiseshell Potion Nails
Layers of honey amber, burnt caramel, espresso brown, and translucent black glint in a glowing tortoiseshell manicure done on short oval nails. Irregular patches of color peek out from beneath the surface, while small flecks of gold foil are sealed inside like bits of forgotten powder from an old alchemical vial. None of the nails are done the same way.
This is a sophisticated version of witch nails for the girl who prefers earth tones to moons and stars. The warm translucence would work well with fall outfits, tortoiseshell accessories, camel trench coats, and yellow gold jewelry. Blooming gel creates the illusion of darkened patches spreading into the nail surface, but patient layering with jelly polish can recreate the effect too.
How to Apply
- Cover each short oval nail with a thin layer of translucent amber jelly polish.
- Add irregular caramel and dark brown patches into uncured blooming gel, or diffuse them with a small brush before curing.
- Repeat the amber layer and add a few deeper spots plus sparse gold foil fragments.
- Encapsulate the pattern with a clear builder layer or thick glossy top coat.
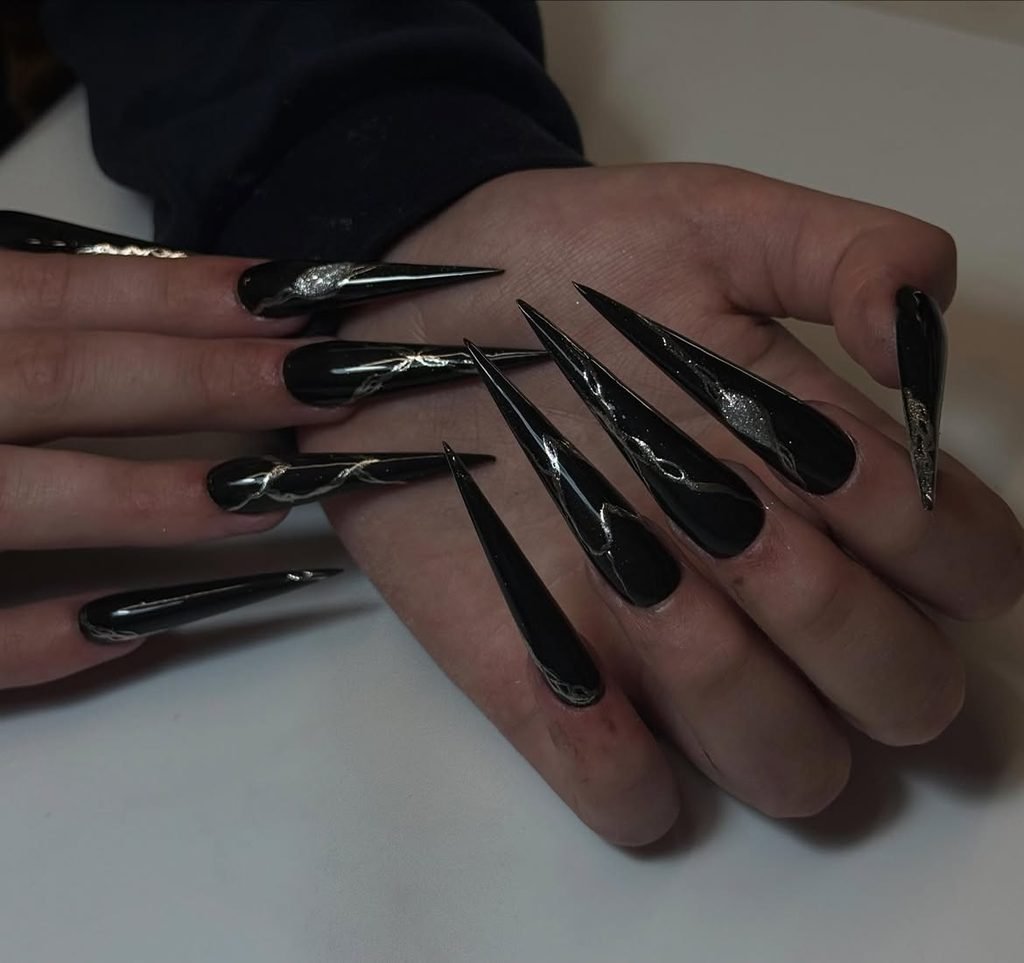
8. Black Stiletto Nails
Clear stiletto extensions fade into translucent black tips, with soft grey wisps moving through the center like smoke under glass. A few slender silver mystical symbols sit between the smoky layers, appearing suspended rather than painted on top. The sharp silhouette and transparent negative space make the design dramatic without covering every nail in opaque black.
This set belongs at a Halloween party, gothic photoshoot, or night out where longer nails will not be inconvenient. The effect relies on controlled transparency, so ask for soft-gel or acrylic extensions rather than trying to force the look onto very short natural nails. Keep the symbols abstract and minimal; too many tiny elements will compete with the smoke.
How to Apply
- Build or apply clear stiletto extensions, keeping the apex and sidewalls balanced.
- Blend diluted black gel from the tip upward, leaving the area near the cuticle mostly transparent.
- Swirl sheer grey and milky white gel into wisps, curing between layers, then add a few silver symbols.
- Encapsulate, refine the shape, and seal with a high-shine top coat.
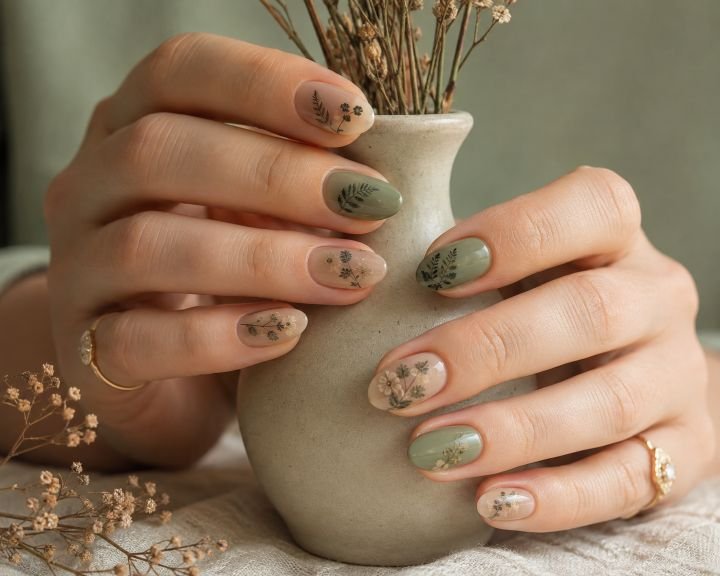
9. Moss Green Herbarium Nails
A calm mix of muted moss green and almost transparent beige dominates the short almond nails in this quiet green witch-inspired mani. Finest black stems, delicate leaves similar to ferns, and tiny cream flowers trail across the sheer accent nails, while the solid color nails appear to be made of light satin. Painted leaves, stems, and flowers seem to be sketched rather than taken from a real photo.
This earthy combo works well outside the Halloween season, as it evokes early autumn or spring. It perfectly complements linen or brown leather items, cream sweaters, and accessories made of antique brass. The leaves could be painted, stamped, or attached as ultra-fine decals. This idea is among the most versatile ones for natural nails and nail press-ons.
How to Apply
- Paint alternating nails moss green and translucent beige, keeping all layers thin.
- Draw delicate stems first, then add narrow leaves and a few tiny cream flower dots on the sheer nails.
- Add a translucent beige wash over selected botanical details to create depth.
- Finish with satin or soft-matte top coat for a pressed-herb effect.
10. Opal Crystal Cluster Nails
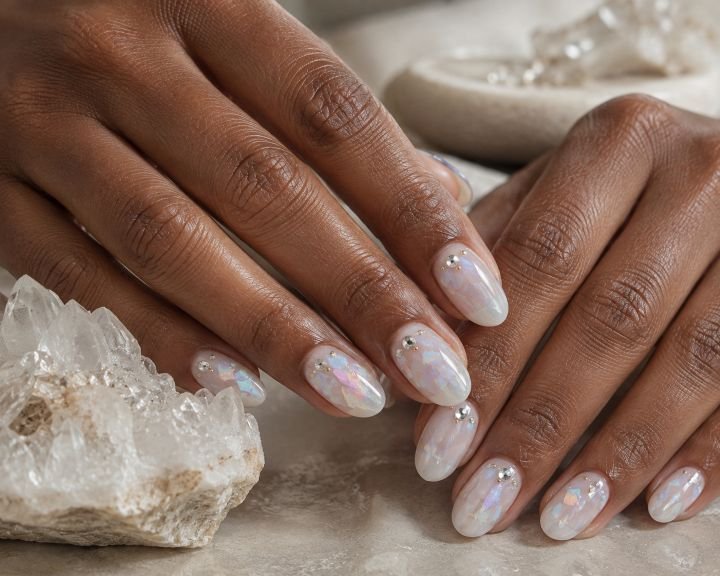
Milky translucent nails feature the iridescent shimmer of pale blue, lilac and peach irregularly placed foil layers under the lacquer’s surface. The two medium oval nails hold minuscule clusters of clear crystals at their sides, framed by sparse little silver spots. Overall, the design looks like an uneven mix of opal and quartz.
The look is festive and perfect for birthdays, winter season events or for people who want to feel magical but avoid dark shades. Medium oval shape softens the overall impression of the manicure, but the crystals may need to be placed carefully to prevent them from damaging clothes or hair. It would be best to visit a professional salon that will be able to secure the nails’ embellishments properly without ruining the manicure’s shape.
How to Apply
- Apply a sheer milky base and place torn pieces of blue, lilac, and peach iridescent foil irregularly across each nail.
- Add another translucent milky layer to soften the foil and cure or dry fully.
- Secure a small cluster of clear crystals and silver microbeads near two cuticles with strong nail gel.
- Seal around, but not over, the crystal facets and finish the remaining surface with a glossy top coat.
11. Blood Moon Eclipse Chrome Nails
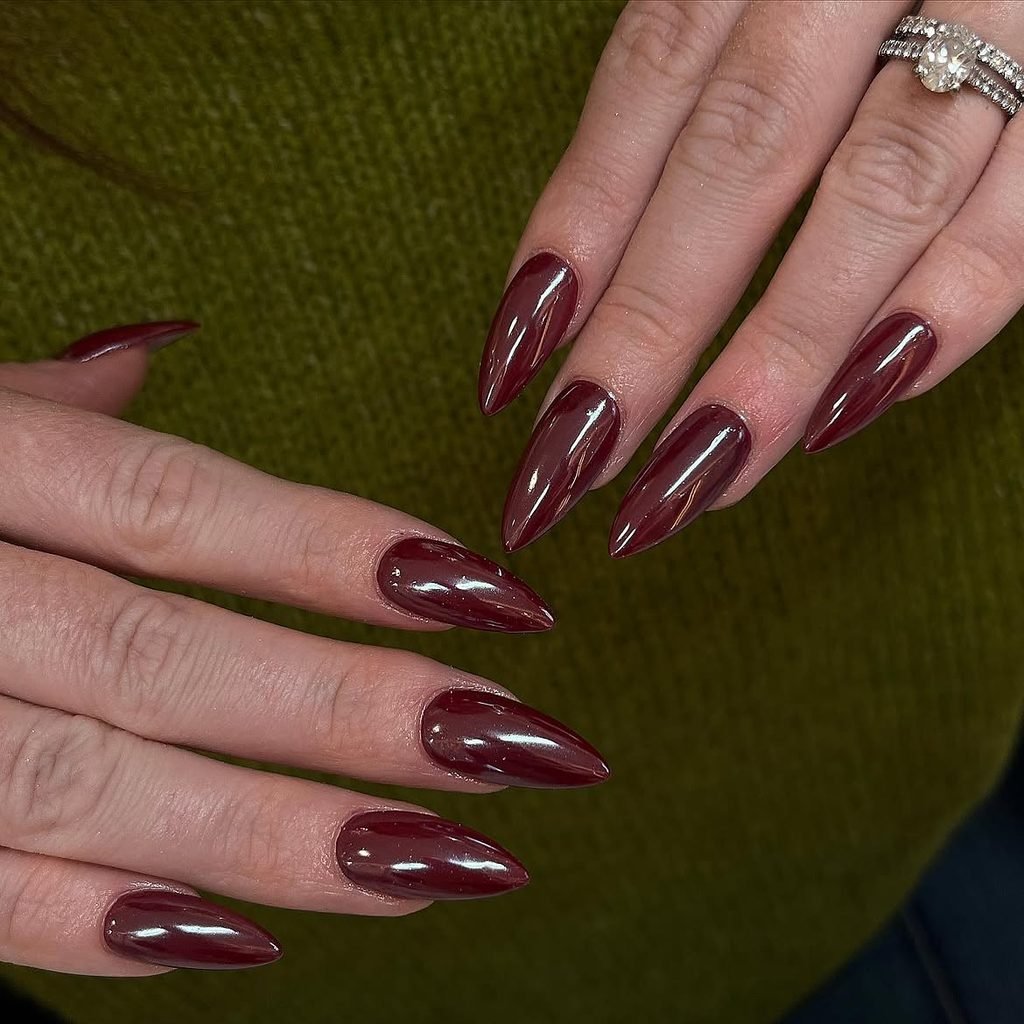
These long almond nails combine a smoked black base with a red chrome glow concentrated in the center. A crisp black circle covers part of the red on two accent nails, creating the impression of a blood moon eclipse, while the remaining nails carry a narrow ruby reflection that shifts with the light. The finish is metallic and mirror-like rather than sparkly.
The elongated almond shape turns the central red glow into a sleek focal point, making this a strong option for evening events or a dramatic Halloween look. Black, burgundy, and silver clothing will support the manicure without competing with it. Chrome placement and the clean eclipse circle require careful gel work, so bring a close reference image to a nail technician.
How to Apply
- Apply a smooth black gel base to long almond nails and cure completely.
- Paint a centered red aura, cure it, apply compatible non-wipe gel only over that area, cure as directed, and rub in red chrome powder.
- Paint an opaque black eclipse circle over part of the red glow on two accent nails.
- Seal the chrome and artwork with a compatible glossy top coat, capping every edge.
12. Flame French Nails
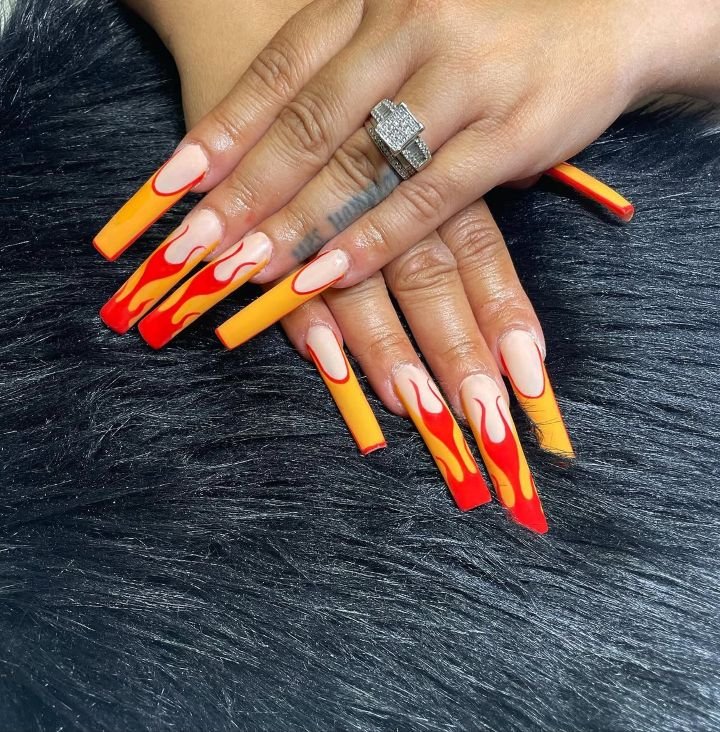
A transparent nude base gives these medium coffin nails a clean foundation, while tapered flames rise from the tips in violet, magenta, and deep plum. Fine black outlines sharpen the flame French tips, and a few tiny lavender sparkles sit near the cuticles. The color transitions should be smooth enough to resemble glowing magical fire.
This design balances a strong silhouette with plenty of negative space, so it feels lighter than a full purple manicure. It works for festivals, parties, Halloween, or a colorful alternative look at any time of year. Coffin nails suit the wide flame pattern, although a shorter square version can work if the flames are simplified and kept low.
How to Apply
- Cover medium coffin nails with a clear or sheer nude base.
- Sketch flame tips in neon orange a, then fill the inner sections with yellow.
- Refine the edges with thin black lines and .
- Smooth the artwork beneath a glossy, self-leveling top coat.
13. Gothic Lace Veil Nails
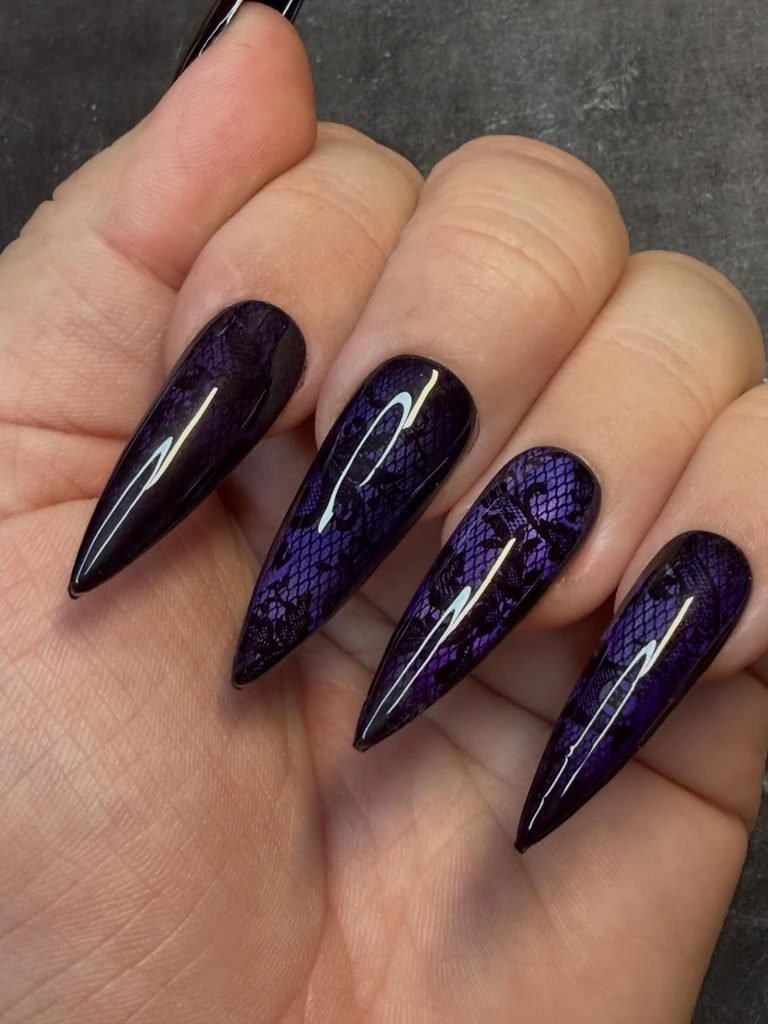
Sheer smoky beige covers medium square nails, framing them with delicate black lace leaving a small clear window in the center. Tiny scallops, fine mesh, and floral patterns add to the effect of lace veils over bare nails. The gothic manicure is accented with high gloss to keep the fine black pattern sharp.
The transparent nail art is sensual rather than severe, making it suitable for gothic weddings, formal dinners, and black evening outfits. Square nails are the best choice for this design, as they provide a rectangular border needed to depict the pattern accurately. However, a similar effect can be achieved on squoval nails using a less angular shape. Stamping plates or full-cover nail art decals can be used at home, while hand-painted lace patterns are a more complex salon procedure.
How to Apply
- Apply a sheer smoky-beige base to medium square nails.
- Stamp or paint fine black mesh, scalloped edges, and small floral lace motifs along the sides and tips.
- Clean the perimeter with a detail brush so the negative-space center stays clear.
- Apply a glossy top coat in a floating layer to avoid smearing the fine pattern.
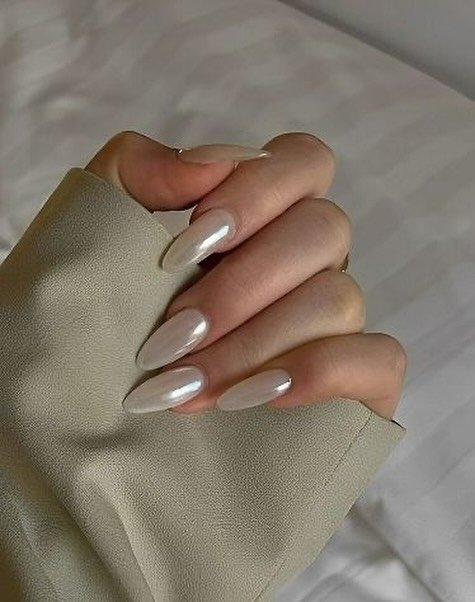
14. White Witch Pearl Nails
Short oval nails were painted translucent ivory and finished with a veil of pearl chrome. The result is a glow that ranges from a pale cream to a faint blue. Small gold moons hang from two cuticles, while a tiny pearl is set into another nail. The overall effect is light and airy, lacking the darkness of black witch nails.
A more light-oriented option for bridal, winter weddings, or any fan of the celestial aesthetic. The short oval shape keeps the detail from being too overwhelming, making it perfect for everyday wear or natural nails. If you want something less dramatic, skip the raised pearl and paint a dot of opaque pearl polish on the middle nail instead.
How to Apply
- Apply two thin coats of translucent ivory gel to short oval nails and cure.
- Rub fine pearl chrome over a compatible cured surface until the glow looks even.
- Add two tiny gold crescent decals and secure one miniature flat-back pearl on an accent nail.
- Seal the chrome carefully with a glossy top coat, working around the raised pearl.
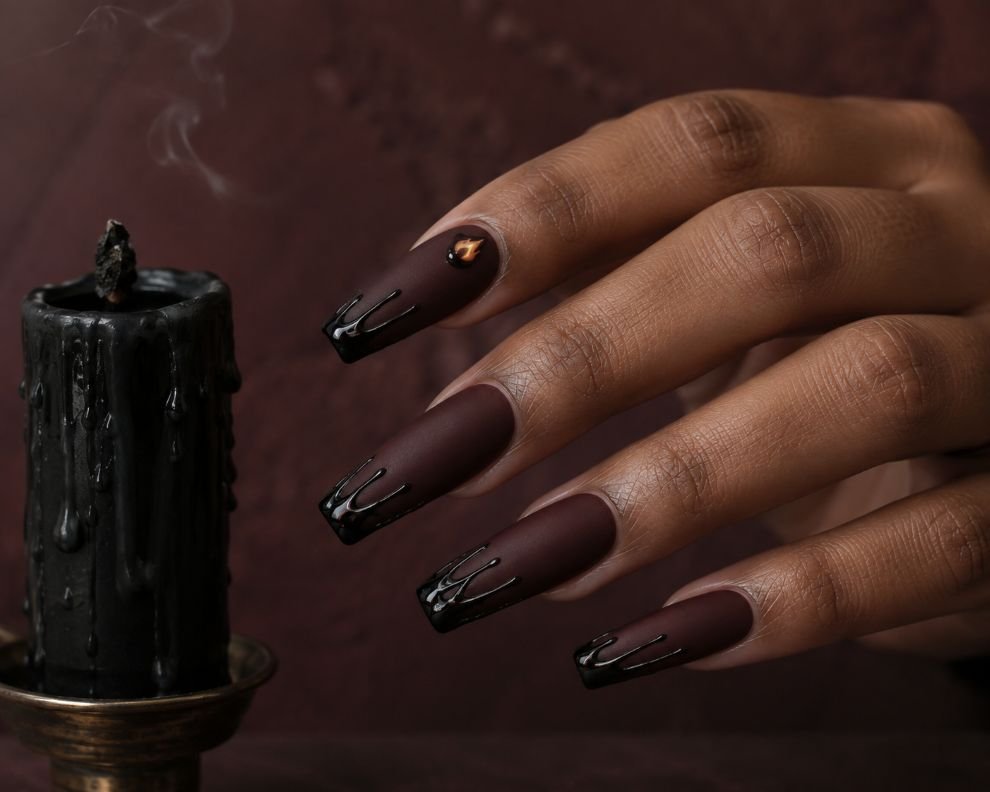
15. Oxblood Candle Wax Drip Nails
Long coffin nails in deep oxblood finish with a velvety matte, while the black gel on top seems to be oozing from the tips in uneven candle wax drips. The drips are finished with high gloss, which makes them pop against the matte base. There is also a small flame in color on one of the nails, close to the cuticle, but it is kept tiny so that it does not make the whole design look cartoonish.
The manicure is clearly seasonal – perfect for Halloween, gothic nights, or a themed picture. The coffin shape is necessary to give the wax trails enough space to appear rounded, and it also helps to make the design less busy due to the additional length. A design that requires the raised gel to be fully cured and professionally smoothed is probably safer to be done in a salon rather than at home.
How to Apply
- Paint long coffin nails with deep oxblood gel and finish the base with a matte top coat.
- Use thick black art gel to form rounded drips that descend irregularly from each tip.
- Cure the raised artwork thoroughly, then paint one small amber flame on an accent nail.
- Apply a glossy top coat only over the black drips and flame details.
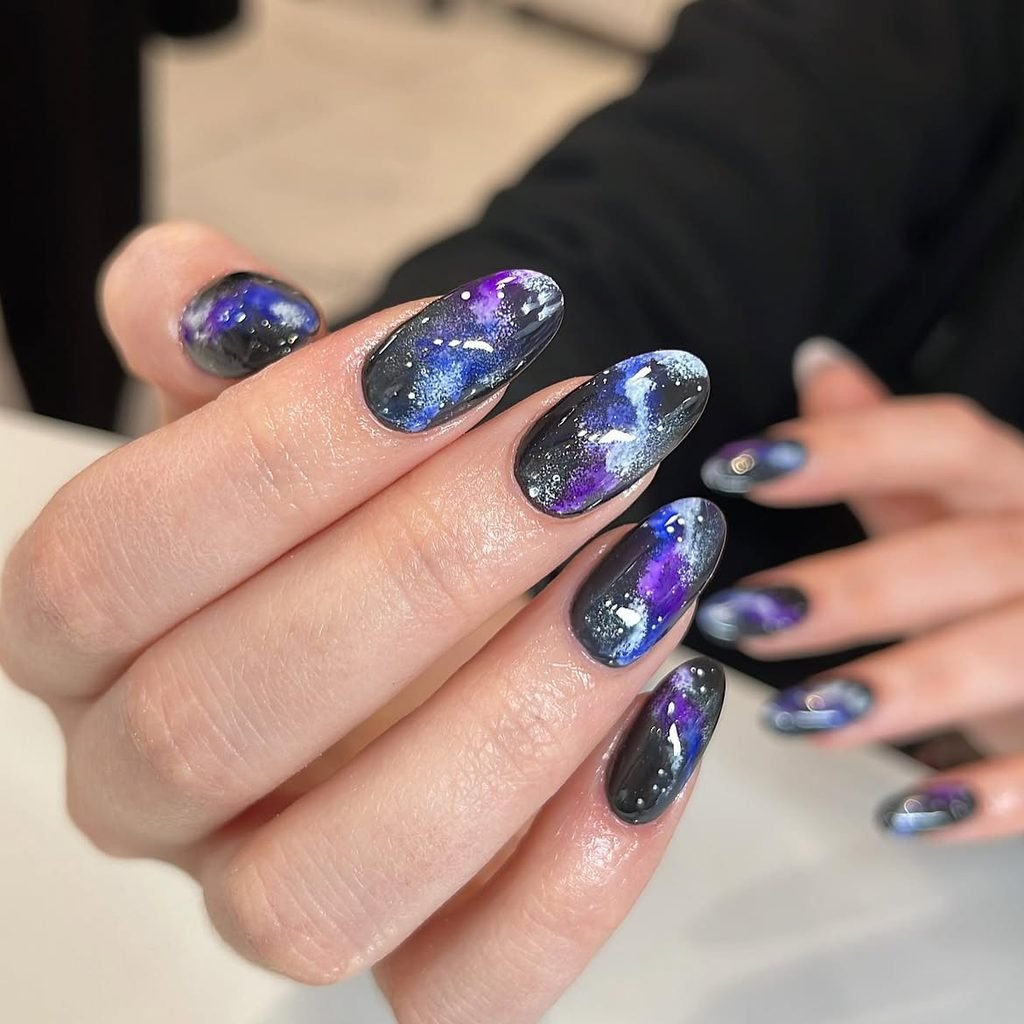
16. Indigo Galaxy Nails
Swirls of cobalt, indigo, violet, and black spread across medium almond nails like a painted nebula. Fine white dusting, scattered stars, and a few translucent blue flakes create layered galaxy nail art, while one nail features a narrow trail of light that runs diagonally from cuticle to tip. The pattern is intentionally varied across the set.
Unlike a solid constellation manicure, this design depends on diffuse clouds of color and uneven luminosity. It suits winter, music events, and anyone who enjoys cool-toned maximalism. A sponge makes the nebula accessible at home, but the key is restraint: several thin cloudy layers look deeper and cleaner than one thick mixture of every color.
How to Apply
- Paint medium almond nails black, then sponge on small overlapping areas of cobalt, indigo, and violet.
- Soften the color boundaries with a trace of black and add a few translucent blue flakes.
- Flick very fine white speckles across the set and hand-paint several larger four-point stars.
- Add a diagonal light trail on one nail and seal everything with a glossy top coat.
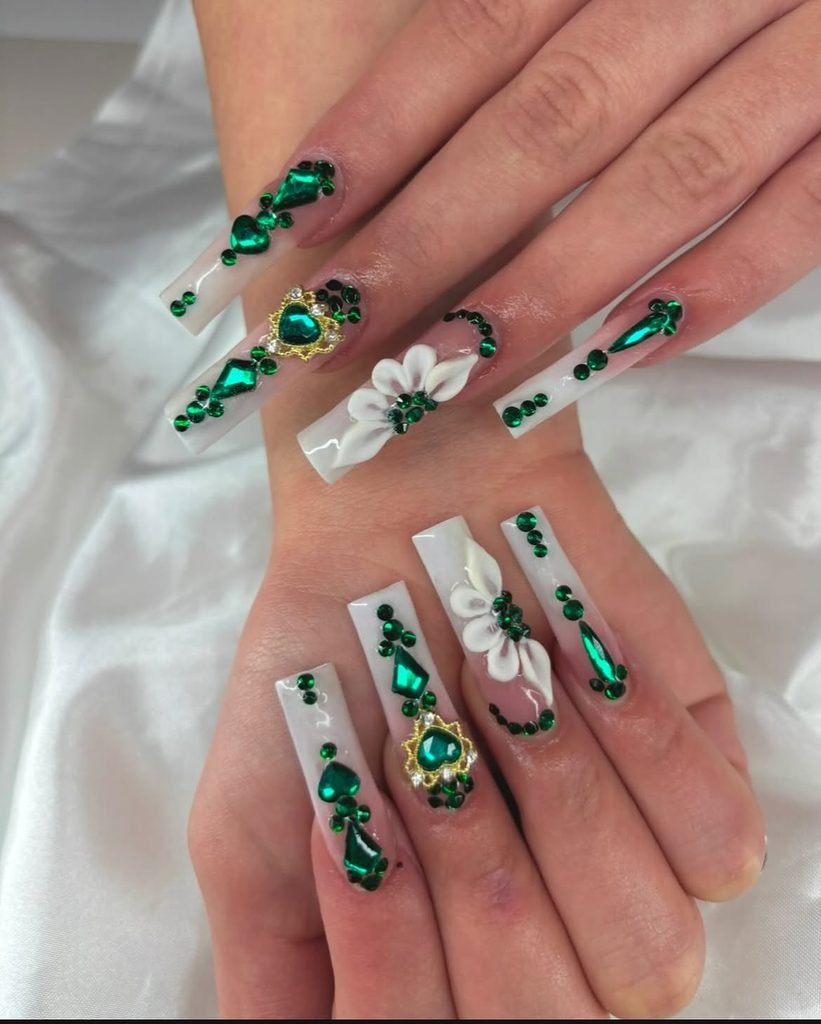
17. White Serpent and Emerald Gem Nails
Long stiletto nails in smoky gunmetal chrome create a sleek base for a raised silver serpent that winds across two accent nails. A small emerald-green cabochon sits beneath the snake’s head, while the remaining nails carry thin silver curves that suggest scales without copying the full motif. The surfaces mix smooth mirror shine with carefully controlled relief.
This is a statement salon set for parties, editorial looks, or anyone comfortable wearing pointed extensions. The serpent reads best when its curves follow the length of the nails, which is why stiletto proportions matter here. Keep rings minimal and choose black, green, or metallic clothing so the 3D detail remains the focal point.
How to Apply
- Build balanced long stiletto extensions and cover them with smoky gunmetal chrome.
- Sculpt a thin winding serpent on two nails using white 3D gel, then cure it in sections.
- Secure a small emerald cabochon below the serpent’s head and paint sparse scale-like curves on the other nails.
- Seal around the raised art and gemstone while leaving reflective surfaces crisp.
18. Lunar Moth Nails
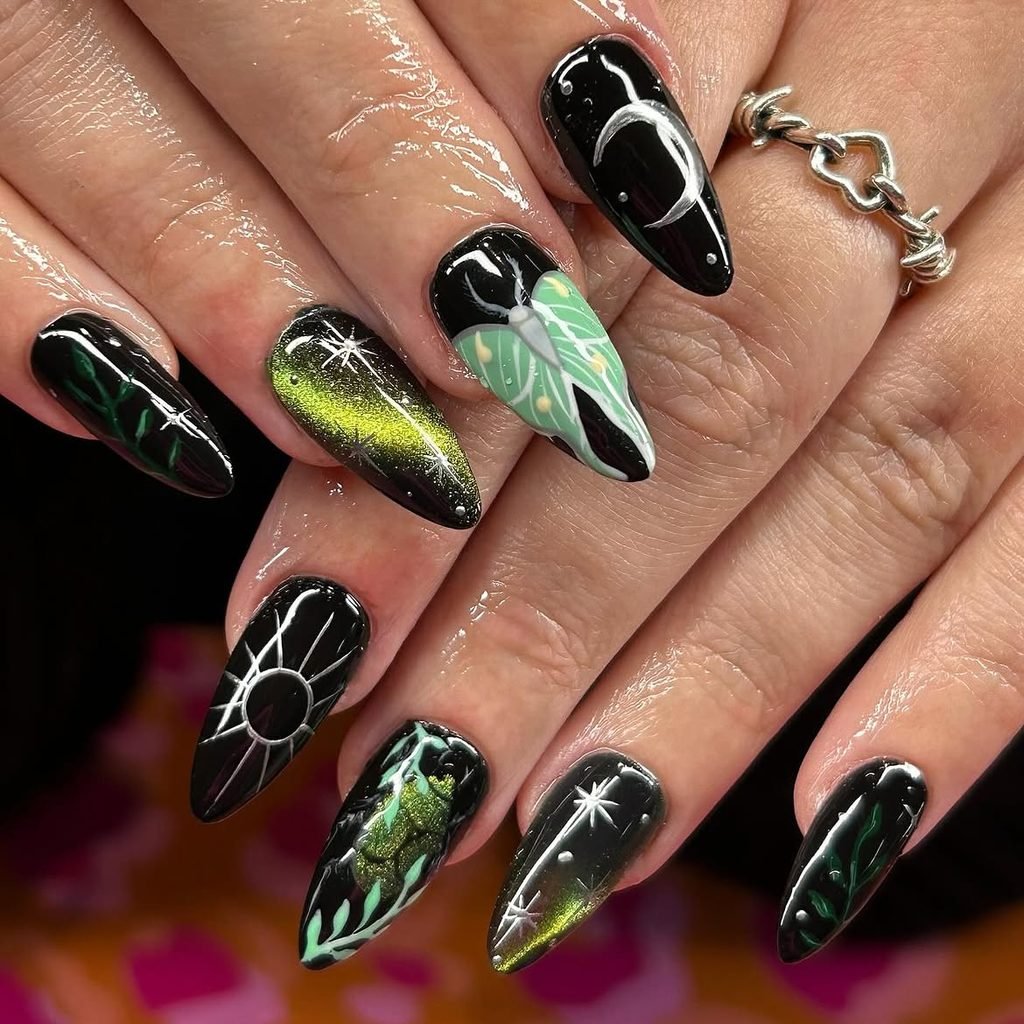
Warm taupe-nude polish serves as a base for these medium almond nails, and a fine black line drawing of a lunar moth takes center stage on the two middle nails. Delicate crescents, pale gold flecks, and tiny antennae add detail, while a satin top coat adds an aged botanical print look. The overall effect is less harsh than one might expect from such stark lines despite the neutral background the black lines stand out against.
The use of moths as a design element lends a kind of woodsy night-time feel to this witchy manicure without invoking the full stereotypical Halloween look. The neutral base also means that the manicure would pair well with black, camel, olive, and cream clothing. To replicate this look, ask the salon to divide the moth design evenly between two nails or opt for a simplified single-moth design if you have shorter nails than the almond shape shown.
How to Apply
- Apply an even warm taupe-nude base to medium almond nails.
- Sketch half of a black moth on each middle nail so the wings align when the fingers meet.
- Add fine crescents and sparse muted-gold speckles without filling every open area.
- Protect the illustration with a smooth satin top coat.
19. Spirit Board Planchette Nails
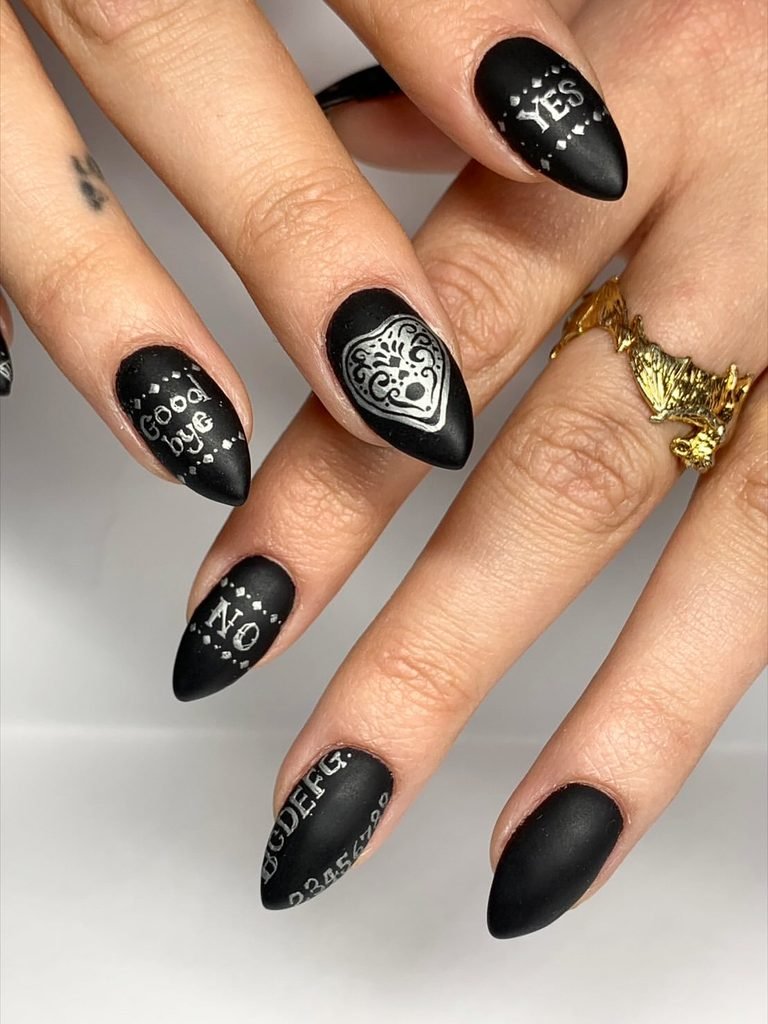
Parchment cream and faded beige give these medium coffin nails the appearance of an aged spirit board. Fine black letters arc across two nails, small sun and moon icons fill the corners, and a glossy black planchette sits on one accent nail with a tiny clear window at its center. Light brown shading around the edges creates a gently weathered finish.
The rectangular coffin shape helps the typography and framed symbols feel intentional, while the muted palette prevents the set from becoming visually noisy. This is a playful choice for Halloween or a themed party, but it requires close, clean lettering. A full-cover transfer or custom press-on set is more realistic for home use than trying to hand-paint an alphabet across both hands.
How to Apply
- Paint medium coffin nails parchment cream and sponge a little translucent tan around the edges.
- Add neat black letters, numbers, and small sun-and-moon symbols with decals, stamping, or a fine brush.
- Paint or attach a small black planchette motif on one nail, leaving a clear center window.
- Seal the set with a glossy top coat to resemble polished aged wood.
20. Minimal Lunar Chrome Nails
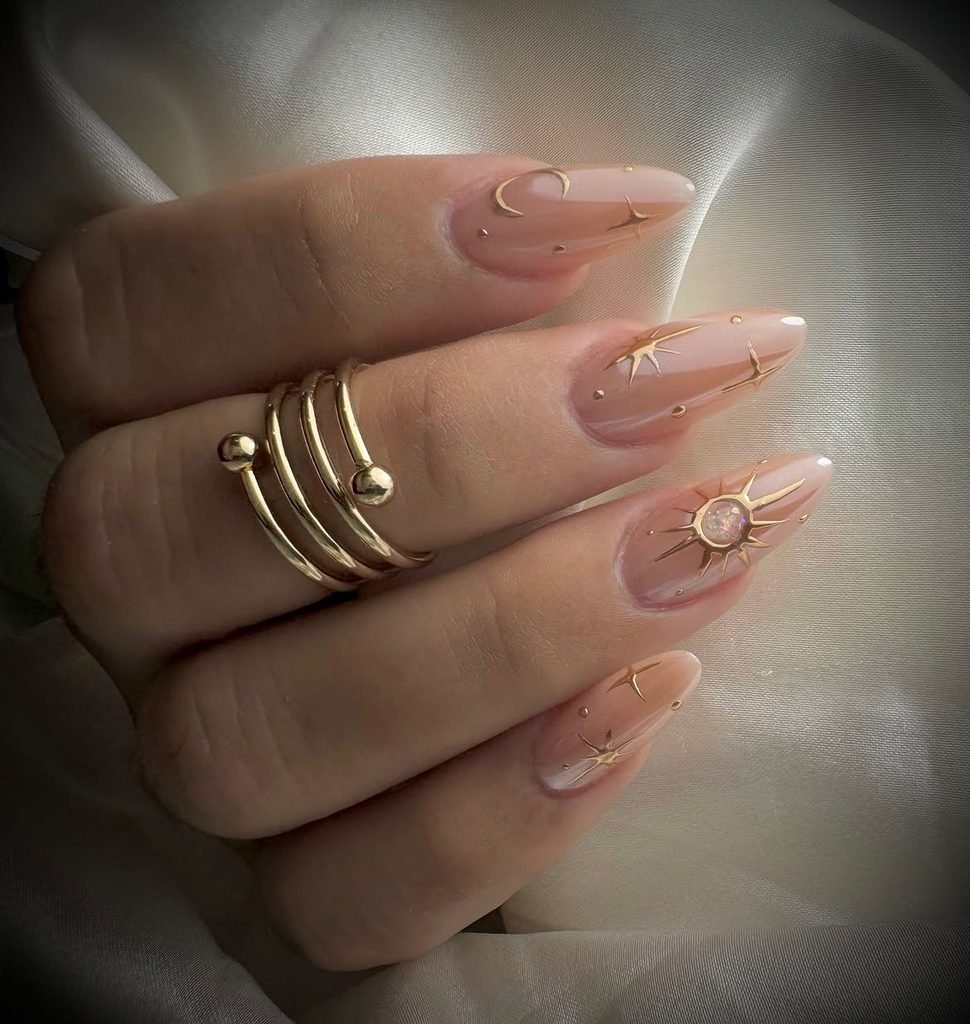
A translucent pink base keeps short square nails nearly bare, interrupted only by slim navy micro-tips and offset silver chrome crescents near the cuticles. One accent nail carries a tiny chrome star, giving this minimal celestial manicure a clear focal point. The negative space makes every metallic curve look deliberate.
This is the most office-friendly idea in the collection and proves that witch-inspired nails do not need long extensions or heavy black polish. Short square nails make the chrome accents feel graphic and modern, especially with crisp tailoring, denim, or silver jewelry. Use crescent decals for an easier home version, or request isolated chrome gel at the salon for the sharpest reflective edges.
How to Apply
- Apply a translucent pink base to neatly shaped almond nails.
- Paint narrow navy micro-French tips and cure or allow them to dry completely.
- Create offset crescent shapes near selected cuticles with chrome gel or metallic decals, then add one tiny star.
- Seal the edges with glossy top coat while preserving the clean negative space.
21. Witch’s Brew Bubble Nails
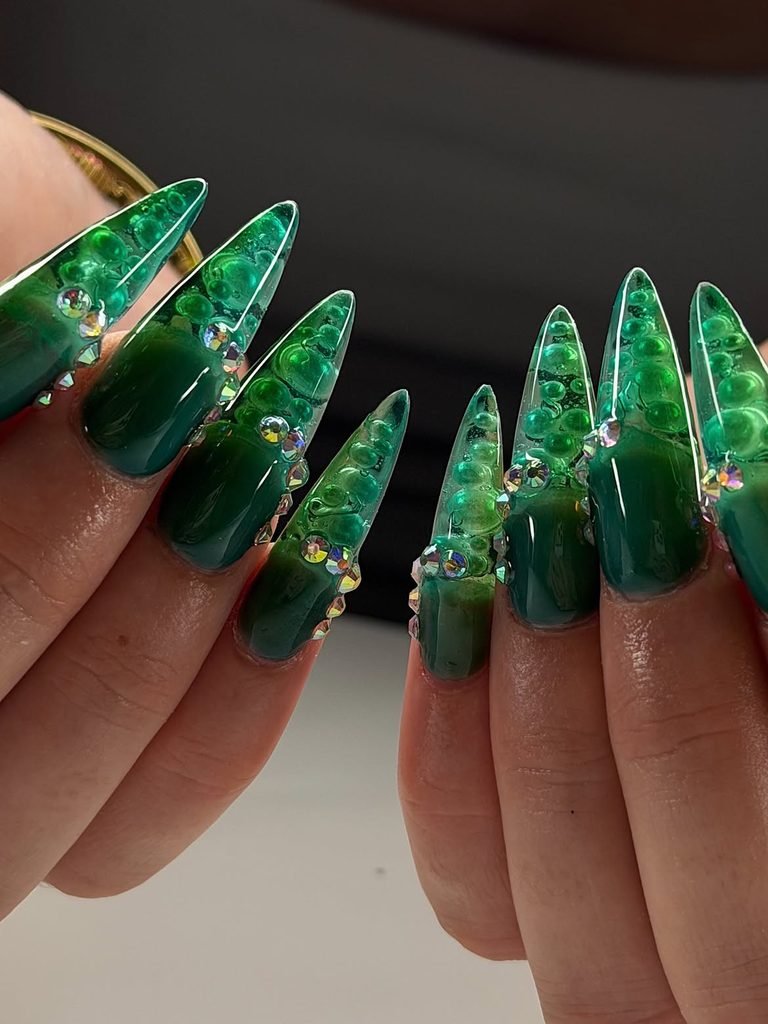
Medium coffin nails fade from glossy black at the cuticle into translucent acid green at the tips. Rounded clear droplets and tiny iridescent circles appear encapsulated inside the green, producing a fizzy witch’s brew manicure with the depth of a bubbling potion. A trace of lime shimmer catches the light without obscuring the jelly finish.
This playful design is ideal for Halloween, costume parties, or anyone who prefers vivid color to traditional orange-and-black nail art. Coffin nails provide enough surface for the dark-to-bright gradient and suspended bubbles, although a medium almond version can soften the look. The transparent layering is easier with gel; press-ons are the most practical DIY alternative if you do not use a curing lamp.
How to Apply
- Apply a sheer acid-green jelly layer over medium coffin nails.
- Blend translucent black from the cuticle downward, keeping the brightest green at the tips.
- Add clear gel droplets, small iridescent circles, and a light dusting of lime shimmer between layers.
- Encapsulate the bubbles and finish with a thick, smooth glossy top coat.
22. Orange Black Haunted Nails
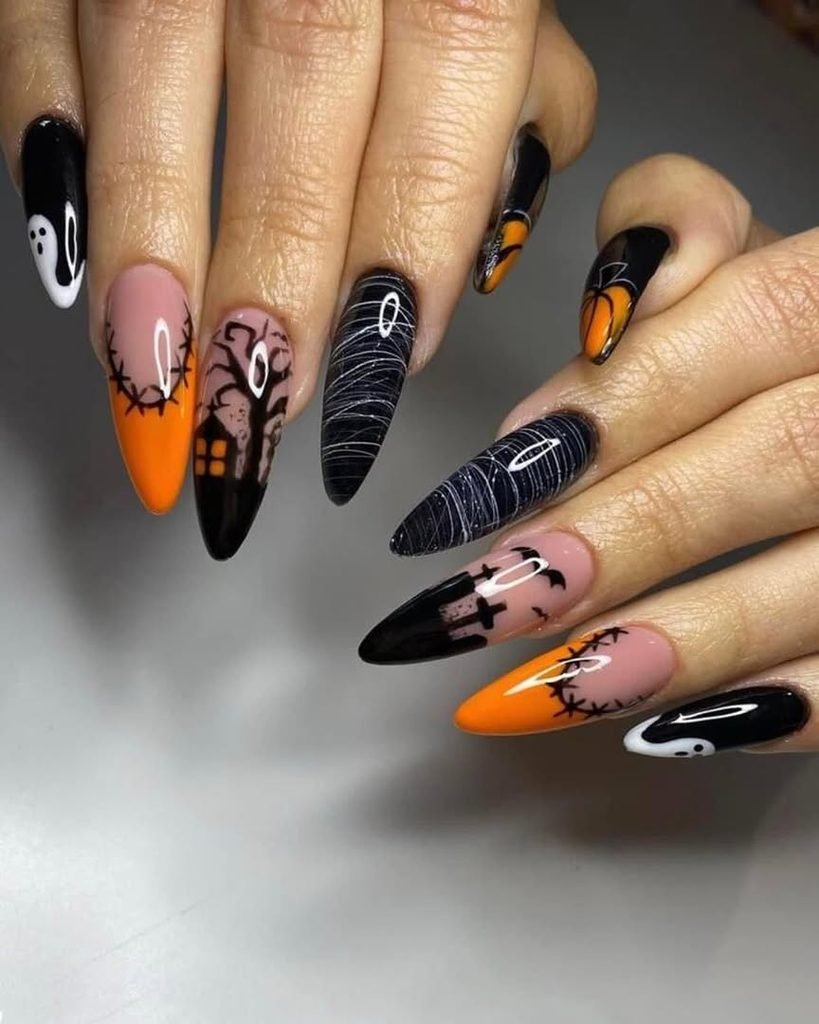
Pale grey fades into charcoal across medium oval nails, creating a misty background for thin black tree silhouettes. Bare branches stretch across several nails, while a small ivory moon glows behind them and two distant birds appear as tiny marks. A satin finish softens the haunted forest nail art and keeps the scene atmospheric.
The horizontal landscape makes this set visually connected even though each nail holds a different part of the forest. It is well suited to late autumn and winter, especially with grey wool, black leather, or silver accessories. The gradient can be sponged at home, but the fine branches need a steady liner brush or a stamping plate to avoid thick, muddy silhouettes.
How to Apply
- Sponge pale grey and charcoal polish into a foggy vertical gradient on medium oval nails.
- Paint a small ivory moon on one accent nail and soften its edge with a thin grey glaze.
- Draw fine black trunks and branching silhouettes across the set, then add two tiny distant birds.
- Finish with a satin top coat to blur the scene slightly without hiding the line work.
23. Rose Quartz Love Spell Nails
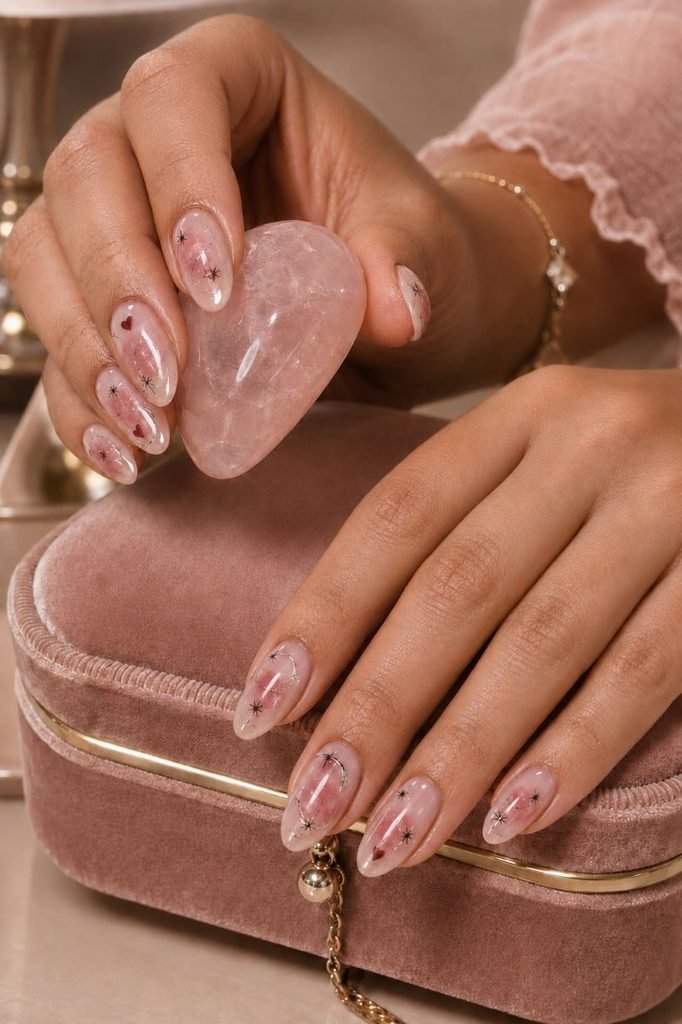
Dusty rose aura centers bloom over translucent pink medium almond nails, framed by wine-red micro hearts, fine black starbursts, and slim silver curves. A soft glazed top coat gives the set a rose quartz nail effect without turning it into a conventional romantic manicure. The contrast between tender pink and sharp celestial details creates a softer kind of witchy mood.
This look works for date nights, Valentine’s season, birthdays, or anyone who wants mystical nail art in a lighter palette. Almond nails allow the aura and small symbols to breathe, but the design also translates to short oval nails if you reduce the number of accents. Keep the hearts tiny and irregular so the manicure feels hand-drawn rather than overly sweet.
How to Apply
- Cover medium almond nails with a translucent pink base.
- Sponge dusty rose into the center of each nail, blending the edges into a soft aura.
- Paint tiny wine-red hearts, black starbursts, and a few slim silver curves with ample spacing.
- Finish with a sheer pearly glazed top coat for a rose-quartz glow.
Best Nail Shapes for Witch-Inspired Designs
It is necessary to choose the shape depending on the amount of artwork. For example, short square and squoval nails are suitable for mini French manicure, small moons, and sparse line art. Oval and almond nails, in their turn, are the best choice for aura gradients, cat-eye halos, cosmic art, and floral patterns because of their shape flexibility. Coffin nails make framed designs and lettering look better, while stiletto nails are useful for creating sharp smoke, serpent, and gothic motifs.
Can Witchy Nail Art Work on Short Nails?
Short nails can carry the theme convincingly when the design is edited. Use one recognizable element, such as a crescent, tiny star, dark micro-tip, magnetic glow, or botanical sprig, and leave visible negative space around it. Trying to compress tarot scenes, alphabets, crystals, and several symbols onto the same short nail will make the result difficult to read. A strong finish and controlled palette usually create more impact than crowded artwork.
Salon and DIY Technique Notes
Some of these manicures are realistic at home with regular polish, decals, a dotting tool, and a fine liner brush. Raised gel, encapsulated art, chrome, and long extensions need more product control. For magnetic effects, shape the pigment with the magnet before curing and then seal it, following the order shown in OPI’s magnetic gel tutorial. For diffused tortoiseshell or potion patterns, color is added over uncured blooming gel before the design is cured, as demonstrated in Gelish’s blooming gel guidance. Chrome also needs a compatible surface; a non-wipe top gel is commonly designed for that purpose, as noted in Aprés Nail’s product guidance.
Bring a clear reference showing the shape, length, palette, finish, and exact accent placement to your appointment. Be honest about your daily routine as well. A raised crystal cluster or long stiletto may look beautiful in a photograph but become irritating if you type constantly, handle contact lenses, or need low-maintenance nails. A skilled technician can preserve the concept while shortening the length, flattening embellishments, or reducing the artwork.
Final Thoughts
Witch-inspired nails are most effective as a suggestion of a world rather than an inventory of its alleged symbols. Matte black moon phases are dramatic and graphic, emerald cat-eye gel adds movement, and rose quartz aura art makes the same statement in a different shade. The most important thing is to pick a version that will continue to look good to you long after the novelty has worn off.
Pick a single dominant impression, and consider the contrast and upkeep. A small crescent on a short natural nail can look just as good as a sculpted serpent on long stilettos. Think about the design that will complement your nail shape rather than fight it.