25 Spring Nail Designs You’ll Want to Wear
Spring manicures look best when they represent the season but don’t involve the same pastel flower done 25 different ways. This beauty nails guide covers a little more ground than that: Byrdie’s spring trends report includes milky color, sheer polish, cantaloupe, meadow green, small-scale detailing, and special effects; meanwhile, Allure’s floral nail art round-up reveals how jelly layers, magnetic pigments, dimensional gel, and encapsulated flowers can turn conventional botanical nail art into something much more thoughtful and thought-out.
These spring nail designs bring all of this inspiration into practical mani ideas for short natural nails, medium almond and oval nails, square tips, and long salon manis. Here you’ll find French tips, solid colors for the season, fruit and garden nail art, chrome, velvet cat eyes, ombré, negative space nail art, and three-dimensional nail art, as well as straight talk about what nail designs are practical to paint yourself and which should be left to a professional.
1. Butter Yellow Micro-French Nails
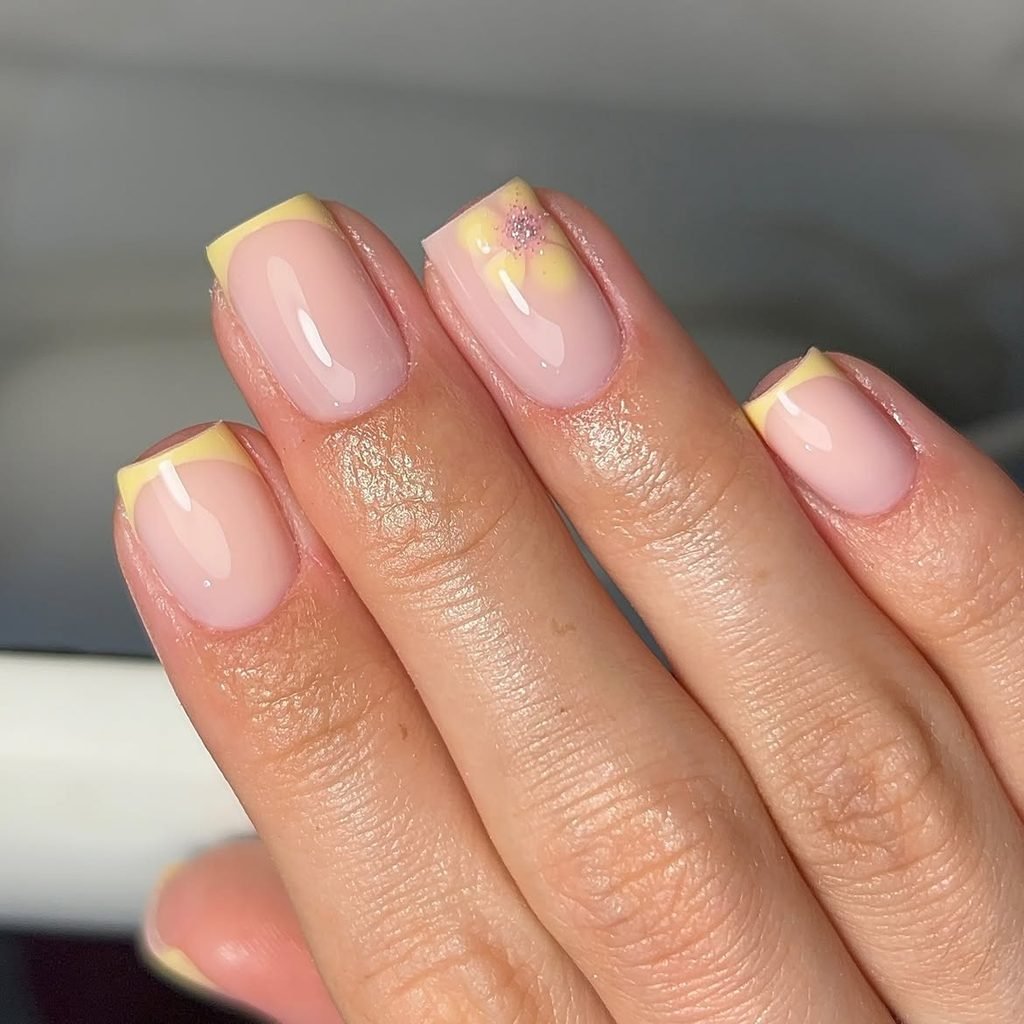
Short squoval nails begin with a translucent pink-beige base and finish with an exceptionally fine butter yellow French tip. The yellow line traces the natural curve of each free edge rather than forming a thick band, while two accent nails carry a single white daisy with a pin-sized yellow center near the sidewall. A glossy finish keeps the pale colors clean rather than chalky.
This design gives spring color enough presence to feel intentional without overwhelming a short nail. It works for the office, brunch, Easter gatherings, and guests attending a spring wedding because the sheer base grows out discreetly. The micro-tip is achievable with regular lacquer, but a long liner brush gives more control than a wide polish brush, especially around the corners of a squoval shape.
How to Apply
- Shape the nails into short, even square and apply one or two coats of translucent pink-beige polish.
- Draw a hairline butter yellow tip along each free edge using a fine liner brush.
- Add one small white daisy to two sidewalls and dot each center with yellow.
- Seal the manicure with a smooth, high-gloss top coat.
2. Milky Lavender Short Square Nails
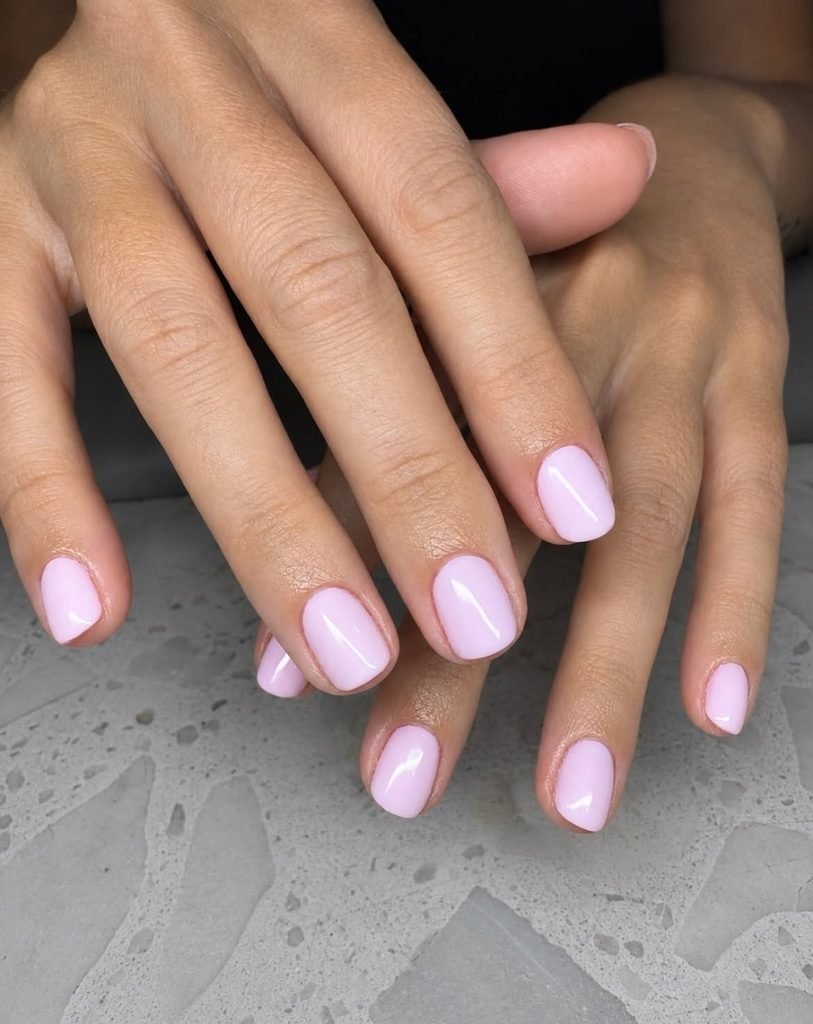
Short square nails are covered in cool lavender softened with a cloudy, milk-like opacity. The color remains consistent across every nail, with no accent art, glitter, or chrome; interest comes from the balanced square shape, slightly rounded corners, and a reflective wet-look surface. The result is more muted than candy purple and less grey than a typical mauve manicure.
A monochrome manicure in soft lavender that could clash with the patterns on clothes or accessories is ideal when you are not doing nail art and have a formal look. The style goes well whether you wear it with spring knitwear or later in the season with white cotton or denim. This is one of the simplest styles from the collection to do yourself. However, thin layers are essential as heavy pastel polish can accumulate near the cuticles.
How to Apply
- File short nails into soft squares and smooth any surface ridges with an appropriate base coat.
- Apply two thin coats of milky lavender, allowing each layer to level before adding the next.
- Clean the cuticle margin and sidewalls with a small brush if necessary.
- Finish with a clear, glassy top coat and cap the free edges.
3. Cherry Blossom Branch Nails
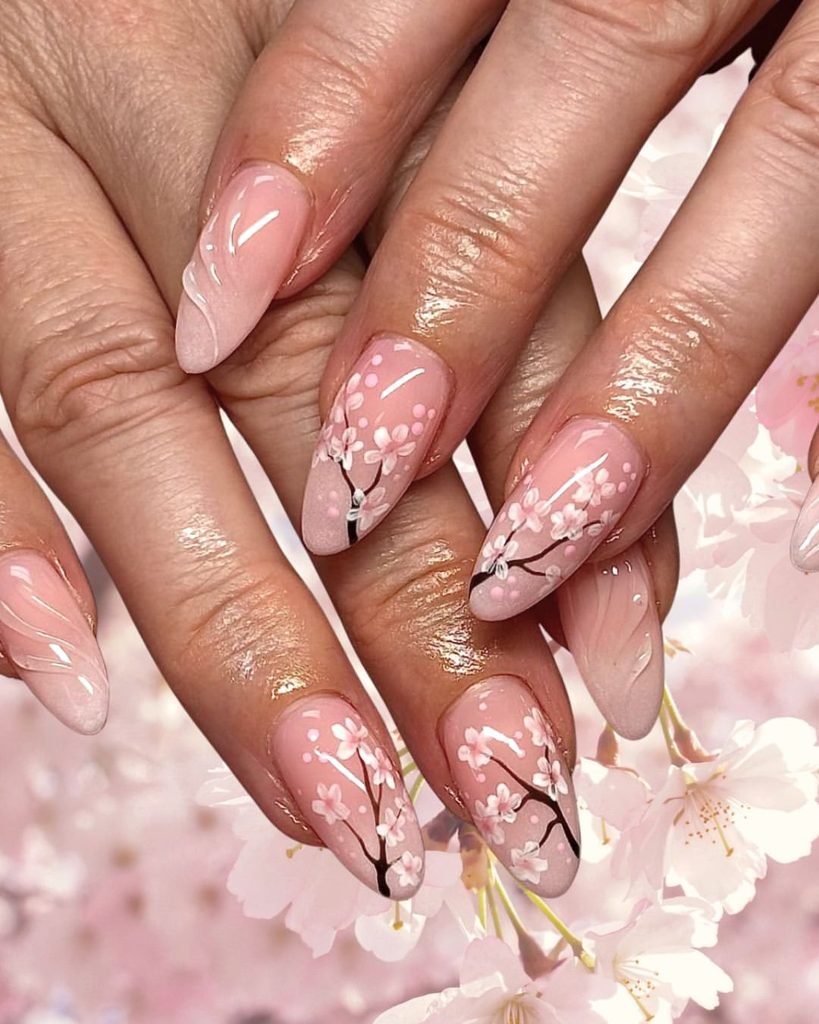
The medium oval nails feature a transparent blush base decorated with thin branches of warm brown color. Small flower buds with five petals of pale pink and cream colors are randomly arranged on the branches, while loose petals are added between the branches so that the composition does not look like a stamp. The small dull-golden flower centers are visible under the gloss topcoat.
The curve of the branches extends along the oval nail shape, creating an impression of airiness instead of crowding. This cherry blossom nail art is a perfect choice for a natural symbol of the beginning of spring, garden parties, birthdays, and romantic looks in blush, cream, or grey colors. Dotting tools can create such flowers at home, but the hairline branches and controlled size of the petals make this nail art a good salon reference.
How to Apply
- Apply a sheer blush base to medium oval nails.
- Paint one or two fine, gently curved brown branches across each nail.
- Build small pale-pink and cream blossoms with five short petals, then add muted-gold centers and several loose petals.
- Protect the fine artwork with a floating layer of glossy top coat.
4. Cantaloupe Pearl Chrome Nails
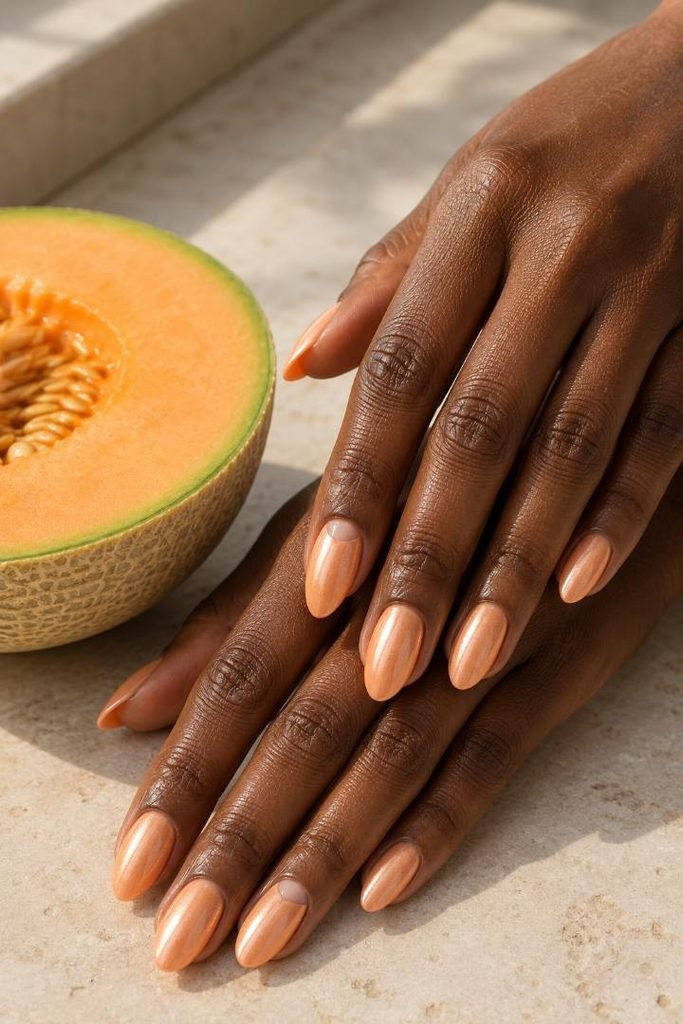
The medium almond nails are given a creamy cantaloupe-pink color and then topped with a very thin layer of pearl glaze. The chrome transitions from a warm peach to a pale gold tone without turning into a reflective silver finish, and one of the accent nails features a translucent half-moon shaped design of peach near the cuticle. The finish is similar to that of a satin fabric backlit by light.
This is a warmer choice compared to chrome pastel nails such as pink or lilac, and it works well with cream, tan, sage, turquoise, and gold accessories. The almond nails provide a longer reflective streak, elongating the fingers. The finish can be replicated at home using pearl topcoat lacquer, although the best results come from chrome powder used at a salon.
How to Apply
- Apply two thin coats of creamy cantaloupe gel to medium almond nails and cure as directed.
- Create one translucent peach half-moon on an accent nail and cure.
- Rub a fine warm pearl powder over a compatible cured layer until the reflection is even.
- Remove loose pigment and seal the surface and free edges with glossy top coat.
5. Blueberry-Milk Polka Dot Nails
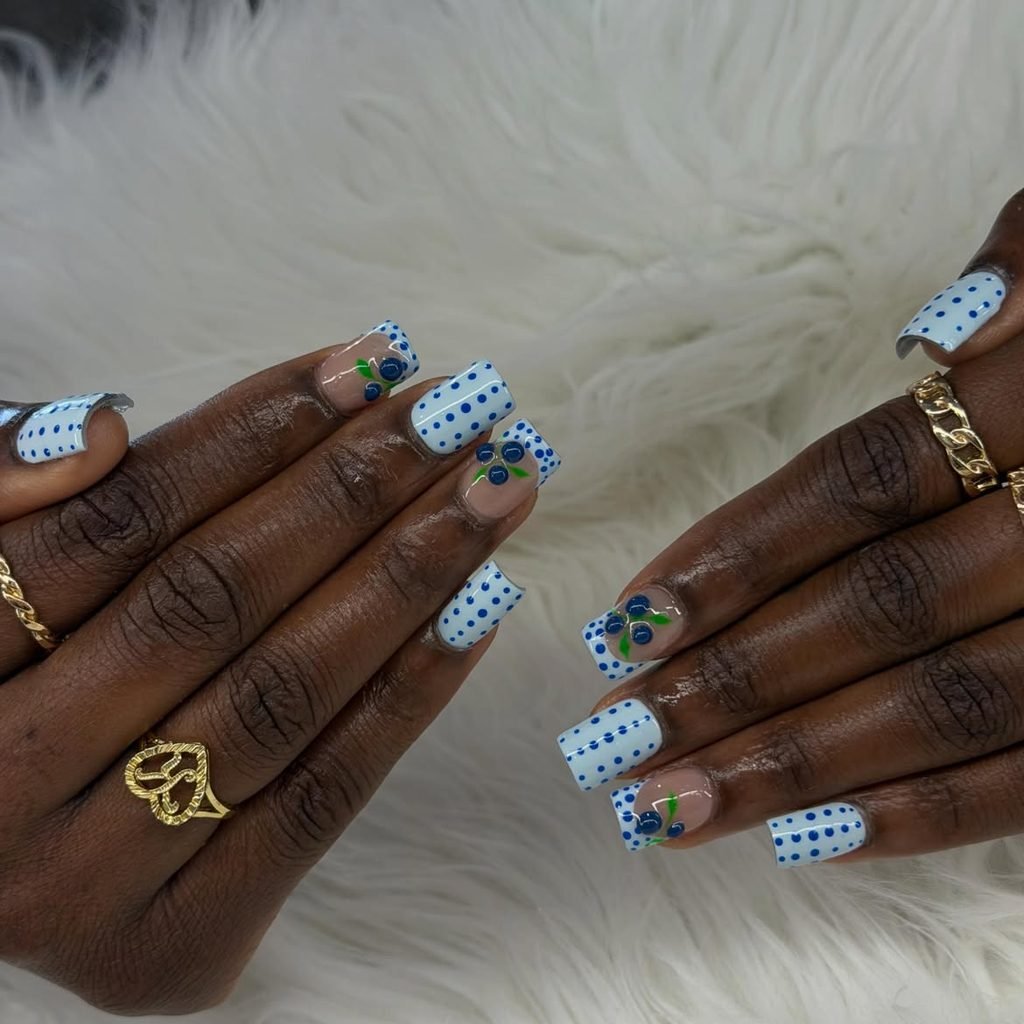
The creamy nail polish is alternated with short round nails in either blueberry blue or a translucent base. In the case of the translucent nail polish, there are clusters of dots that are not centered in periwinkle, powder blue, white and navy accent colors. The dots range in sizes from dots to tiny circles, creating enough empty spaces for the pattern to be visible on the small nails.
This is a fun and mature look for the spring nails as it features a tonal palette of colors and well-spaced dots instead of random dots all over the nails. The pattern can be paired with denim clothes, white t-shirts and cool grey shades. It is a great beginners’ pattern too since, according to OPI’s DIY, it can be created with a dotting tool.
How to Apply
- Paint alternating short round nails creamy blueberry blue and sheer milky white.
- Place off-center dot clusters on the sheer nails using periwinkle, powder blue, white, and minimal navy.
- Vary the dot sizes while preserving visible space between the marks.
- Allow the dots to set, then cover the manicure with glossy top coat.
6. Sage Leaf Negative-Space Nails
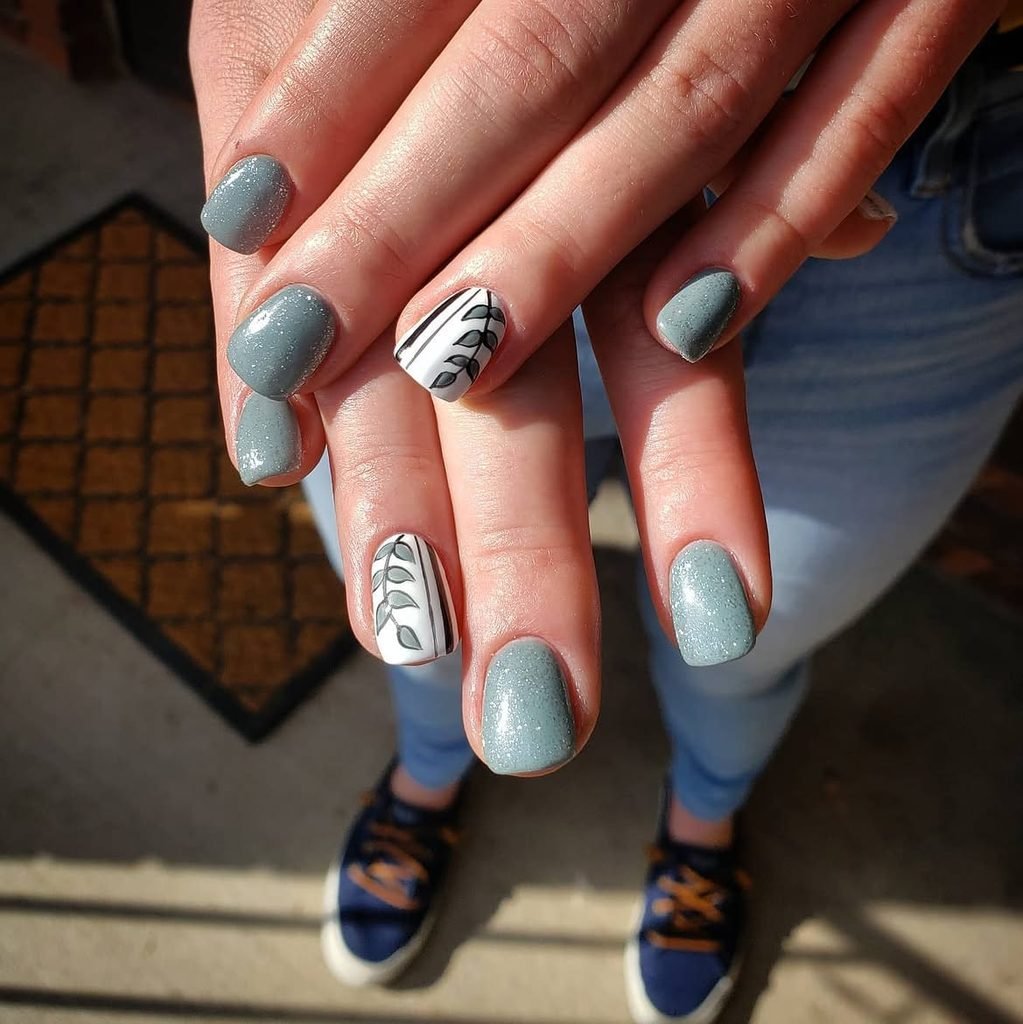
The short oval nails are mostly left nude under a clear neutral base. The slender leaves in sage, moss and eucalyptus green grow up from alternating sidewalls, joined by fine lines of olive-colored stems. A few leaves are fully colored in, while others are sketched in outlines, keeping the natural nails as part of the negative space nail art.
The botanical vertical pattern helps make short nails appear longer and gives a more subtle spring reference than regular flowers. This nail art design is perfect for work, traveling, outside functions and wardrobe that revolves around linen, denim, camel, or cream. Nail stickers can be used to make this easy leaf pattern simpler, but a short detail brush works well enough for a do-it-yourself version.
How to Apply
- Apply a transparent neutral base to clean short oval nails.
- Draw fine olive stems upward from alternating sidewalls.
- Add solid and outlined leaves in sage, moss, and eucalyptus, keeping the central nail area open.
- Finish with a clear glossy top coat, making sure every painted edge is sealed.
7. Pastel Argyle Velvet Nails
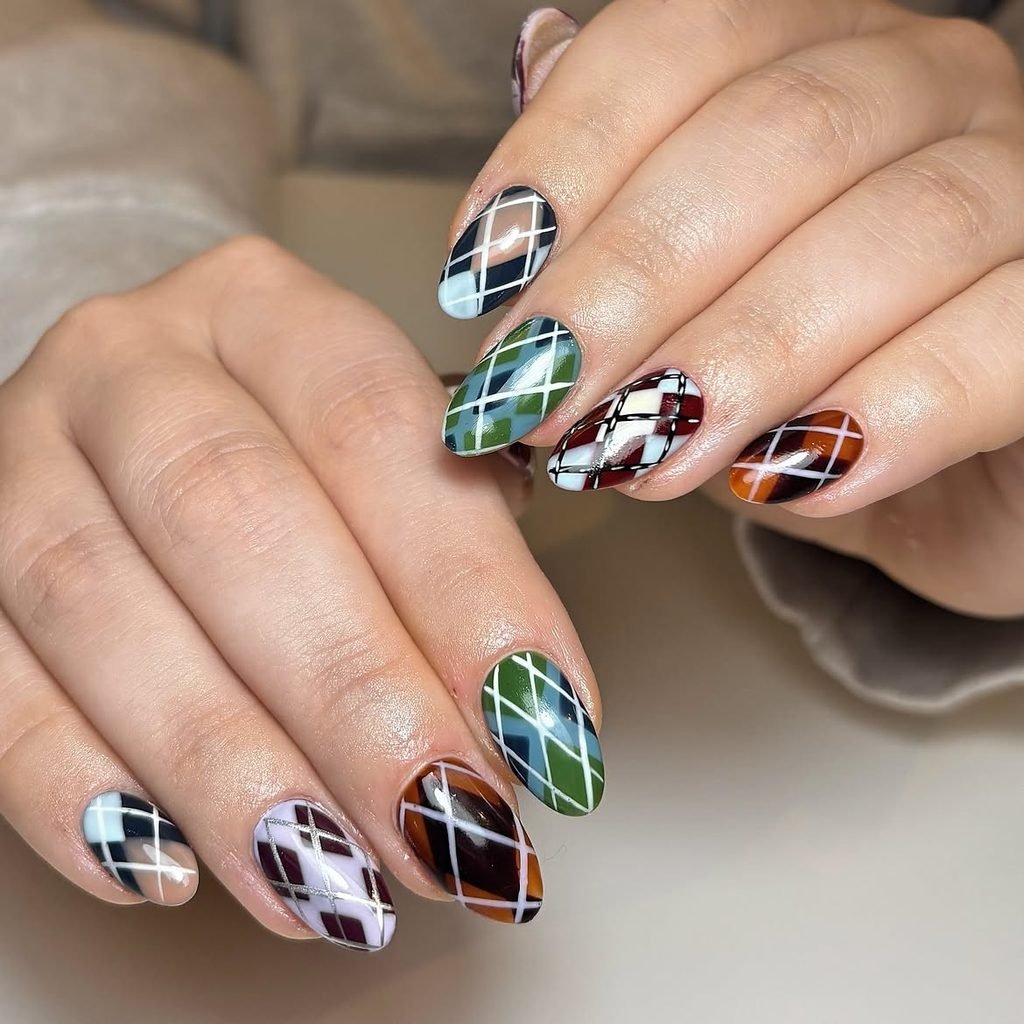
Long almond nails use a sheer champagne base beneath elongated diamonds in lavender, icy blue, and pale rose magnetic polish. A fine gold lattice crosses the diamonds, while the magnetic pigment forms a soft central glow inside each colored section. Two nails carry only one partial diamond so the full set does not become visually heavy.
This pastel argyle manicure combines a preppy pattern with a velvet cat-eye finish, giving the familiar grid more depth. It works for spring celebrations, fashion events, and anyone who wants a design that reads differently as the hand moves. The geometry and magnetic placement require control, so it is best treated as a salon design or planned on press-ons before application rather than attempted directly on both hands.
How to Apply
- Apply a sheer champagne base to long almond nails and cure according to the gel system.
- Paint elongated lavender, icy-blue, and pale-rose diamonds, then pull the magnetic pigment into soft centered highlights.
- Add a fine gold lattice across the diamonds, leaving two nails with restrained partial patterns.
- Cure each completed layer and seal with a high-gloss top coat.
8. Strawberry Jelly Picnic Nails
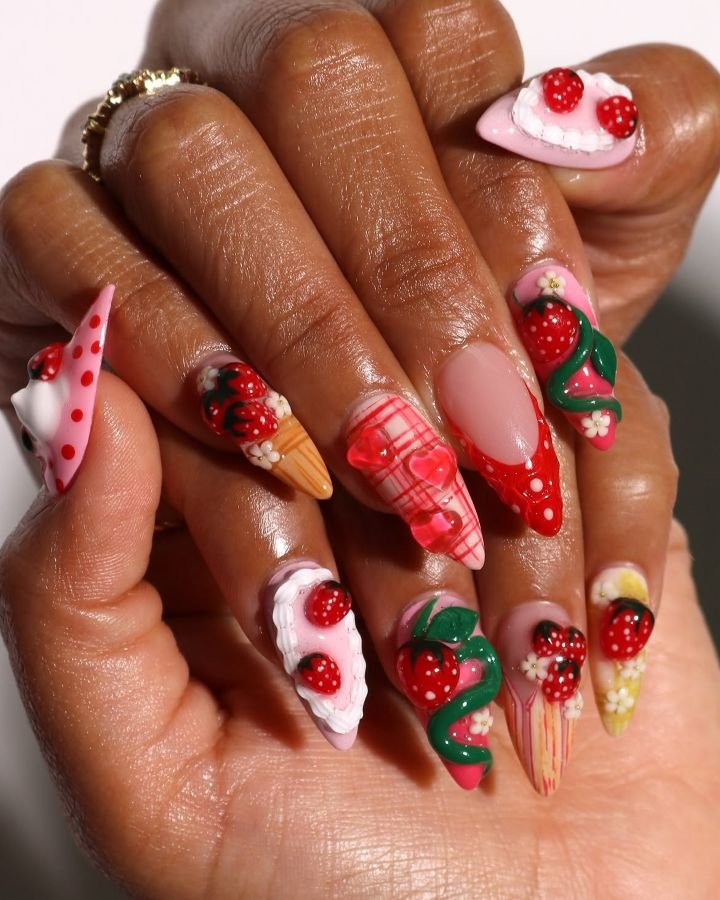
Medium squoval nails alternate translucent strawberry-pink jelly polish with gingham accent nails. The checks combine soft pink, white, and deeper berry intersections, while two jelly nails feature one miniature strawberry with a leafy green cap and tiny cream seeds. A high-gloss top coat gives the entire set a juicy, glass-like appearance.
The combination feels distinctly spring without depending on florals, making it a fun choice for picnics, weekend trips, birthdays, and casual dresses. Squoval nails provide enough width for the gingham grid while keeping the manicure practical. Strawberry decals are the easiest DIY route; painting the fruit is manageable, but a balanced gingham pattern requires thin striping lines and patience.
How to Apply
- Paint most medium squoval nails with translucent strawberry-pink jelly polish and keep two accents pale pink.
- Build gingham on the accents with crossing translucent pink and white bands, deepening their intersections.
- Paint or place one miniature strawberry on two jelly nails, adding green caps and cream seeds.
- Smooth the complete design beneath a glassy top coat.
9. Pressed Wildflower Nails
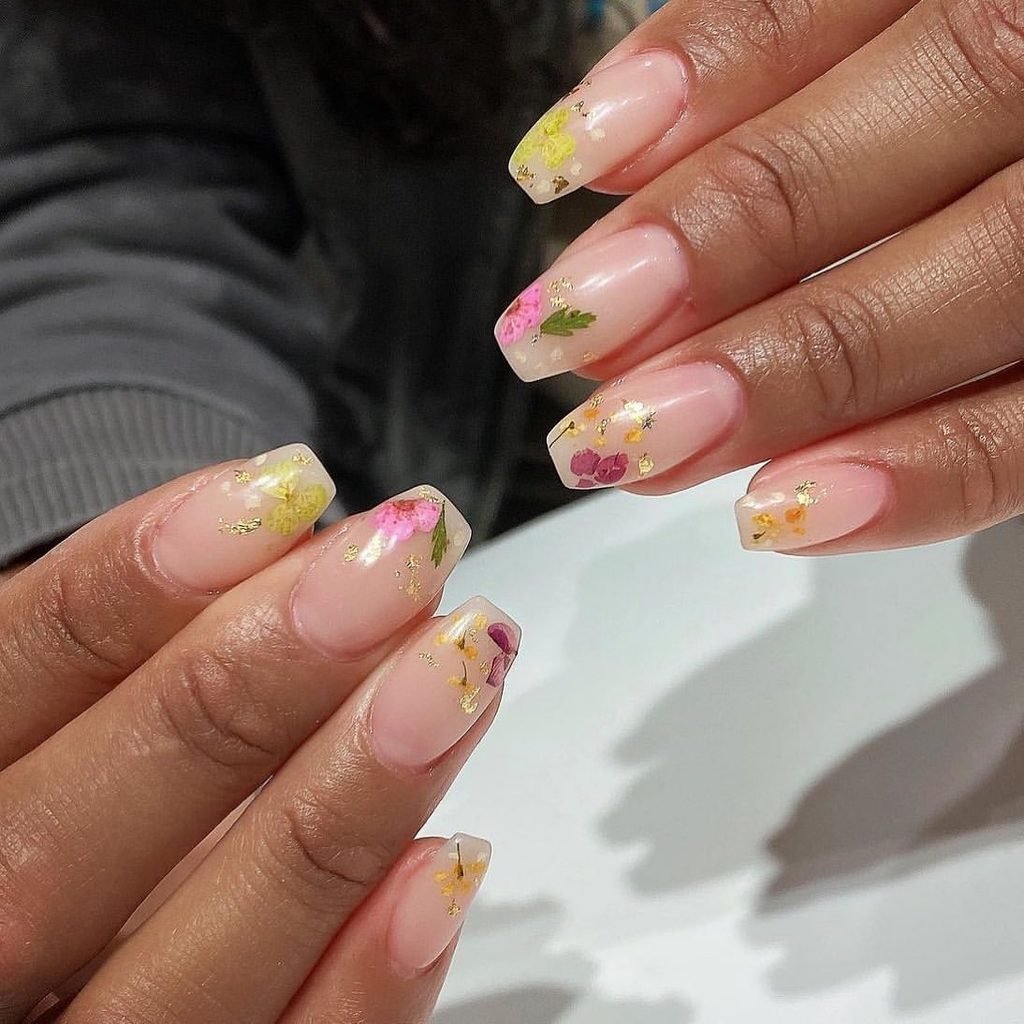
Long oval nails transition from a sheer nude nail bed into transparent free edges containing miniature dried flowers in violet, yellow, blue, and cream. Fine green stems point in different directions, and sparse pieces of warm gold leaf sit between the botanicals. The flowers appear suspended inside the clear structure rather than attached to the surface.
These encapsulated flower nails are especially suited to spring weddings, engagement photographs, garden parties, and formal occasions where the manicure can act like pressed-flower jewelry. The transparent edge keeps the longer length visually light, but correct encapsulation and balanced architecture are essential. This is a salon or custom press-on design; an ordinary top coat is not designed to encapsulate bulky dried materials or build a durable clear tip.
How to Apply
- Build or fit long clear oval extensions over a sheer nude base.
- Position ultra-thin dried flowers, fine stems, and sparse gold leaf within the clear free-edge area.
- Encapsulate the materials with transparent builder product and refine the nail structure after curing.
- Buff the surface smooth and finish with a crystal-clear glossy top coat.
10. Pink and Aqua Aura Nails With a Silver Beam
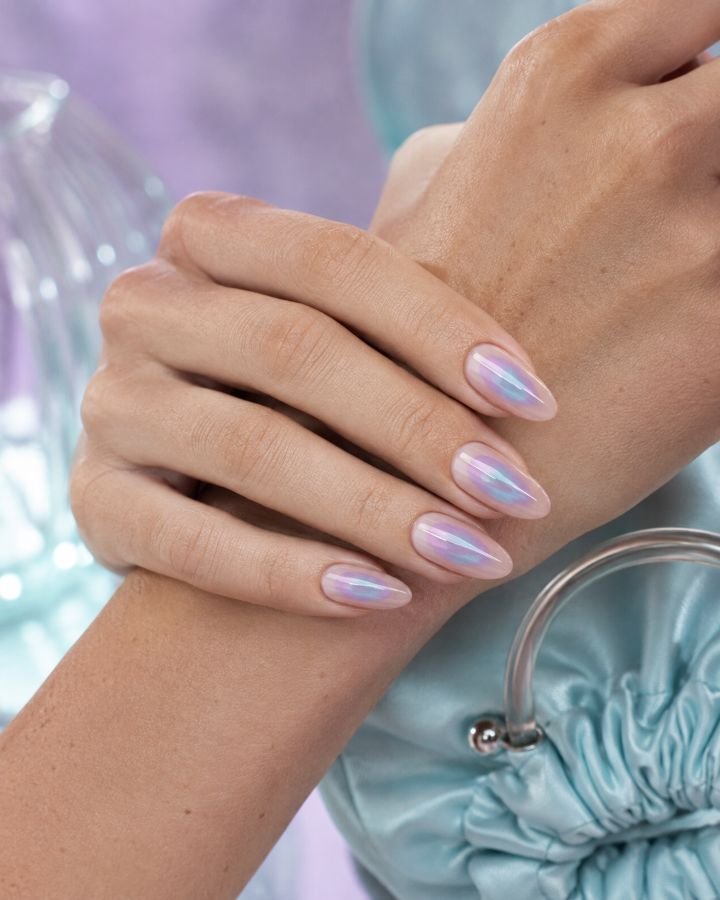
Medium almond nails start off with a cool-pink base and then blend into aqua and orchid colors. Each nail is topped by a slanted reflective silver line which looks like a light beam passing over clouds of color. The pigment will be most prominent in the center, creating an almost sheer edge near the cuticles and sidewalls.
The spring aura nail polish gives you color without harsh geometric shapes, and the silver slanted line will make sure that the pastel color blend doesn’t seem too saccharine. It would go well for concerts, spring break, birthday parties, and cool clothing combinations in white, lilac, denim, or metallic silver. You can achieve the most even fade with an airbrush in a salon, but at home a little cosmetic sponge could do the trick.
How to Apply
- Apply a translucent cool-pink base to medium almond nails.
- Blend a soft aqua cloud into each center, followed by a smaller orchid area.
- Paint one narrow diagonal silver beam across every nail, varying its height slightly.
- Cover the gradient and metallic line with a leveling glossy top coat.
11. Rainy-Day Blue Droplet Nails
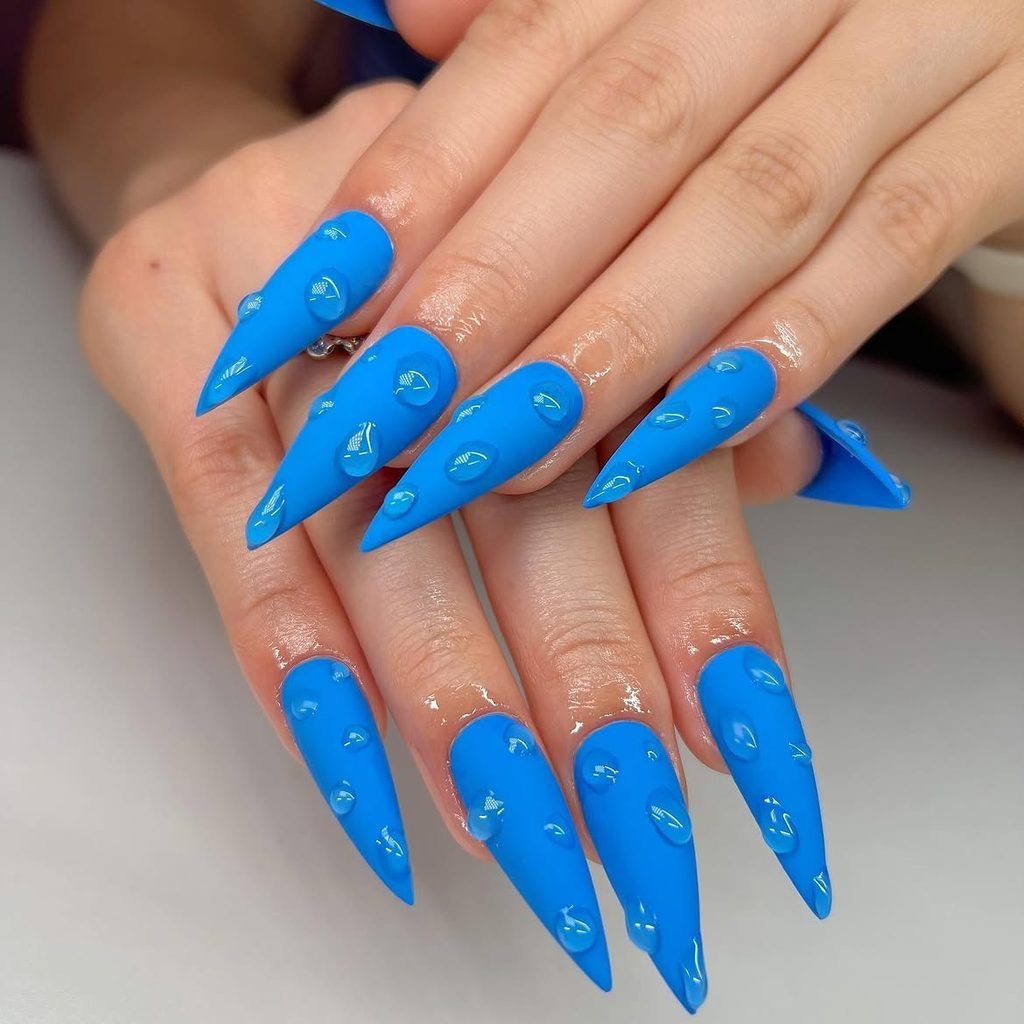
Short natural nails are painted a sheer stormy blue that remains translucent near the cuticles and deepens toward the tips. Small clear droplets in varied sizes sit low on the surface, while two nails feature a fine silver arc suggesting the edge of a cloud. The contrast between the watery blue base and raised glass-like beads creates texture without adding glitter.
These blue spring nails reference April rain in a restrained way and look especially clean on short round or squoval shapes. They pair well with grey tailoring, denim, and silver jewelry. A flat version is simple to recreate using dots of ordinary glossy top coat over a satin blue base; dimensional droplets made from structured gel should be kept low, fully cured, and handled by someone familiar with the product system.
How to Apply
- Apply a sheer storm-blue base, concentrating a second thin layer toward the tips.
- Paint a fine silver cloud arc on two accent nails.
- Add irregular clear dots with glossy top coat or low beads of transparent art gel.
- Cure structured gel as directed, leaving the surrounding blue finish softly satin.
12. Green Daisy French Nails
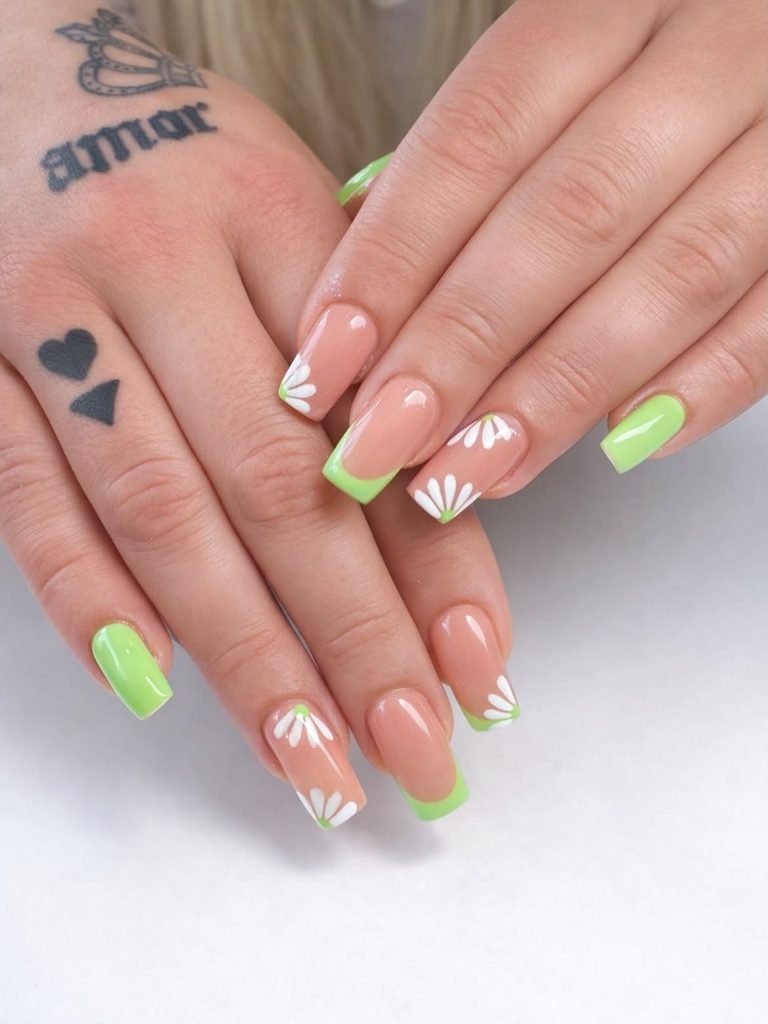
Medium square nails use a sheer pink base beneath curved French tips in alternating pistachio and fresh grass green. Small white daisies interrupt the color along several smile lines, with yellow centers positioned partly over the green and partly over the bare base. One nail reverses the arrangement with a green base and a slim sheer half-moon.
The two greens keep this floral French manicure connected to new leaves rather than a generic pastel palette. Medium square nails give the daisies enough width to remain readable, but the design can be simplified on short nails by limiting the flowers to two accents. It is suitable for garden parties, casual weddings, and spring weekends; a dotting tool makes the petals accessible for an intermediate DIY attempt.
How to Apply
- Apply a sheer pink base to medium square nails.
- Paint alternating pistachio and grass-green curved tips, reversing the color placement on one accent.
- Add small white daisy petals across selected smile lines and dot yellow centers.
- Seal the artwork with a clear glossy top coat.
13. Soft Rainbow Skittle Nails
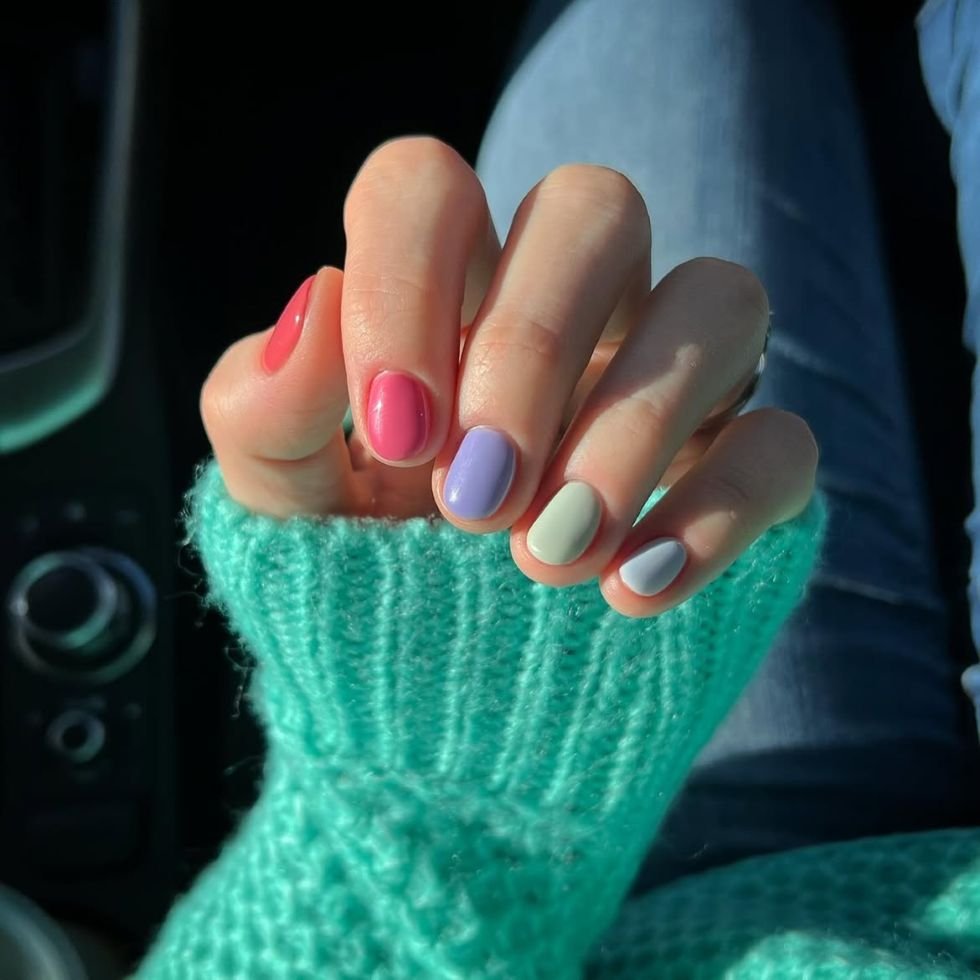
Short oval nails each receive a different creamy shade: petal pink, apricot, butter yellow, mint, and powder blue. The colors share the same muted opacity and glossy finish, so the hand reads as one coordinated pastel Skittle manicure rather than five unrelated polishes. There is no artwork beyond one tiny white cuticle dot on each nail.
This is a practical choice for anyone who wants colorful spring nails but does not have the time or tools for detailed art. It works on natural nails, is easy to reproduce with ordinary lacquer, and can be adjusted to match a wardrobe by warming or cooling the palette. Keep the polish formulas similar; mixing a translucent shade with four opaque creams makes the set look accidental rather than deliberately mismatched.
How to Apply
- Prepare short oval nails and apply a smoothing base coat.
- Paint one nail each in petal pink, apricot, butter yellow, mint, and powder blue.
- Add one tiny white dot near the center of every cuticle line.
- Apply the same glossy top coat across all five shades for a unified finish.
14. Peach Sorbet Ombré Nails
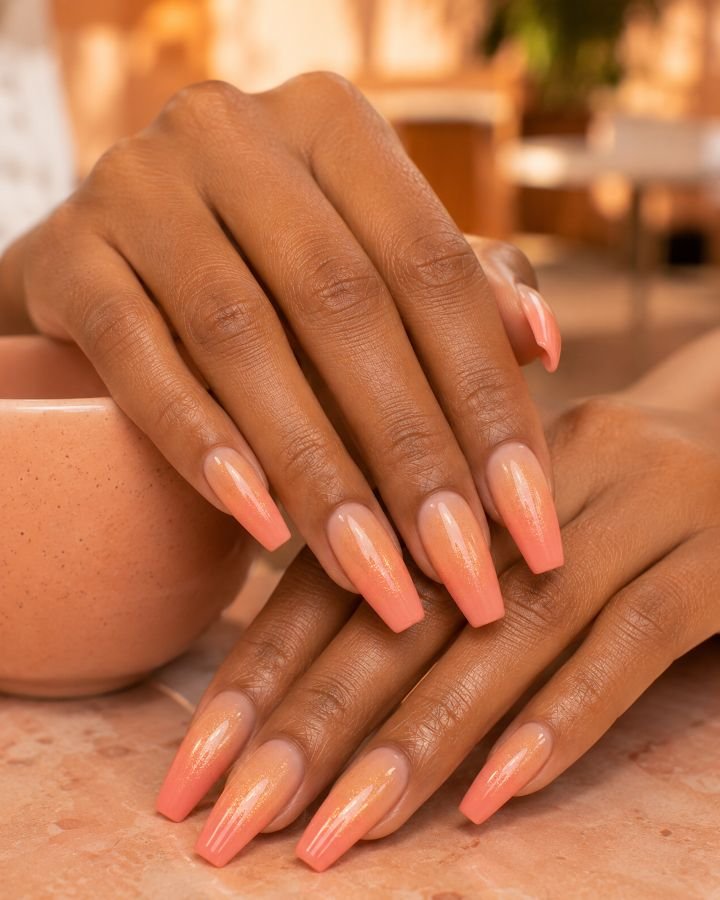
Medium coffin nails melt from a translucent peach at the cuticles through cantaloupe and into pale coral at the squared tips. The gradient stays within one warm color family, and a dusting of extremely fine gold shimmer appears only through the center transition. The sidewalls remain clean and the finish is glossy rather than frosted.
The tonal transition makes this peach ombré manicure easier to coordinate than a full rainbow fade while still giving the longer shape dimension. It suits vacations, spring dinners, graduations, and warm neutral outfits. A sponge can produce the effect with lacquer, following the same basic approach outlined in OPI’s beginner ombré instructions, though an airbrush gives the most seamless salon result.
How to Apply
- Apply a translucent peach base to medium coffin nails.
- Load peach, cantaloupe, and pale coral in overlapping bands on a cosmetic sponge.
- Press several thin gradient layers onto each nail and add fine gold shimmer only at the central transition.
- Clean the sidewalls and smooth the fade beneath glossy top coat.
15. Tiny Ladybug Garden Nails
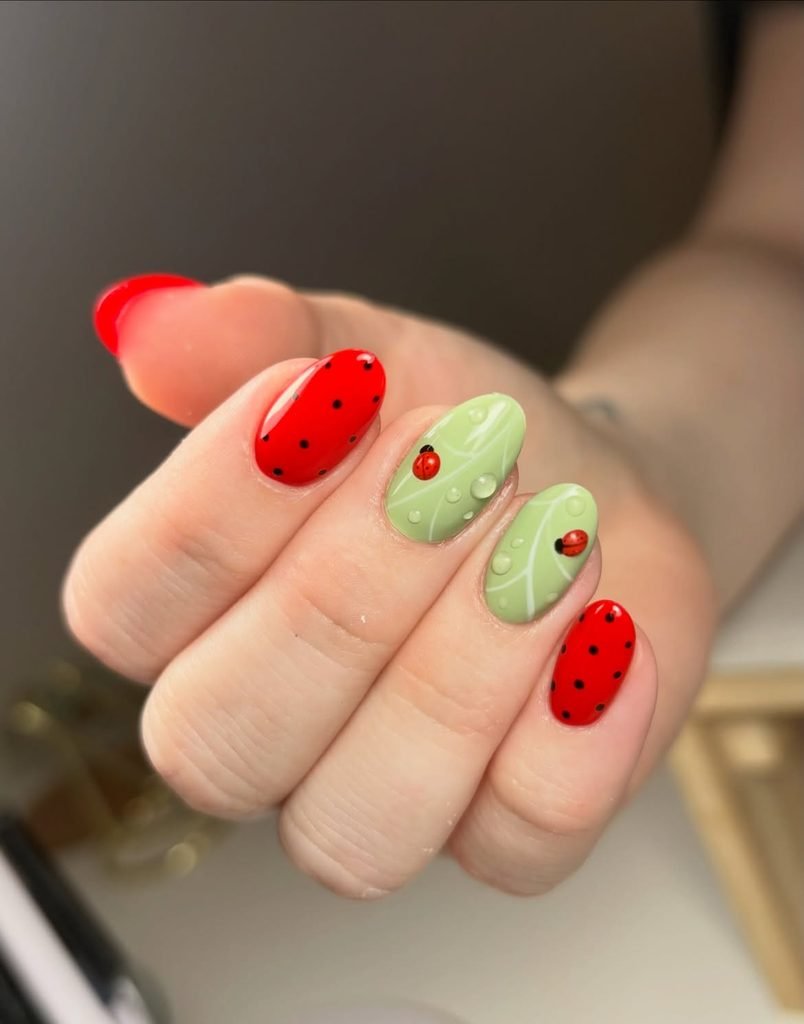
Short squoval nails use a transparent blush base dotted with miniature red-and-black ladybugs, fine grass-green stems, and a few pin-sized white buds. The motifs sit near different cuticles and corners rather than filling each surface, and several nails carry only one insect or one stem. A glossy top coat preserves the clean, almost bare background.
The small scale gives ladybug nail art a graphic, editorial quality instead of making the manicure resemble a children’s illustration. It is playful enough for a spring weekend or picnic yet compact enough for short working nails. Dotting tools simplify the red bodies and black markings, while decals are a practical alternative if painting the non-dominant hand becomes frustrating.
How to Apply
- Cover short ovall nails with a sage green and red base.
- Place tiny red ovals near varied corners and add black heads, center lines, and dots.
- Paint several fine green stems and pin-sized white buds, leaving generous bare space.
- Let the motifs set fully before floating on glossy top coat.
16. Ribbed-Glass Floral Nails
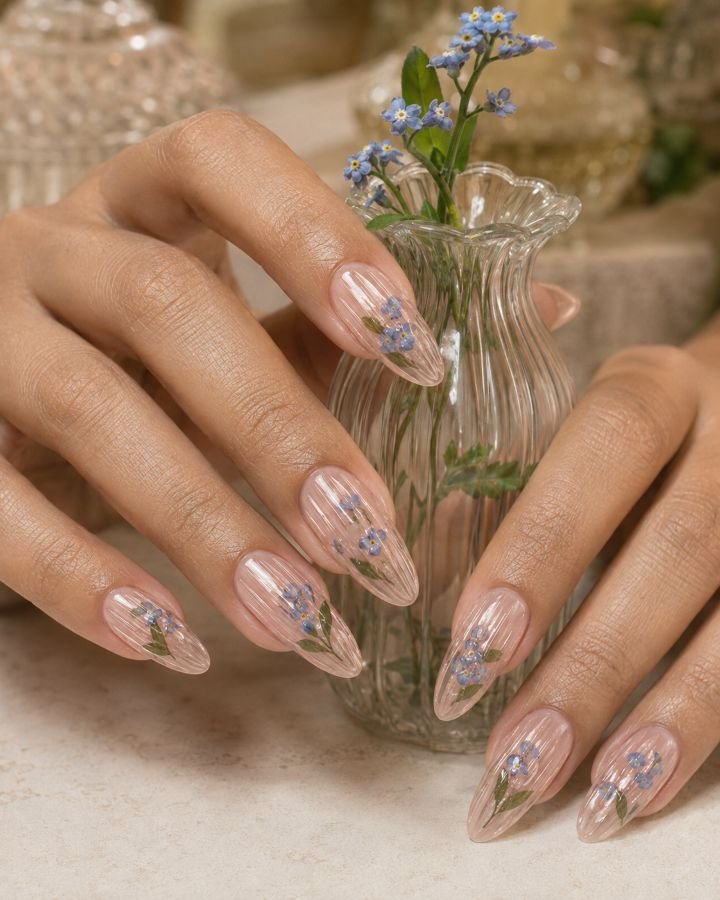
Long almond nails are built from transparent blush gel with fine vertical ridges that mimic vintage ribbed glass. Tiny blue forget-me-not flowers and moss-green leaves sit beneath selected ridges, while narrow clear sections remain completely undecorated. The flowers appear slightly distorted through the linear texture, creating depth without a heavy embellishment.
This is a refined option for wedding season, formal garden events, and anyone who prefers textured spring nails to obvious glitter. The long almond shape gives the parallel ribs enough space to remain straight and elegant. Because the design combines structured clear gel, encapsulated artwork, and raised lines, it is firmly a salon request; for an easier version, choose ribbed nail decals over a flat floral base.
How to Apply
- Build long almond nails with a transparent blush structure and place tiny blue flowers and green leaves within selected areas.
- Encapsulate and refine the surface until the architecture is smooth and balanced.
- Draw evenly spaced vertical ribs with clear structured art gel, keeping some lanes undecorated.
- Cure thoroughly and add gloss without flooding the grooves between the lines.
17. Mother-of-Pearl Shell Nails
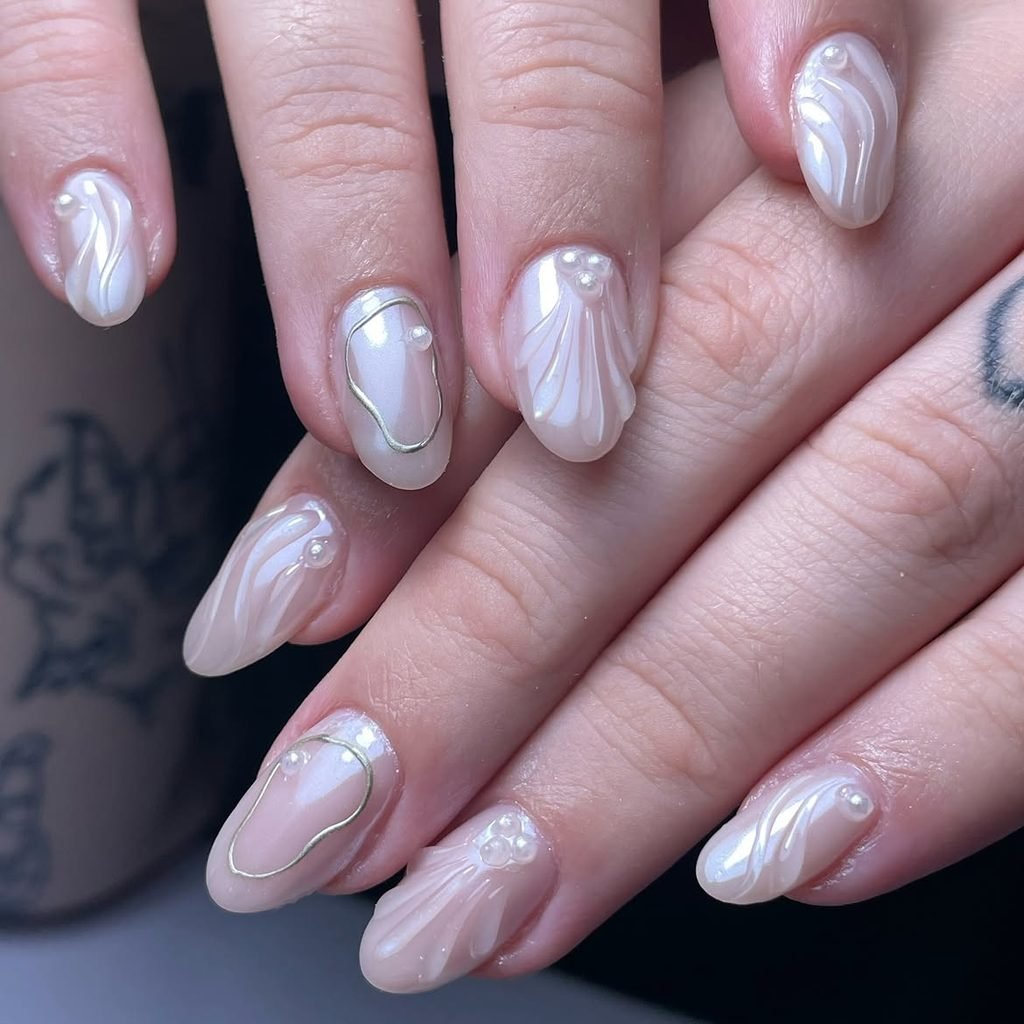
Medium oval nails begin with a translucent cream base layered with opalescent foil and fine pearl pigment. The reflection moves between soft pink, pale blue, mint, and warm ivory, while two accent nails carry delicate curved ridges radiating from one corner like the interior of a shell. There are no chunky glitter pieces or literal seashell charms.
These pearl chrome nails bridge early spring and warmer weather without looking overtly beach-themed. They are particularly effective for bridal events because the finish changes gently under different lighting while remaining neutral beside white or ivory fabric. A sheer pearlescent topper offers a straightforward DIY version, but encapsulated foil and sculpted shell lines will look smoother when created with gel at a salon.
How to Apply
- Apply a translucent cream base to medium oval nails.
- Place irregular pieces of opalescent foil on selected nails and soften them beneath another sheer layer.
- Add fine pearl pigment, then draw several clear curved shell ridges on two accents.
- Seal the perimeter and surface with a glossy top coat.
18. Pastel Checkerboard Nails
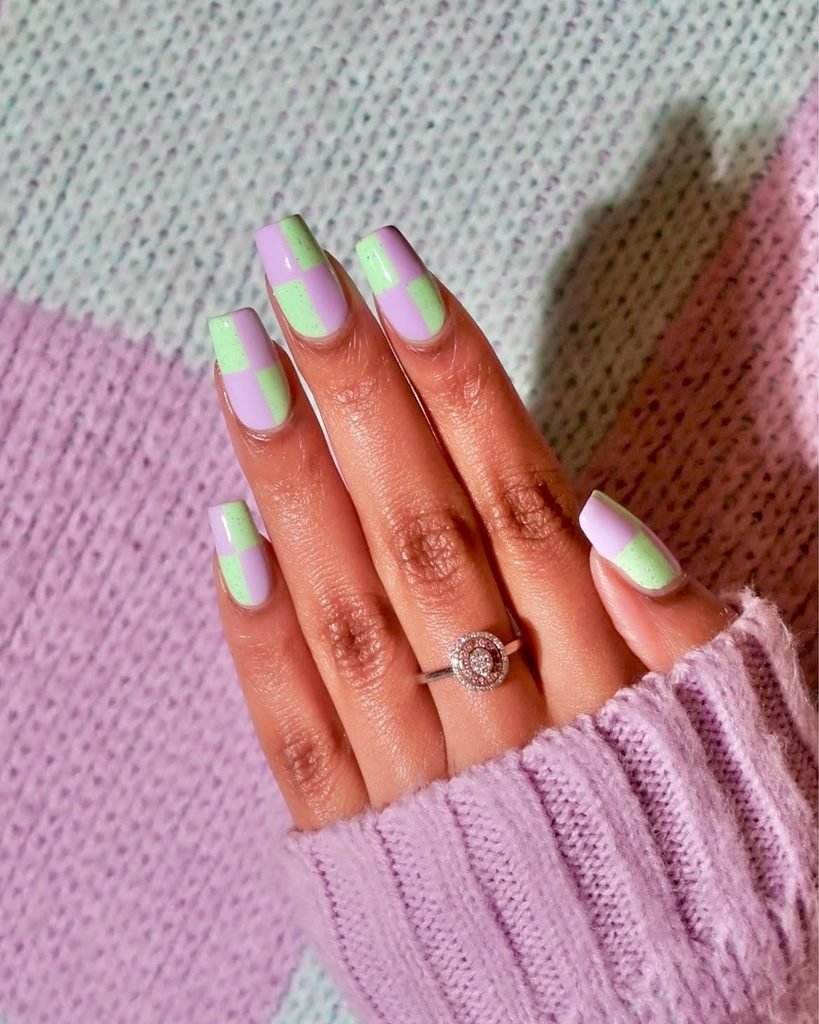
Medium soft-square nails contain a large-scale checkerboard pattern done in cream, lavender, mint green, and coral colors. Two colors are used in each nail and some squares remain transparent nude negative spaces. A very delicate outline done in a light cocoa-brown color borders certain blocks adding definition to the pastel geometric pattern without making it a harsh black one.
This large size allows this manicure to be seen clearly and avoids the impression that the nail contains a small overcrowded grid. The checkerboard manicure works well with retro dresses, artistic places of work, festivals, and those who need graphic spring art without flowers. One can use stripping tape at home, however, one has to wait until each layer dries before moving guides; else, custom press-on nails are a better choice.
How to Apply
- Apply a translucent nude base to medium soft-square nails.
- Divide each nail into a small number of large squares using cream with either lilac, mint, or coral.
- Preserve selected nude squares and add fine cocoa outlines to only a few colored blocks.
- Level the geometric surface beneath a clear glossy top coat.
19. Garden-Confetti Cuticle Nails
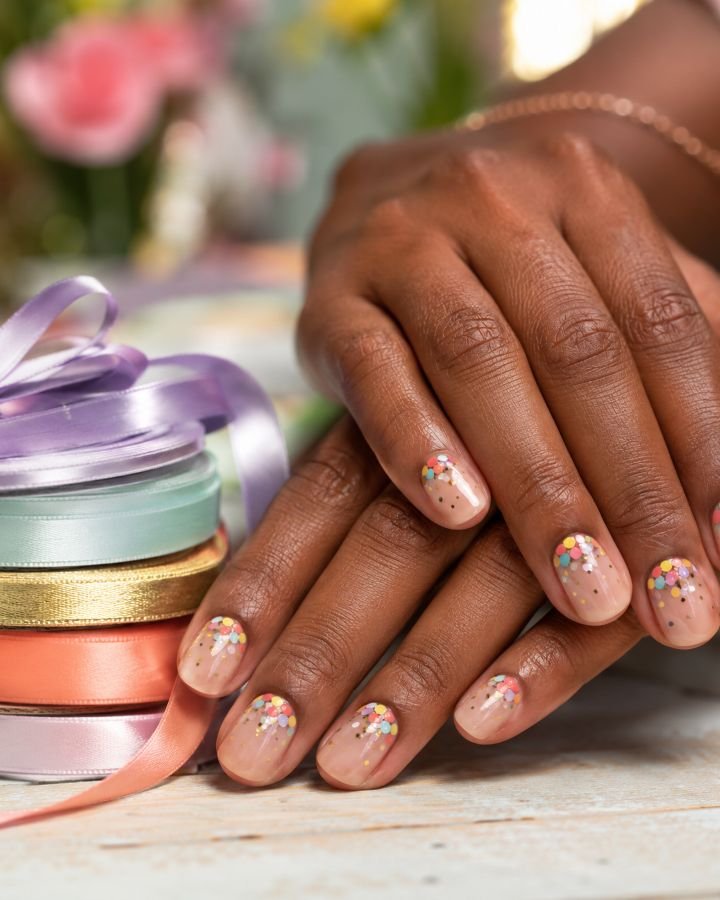
Short round nails are covered with a sheer beige-pink wash, then framed at the cuticles with tiny irregular pieces of pastel color. The confetti includes coral, yellow, blue, lilac, green, and white fragments, mixed with several micro gold dots. The decoration fades upward within the lower third of each nail, leaving the tips almost completely bare.
This cuticle nail art gives short nails a celebratory spring detail without shortening them with a heavy tip. It works for birthdays, showers, graduations, and anyone who likes color but needs a manicure that grows out gently. Irregular placement is forgiving for DIY; use small polish dots and dashes rather than loose craft glitter, which may be too thick or unsuitable for nail application.
How to Apply
- Apply a sheer beige-pink wash to short round nails.
- Place tiny coral, yellow, blue, lilac, green, and white fragments close to each cuticle.
- Add sparse micro gold dots and reduce the amount of decoration toward the middle of the nail.
- Encapsulate the confetti with a smoothing glossy top coat.
20. Lilac Velvet Cat-Eye Nails
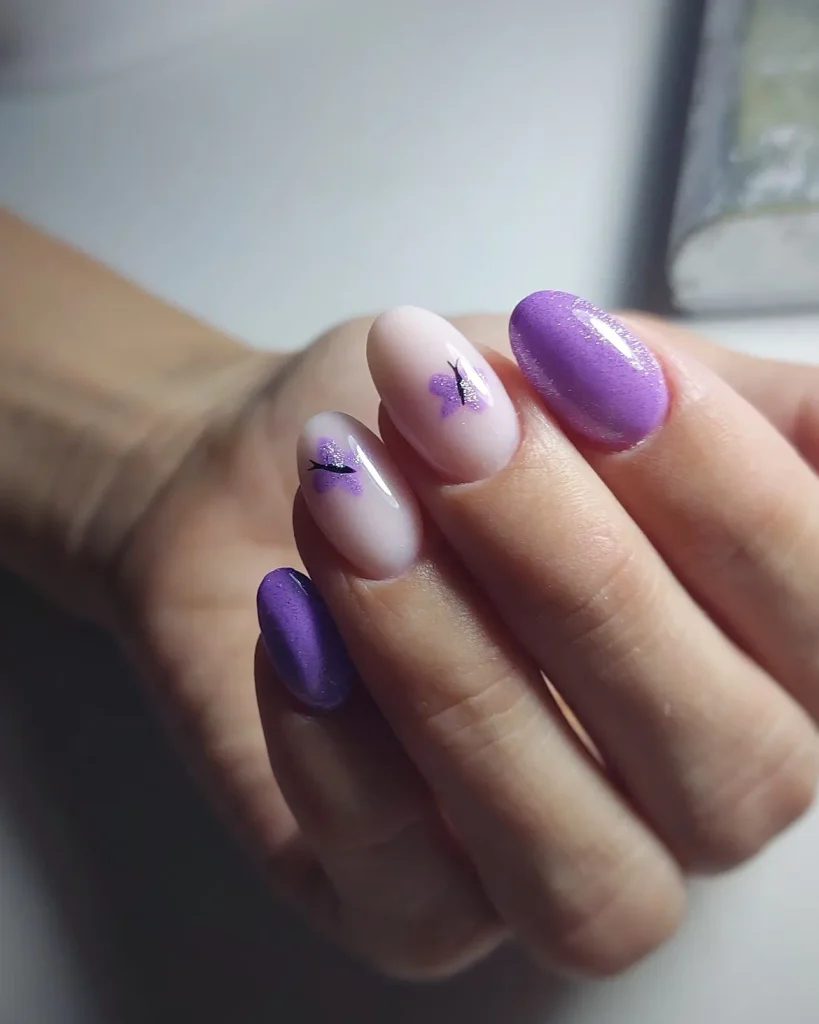
Medium almond nails shift between cool lilac, silver lavender, and muted violet as a broad magnetic highlight moves across the surface. The reflective particles are gathered into a soft diagonal sweep rather than a narrow stripe, and a smoky-purple perimeter keeps the shape defined. The finish is glossy even though the light effect resembles plush velvet.
This lilac cat-eye manicure adds movement to a familiar spring color without needing painted motifs. It suits evening weddings, dinners, concerts, and transitional weather when flat pastel polish feels too light. Magnetic gel is easiest to control one nail at a time, curing once the highlight sits correctly, so the effect is simpler at a salon; magnetic regular polish or predesigned press-ons can provide a less technical home version.
How to Apply
- Apply a smoky-lilac base gel to medium almond nails and cure as directed.
- Cover one nail with silver-lavender magnetic gel and use the magnet to create a broad diagonal velvet sweep.
- Cure immediately, repeat nail by nail, and refine the perimeter with muted violet if needed.
- Finish with a clear high-gloss gel top coat.
21. White Lace Bow French Nails
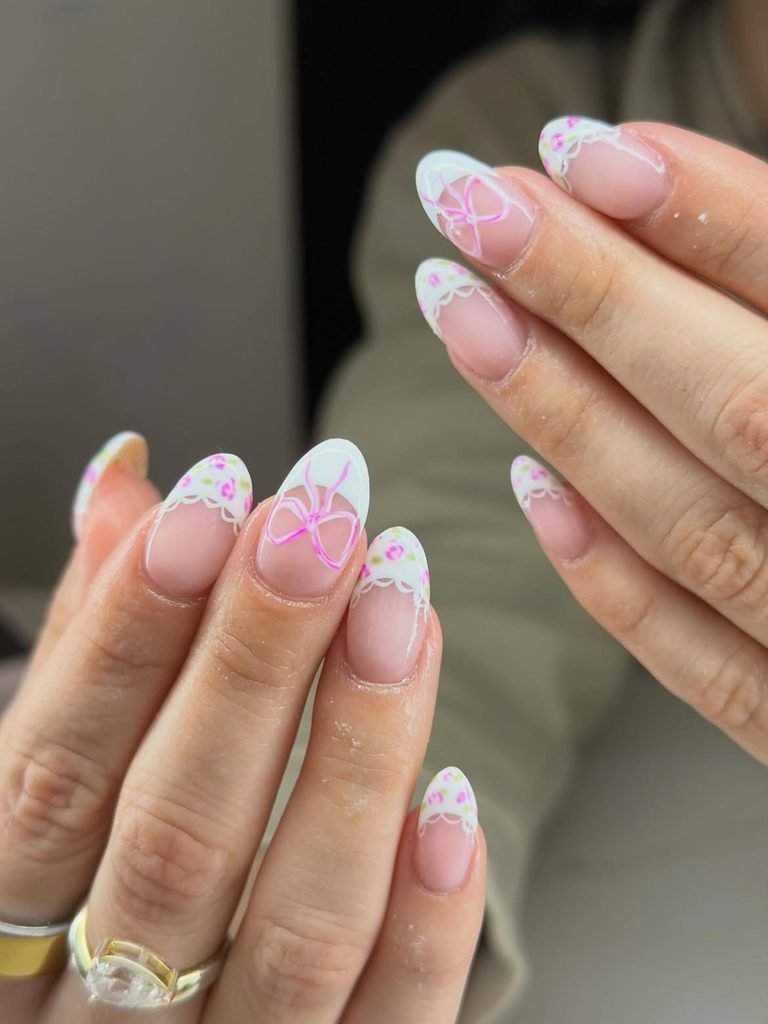
Medium oval nails use a translucent rosy nude base beneath soft-white French tips edged with tiny lace scallops. Two accent nails feature an exceptionally fine painted ribbon bow just above the smile line, while small pearl dots replace the knot centers. The lace remains narrow and flat, avoiding bulky charms or oversized coquette details.
This manicure is designed for spring weddings, bridal showers, anniversaries, and outfits with delicate fabric or pearl jewelry. The oval shape softens the white tip and provides a natural curve for the scalloped border. French guides and bow decals make a simplified DIY version possible, but freehand lace at this scale requires a liner brush and consistent spacing, so a salon reference will give the most refined result.
How to Apply
- Apply a translucent rosy-nude base to medium oval nails.
- Paint soft-white French tips that follow the rounded free edges.
- Add tiny lace scallops along each smile line and two fine ribbon bows with pearl-dot centers.
- Seal the flat details carefully with a glossy top coat.
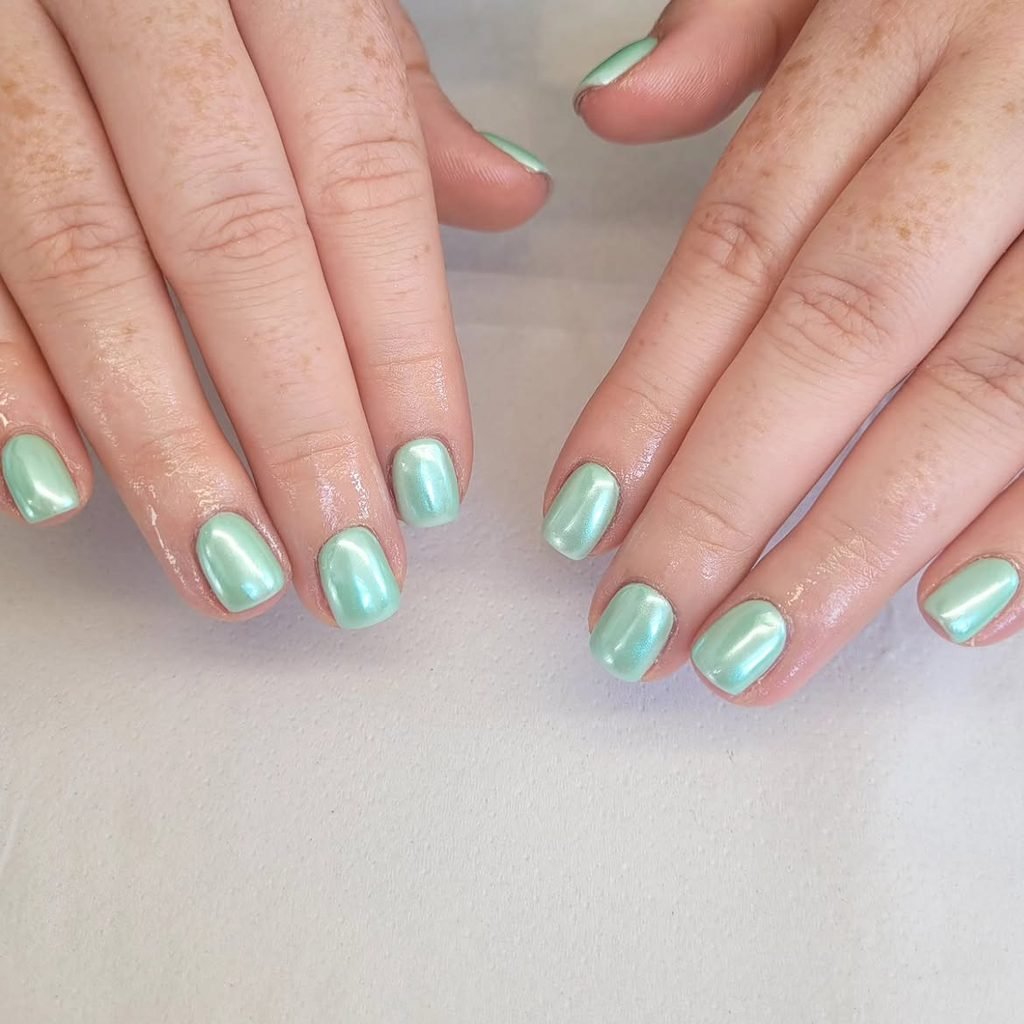
22. Mint Chrome Nails
Long tapered-square nails begin with a translucent milky nude base crossed by fluid mint-green ribbons. Hairline silver chrome follows one edge of each ribbon, while occasional clear spaces interrupt the curves so the design never becomes a full swirl pattern. Every nail uses a different route, but all lines travel lengthwise to maintain cohesion.
The mint and silver pairing makes this abstract spring nail design feel cool and architectural rather than sugary. Long nails provide enough space for the ribbons to bend without merging into thick color blocks, making the idea suitable for creative events, parties, and fashion-forward outfits. Metallic art gel can imitate the silver at home on press-ons; isolated chrome and precise negative-space gaps are more reliable in a salon.
How to Apply
- Apply a translucent milky-nude base to short square nails.
- Paint varied lengthwise ribbons in fresh mint, leaving deliberate clear interruptions.
- Trace edge selected with fine silver chrome or metallic art gel.
- Seal the curves beneath a leveling glossy top coat without blurring the open spaces.
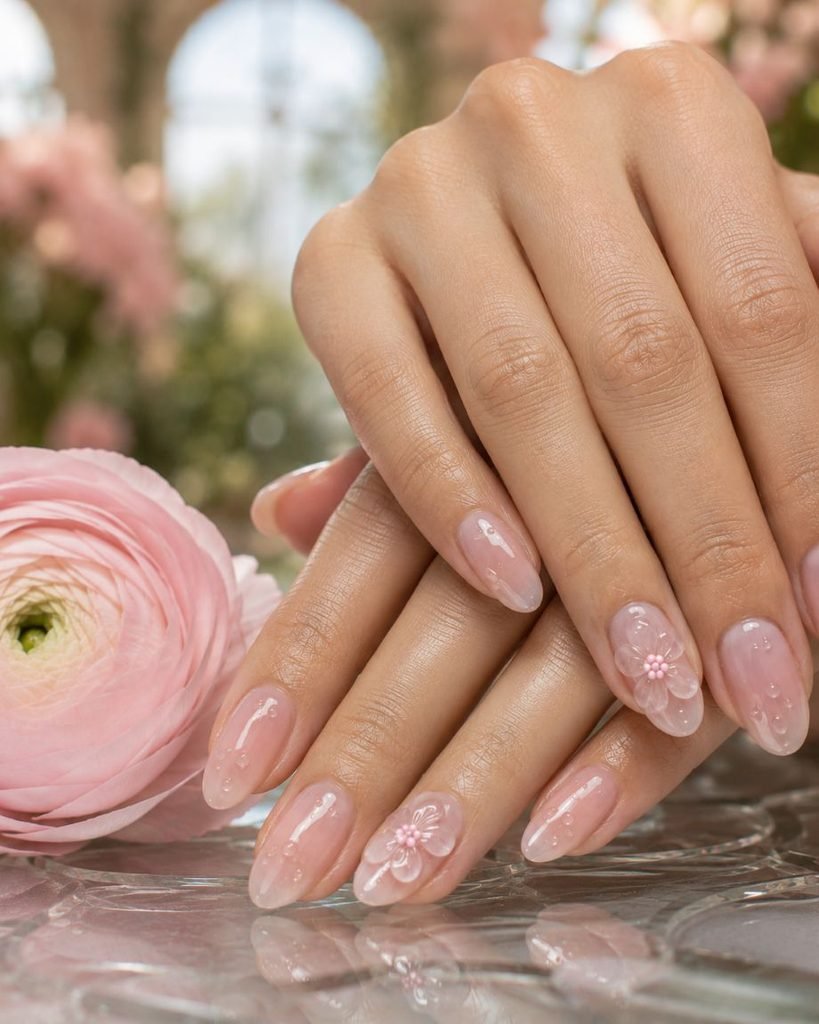
23. 3D Dewdrop Petal Nails
Medium almond nails wear a translucent pink jelly base with sculpted clear petals gathered into one asymmetrical flower on two accent nails. Tiny pale-pink centers sit inside the blooms, and several low clear droplets continue across the remaining nails. The petals are transparent and softly rounded, allowing the pink beneath them to show through like wet glass.
These 3D flower nails suit spring parties, editorial events, and anyone who wants tactile detail without covering every finger in charms. Restricting the blooms to two nails keeps the manicure wearable and gives the smooth jelly color room to balance the texture. Sculptural art gel requires controlled placement and complete curing, so this is a salon design; translucent floral decals offer a flatter home alternative.
How to Apply
- Apply a translucent pink jelly base to medium almond nails and cure according to the system.
- Sculpt clear rounded petals into one asymmetrical flower on each of two accent nails.
- Add pale-pink centers and several low clear droplets across the remaining nails.
- Cure every raised detail thoroughly and gloss only the areas required by the product system.
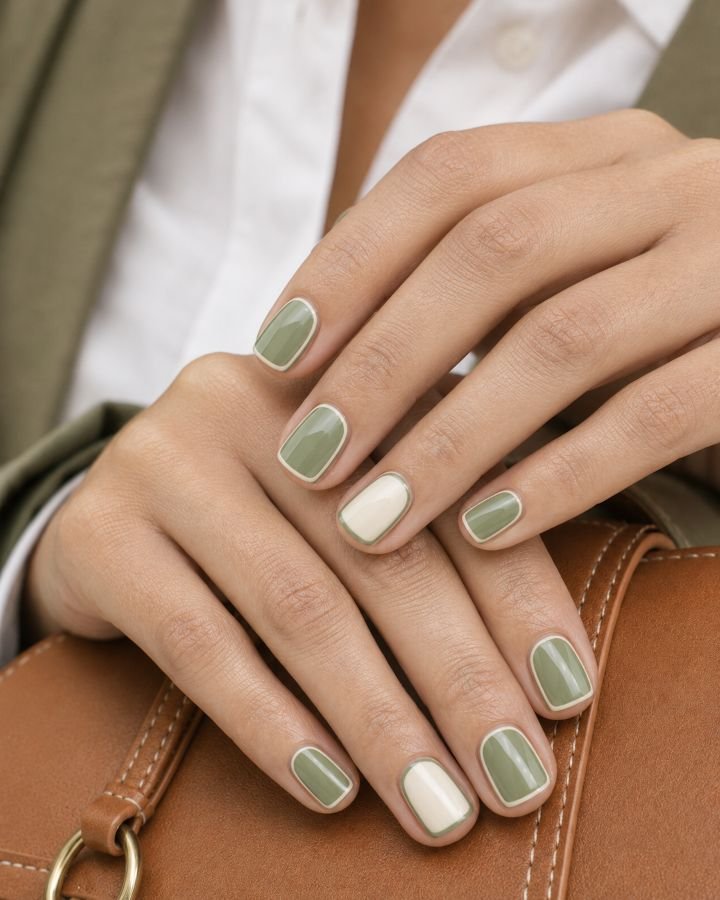
24. Meadow Green Outline Nails
The short square nails are colored in an opaque meadow green hue with a balanced ivory undertone. An ivory hairline border traces the outline of each nail, leaving a thin green border around the cuticles to keep the shape clean instead of overcrowded. One nail accent breaks the pattern and features an ivory-colored center with a meadow green border.
This is an excellent choice for the people who are looking for green spring nails that do not have leaves, flowers, or glitter accents. This solid shade looks refreshing with white tops, tan leather, blue jeans, and gold jewelry, while the border adds a graphic element to a basic manicure. The design can be done at home with a small detail brush, but it is important to keep everything clean.
How to Apply
- Shape short nails into soft squares and paint them with two thin coats of meadow green.
- Use a liner brush to trace a hairline ivory border around each nail perimeter.
- Reverse the palette on one accent with an ivory center and green frame.
- Correct uneven lines before adding a high-gloss top coat.
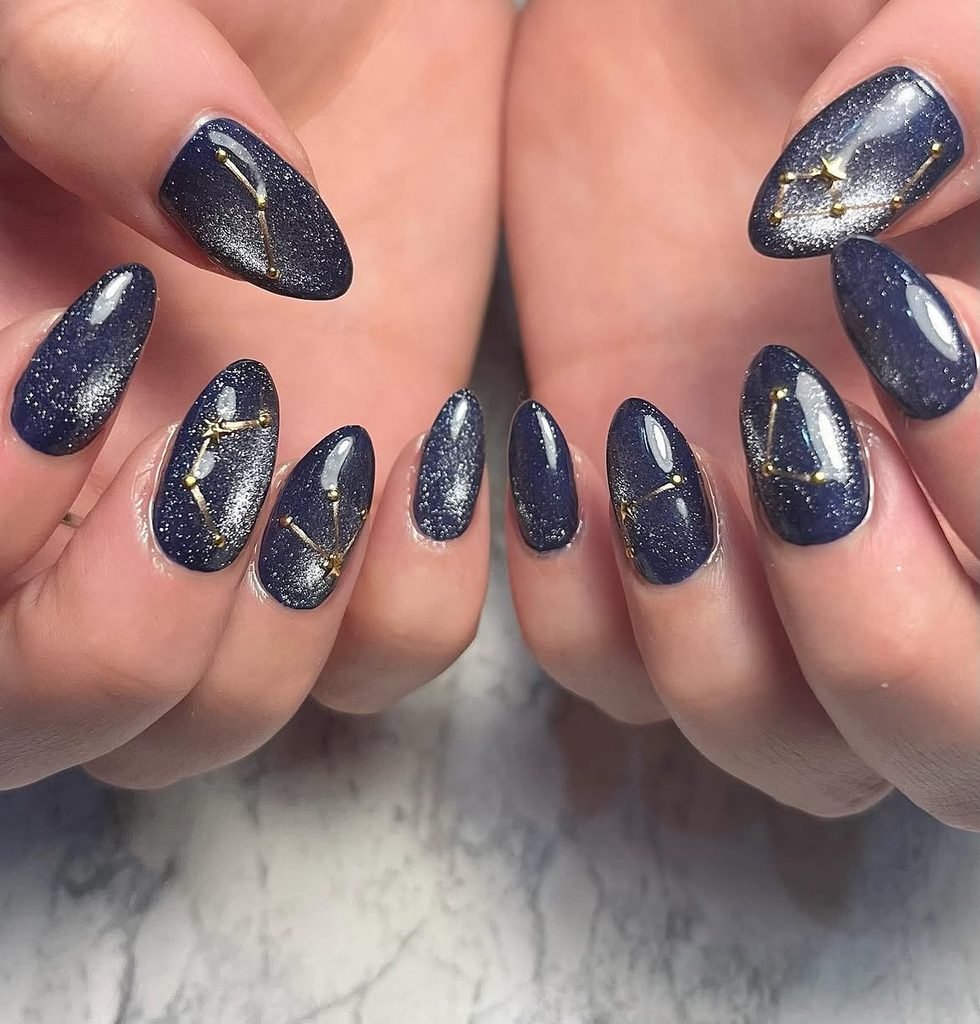
25. Festival Gem Constellation Nails
Long oval nails use a sheer lilac-grey base with small iridescent gems arranged in loose constellations. Fine silver lines connect only a few stones, and tiny dots in cobalt, coral, and lime add color between them. The gems vary subtly in size but stay low and widely spaced, preventing the design from becoming a fully encrusted manicure.
This spring festival manicure catches daylight and stage lighting while remaining more practical than dense crystal coverage. The oval shape gives the connected arrangements a smooth vertical path and reduces sharp corners around the embellishments. It is best created by a nail technician who can anchor each gem securely with a compatible system; for a temporary look, custom press-ons allow the layout to be completed and checked before wear.
How to Apply
- Apply a deep blue base to long oval nails.
- Arrange low iridescent gems into loose, uneven constellation groups.
- Connect selected stones with fine silver lines and add sparse cobalt, coral, and lime dots.
- Secure the embellishments with the appropriate gel or adhesive system and seal around, not over, their reflective faces.
Which Colors Work Best for Spring Nail Designs?
Pastel shades such as blush pink, lilac, butter yellow, baby blue, mint, and peach are still functional as they go well together and help make the good artwork noticeable. But these are not the only spring colors. Colors like cantaloupe, coral, meadow green, pistachio, accents in cobalt, and transparent berries give more contrast, while sheer nudes and milky shades help avoid the combination of many different colors in one place.
Find the undertone before going after the particular shade. Peach, cantaloupe, cream, and yellow shades usually look nice next to the gold jewelry and neutral warm shades; lilac, baby blue, mint, and silver give more of the cold touch. These are simply directions in terms of styling, but not the strict guidelines for the face colors. When a shade does not suit the skin, try the lighter version of it first.
Spring Nail Designs for Short and Long Nails
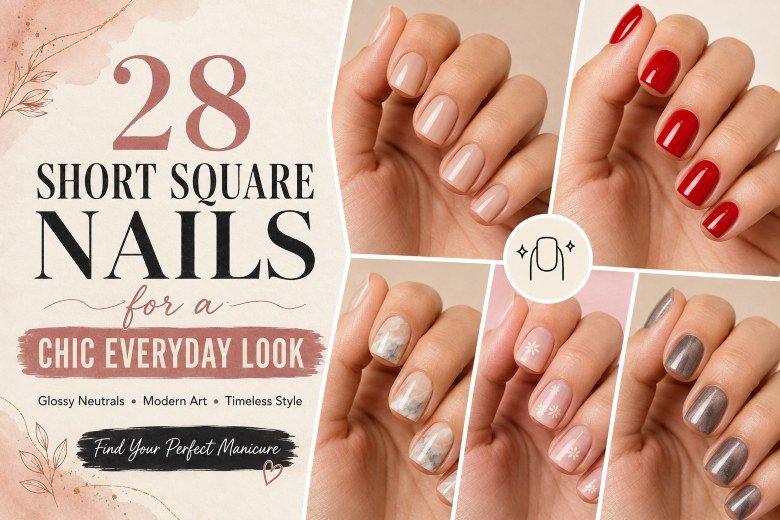
Small nails can accomplish more art than many people think possible, but it all depends on scale. Micro French lines, dots, bugs, cuticle confetti, negative space leaves, and outline art maintain an appearance of visible nail base color without giving a compacted look to the nail. Round, squoval, and soft square shapes are well suited to these simplified nail arts.
Medium to long nails make sense when a nail art technique requires some breathing room. Argyle grid, flower encapsulation, ribbed glass, aura gradient, chrome ribbon, and gem constellations are much easier to appreciate when the nail is medium or long. It makes no sense to extend a simple solid colored nail just because a longer nail is popular; it should be done because it complements the art.
Which Designs Are Realistic to Do at Home?
Solid milky color, Skittle nails, dots, simplified fruit, micro motifs, basic French tips, leaf strokes, and sponge ombré are realistic DIY choices. Work in thin layers, let ordinary lacquer set before adding guides or top coat, and simplify complex references to one or two accent nails. A design that is clean on three nails and plain on two usually looks more intentional than fine art that has been forced onto every finger without enough control.
Magnetic patterns, isolated chrome, clear extensions, encapsulated dried flowers, structured ribbing, sculptural gel petals, and securely anchored gems require compatible products and precise curing or construction. Take those references to a trained nail technician or use professionally made press-ons. Regular polish can imitate the color story, but it cannot reproduce the architecture of builder gel or the movement of magnetic pigment.
How to Help a Spring Manicure Stay Neat
Use clean, even nail plates and keep polish away from skin. Use only the base and top coats recommended for that specific system. Thin, controlled layers of color will be much easier to smooth out than applying one thick layer. Cap the free edge when allowed by the instructions on your manicure products and avoid picking at lifted gel, gems, or extensions.
To maintain your manicure, use cuticle oil daily and wear gloves when you will be engaged in cleaning or gardening for long periods of time. Do not apply more household glue or nail polish to a damaged raised design or nail structure; repair the nail structure. Taking pictures of your design will help remember the details once the manicure is worn normally.
Final Thoughts
Not all manicures for spring need to have lots of flowers and a wide pastel range. Even a micro tip in butter yellow, a pure milk lavender, or an outline in meadow green can speak about the season. It all depends on the fact that everything must be connected into one picture.
Selecting the manicure should be done based on how often the hands will be used and how often you change clothes. Short and neat designs are preferable for those who work a lot. Longer designs made of chrome, glass, magnetic, and dimensional nails are worth the trouble when the occasion and care are appropriate. Do not forget to keep a photo which shows the whole hand with the design.