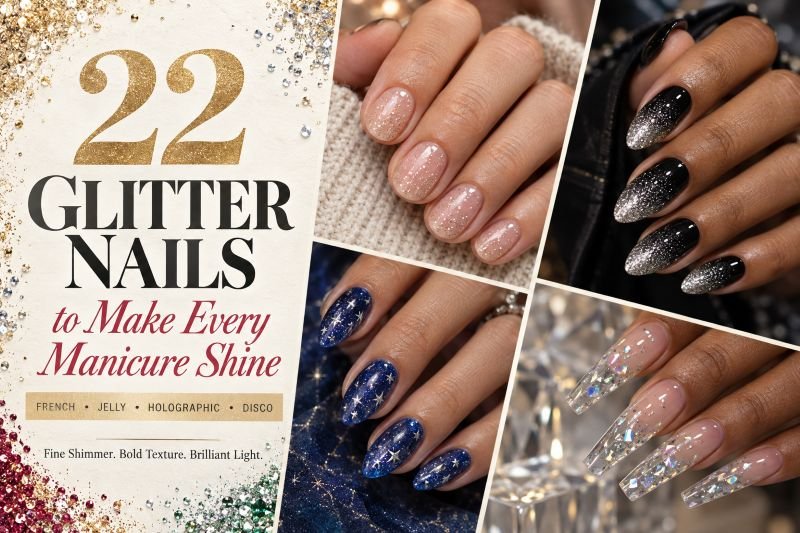
22 Glitter Nails to Make Every Manicure Shine
Glitter is unforgiving in the best possible way; when the particle size, application, and base color are all correct, just a small amount of glitter adds intentionality to the manicure. If everything is fighting for space, the same glitter will come across as heavy or even untidy. Here’s how these glitter nails make the most out of this contrast, ranging from barely noticeable champagne shimmer on short natural nails, to silver pieces suspended inside transparent extensions.
The collection includes glitter French tips, jelly suspension, cuticle fades, sugar textures, holograms, bridal neutrals, dark colors, and even party nails fully covered in glitter. Recently, beauty media has even taken the glitter look off of its usual holiday manicure, focusing instead on jewelry-inspired French tips and contemporary glitter ombré.
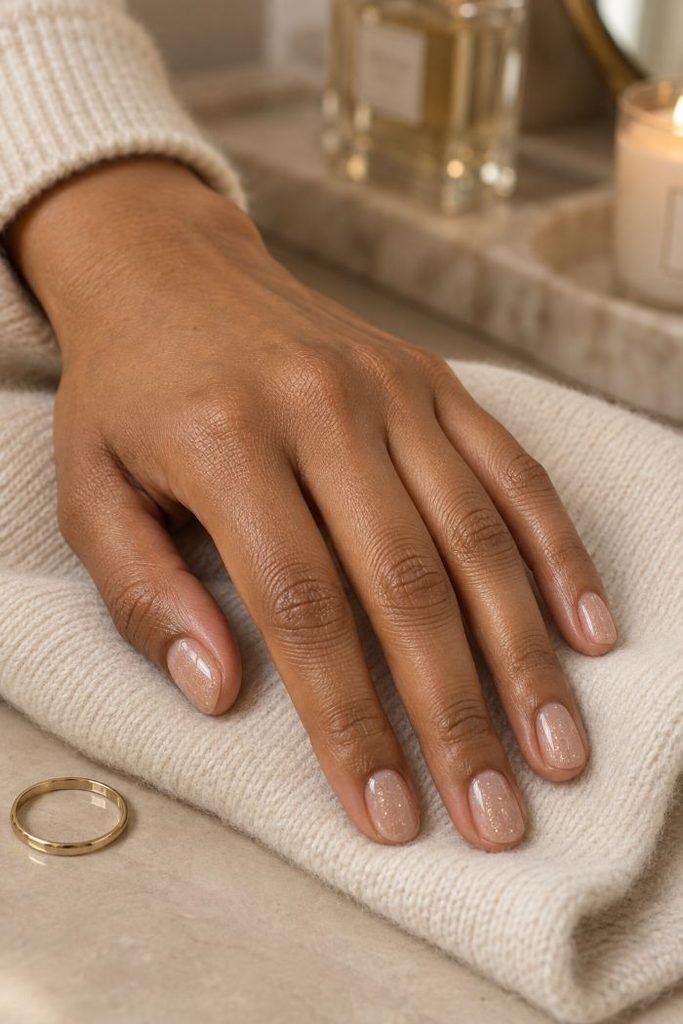
1. Champagne Micro-Glitter Nude Nails
Short ovals are coated with a transparent pink base, which shows off the natural nail line beneath. There is champagne micro-glitter sparsely scattered on each nail, from the cuticles to the tip. The particles are very tiny, and give off a warm shine rather than being visible as grains or having a metallic look.
The subtle way the glitter is applied makes it useful for working days, dinners, and social events, where wearing a full sparkling manicure would be too much. The ovals allow for easy transition of the light, while the sheer color creates an attractive grow out. It also provides a brighter version of the classic “quiet luxury manicure”, retaining its minimalistic qualities. For at-home application, select the glitter polish without loose particles.
How to Apply
- Shape the nails into short ovals and apply a smoothing base coat.
- Add one or two thin coats of translucent beige-pink polish.
- Brush on fine champagne glitter, keeping slightly more sparkle through each center.
- Finish with a glossy top coat and seal the free edges.
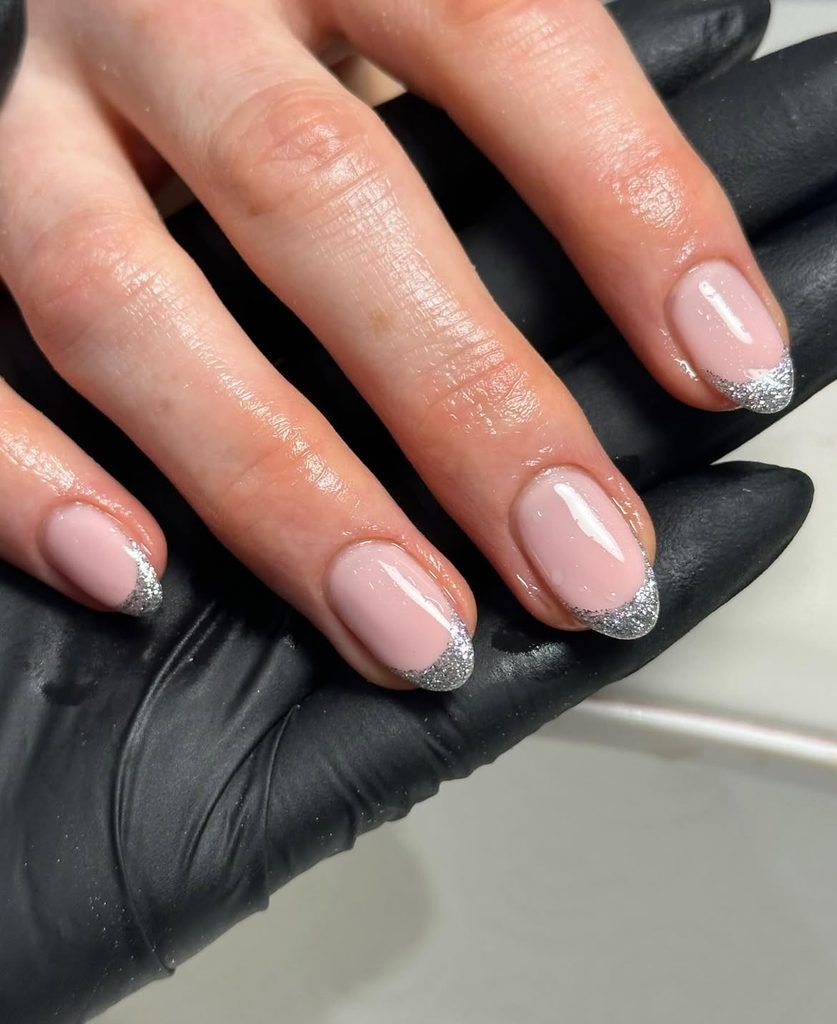
2. Silver Glitter Micro-French Tips
Short oval nails begin with a clear blush base and finish with pin-thin silver glitter French tips. The glitter follows the straight free edge precisely, becoming slightly curved at the softened corners. One nail carries a second hairline of silver just below the tip, creating a restrained double-French accent without increasing the width of the design.
The narrow placement supplies shine while preserving the compact proportions of short nails. Silver also reads cleanly against the transparent pink base, so the manicure works with cool-toned jewelry, grey tailoring, denim, or evening clothes. Readers exploring more variations can compare it with these French tip nail designs. For home application, a dense glitter liner is easier to control than trying to arrange separate loose particles along such a fine edge.
How to Apply
- Apply a clear blush base to prepared short oval nails.
- Use a fine liner brush to draw a narrow silver glitter line across each free edge.
- Add a second parallel line below one selected tip and correct uneven corners.
- Seal the design with a smooth high-gloss top coat.
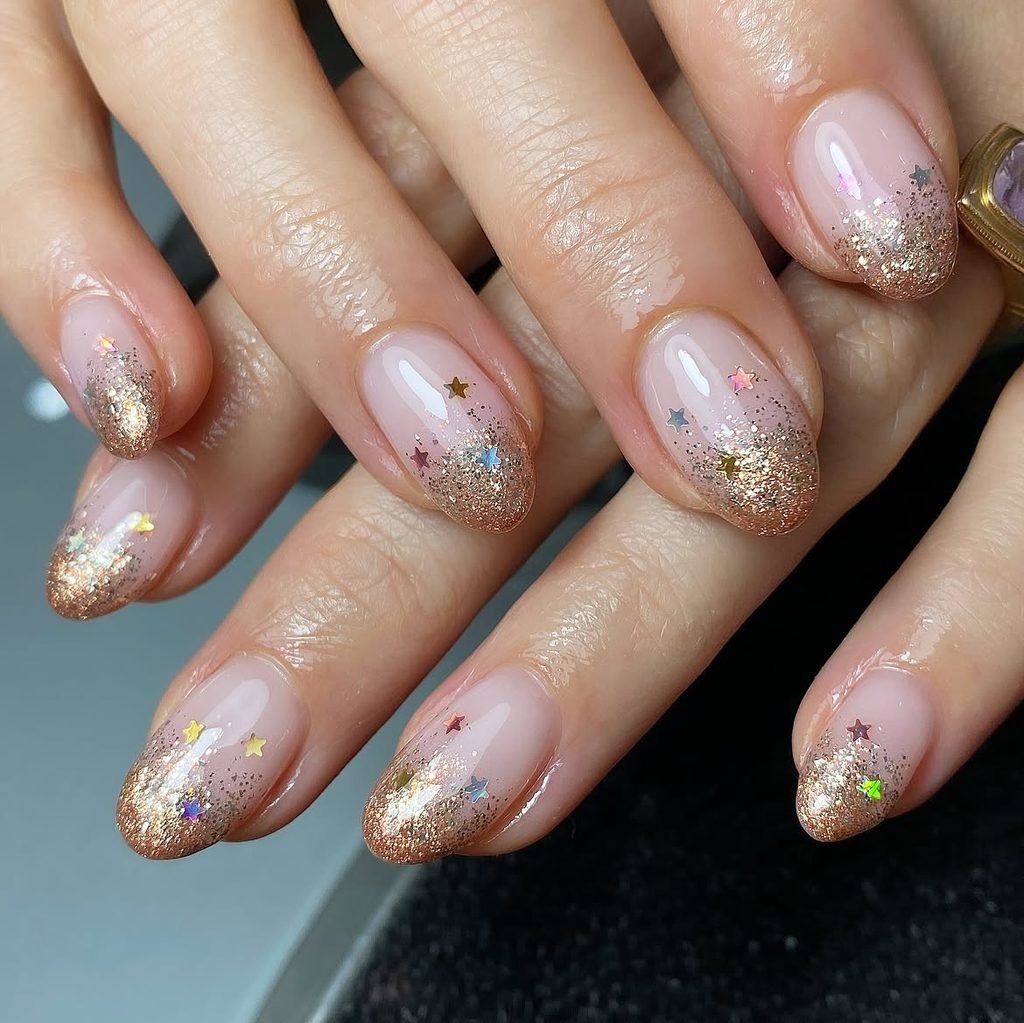
3. Copper Cuticle Glitter Fade
Medium almond nails wear a warm peach-beige base with copper glitter concentrated closely around the cuticles. The particles thin out before reaching the middle of each nail, leaving the tapered tips almost completely clear. A mix of fine copper and a few slightly larger bronze pieces creates depth without turning the fade into a chunky border.
Reversing the usual tip gradient draws attention toward rings and makes the almond shape appear longer. The warm metal works especially well with brown, rust, cream, olive, and gold accessories, offering a richer route into seasonal orange nail ideas. A cosmetic sponge gives better control than repeated brushstrokes: dab the densest glitter near the cuticle, then use the small amount remaining on the sponge to soften the upper edge.
How to Apply
- Cover medium almond nails with one or two thin coats of warm peach-beige polish.
- Dab copper glitter near each cuticle using a small cosmetic sponge.
- Carry a lighter scattering upward, stopping before the nail midpoint.
- Apply a leveling top coat without flooding the cuticle area.
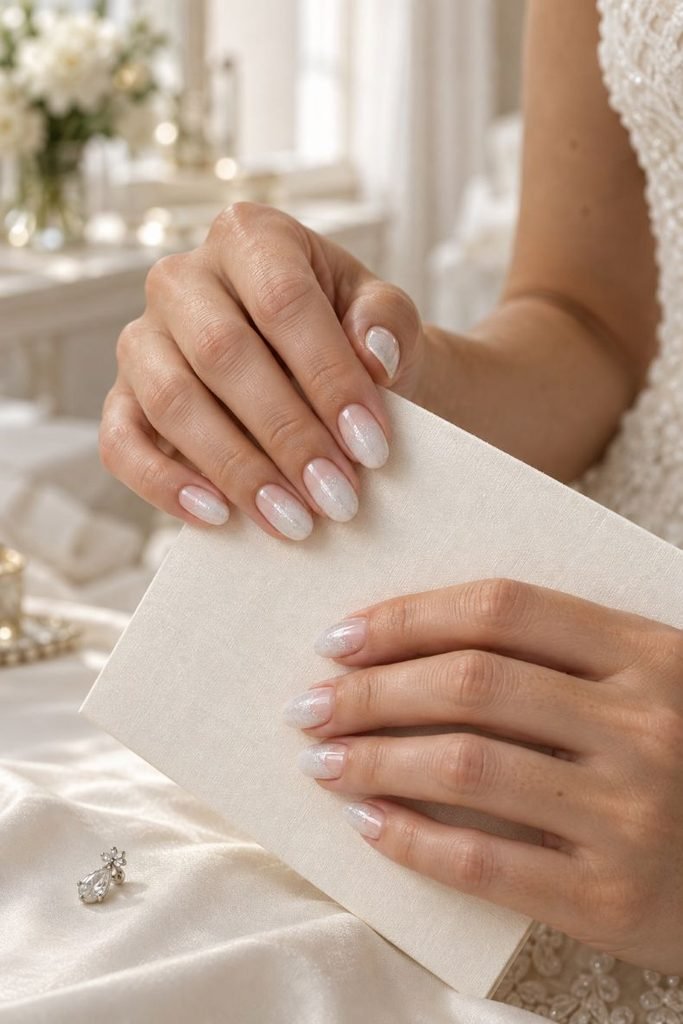
4. Milky White Bridal Glitter Veil
Medium oval nails are covered in semi-sheer milky white, then veiled with pearl-white and fine silver glitter across the upper third. The sparkle is denser at the tips but remains translucent enough for the soft base to show through. Two nails include one tiny clear area near the sidewall, preventing the finish from looking like solid metallic polish.
This is an elegant choice for brides who want more light than a plain neutral manicure but less decoration than crystals or sculpted flowers. The oval silhouette echoes the soft gradient and will not compete with lace, satin, or heavily detailed jewelry. It can also coordinate with the neutral looks in these bridesmaid nail ideas. Ask for fine cosmetic glitter and a fully smoothed surface so delicate fabrics do not catch on exposed particles.
How to Apply
- Apply two thin layers of semi-sheer milky-white polish to medium oval nails.
- Sponge pearl-white and fine silver glitter over the upper third of each nail.
- Leave two narrow sidewall areas clear and soften every gradient edge.
- Encapsulate the glitter with a leveling glossy top coat.
5. Black-to-Silver Glitter Ombré
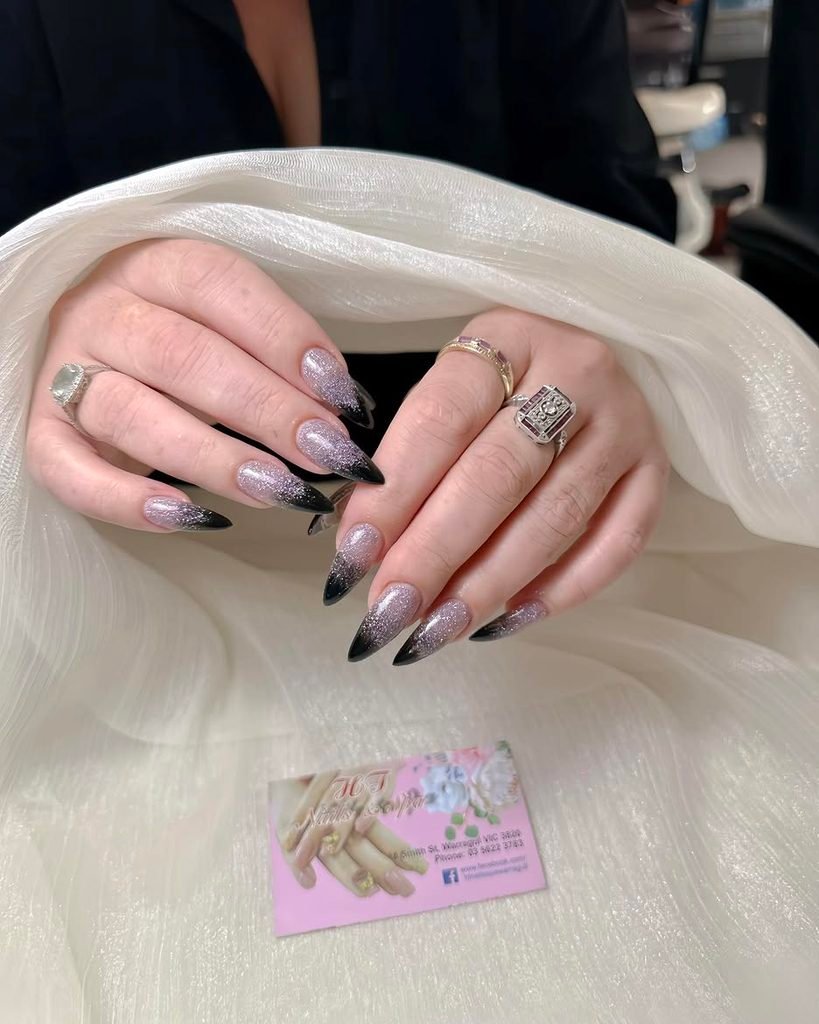
Long nails start with glossy black at the cuticles and transition into densely packed silver glitter at the tips. Fine charcoal particles bridge the two shades, preventing an abrupt dividing line, while one accent nail reverses the gradient. The silver contains mixed micro and small hex particles, giving the free edges a brighter, dimensional reflection.
The dark base makes every particle visible, so this manicure feels graphic even without additional artwork. It suits evening events, winter outfits, and anyone drawn to the sharper mood of gothic nail ideas without requiring crosses, chains, or other literal motifs. Because black can become muddy when overworked, build the silver gradually with a sponge and inspect the fade from a full-hand distance before adding more glitter.
How to Apply
- Paint long nails with two thin coats of glossy black.
- Sponge charcoal micro-glitter from the midpoint toward each tip.
- Add denser silver mixed-size glitter at the free edges, reversing the fade on one accent.
- Smooth the particles beneath one or two compatible top-coat layers.
6. Ruby Jelly Suspended-Glitter Nails
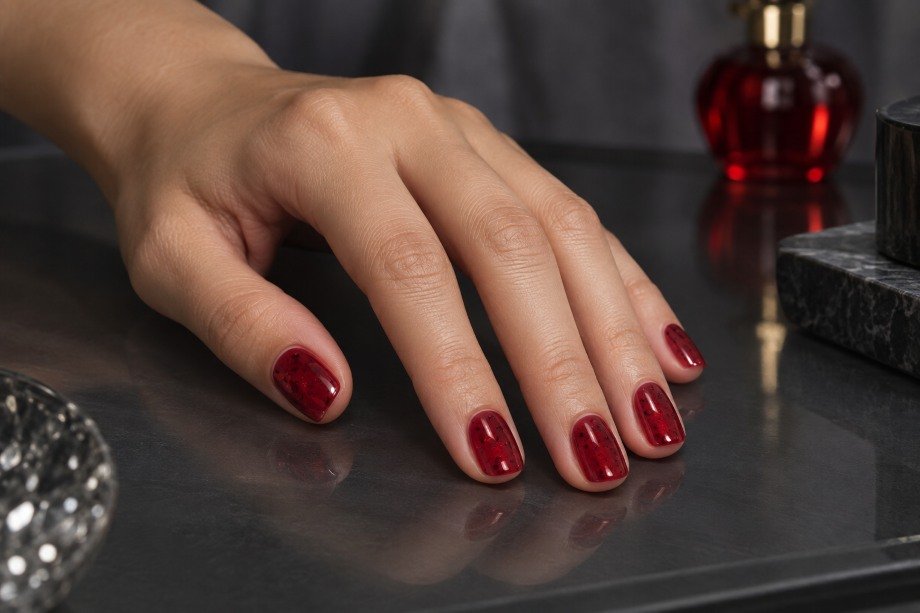
Short squoval nails glow through a translucent ruby-red jelly base containing suspended crimson micro-glitter and a sparse scattering of small garnet hexagons. The particles appear at different depths because some sit beneath a second coat of jelly color. Clear margins around the cuticles keep the rich red from looking heavy on the short shape.
Unlike glitter placed only on the surface, this layered technique creates depth similar to colored glass. It is bold enough for a date night or party yet compact enough for everyday wear because the nails remain short and smoothly finished. Use a polish formulated with suspended glitter or encapsulate nail-safe pieces between compatible gel layers. Random spacing is essential; evenly arranged hexagons would change the look from organic sparkle to a deliberate dot pattern.
How to Apply
- Apply one thin coat of translucent ruby jelly polish to short squoval nails.
- Add crimson micro-glitter and a few small garnet hexagons in irregular positions.
- Cover the particles with another sheer ruby layer to create visible depth.
- Finish with a clear leveling top coat and seal each edge.
7. Sapphire Galaxy Glitter Nails
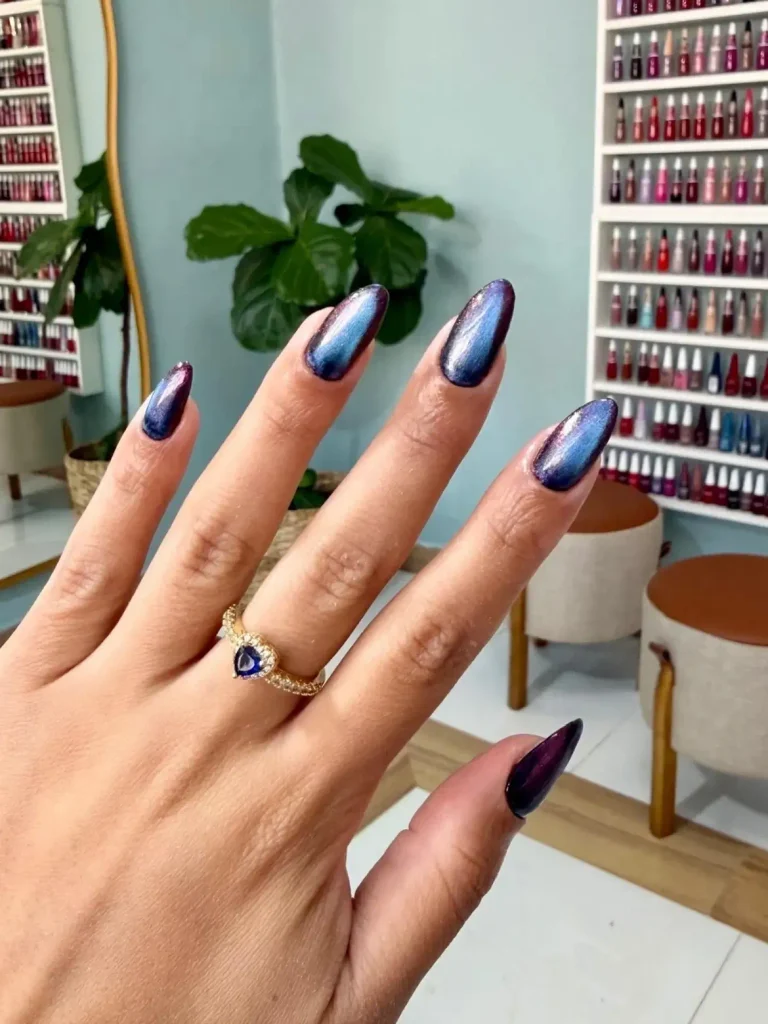
Long almond nails use a midnight-blue jelly base layered with sapphire glitter, tiny silver flecks, and a few larger cobalt particles. The concentration shifts diagonally across each nail, forming loose trails rather than identical centered clusters. Fine violet glitter appears only at selected intersections, creating subtle color variation without turning the manicure into a rainbow galaxy.
This design gives dark blue nail ideas more movement while keeping the palette cohesive. Long almond nails provide enough space for the scattered trails, although the same concept can be reduced to two accents on a shorter set. Ask the nail artist to keep some areas visibly blue; glitter needs dark negative space around it to read as separate points of light instead of undifferentiated metallic coverage.
How to Apply
- Apply a translucent midnight-blue base to long almond nails.
- Build diagonal trails using sapphire micro-glitter and tiny silver flecks.
- Add a few cobalt particles and restrained violet glitter at selected points.
- Encapsulate the layered design beneath a clear glossy top coat.
8. Emerald Crushed-Glitter Nails
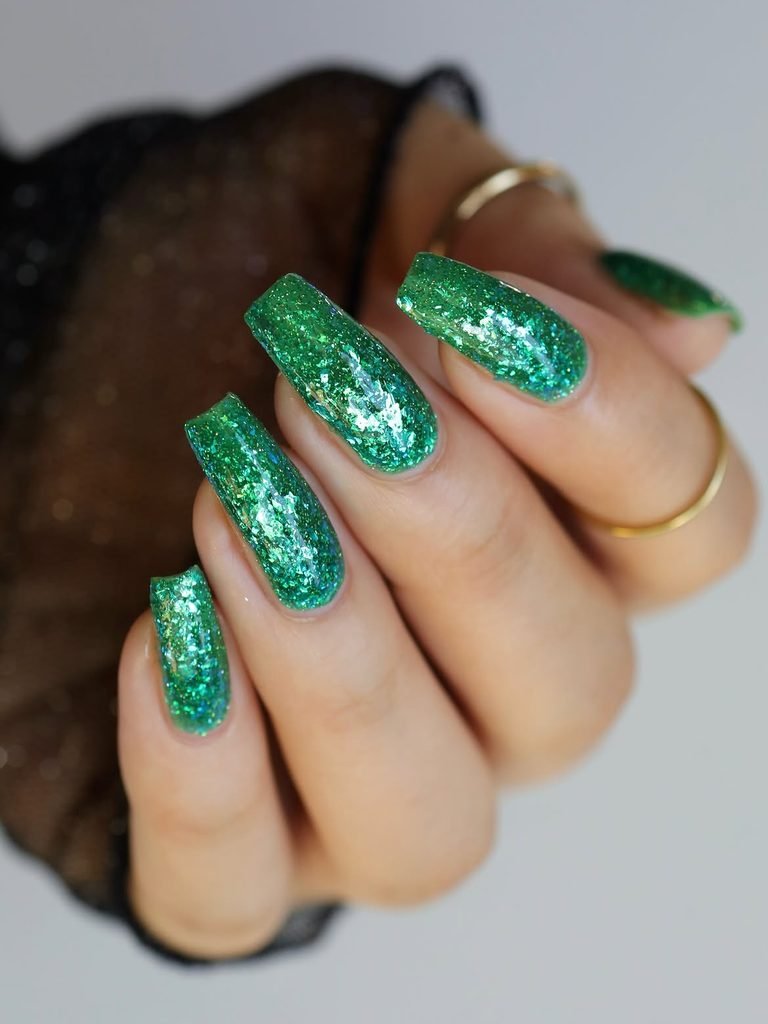
The medium coffin nails are entirely covered in emerald glitter powder that transitions from dark forest green colors into jewel tones. Metal particles fill the empty spaces between the flaky powder, creating opaque coverage without any visible holes. One nail is covered with a clear translucent green color base that has a diagonal hole in it, giving you an opportunity for a small break in the full-on set.
Full-coverage glitter looks good here due to the fact that the color is controlled and coffin nails create clean side walls for the shiny layer. This look can easily be paired with black clothing, cream sweaters, gold jewelry, or evening gown. The dense glitter coverage tends to give you a bulky effect quite fast, so thin layers and large flakes should be used only when necessary.
How to Apply
- Apply a deep green base to prepared medium coffin nails.
- Press fine emerald glitter and irregular nail-safe flakes into a thin tacky layer.
- Preserve one diagonal translucent opening on an accent nail.
- Encapsulate, refine the surface, and finish with glossy top coat.
9. Holographic Prism Glitter Nails
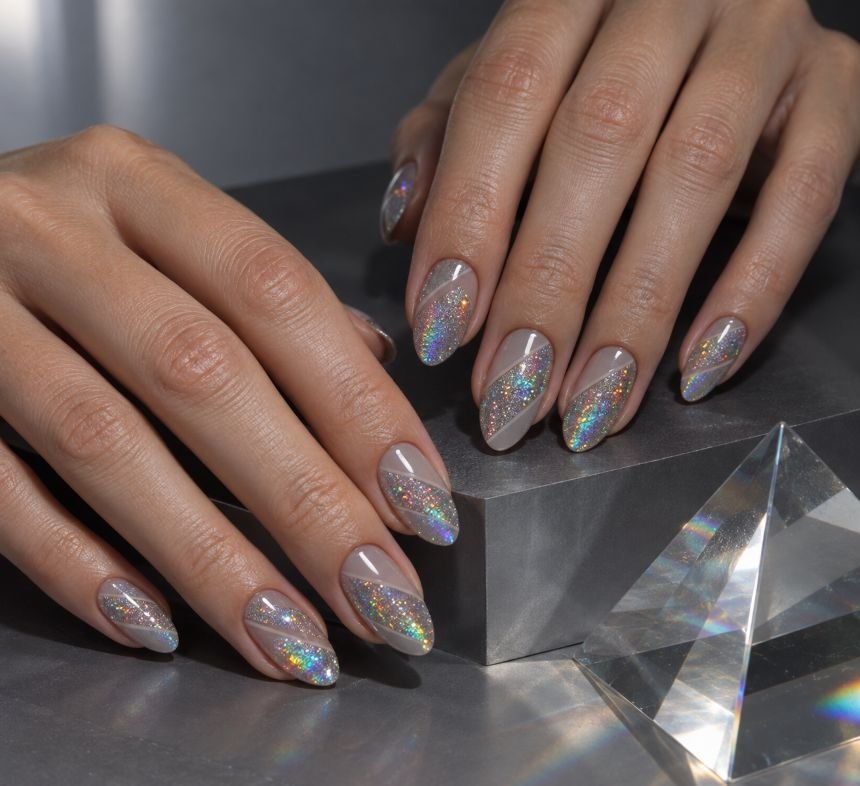
Medium almond nails have a cool translucent grey base crossed by angled panels of holographic glitter. Under direct light, the particles separate into clear rainbow reflections instead of simply shifting between two pastel shades. Narrow grey channels remain between the prism panels, keeping the geometry visible and stopping the holographic finish from covering every surface.
This manicure is designed for movement, flash photography, concerts, and evening celebrations where directional light can reveal the full spectrum. The neutral base prevents the rainbow reflection from competing with an underlying color, while almond tips soften the angular panel layout. Use a true holographic glitter product rather than labeling ordinary iridescent glitter as holographic. If the particles feel raised after one top coat, add a compatible leveling layer instead of leaving sharp edges exposed.
How to Apply
- Cover medium almond nails with a translucent cool-grey base.
- Map two or three angled panels while leaving narrow grey channels visible.
- Fill the panels with dense holographic glitter and clean their boundaries.
- Apply enough compatible top coat to create a completely smooth surface.
10. Opal Iridescent Glitter Glaze
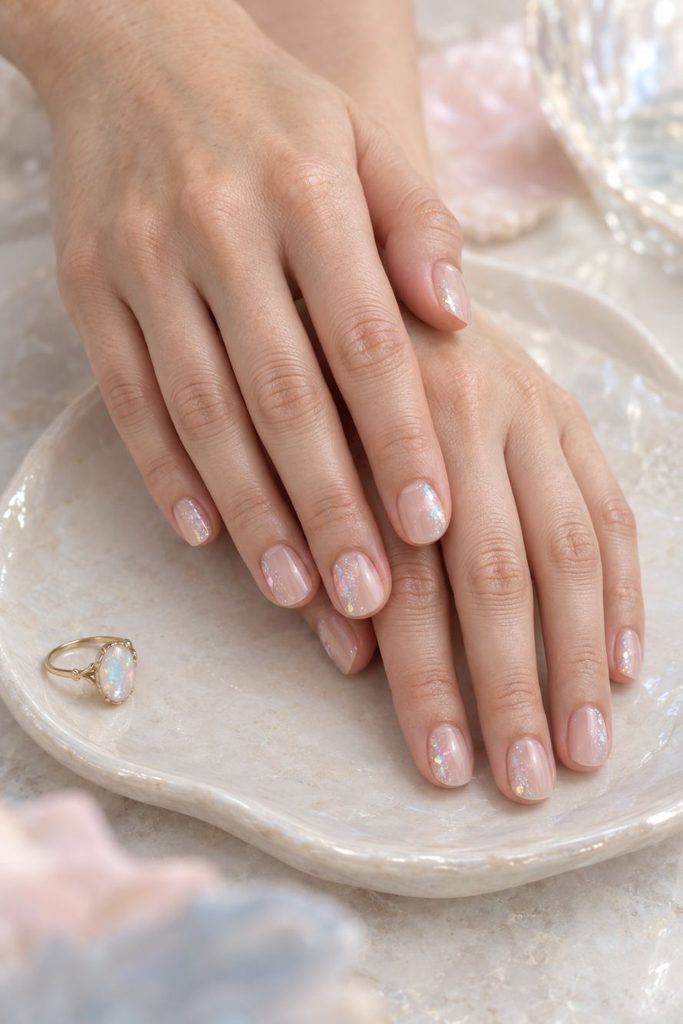
Short oval nails begin with a sheer milky nude base and a sparse glaze of translucent iridescent glitter. The particles shift softly through pink, aqua, lilac, and pale gold, depending on the angle, but never form the hard rainbow line associated with holographic glitter. Their density increases slightly near alternating sidewalls, leaving the middle of each nail calm.
The effect resembles light moving through opal rather than a mirrored or chrome surface. It works for workdays, weddings, spring outfits, and readers who want visible color play without a strongly colored polish. Anyone drawn to a more pearly finish can explore these pearl nail ideas, but this design should retain distinct glitter particles. Apply the glaze sparingly; too many overlapping pieces will hide the milky base and flatten the delicate shift.
How to Apply
- Apply one or two thin coats of sheer milky-nude polish to short oval nails.
- Place translucent iridescent glitter lightly over each surface.
- Concentrate a few extra particles along alternating sidewalls.
- Seal the glaze with a smooth, crystal-clear top coat.
11. Reflective Flash-Glitter Nails
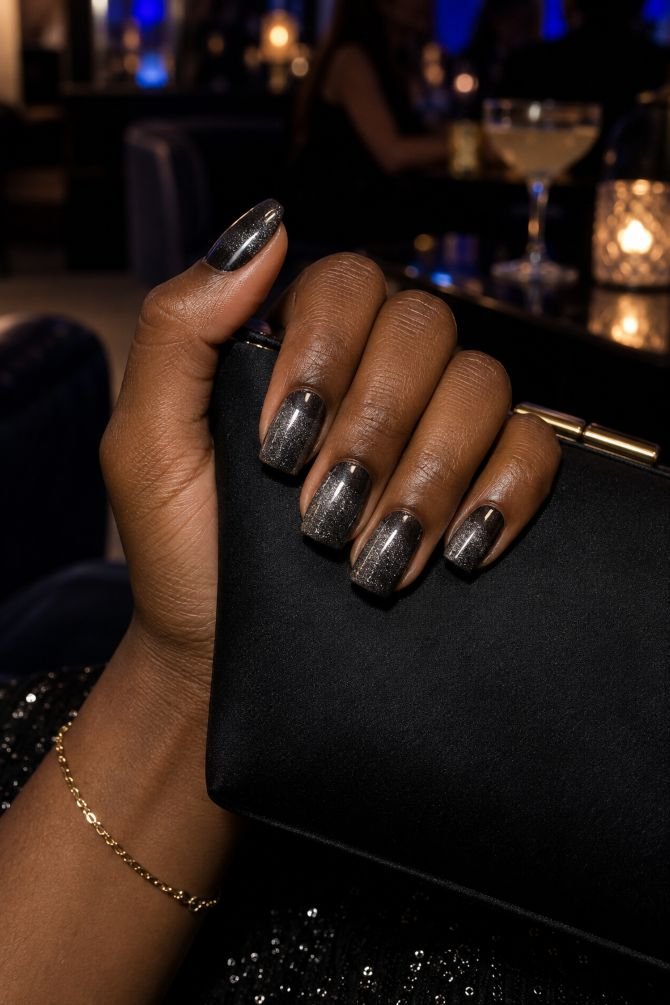
Medium square nails are painted smoky charcoal and covered with fine reflective glitter. In ordinary diffuse light, the surface appears pewter-grey with a restrained granular sparkle; under direct illumination or a camera flash, the particles become intensely bright. A slim charcoal half-moon remains uncovered at every cuticle, giving the reflective layer a consistent boundary.
This is a nightlife manicure built around changing light rather than additional art. It differs from magnetic cat-eye nail ideas, which create a movable band using magnetic pigment; reflective glitter brightens when strong light returns toward the viewer. Product labels matter because ordinary silver glitter will not create the same flash response. Photograph the manicure in both soft and direct light before choosing it solely from a highly illuminated reference image.
How to Apply
- Apply a smoky-charcoal base to medium square nails.
- Leave a narrow charcoal half-moon visible above every cuticle.
- Cover the remaining surface with a thin, even layer of reflective glitter gel.
- Cure as directed and seal with a compatible glossy top coat.
12. Lavender Sugar-Glitter Accents
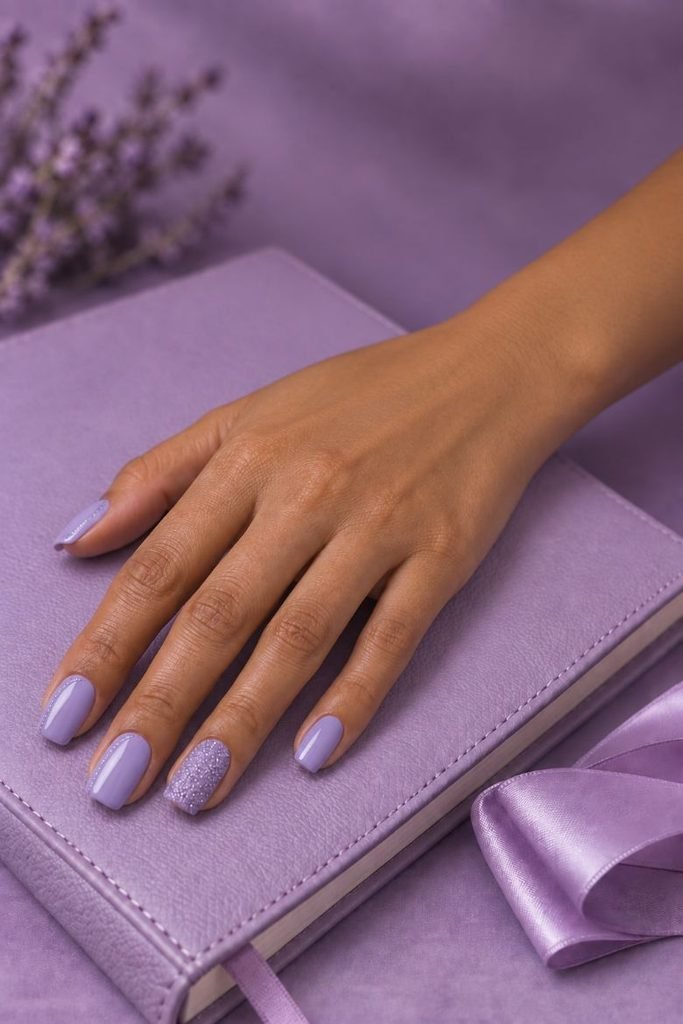
Medium squoval nails alternate glossy lavender polish with two textured sugar-glitter accents. The accent nails use closely packed lavender micro-glitter left intentionally matte and slightly granular, while the remaining nails carry only one narrow sparkling curve near the sidewall. No crystals or metallic outlines are added, allowing the contrast between rough and smooth finishes to lead the design.
Sugar texture is one of the few glitter techniques that is not meant to look fully encapsulated. That tactile finish makes a stronger accent than another layer of shine, but it can catch on delicate fabric and may not suit someone who prefers a perfectly smooth manicure. Keep the textured treatment to two nails and avoid building excessive thickness around the cuticles. A fine, uniform glitter produces a cleaner sugar effect than mixed chunky pieces.
How to Apply
- Paint medium squoval nails with an even lavender base.
- Sprinkle fine nail-safe lavender glitter over two wet or uncured accent nails.
- Cure or set the accents according to the compatible product system, then remove loose particles.
- Top-coat only the glossy nails and their narrow sidewall curves, leaving the sugar accents textured.
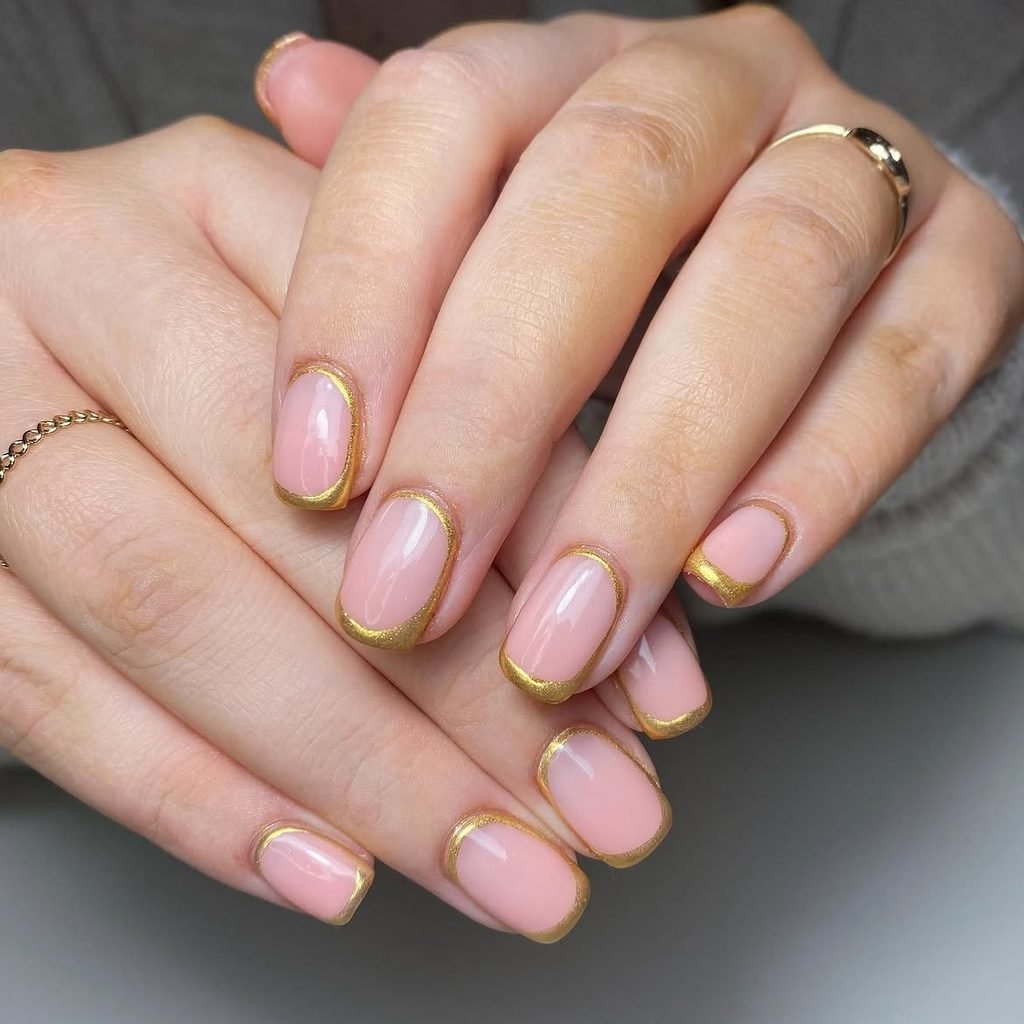
13. Gold Glitter Frame Nails
Squoval nails use a translucent rosy-beige base surrounded by a fine gold glitter frame. The outline follows both sidewalls, the cuticle curve, and the free edge, leaving a large clear center on every nail. Two nails contain a tiny break in the frame near one side, which keeps the layout modern rather than resembling a continuous metallic border.
Framing defines the length and shape without filling the nail, making this a useful compromise between minimal and decorative glitter nails. The warm gold works with neutral dresses, evening tailoring, and mixed-metal jewelry, while the transparent center allows the natural nail to remain part of the design. A dense glitter gel gives the most precise line. Loose glitter is difficult to control at this scale and can spread into the negative space before the border is sealed.
How to Apply
- Apply a translucent rosy-beige base to prepared squoval nails.
- Trace the cuticle, sidewalls, and free edges with dense fine gold glitter gel.
- Leave one tiny intentional break in the frame on two nails.
- Refine the outlines and protect them with a clear glossy top coat.
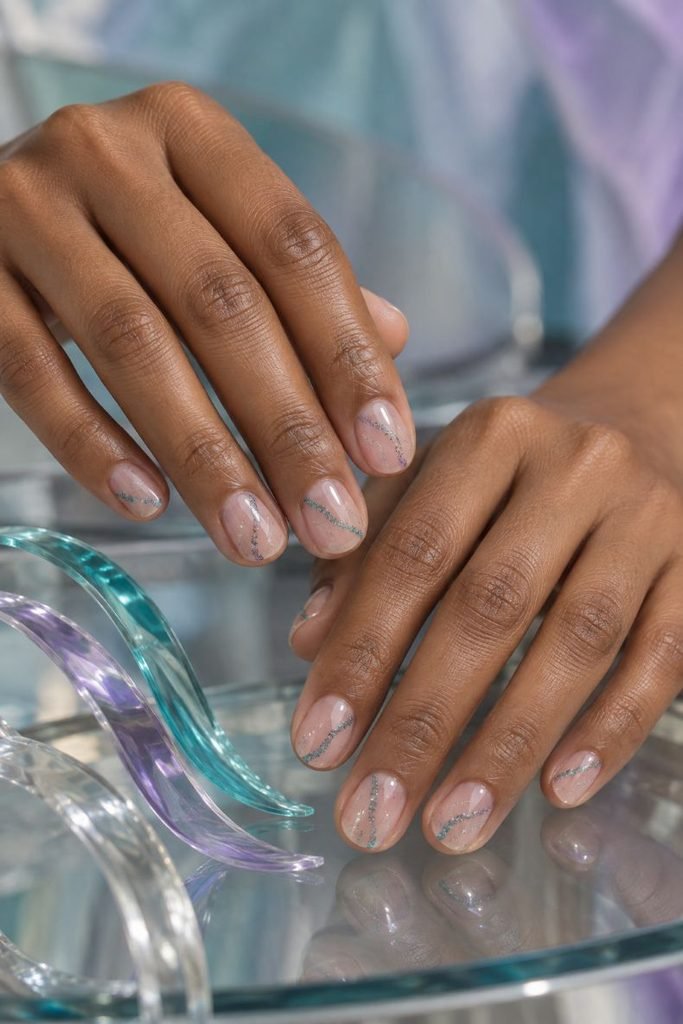
14. Negative-Space Glitter Waves
Short round nails remain mostly visible beneath a transparent pink-beige base. Thin waves of teal, violet, and silver micro-glitter travel diagonally across the nails, but each color follows a separate route and never forms a dense swirl. Some lines stop at the sidewall, while others continue across the free edge to make the set feel connected.
The generous negative space keeps three glitter colors readable on a small surface. Rounded nails support the flowing lines, and the design can be simplified further by using silver on every nail with teal and violet reserved for two accents. This is achievable with a fine liner and pre-mixed glitter gel, although each wave should be set before another crosses nearby. Thick, repeated strokes will erase the transparent spaces that give the manicure its structure.
How to Apply
- Apply a clear pink-beige base to short round nails.
- Draw one or two thin diagonal waves in teal, violet, or silver glitter.
- Vary the routes and endpoints while preserving broad areas of negative space.
- Seal the linework with a smooth glossy top coat.
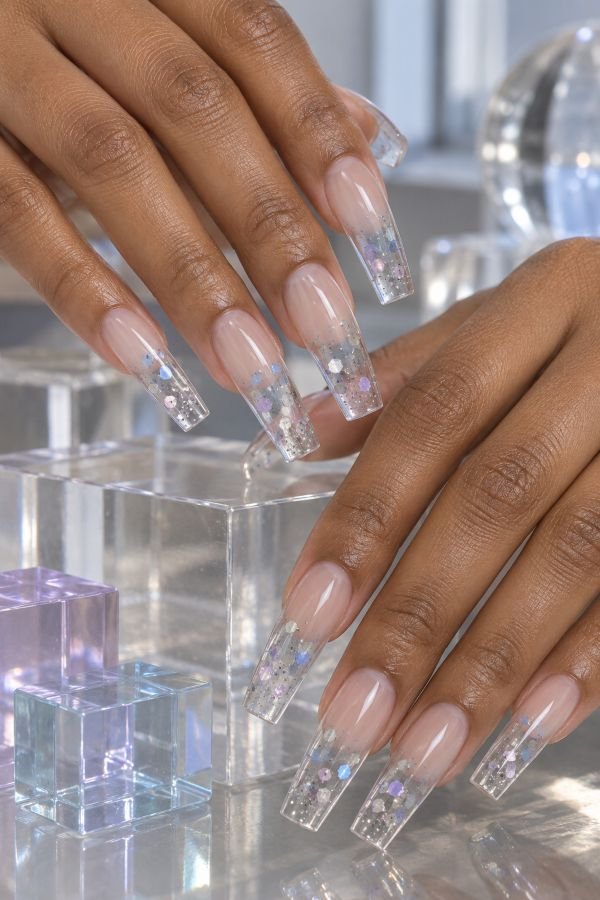
15. Chunky Hex-Glitter Clear Tips
Long tapered-square nails transition from sheer nude nail beds into transparent tips filled with silver, lilac, and pale-blue chunky hex glitter. The pieces vary in size and sit at different depths, with more clear space than decoration remaining visible. Fine silver glitter bridges a few gaps without turning the extensions opaque or disguising the individual shapes.
Clear structure lets the particle size become the artwork, which is why these nails feel more architectural than ordinary glitter polish. The design requires proper encapsulation so no hexagon lifts or creates a sharp surface. It is best handled by a trained nail technician or ordered as professionally built press-ons. Ask to see the side profile as well as the top view; overloaded glitter can force unnecessary thickness even when the photographed surface looks attractive.
How to Apply
- Build or fit clear tapered-square extensions over sheer nude nail beds.
- Arrange nail-safe silver, lilac, and pale-blue hex glitter sparsely within the clear tips.
- Add minimal silver micro-glitter, then encapsulate everything in a clear builder product.
- Refine the structure and finish with a crystal-clear glossy top coat.
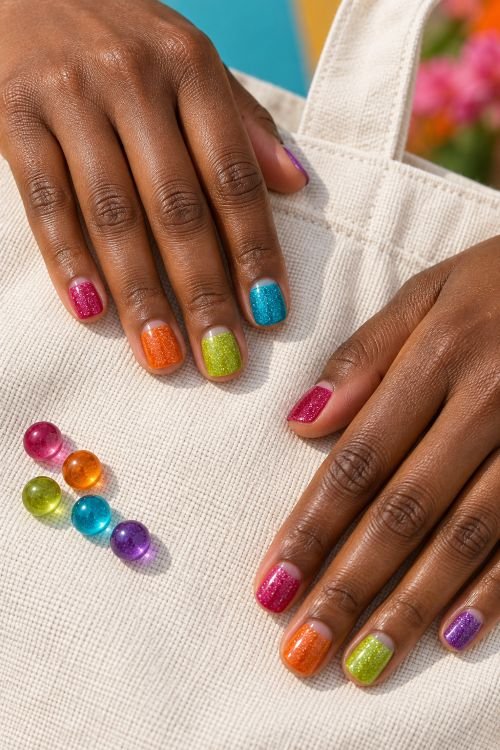
16. Rainbow Micro-Glitter Skittle Nails
Short squoval nails each carry one saturated micro-glitter shade: raspberry, tangerine, chartreuse, turquoise, and violet. Every color has the same fine particle size and opaque density, creating a unified Skittle manicure rather than five unrelated finishes. A narrow translucent margin at the cuticles gives the bright shades a cleaner outline and makes the short nails appear carefully shaped.
The disciplined finish is what makes the rainbow palette work. Mixing chunky glitter, shimmer, metallic foil, and several base opacities would introduce too many variables, whereas matching particles let color provide all the variation. This set suits festivals, birthdays, vacations, and anyone who wants a cheerful manicure without illustrative nail art. Test each polish on a swatch first, because some glitter shades need a coordinating base color to reach comparable coverage without becoming excessively thick.
How to Apply
- Select five micro-glitter polishes with matching particle size and finish.
- Apply a coordinating thin base color to each short squoval nail if needed.
- Build raspberry, tangerine, chartreuse, turquoise, and violet glitter to even opacity.
- Preserve neat cuticle margins and finish with a glossy top coat.
17. Pink Confetti-Glitter Jelly Nails
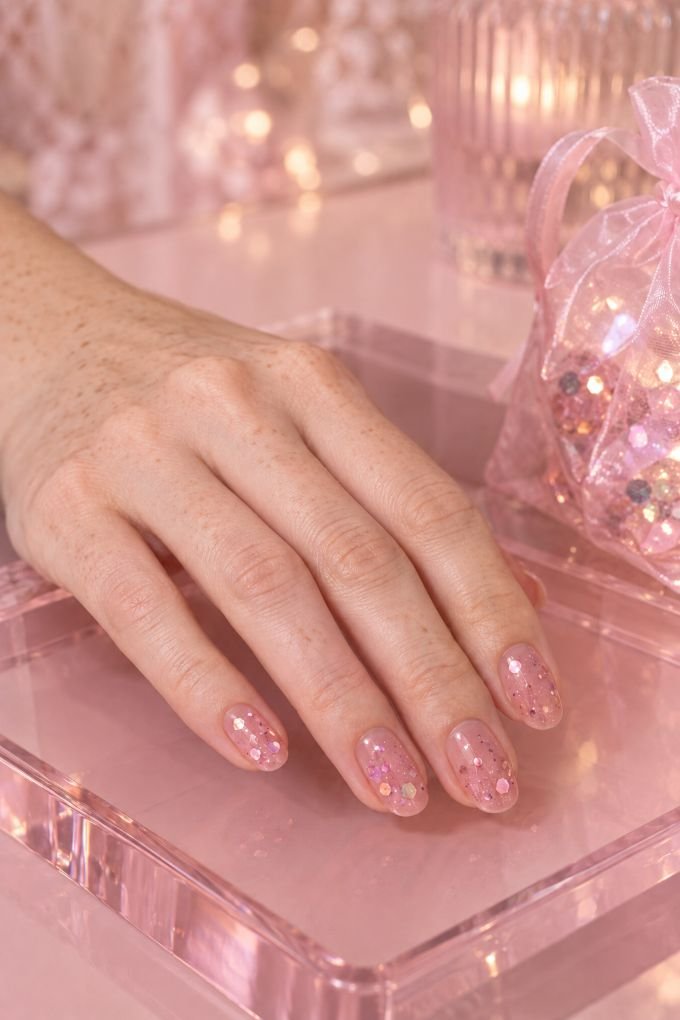
Medium oval nails use a transparent bubblegum-pink jelly base layered with fine rose glitter and a few larger reflective circles and hexagons. The shapes appear suspended at different levels rather than scattered only across the surface. Their spacing stays irregular, and several areas remain completely pink so the manicure retains a glass-like quality.
This design sits deliberately between pink glitter nails and playful confetti nails. Fine particles create the continuous sparkle, while the larger mixed shapes supply the confetti effect; treating those materials as identical would produce a less controlled result. Medium oval nails offer enough room for the separation to remain visible. Keep the pieces thin and nail-safe, and encapsulate them thoroughly rather than relying on a single surface coat to hold their edges down.
How to Apply
- Apply one thin layer of transparent bubblegum-pink jelly polish to medium oval nails.
- Add fine rose glitter and a few reflective circles and hexagons in uneven positions.
- Cover with another jelly layer, then add selected pieces closer to the surface.
- Encapsulate the design and finish with a smooth glossy top coat.
18. Celestial Gold-Glitter Starburst Nails
Long stiletto nails are painted deep plum-black and decorated with fine gold-glitter starbursts. Each burst has a small concentrated center and several tapered rays, with tiny scattered particles connecting the compositions across the hand. The artwork changes scale from nail to nail, and two tips remain mostly dark to give the reflective motifs room to shine.
The pointed shape reinforces the radiating lines and gives this celestial manicure a sharper mood than conventional moon-and-star decals. It works for evening events, gothic styling, or a dramatic holiday look without requiring raised charms. Dense glitter gel is more suitable than loose glitter for the narrow rays because it keeps the edges precise. If stiletto extensions are impractical, place one starburst on each of two short almond accent nails and leave the remaining nails plum-black.

How to Apply
- Paint long stiletto nails with two thin coats of deep plum-black.
- Mark varied starburst centers and draw tapered rays using dense fine gold-glitter gel.
- Connect selected motifs with a restrained scattering of tiny gold particles.
- Cure or dry completely and protect the artwork with a glossy top coat.
19. Daisy Nails With Glitter Centers
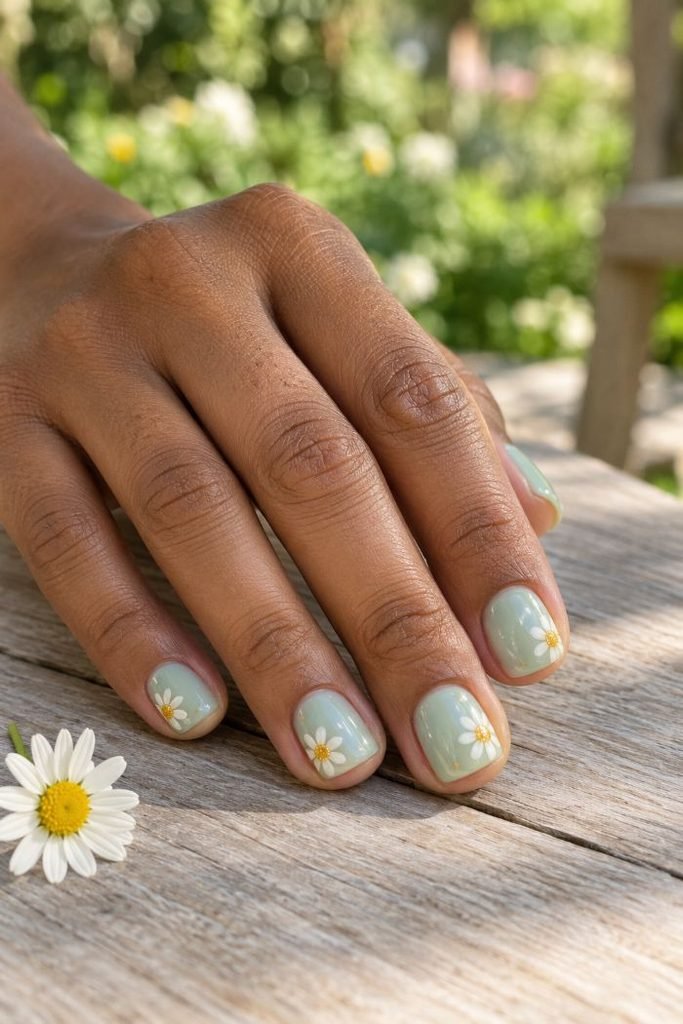
Short square nails have a translucent mint wash with small white daisies placed near alternating corners. Every flower is built from five rounded petals surrounding a concentrated yellow-gold glitter center. A few loose gold particles sit close to two flowers, but the remaining surface stays clear enough for the soft green base to dominate.
Using glitter only at the flower centers gives a familiar spring motif one precise reflective detail. The square shape provides orderly corners for placement, while the translucent base prevents the white petals from looking heavy on short nails. This is manageable at home with a dotting tool and dense glitter polish; loose particles would be harder to keep inside such small circles. Limit each nail to one flower or a partial bloom so the manicure does not become a crowded all-over floral print.
How to Apply
- Apply a translucent mint wash to prepared short square nails.
- Form small corner daisies with five white dots or short rounded strokes.
- Place dense yellow-gold glitter at each center and add a few restrained nearby particles.
- Allow the details to set before brushing on a glossy top coat.
20. Tortoiseshell Nails With Gold Glitter Flecks
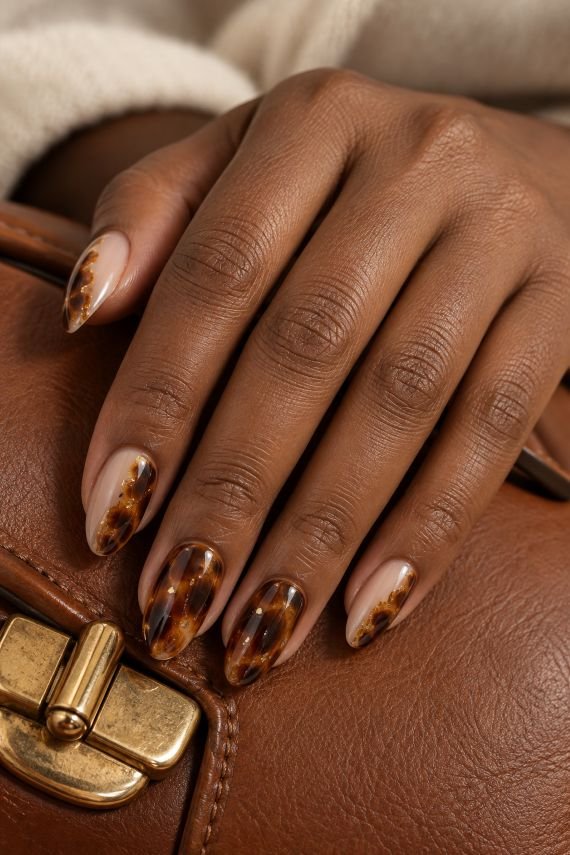
Medium almond nails layer translucent amber, caramel, and deep brown into irregular tortoiseshell patches. Small warm-gold glitter flecks appear between selected layers, so some pieces look sharp while others seem softened beneath tinted polish. Two nails remain mostly honey-colored with only a side cluster of brown and gold, preventing the pattern from becoming uniformly dark.
Gold works as part of the tortoiseshell rather than a decoration placed on top, bringing light to the brown palette without disrupting its organic depth. The combination coordinates easily with leather, denim, cream, olive, and the richer shades found in chocolate brown nails. Blooming gel can diffuse the patches, but a lacquer version is possible with thin translucent coats. Do not outline every brown area; imperfect, partially overlapping edges make the pattern convincing.
How to Apply
- Apply a translucent honey-amber base to medium almond nails.
- Layer irregular caramel and deep-brown patches, allowing some edges to diffuse.
- Place sparse warm-gold glitter flecks between selected translucent layers.
- Add a final amber glaze and seal the pattern with a glossy top coat.
21. Encapsulated Silver Glitter-Shard Coffin Nails
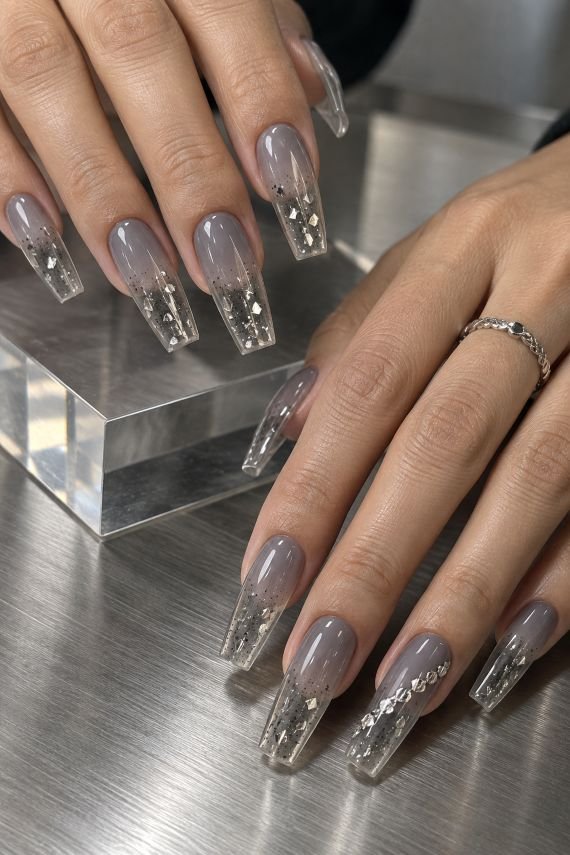
Long coffin nails combine sheer smoky nail beds with transparent tips holding angular silver glitter shards and fine graphite particles. The shards point in different directions but become sparser near the sidewalls, leaving clear windows around the structure. One nail contains a narrow diagonal trail instead of a full tip composition, adding variation without introducing another color.
These are true salon extensions: the reflective pieces must be encapsulated inside clear builder products, not attached loosely to the finished surface. The straight edges of coffin nail designs complement the angular shards, while the transparent gaps prevent the length from looking too dense. Ask for thin nail-safe glitter pieces rather than sharp craft material. Proper architecture, a balanced apex, and a smooth underside matter as much as the top-view arrangement.
How to Apply
- Build clear coffin extensions over softly smoky sheer nail beds.
- Position thin silver glitter shards and fine graphite particles inside the transparent tips.
- Preserve clear sidewall windows and create one narrow diagonal accent trail.
- Encapsulate, refine the structure, and apply a crystal-clear glossy top coat.
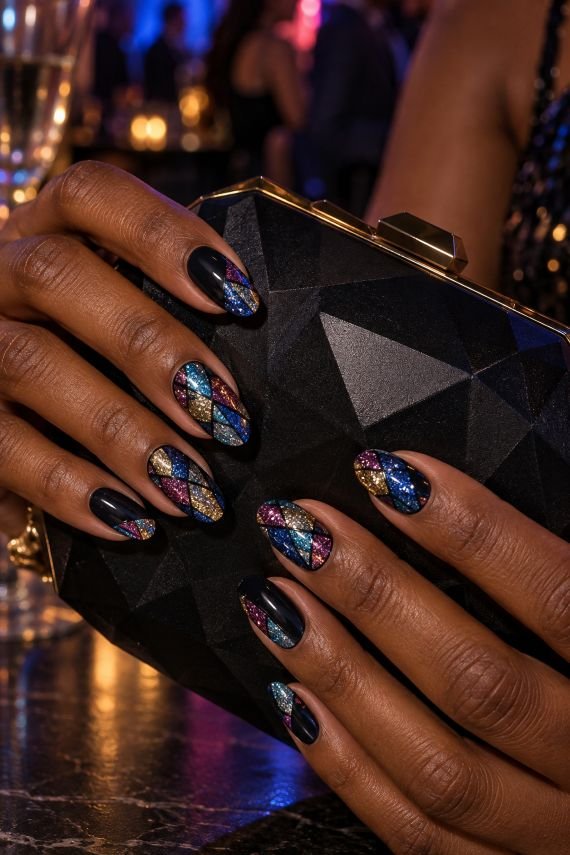
22. Midnight Disco Glitter Mosaic Nails
Long oval nails use an inky midnight base divided into irregular mosaic sections of silver, electric blue, magenta, and antique-gold glitter. Thin black channels separate the colors, and the particle size changes subtly between sections, giving the surface the fractured reflection of a disco ball. Two nails carry only one mosaic corner so the full-hand view retains areas of darkness.
This is the collection’s maximalist finish, but its repeated black outlines keep four glitter colors from merging into visual noise. It belongs at parties, concerts, birthdays, or festive dinners and can replace predictable red-and-gold holiday nail ideas. Because the design contains several dense products, plan the mosaic first and work in thin sections. Custom press-ons are a sensible alternative when the layout is wanted for one event rather than several weeks of wear.
How to Apply
- Paint long oval nails with an opaque inky-midnight base.
- Map irregular mosaic sections while preserving thin black channels between them.
- Fill the sections with silver, electric-blue, magenta, and antique-gold glitter.
- Level the finished surface and seal it with a high-gloss top coat.
How to Choose Fine, Chunky, Holographic, or Reflective Glitter
The type of particle is the key to choosing which glitter is best for an application. The micro-glitter provides even distribution, precision, and gradient effects and can be used in French tips or nude manicure. The chunky hexagons, circles, and shards will stay visible and therefore require more spacing and encapsulation. Holographic glitter gives a unique rainbow effect in bright light, while iridescent particles change their look depending on the base and angle of view. The reflective glitter has a rather modest look in diffused light but becomes notably brighter when hit by direct light or camera flash.
Pick up the finish based on the nail design you choose, not only on the most colorful photo of the product. Fine glitter tends to work better on short natural nails; larger glitter needs wider nail beds or clear extensions. Be sure to pick up the glitter that is marked as cosmetic or nail polish glitter. Do not substitute the craft glitter even if it seems to have a right color.
How to Apply Glitter Without a Thick, Uneven Finish
Begin with a smooth base and decide where the glitter should be dense before opening the product. For a gradient, apply glitter to a cosmetic sponge so excess clear base is absorbed, then press the particles onto the nail in controlled layers. For lines and small motifs, a pre-mixed glitter gel or lacquer gives more accuracy than loose pieces. Larger nail-safe particles can be placed individually with a wax pencil or detail tool while the compatible layer remains tacky.
Do not keep adding glitter to correct a poor outline; clean the boundary and rebuild only the affected area. Most designs need a leveling top coat or clear encapsulation to prevent a gritty surface, exposed corners, and fabric snagging. Inspect the side profile before sealing the free edge because excess bulk is harder to disguise from that angle. Sugar-glitter nails are the exception: their intentionally textured accents should not receive the same smoothing coat.
Can Glitter Nails Work on Short Natural Nails?
Short nails can carry glitter successfully when the placement respects the available surface. Micro-French lines, sidewall curves, cuticle fades, tiny floral centers, and one controlled accent nail add reflection without visually shortening the nail bed. Round and oval shapes complement scattered particles, while the clean free edge of short square nails makes precise glitter tips easier to position. A translucent base also preserves depth, which is why many trending nude nail shades work well beneath champagne, silver, or rose-gold sparkle.
Avoid forcing several large glitter pieces onto every short nail. Chunky particles need clear space around them, and overcrowding can make the surface appear bulky even when it feels smooth. If the reference was created on extensions, reduce the motif rather than compressing the entire composition. One starburst, corner flower, narrow gradient, or framed accent usually translates more convincingly than a miniature copy of a long sculpted set.
How to Remove Glitter Polish Without Scraping
Glitter lacquer is difficult to wipe since the remover has to go around many closely packed particles. Soak the pad with appropriate nail-polish remover then press the pad onto the nail, waiting for it to work on the layers of glitter before pulling the pad away. The tight wrapping of each pad will ensure the polish stays in touch with it. Rather than scraping glitter off the natural nail using metal tools, reapply the procedure if needed.
Gel, builder gel, and acrylic glitter manicures require the removal method specified for that product system. Some material must be filed down before soaking, while other products are not designed to soak off at all. If the structure or product is unknown, return to the nail technician rather than guessing. Never peel cured material from the nail plate; it can take surface layers with it. After removal, wash the hands, dry them thoroughly, and apply cuticle oil or hand cream to replace lost moisture.
Final Thoughts
The most convincing glitter nails are controlled rather than uniformly overloaded. A silver micro-tip works because the line remains narrow; ruby jelly looks dimensional because particles sit at different depths; a chunky clear tip succeeds because visible space separates the shapes. Particle size, base opacity, placement, and surface finish should support one another before more decoration is considered.
Select the manicure based on how it is going to be used. Champagne or glitter can switch freely from workplace to evening parties, whereas reflective pigment, holographic panelling, crushed emerald, and disco mosaics have been created for harsh lighting and intentional style. Shorter nails should have an edited placement, but extensions are more justified if there is a need for room in the process of encapsulation or multilevel construction. Whatever style you choose to keep, bring your whole hand example to the salon and pay attention to its proportion as much as to its shimmer. Glitter draws eyes like a magnet, so irregularities will be spotted at once.