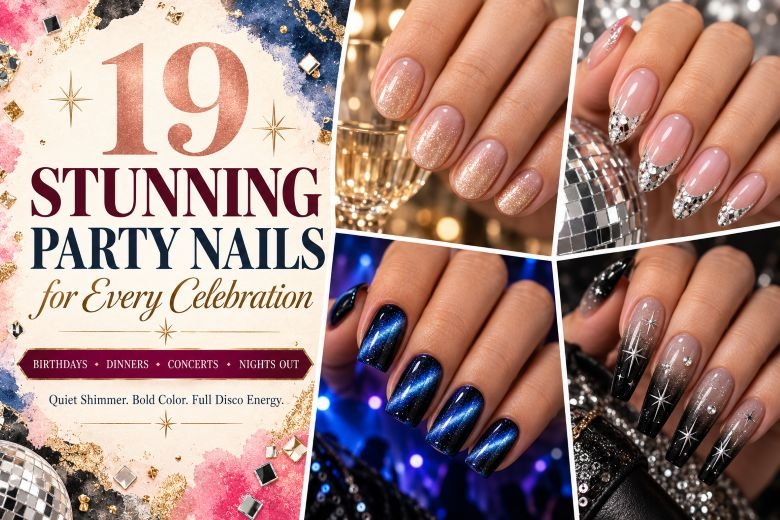
19 Stunning Party Nails for Every Celebration
There is more to a party manicure than being flashy in a close up. It should make sense with the outfit, lighting, venue setting, and the amount of attention that your hands will get during the evening. Metallic edges will do just fine for some drinks after work; a mirror mosaic or a crystal bow goes with an evening where being subtle is not on the menu.
These party nails cover options for birthdays, formal dinners, bachelorette and garden parties, concerts, graduation ceremonies, holiday get-togethers, and spur-of-the-moment nights out. You can find short natural nails, longer salon-style nails, understated finishes, and designs meant for the disco ball effect. Recent trend roundups have also pointed out the fact that the traditional party manicure does not consist of glitter on all fingernails: Who What Wear offers three approaches to party manicures (minimalist, embellished, and artistic), and InStyle talks about choosing your celebration manicure depending on your style.
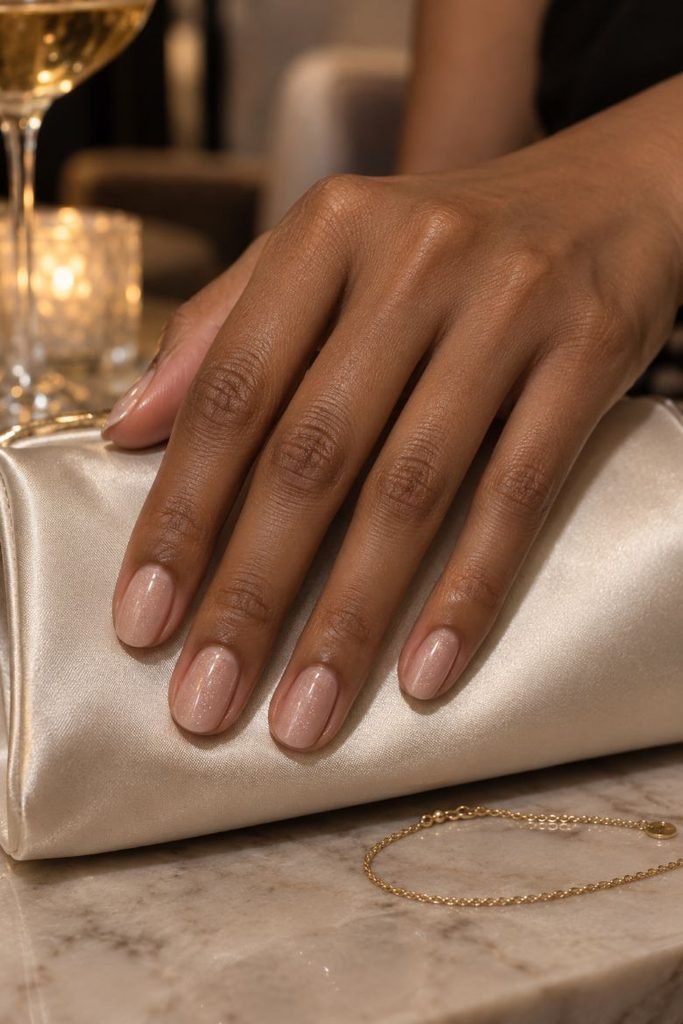
1. Champagne Micro-Shimmer Oval Nails
A touch of champagne shimmer in a see-through beige-pink base covers short oval-shaped nails. The reflective particles appear brightest closest to the cuticles and slightly more radiant over the center due to catching light while moving the fingers. No glitter accent or special nail is required as the whole manicure looks interesting due to the subtle glow, and you still can see the natural nail through the translucent base.
Minimalism is what this manicure stands for. Such manicures can be worn from the office hours till evening parties – an engagement celebration or birthday party – and will not look like a themed look. Warm shimmers will perfectly go along with gold accessories, ivory satin, camel clothing, and black dresses, but not as loudly as metallic polishes. Readers interested in similar nail looks can check out such classy nail designs. Paint thin coats only; otherwise, the translucent base may become too murky.
How to Apply
- Shape the nails into short ovals and apply a smoothing base coat.
- Add one thin layer of translucent beige-pink polish.
- Apply champagne micro-shimmer evenly, concentrating a little more through each center.
- Finish with a clear high-gloss top coat and seal the free edges.
2. Silver Disco French Tips
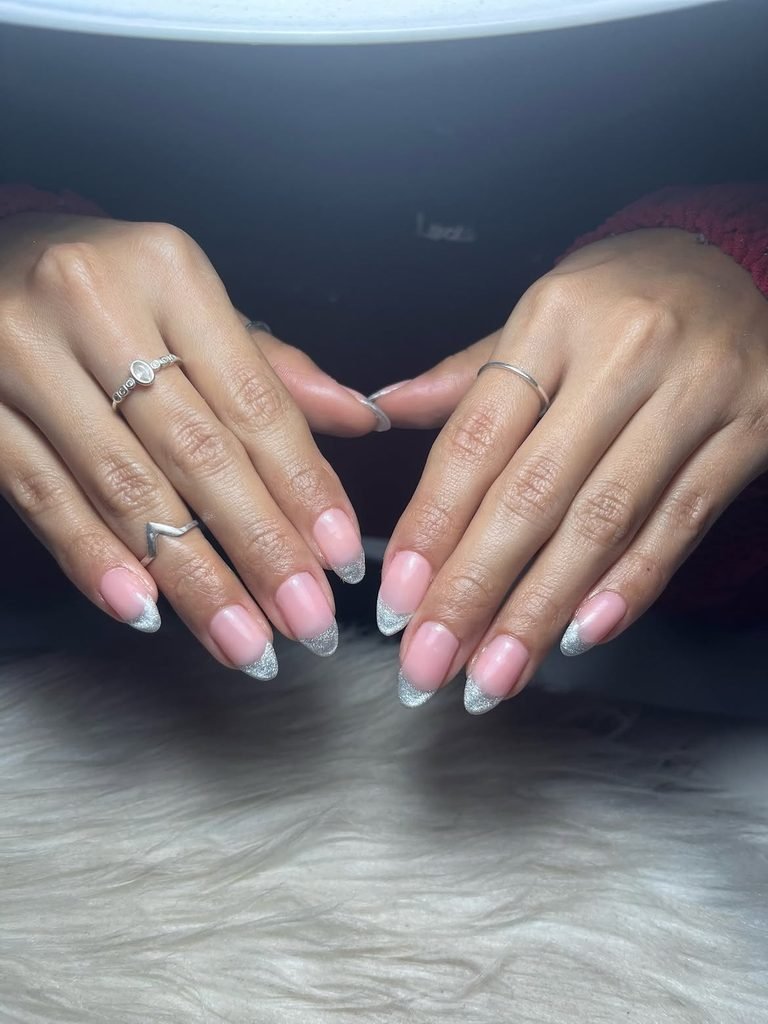
Instead of a solid white edge, medium almond nails wear curved French tips packed with fine silver glitter and sparse mirror-like pieces. The sparkle fades slightly toward the smile line, softening the border against a sheer cool-pink base. One nail carries a slim silver arc near the cuticle, echoing the tip without turning the set into symmetrical nail art.
Under low light, the tips read as polished silver; beneath direct light, their mixed particles break into brighter flashes. That shift makes them useful for cocktail parties, dancing, and New Year celebrations without tying the manicure to one season. The almond curve also gives the glitter room to taper elegantly. More interpretations appear in these French tip nail designs. Use a sponge for density, then inspect the side profile before top coat so the free edge does not become visibly thick.
How to Apply
- Apply a sheer cool-pink base to medium almond nails.
- Sponge fine silver glitter across the tips, following a narrow curved smile line.
- Place a few mirror-like particles near the free edges and add one slim cuticle arc.
- Smooth the design with a leveling top coat and cap each tip.
3. Black Cherry Nails With Gold Half-Moons
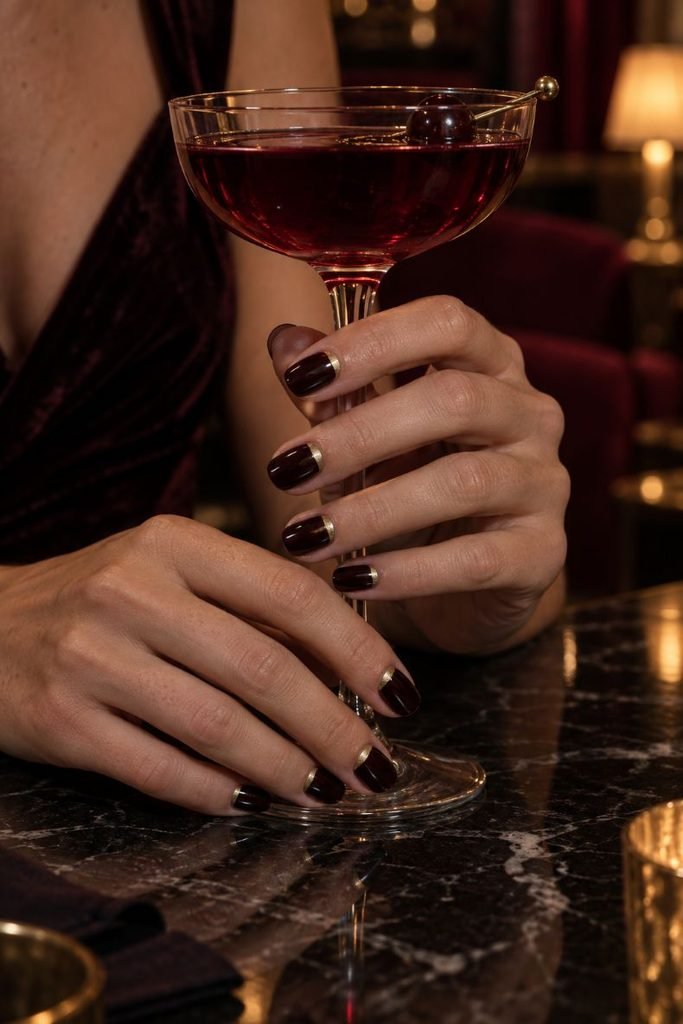
Deep black-cherry polish covers the short squoval nails in an almost liquid finish. Each cuticle has a thin warm-gold half-moon that follows the natural shape; the half-moons switch between foil and gold lacquer every time. Since the red can be seen only where the light hits the nail tips, this manicure will shift its look from burgundy, oxblood to black depending on the time of night.
It is quite contrasting for a formal event, but nothing to snag on clothing or hair. This short nail shape ensures the darkness is intentional and not intimidating. Wear it with black slip dress, cream suit, deep green velvet or gold accessories; the manicure doesn’t have to match the clothing at all. There are guides to help create this look at home, but the foil placement requires some patience. Make sure you leave space around every cuticle; any metallic color highlights any imperfections.
How to Apply
- Apply two thin coats of glossy black-cherry polish to short squoval nails.
- Position curved guides just above the cuticles once the base is fully set.
- Fill alternating half-moons with warm-gold lacquer or small smooth foil pieces.
- Remove the guides carefully and finish with a deep glossy top coat.
4. Cobalt Velvet Cat-Eye Nails
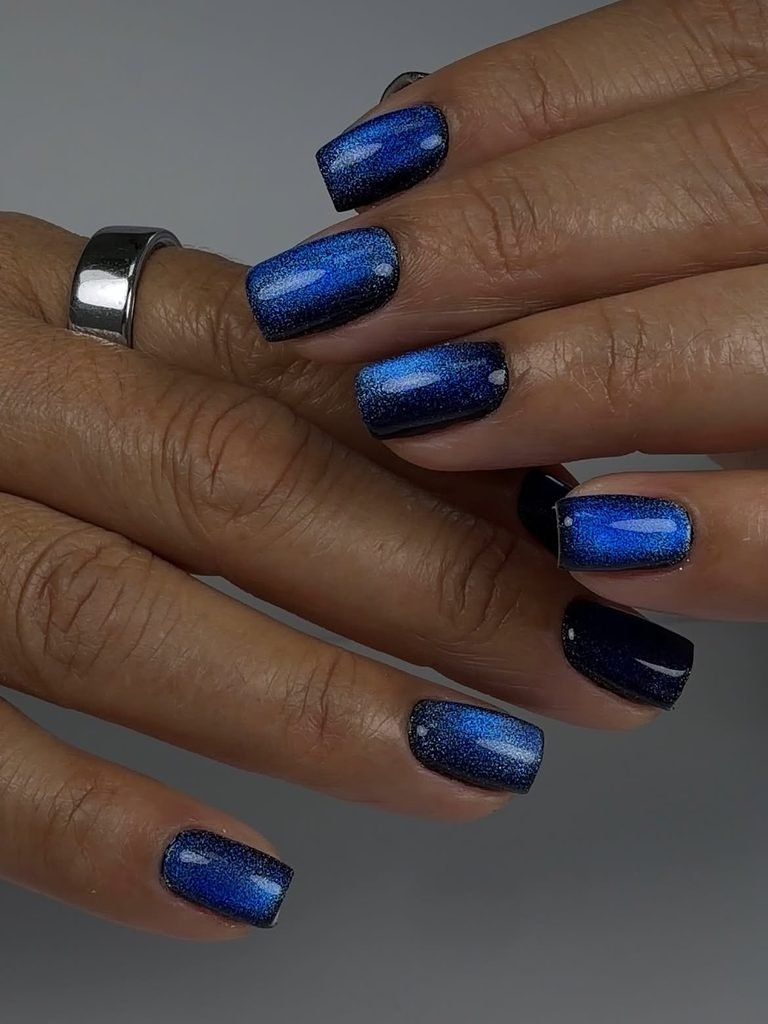
Movement, not extra artwork, gives these medium squarenails their party energy. A blackened cobalt base holds a diagonal magnetic beam that shifts from electric blue to icy silver as the hand turns. The highlight sits at a different angle on two accent nails, preventing the full set from looking mechanically repeated while preserving the same saturated color story.
The velvet cat-eye effect earns its place at concerts, rooftop drinks, winter dinners, and any room with changing light. It has more depth than flat blue glitter and needs no crystals to look finished. Similar magnetic treatments appear in these cat-eye nail ideas. This technique is simplest in a salon: the pigment can drift before curing, so each nail should be magnetized and set separately. At home, test the magnet direction on a swatch rather than discovering the wrong angle halfway through the manicure.
How to Apply
- Cover medium square nails with a thin blackened-cobalt base and cure as directed.
- Apply one layer of compatible blue magnetic gel to a single nail.
- Pull the pigment into a diagonal beam, vary two accent angles, and cure immediately.
- Repeat nail by nail before sealing the set with a glossy top coat.
5. Hot Pink Aura Star Nails
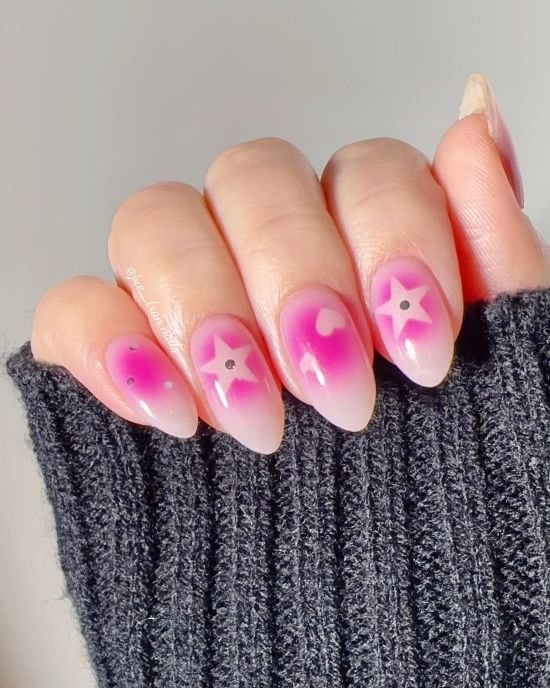
Hot pink does not cover these medium almond nails from edge to edge. Instead, a diffused fuchsia center glows through a translucent blush base and fades before reaching the sidewalls. Tiny chrome stars appear on three nails, each positioned outside the brightest part of the aura. The stars vary slightly in size, adding movement without turning the set into a scattered sticker collage.
For a birthday dinner or dance party, the saturated center delivers color while the transparent border keeps it easy to style with silver, black, white, denim, or a contrasting dress. A salon airbrush creates the cleanest halo, though a small sponge can produce a softer DIY interpretation. If sparkle matters more than the aura technique, these pink glitter nails offer a separate direction. Resist adding stars to every finger; the empty nails make the decorated ones feel intentional.
How to Apply
- Apply a translucent blush base to medium almond nails.
- Airbrush or sponge fuchsia into each center, keeping the sidewalls softly transparent.
- Place tiny silver-chrome stars on three nails outside the brightest aura areas.
- Seal the gradients and flat decorations beneath a smooth glossy top coat.
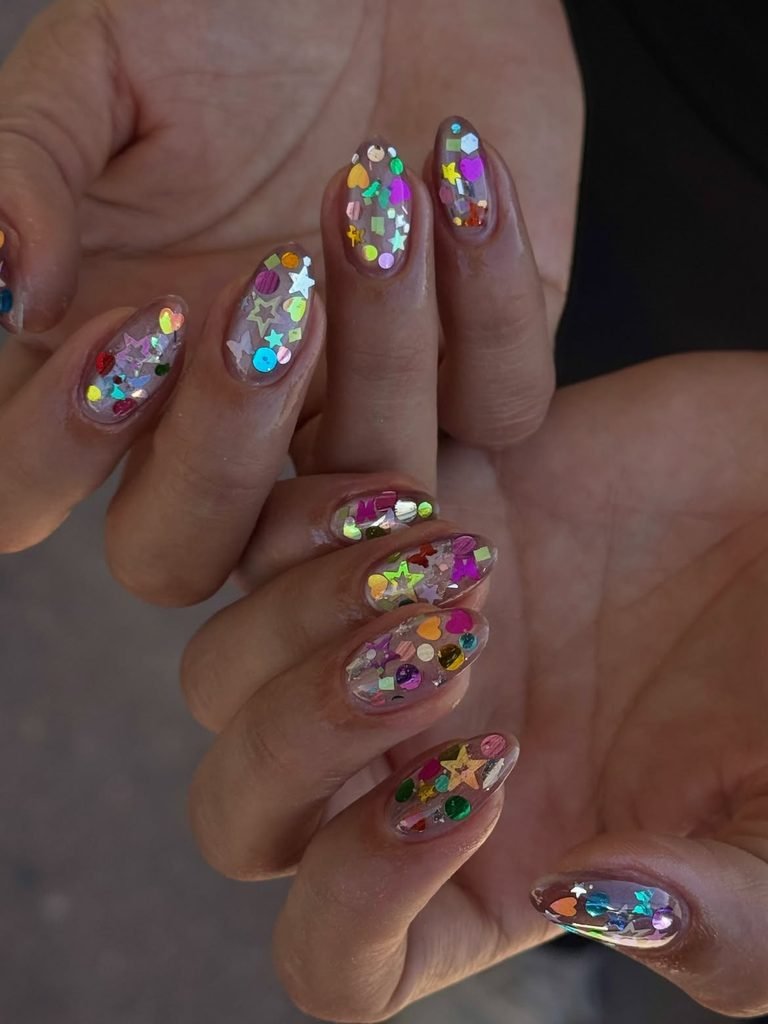
6. Multicolor Confetti Jelly Nails
The clear jelly base on these short round nails contains small circles, stars, and hexagons in coral, turquoise, yellow, lilac, and metallic silver. Some pieces sit beneath a second transparent layer while others appear closer to the surface, creating depth without physical texture. Distribution stays lighter near the cuticles and denser toward the tips, like confetti settling in glass.
This is celebratory in a literal sense, yet the controlled scale keeps it useful beyond one birthday. It can suit a festival, graduation, house party, or New Year’s Eve, particularly when the outfit itself is simple. The dedicated guide to confetti nails offers more variations, but here the design functions as one playful option within a broader party edit. Use only thin, nail-safe pieces and stop while clear space remains; crowding every gap will turn five crisp colors into visual static.
How to Apply
- Apply a thin transparent jelly base to short round nails.
- Place small nail-safe circles, stars, and hexagons more densely toward the tips.
- Cover selected pieces with another clear layer, then add a few nearer the surface.
- Encapsulate all edges with a leveling glossy top coat.
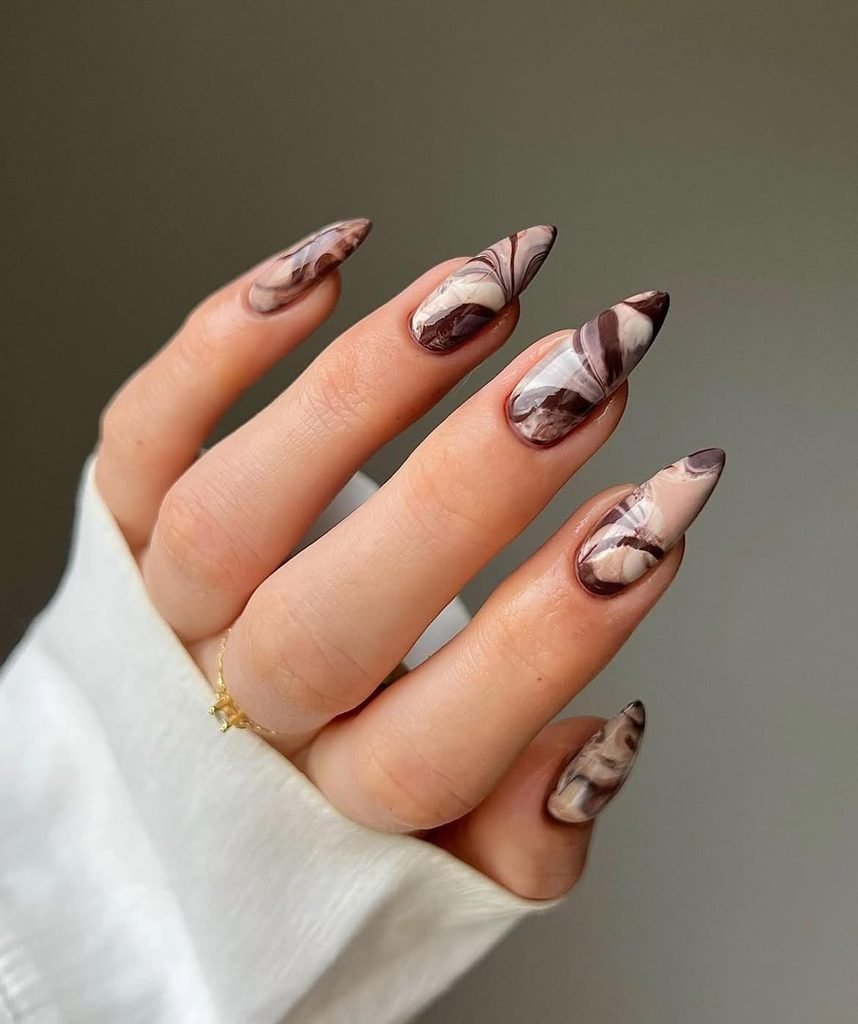
7. Espresso Martini Swirl Nails
Espresso brown moves through translucent mocha and creamy beige on medium oval nails, forming loose swirls that resemble crema turning through a fresh drink. Fine gold lines trace only a few curves, and one accent nail carries a miniature martini-glass outline near the sidewall. The art stays abstract across the other fingers, so the cocktail reference feels discovered rather than announced.
Brown may not be the obvious party color, which is exactly why this set feels considered at a restaurant or cocktail bar. Its warmth sits beautifully beside black, ivory, burgundy, leopard print, and gold jewelry, while the glossy layers give more depth than a flat neutral. These chocolate brown nails offer related color inspiration. For the marble, stop swirling before espresso and cream blend into one muddy tan; visible separation creates the drink-like effect.
How to Apply
- Apply a translucent mocha base to medium oval nails.
- Float espresso-brown and creamy-beige curves through a blooming or still-workable layer.
- Trace selected swirls with tiny martini-glass outline.
- Cure or dry without overworking the pattern, then add glossy top coat.
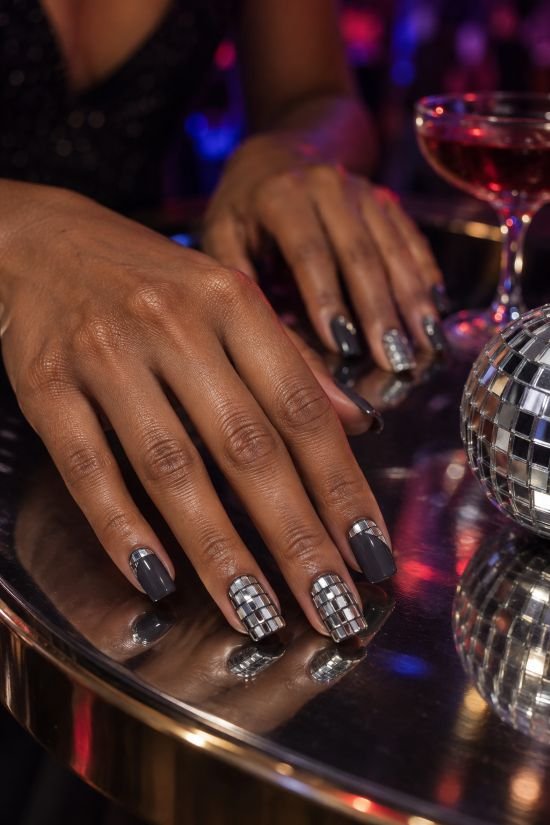
8. Mirrorball Chrome Mosaic Nails
A disco ball becomes a graphic manicure on medium square nails. Small silver-chrome tiles cover two accents in staggered rows, separated by hairline charcoal channels. The remaining nails are glossy graphite with a tiled crescent at one corner, giving the full set repeated reflection without duplicating the mosaic across all ten nails. Each tile is flat and smooth beneath clear gel.
Chrome responds sharply to directional and colored light, so this design changes constantly on a dance floor. Square nails support the grid, while the dark negative channels stop the silver from reading as one uninterrupted mirror. The technique is more exacting than it appears: isolated chrome needs a compatible surface, and messy boundaries will blur the tile pattern. A nail artist can keep the geometry crisp; custom press-ons are another sensible choice when the manicure is meant for a single weekend.
How to Apply
- Paint medium square nails glossy graphite and cure or dry completely.
- Map staggered mosaic tiles on two accents and smaller corner crescents elsewhere.
- Apply silver chrome only inside the prepared tile shapes, preserving charcoal channels.
- Remove loose pigment and seal the flat mosaic with compatible clear top coat.
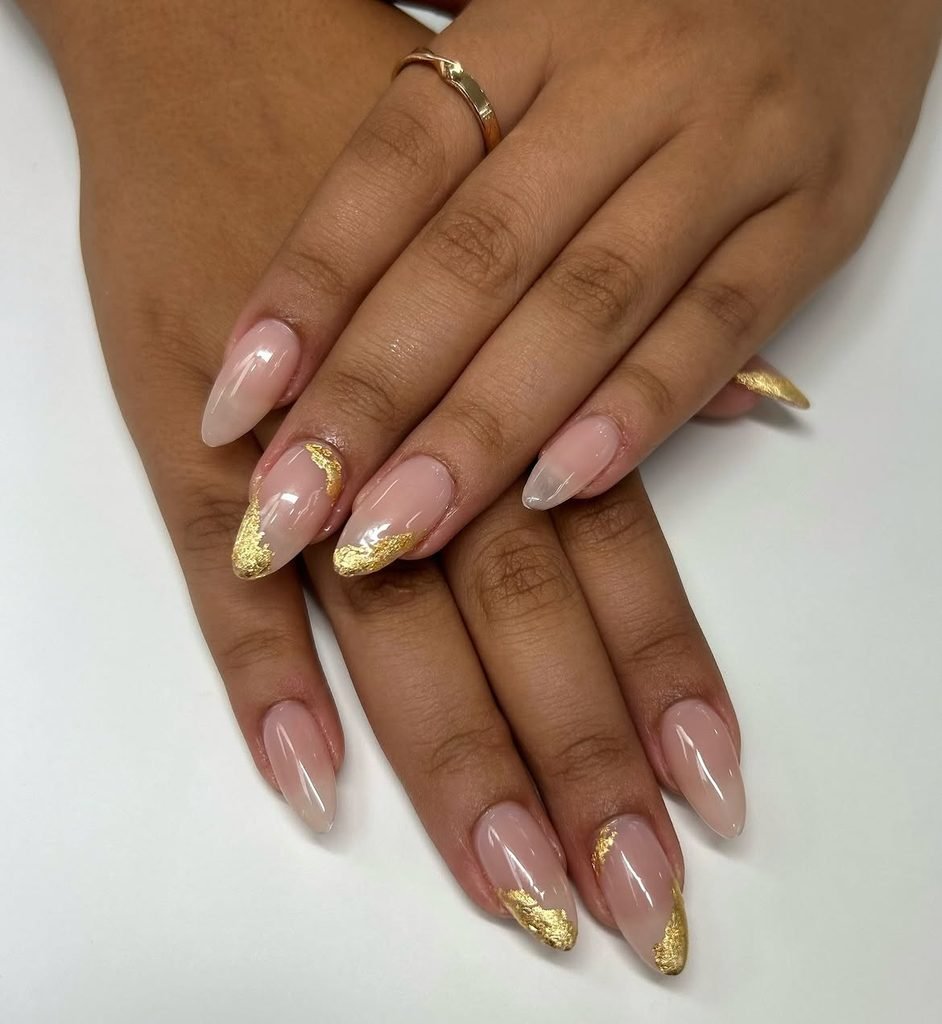
9. Gold Foil Negative-Space Nails
Not every party manicure needs a colored base. Almond nails remain visible beneath clear pink-beige polish, with torn pieces of warm gold foil climbing one sidewall in an uneven diagonal. Several fragments stop before the tip, and each nail leaves at least half of its surface bare. Fine black dots appear between selected pieces, adding definition without turning the foil into a heavy border.
The open base makes these gold party nails especially adaptable: they can accompany a printed dress, black tailoring, a vivid jewel tone, or an outfit already covered in texture. Almond nails gain direction from the diagonal without needing extensions. Foil is light enough for home use, but uncontrolled fragments can look accidental; tear them into varied yet deliberate sizes before applying anything. Press each piece completely flat, because folded corners remain visible after top coat and can catch on fabric.
How to Apply
- Apply a transparent pink-beige base to almond nails.
- Tear warm gold nail foil into small irregular pieces before beginning placement.
- Press the fragments along one diagonal sidewall and add sparse fine black dots.
- Flatten every edge and encapsulate the design beneath glossy top coat.
10. Crystal Bow Accent Nails
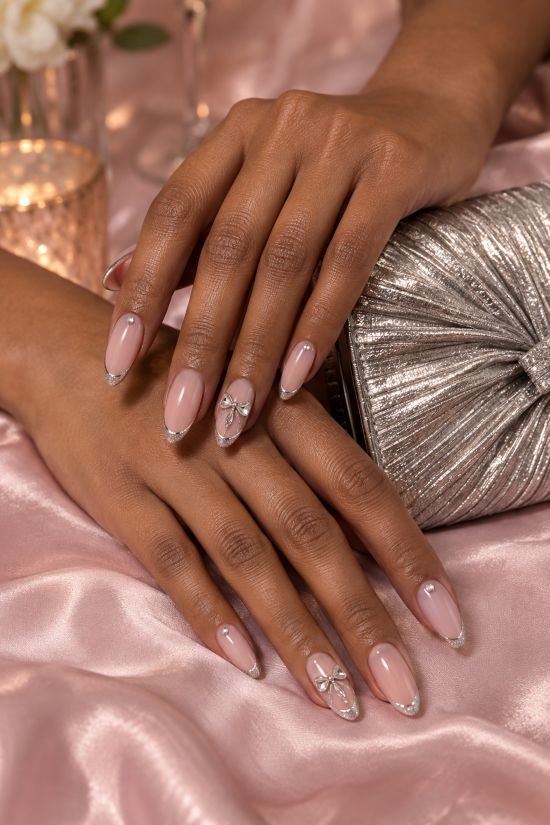
One low crystal bow sits slightly off-center on each ring-finger nail, built from two marquise stones, a small round center, and short tails of silver caviar beads. Long almond nails carry a translucent ballet-pink base with narrow silver micro-tips. The other fingers have only one clear crystal near alternating cuticles, allowing the bow accents to remain the obvious focal point.
There is a celebratory sweetness here, but the cool monochrome materials keep it away from novelty territory. It suits a bachelorette dinner, engagement party, milestone birthday, or any outfit with satin, bows, or sculptural jewelry. Raised embellishments need more than top coat for attachment; use dedicated gem adhesive or have the bows constructed on custom press-ons. Check the height from the side before committing. A large premade charm may photograph well yet feel awkward if it overwhelms the nail’s width.
How to Apply
- Apply a translucent ballet-pink base and narrow silver micro-tips to long almond nails.
- Set dedicated gem adhesive slightly off-center on both ring-finger nails.
- Build each bow from two marquise crystals, one round center, and short silver-bead tails.
- Add single cuticle crystals elsewhere and reinforce every embellishment base.
11. White Pearl Chrome Party Nails
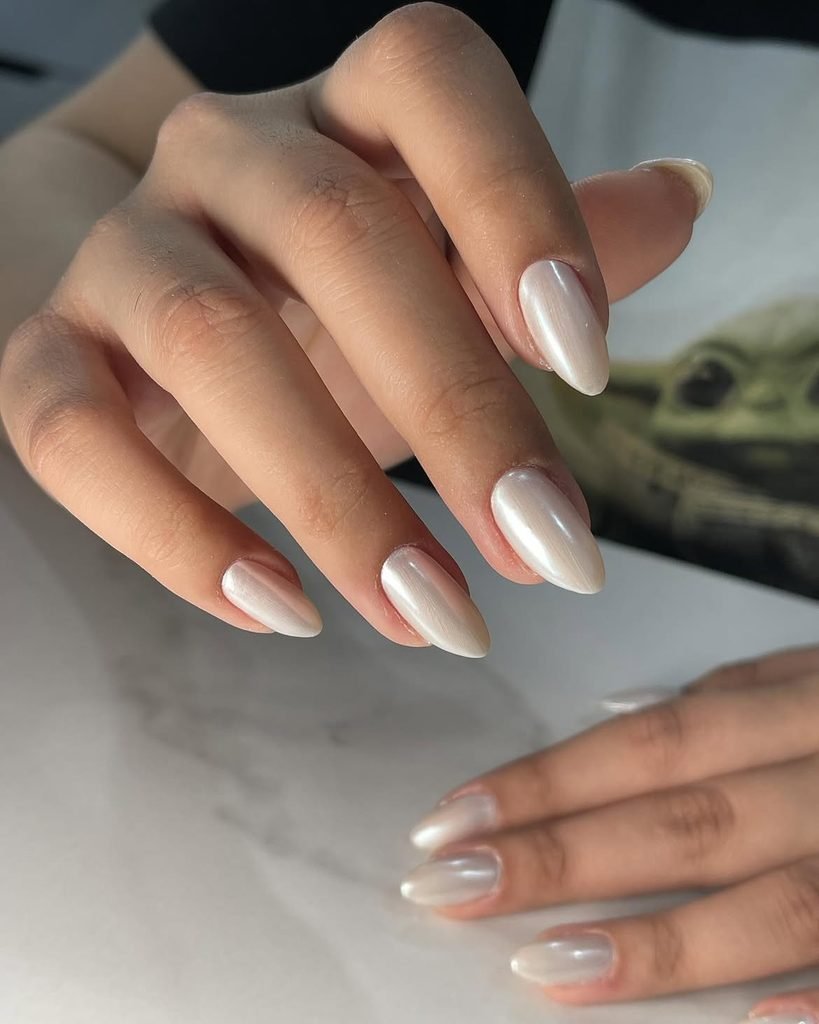
For an all-white party, nails are done in medium almond coated in sheer ivory and a very fine layer of pearl chrome polish. The reflection moves gracefully between white, soft pink, and cool silver instead of creating a mirror effect. On the bottom corner of two nails there is a single small silver nail art; otherwise the nails are plain, shiny and have no other artwork on them.
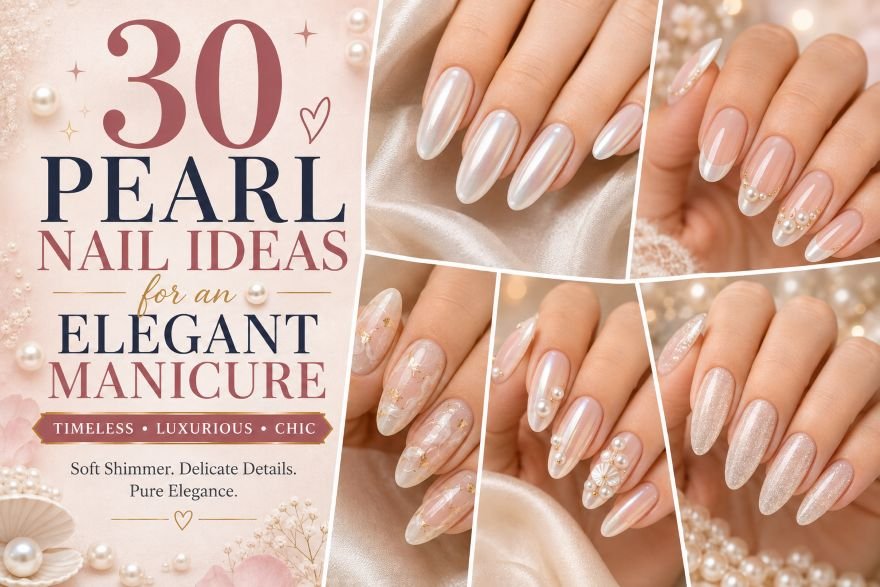
White may be boring in black-and-white photos, but pearl nail designs will give it some depth without using another bright color. This modern and square style will help maintain the effect of brightness throughout the whole evening. Have a look at these pearl nails for more decorated design options. Chrome polish is sensitive to nail flaws and does not require any decoration, but proper preparation.
How to Apply
- Smooth and shape the nails into medium soft almond.
- Apply one or two thin coats of semi-sheer ivory and cure as directed.
- Rub fine pearl chrome over the compatible surface, then add two tiny silver corner studs.
- Remove loose pigment and seal the nails and free edges with a glossy top coat.
12. Garden-Party Floral Tips
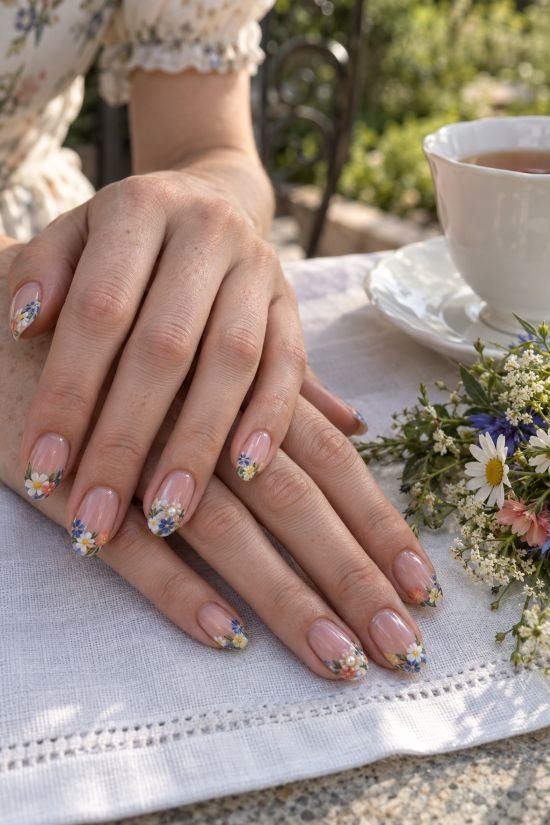
The little flowers are found solely along the free edge of medium oval nails, forming a replacement for a traditional French manicure tip. Cornflower blue, coral, butter yellow, and white petals overlay each other lightly over a transparent rosy base, and narrow sage green leaves stretch towards the sidewalls. There are two little pearl flowers with centers on the nails, whereas all the others have painted centers to avoid a raised surface.
This manicure will suit a garden lunch, a tea party, a bridal shower or an outside birthday party without requiring a floral dress. Nail bed space helps to avoid four colors appearing as too much. More explicit botanical imagery is present in tropical flower nails, but this style remains petite and light. A dotting tool allows creating simple petals at home. If it is hard to do hand painting, it is possible to mix little decals with some hand-painted leaves.
How to Apply
- Apply a clear rosy base to medium oval nails.
- Paint loose flower clusters in cornflower, coral, butter yellow, and white along the tips.
- Add narrow sage leaves and place miniature pearl centers in only two flowers.
- Allow the artwork to set, then seal around the pearls with glossy top coat.
13. Neon Color-Block French Nails
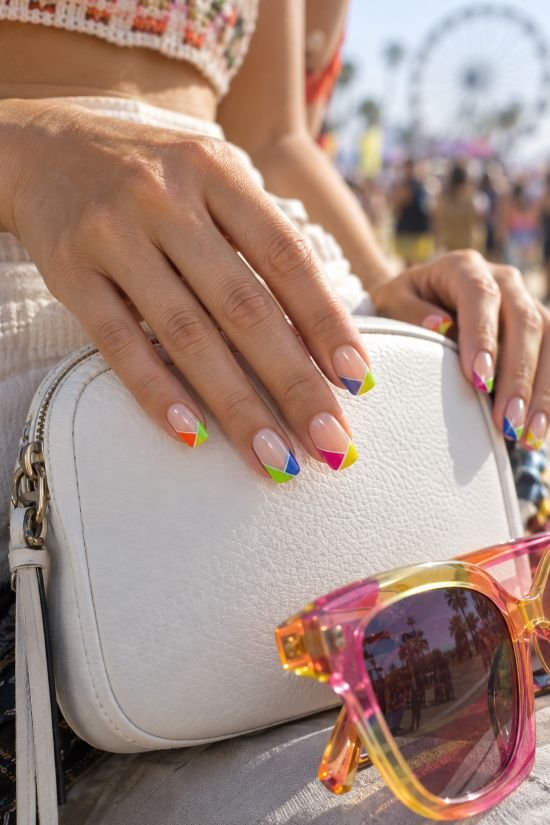
Five colors divide the tips of medium squoval nails into crisp geometric blocks: hot orange, acid green, cobalt, magenta, and electric yellow. Each nail combines two shades separated by a narrow clear channel, while the nail bed stays translucent nude. The blocks vary in width, but every design follows the straight free edge so the set retains one recognizable structure.
This manicure belongs at a festival, pool party, summer birthday, or any celebration where bright accessories already make sense. Color-block tips deliver more impact than tiny motifs and remain readable from a distance. The transparent channels are important; without them, neighboring neon shades can merge into an uneven multicolor band. Striping tape helps at home, provided the base is completely set before it is applied. Choose custom press-ons if you want razor-sharp geometry without painting the non-dominant hand.
How to Apply
- Cover medium squoval nails with a translucent nude base and let it set completely.
- Map two tip blocks per nail, preserving a narrow clear channel between them.
- Fill the sections with varied combinations of orange, green, cobalt, magenta, and yellow.
- Remove guides carefully, refine the edges, and apply glossy top coat.
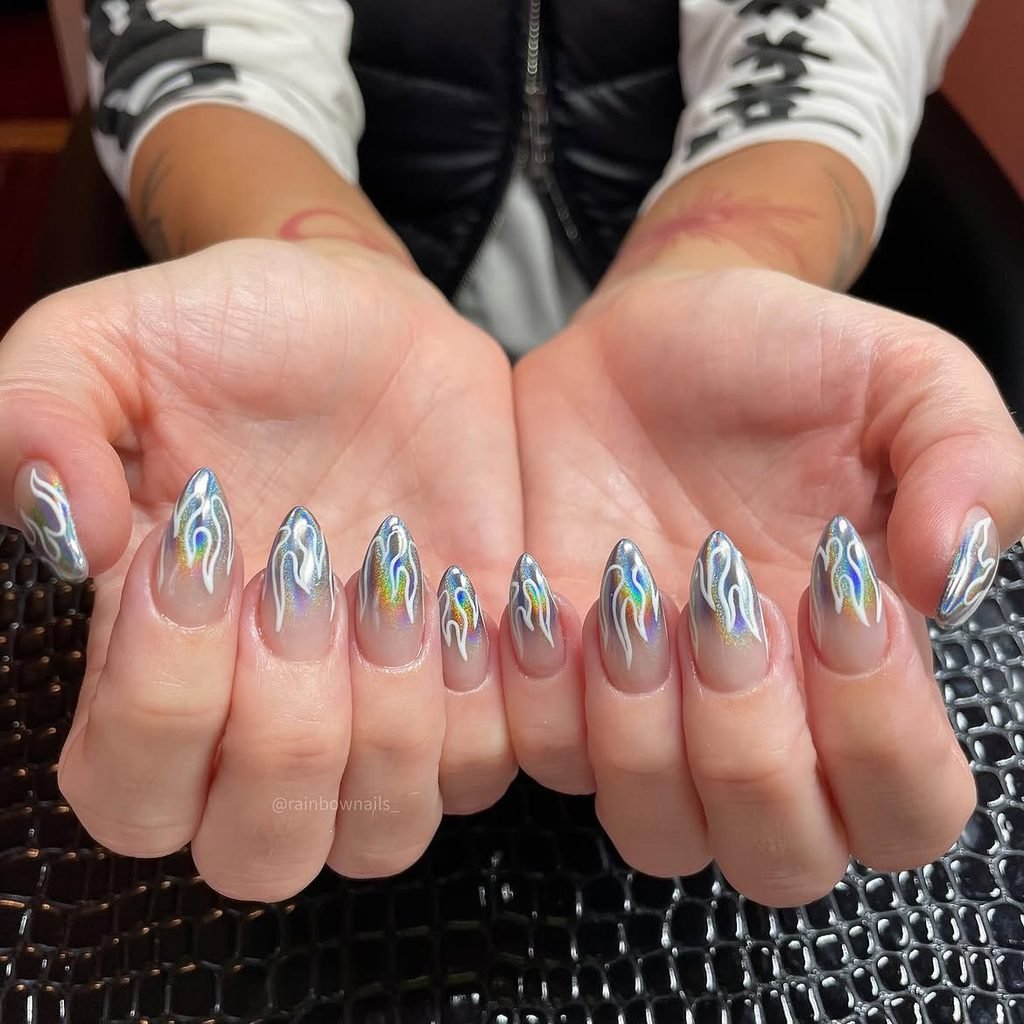
14. Holographic Flame Tips
A smoky translucent base gives long stiletto nails a dark foundation without making them fully opaque. Holographic flames rise from the pointed tips in narrow, asymmetrical shapes, flashing violet, blue, green, and gold under direct light. Fine black outlines sharpen selected curves, while two nails carry only a single flame tongue to break up the repeated pattern.
The stiletto silhouette already has speed and attitude; directing the flames toward each point makes the artwork feel native to the shape. This is concert, club, or late-night birthday territory rather than an understated dinner manicure. Holographic pigment needs a controlled light source to show its full spectrum, so examine references in both direct and diffuse lighting. Flame decals simplify the concept for press-ons, but salon linework will look cleaner when the black borders need to remain pin-thin.
How to Apply
- Apply a smoky translucent base to prepared long stiletto nails.
- Map narrow asymmetrical flame shapes rising from each pointed tip.
- Fill the flames with holographic gel or pigment and trace selected edges in fine black.
- Cure or dry completely, remove loose pigment, and seal with glossy top coat.
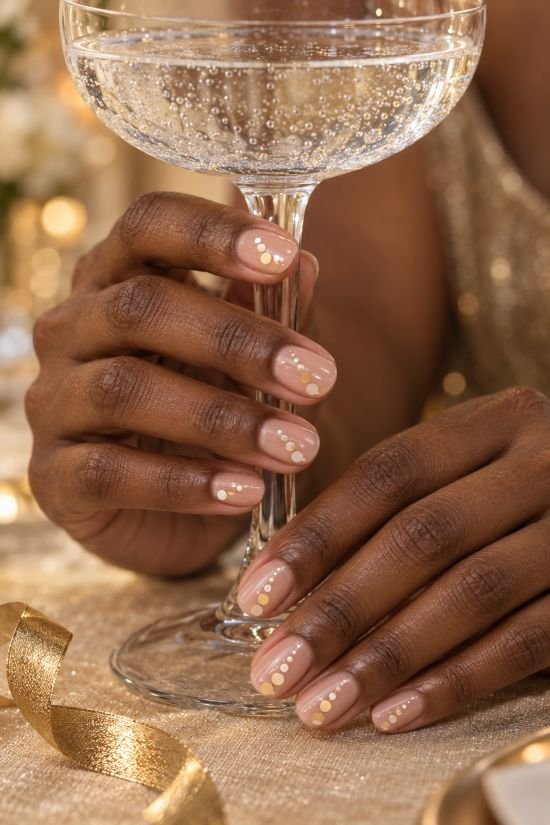
15. Champagne Bubble-Dot Nails
Champagne bubbles become a simple graphic on short oval nails with a sheer peach-nude base. Round dots in pale gold, cream, and translucent white rise diagonally from one lower corner, beginning larger and becoming finer toward the tip. Several dots overlap, but no glitter or literal bottle illustration is added; the changing scale creates the sense of movement.
Because the palette is quiet, the idea can mark a graduation, anniversary, promotion, engagement toast, or milestone birthday without announcing a specific event. It also photographs cleanly beside rings and bracelets. A dotting tool makes the design accessible at home, although the pressure must lighten as the dots become smaller. Practice the sequence on foil first. Equal-sized circles arranged in straight rows will look like polka dots, not rising bubbles, so let the spacing loosen toward the free edge.
How to Apply
- Apply one or two thin coats of sheer peach-nude polish to short oval nails.
- Place several larger pale-gold, cream, and translucent-white dots near one lower corner.
- Continue diagonally toward the tip with progressively smaller dots and wider spacing.
- Let the circles set fully before adding a clear glossy top coat.
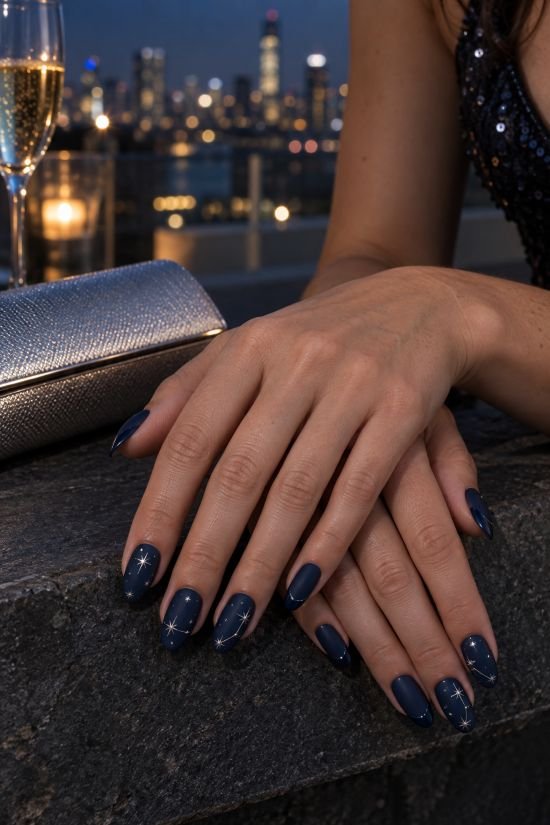
16. Midnight Celestial Party Nails
At first glance, these medium almond nails look like solid midnight blue. Closer light reveals scattered silver stars, tiny navy crystals, and fine constellation lines placed across only three fingers. The remaining nails have glossy blue-black tips over a satin base, creating a subtle finish change that becomes more visible as the hand moves.
Celestial art can become crowded quickly, so the dark open space matters as much as the stars. This version suits rooftop parties, winter birthdays, formal dinners, and New Year gatherings without depending on clock faces or a written year. Anyone drawn to the color can explore additional dark blue nail ideas. Use low-profile crystals and keep them near the nail center rather than the free edge. A mixed satin-and-gloss finish provides enough interest on the undecorated fingers.
How to Apply
- Paint medium almond nails midnight blue and apply a satin finish.
- Draw sparse silver constellations and stars across three selected nails.
- Attach tiny navy crystals at a few central points without crowding the artwork.
- Add glossy blue-black tips to the plain nails and reinforce around the crystal bases.
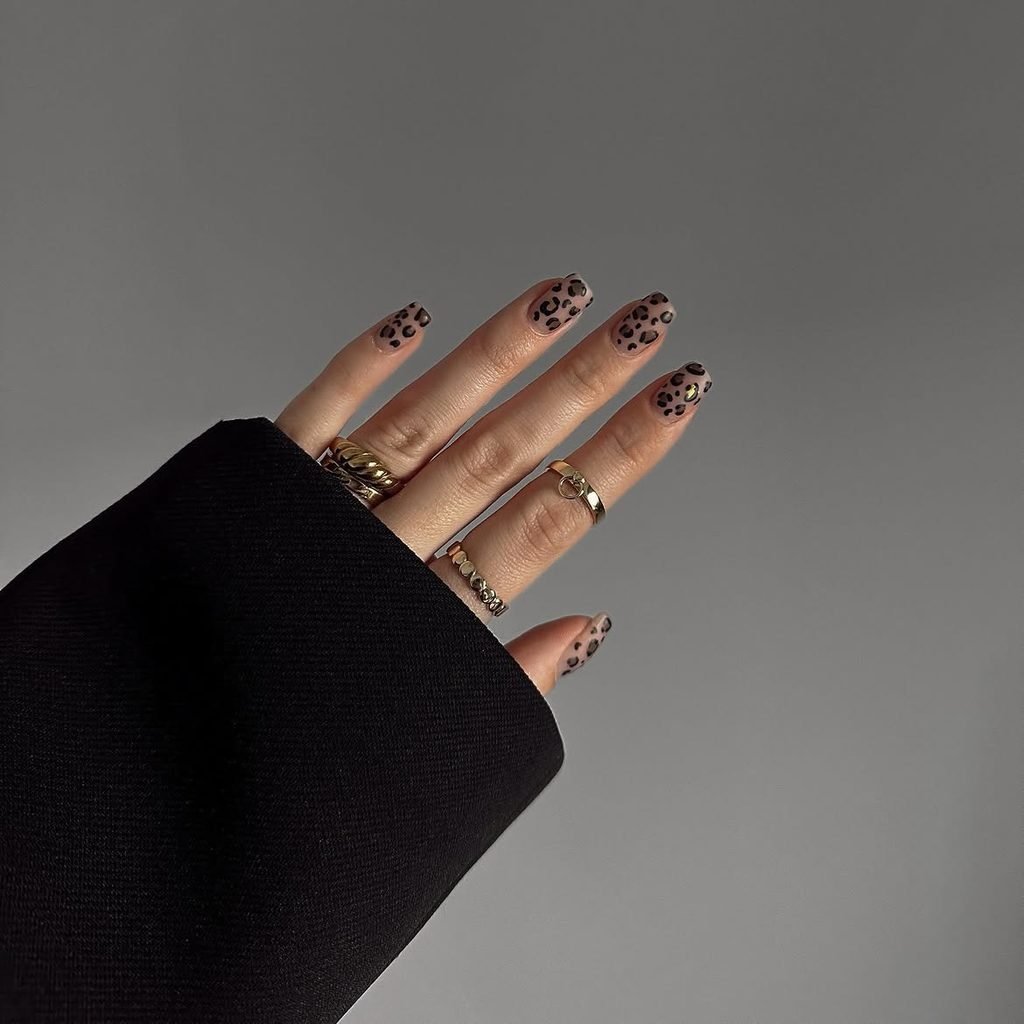
17. Metallic Leopard Accent Nails
Animal print takes a sharper evening turn on medium square nails. Three fingers are lacquered glossy black, while two sheer taupe accents carry irregular bronze spots edged selectively in liquid gold. The markings stay broad and widely spaced, with visible neutral base between them. One black nail repeats a single metallic spot near the cuticle to connect the two finishes.
The pattern brings texture to a simple black outfit without asking the jewelry, bag, and dress to compete for attention. Bronze warms the taupe base; gold supplies the small flashes needed under restaurant or party lighting. Freehand imperfection is an advantage here, making this more approachable than exact geometric art. Use a dotting tool to place uneven centers and a fine brush for incomplete outlines. If every spot becomes the same size or receives a full gold ring, the print will look stamped rather than organic.
How to Apply
- Paint three medium square nails glossy black and keep two accents sheer taupe.
- Add irregular, widely spaced bronze spots to the taupe nails.
- Trace only portions of the spots with liquid gold and place one cuticle mark on a black nail.
- Allow the metallic details to set before applying glossy top coat.
18. Jewel-Tone Skittle Nails
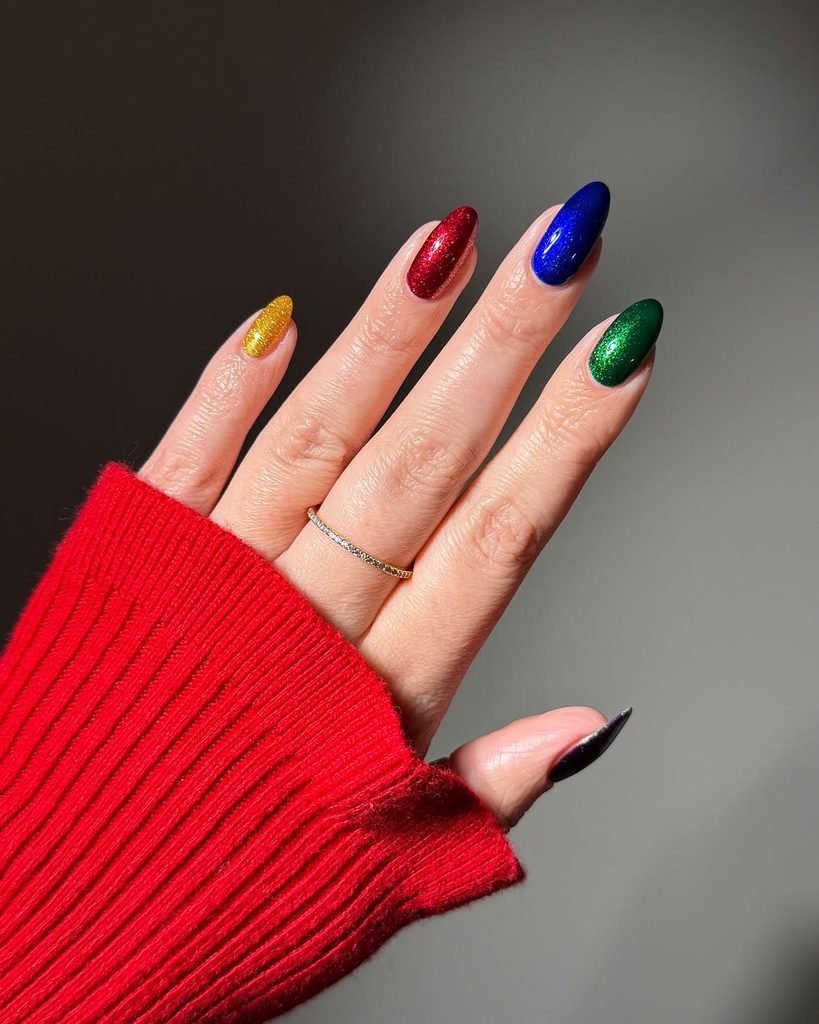
Ruby, emerald, sapphire, amethyst, and smoky topaz each take one short squoval nail. The colors are translucent jellies rather than opaque creams, creating internal depth beneath a glassy surface. A tiny warm-gold dot sits near alternating sidewalls, repeated at the same height so the five-color palette still feels orderly. No accent finger receives extra decoration.
Jewel tones carry their own evening weight, which makes this a useful choice when glitter, gems, or intricate art would fight with the outfit. The set can accompany black, navy, ivory, gold, or a dress that repeats one of its colors. Short nails keep the five shades compact and modern. Apply each jelly in thin layers until the saturation feels balanced across the hand; emerald may reach depth faster than topaz, so identical coat counts are less important than an even visual result.
How to Apply
- Prepare short squoval nails and apply a clear base coat.
- Paint one nail each in ruby, emerald, sapphire, amethyst, and smoky-topaz jelly polish.
- Adjust the thin layers until all five shades have comparable depth.
- Add tiny alternating gold side dots and finish with a wet-look top coat.
19. Black-and-Silver Starburst Coffin Nails
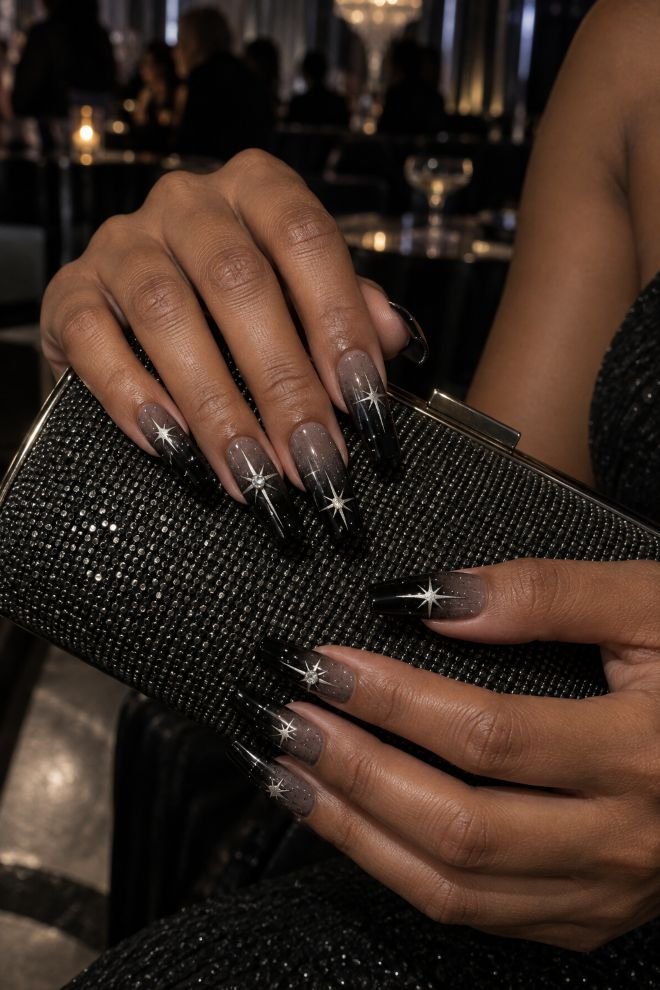
The final set is unapologetically after dark. Long coffin nails fade from translucent smoke at the cuticles into opaque black tips, crossed by silver reflective starbursts of different sizes. Tiny clear crystals mark only three burst centers, and fine flash-reactive glitter appears through the black gradient. The squared ends anchor the radiating lines and keep the composition graphic.
This is the option for a major birthday, club event, concert, or New Year’s Eve when the manicure is meant to register from across the room. Long coffin nail designs give each burst enough space to remain distinct. Ask for a full-hand layout before anything is attached; placing the largest star on every nail would flatten the rhythm. Reflective glitter and raised crystals also require compatible salon products, so press-ons are the lower-commitment route for one night.
How to Apply
- Blend long coffin nails from translucent smoke at the cuticles into opaque black tips.
- Paint varied silver reflective starbursts across the set, preserving dark space around them.
- Add fine flash-reactive glitter through the gradient and clear crystals to only three centers.
- Secure the embellishments, level the flat artwork, and finish with glossy top coat.
How to Match Party Nails to the Dress Code and Outfit
Start with the formality of the event, and then consider the other details the outfit has going on. An embellished dress doesn’t need to be paired with equally elaborate nail polish. It should complement without competing: a metallic French tip or glossy red nails will do the trick. On more basic clothes, such as neutral tailoring or slip dresses, the nails can have more texture in the form of chrome, crystals, color blocking, and an intricate design.
Motifs in the literal sense should only appear at less formal events. Glass cocktail glasses, bows, stars, and confetti might look cute at a birthday or bachelorette party, but they won’t be appropriate for a more formal dinner party. Special seasonal events also call for special nail art designs: people who plan to host something in December can turn to holiday-themed ideas.
Best Party Nail Colors and Finishes
The theme isn’t limited to any specific palette either. Richer hues such as black cherry, midnight blue, shiny black, and espresso provide dimensionality in low-light conditions. More vivid and vibrant choices include shades like hot pink, cobalt, citrus shades, and multiple colored jellies that stand out under bright lighting. Colors like champagne, silver, gold, ivory, and sheer nude complement outfits with plenty of hues.
Finish changes the mood more dramatically than another accent shade. High gloss looks sharp and clean, micro-shimmer catches light quietly, chrome gives a harder reflection, and magnetic polish creates movement. Glitter produces visible particles, while foil makes irregular metallic flashes. Matte surfaces can calm a dark color or increase contrast beside glossy details. Pick one leading finish and allow secondary elements to support it. Combining chrome, glitter, gems, foil, and magnetic pigment across every nail often photographs as texture without a clear idea behind it.
Can Party Nails Work on Short Nails?
Short nails do not need extensions to look ready for an event. What they need is appropriate scale. Micro-French tips, cuticle crescents, sidewall foil, rising dots, small stars, jelly color, and one controlled accent preserve enough open surface for the nail shape to remain visible. The straight edge of short square nails supports geometric tips and chrome tiles; round or oval nails suit scattered details, bubbles, and softer gradients.
Avoid shrinking an elaborate long-nail reference until every component becomes unreadable. Remove elements instead. A coffin design with several starbursts might translate to one silver burst on each ring finger, while a crystal bow can become a single tiny cuticle stone. Low-profile decoration is usually more comfortable on a compact nail because there is less surface available to support height. A well-positioned detail will look intentional from the full-hand view, which matters more than fitting every feature from the original close-up.
DIY, Press-Ons, or Salon: Which Is Best?
Choose the method according to the technique and how long the manicure needs to last. Solid jelly color, bubble dots, basic foil, simple animal print, and loose floral tips can be attempted with ordinary lacquer and a few detail tools. Work in thin layers and allow enough drying time; rushing top coat over soft artwork is one of the quickest ways to drag an otherwise neat design.
Press-ons make sense for a weekend, one formal night, or complicated art that would be difficult with the non-dominant hand. They also let you test length before committing to extensions. Book a trained technician for magnetic placement, isolated chrome, structured crystal bows, encapsulation, or long coffin and stiletto architecture. Bring a reference that shows all five nails, discuss how raised the decorations feel, and arrange the appointment early enough that repairs are possible before the event. Technique should determine the service—not the assumption that every party manicure must be salon-made.
Final Thoughts
Good party nails do not all speak at the same volume. Champagne shimmer and gold foil can quietly finish an outfit; hot-pink aura, cobalt velvet, and neon tips bring visible color; mirrorball chrome and silver starbursts are designed to take focus. The useful question is not which idea looks most elaborate in isolation, but which one supports the celebration, clothes, lighting, and amount of maintenance you are willing to handle.
Choose a dominant element, then edit. If the color is vivid, the artwork can be spare. If the finish is highly reflective, a complicated pattern may be unnecessary. Short nails benefit from precise details and open space, while longer shapes should earn their extra length through artwork that genuinely needs room. Save a full-hand reference rather than a cropped accent nail, and ask for an adaptation when the original shape does not suit your routine. A party manicure should feel considered before the first photograph and remain comfortable after the last guest leaves.