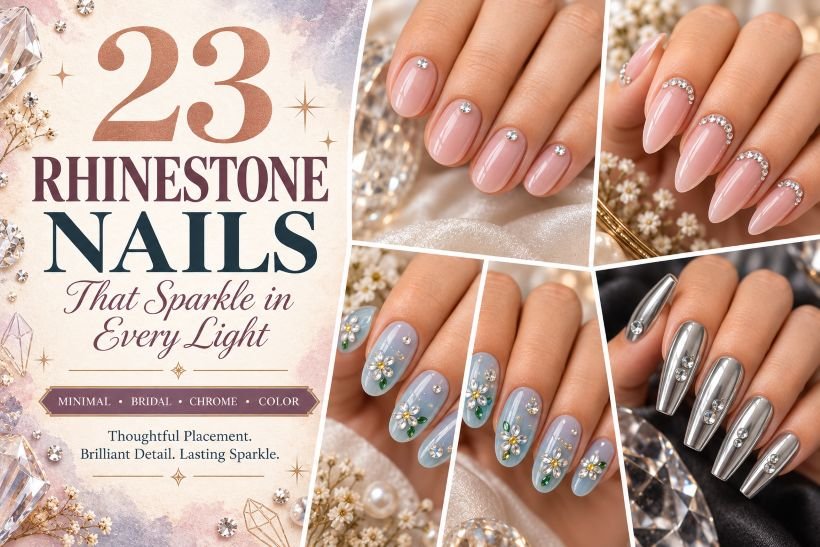
23 Rhinestone Nails That Sparkle in Every Light
Rhinestones work best when they look deliberately placed rather than scattered on as a final thought. One clear stone can sharpen a sheer nude manicure, while a measured mix of crystal shapes can turn longer extensions into miniature jewelry. Current beauty coverage reflects both directions, pairing strategic micro gems with negative space as well as chrome, cat-eye, French, and deliberately maximalist sets. Glamour’s rhinestone nail edit captures that full spectrum without limiting crystal art to formal occasions.
These rhinestone nails range from simple accents to all-out statements, providing short natural nail designs, almond shapes, square and coffin extensions, wedding , birthday, and even evening manicures. All of these designs include the nails’ base, where to put the stones, the finish of the nails, and how realistic the maintenance is, ensuring that you can keep a nail design that will work well with your hands rather than simply a close-up look. The rhinestone nail ideas also distinguish between flat-backed stones, pearls, and charms.
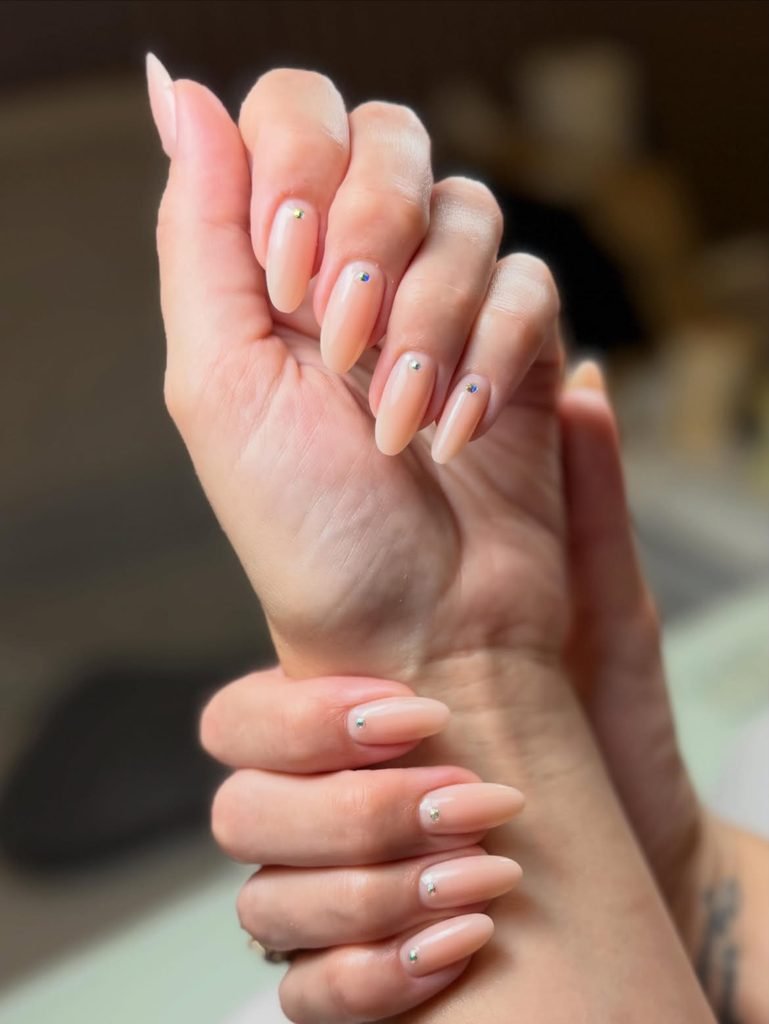
1. Sheer Nude Single-Crystal Nails
Short oval nails are covered with a transparent rosy-beige tint that leaves the natural nail line softly visible. One tiny clear round crystal sits just above the center of each cuticle, with identical scale and spacing across the hand. The glossy base and exposed light-catching facets create a clean point of reflection without glitter, foil, or extra decoration.
This restrained placement answers the intent behind simple rhinestone nails and remains practical for work, dinners, and everyday jewelry. The low cuticle position is less exposed to impact than a stone near the free edge, while the sheer color grows out discreetly. Choose a flattering shade from these nude nail shades and keep the crystals genuinely small; oversized stones would disturb the quiet proportions.
How to Apply
- Shape the nails into short ovals, prepare the surface, and apply one or two thin coats of sheer rosy-beige polish.
- Place a small dot of compatible nail adhesive or rhinestone gel above the center of each cuticle.
- Position one tiny flat-back crystal on every nail with a wax pickup pencil, then dry or cure according to the product system.
- Seal around each crystal with a top coat while leaving its faceted face uncovered.
2. Crystal Cuticle Crescent Nails
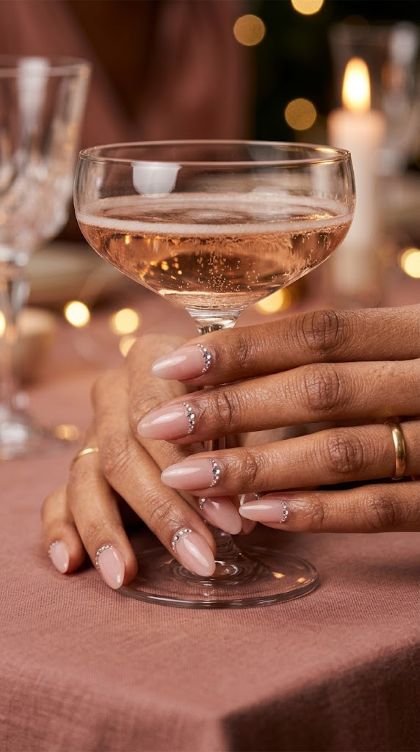
Medium almond nails begin with a translucent blush base, then trace each cuticle with a shallow crescent of clear micro rhinestones. The stones graduate from a slightly larger center crystal to smaller pieces near the sidewalls, following the natural curve without touching the skin. Wide areas of bare-looking pink remain above the sparkling crystal cuticle curve.
With the graduated sizes of the design, it does not look like a sticker stuck on the nail but rather something that has been specially made for the nail. The almond shaped tips match the tapering nature of the crescent and give breathing space to the crystal studded manicure, which is apt for an engagement party, dinner party or a birthday party. Do not make your crescent too large or deep, as it would make your nails look shorter.
How to Apply
- Apply a translucent blush gel or lacquer base to prepared medium almond nails and cure or dry it completely.
- Map a shallow cuticle crescent with compatible gem gel or clear nail adhesive, keeping product off the surrounding skin.
- Place one small center crystal first, then add progressively smaller flat-back stones toward both sidewalls.
- Set the adhesive fully and reinforce the outer edges without coating the crystal faces.
3. Rhinestone Micro-French Nails
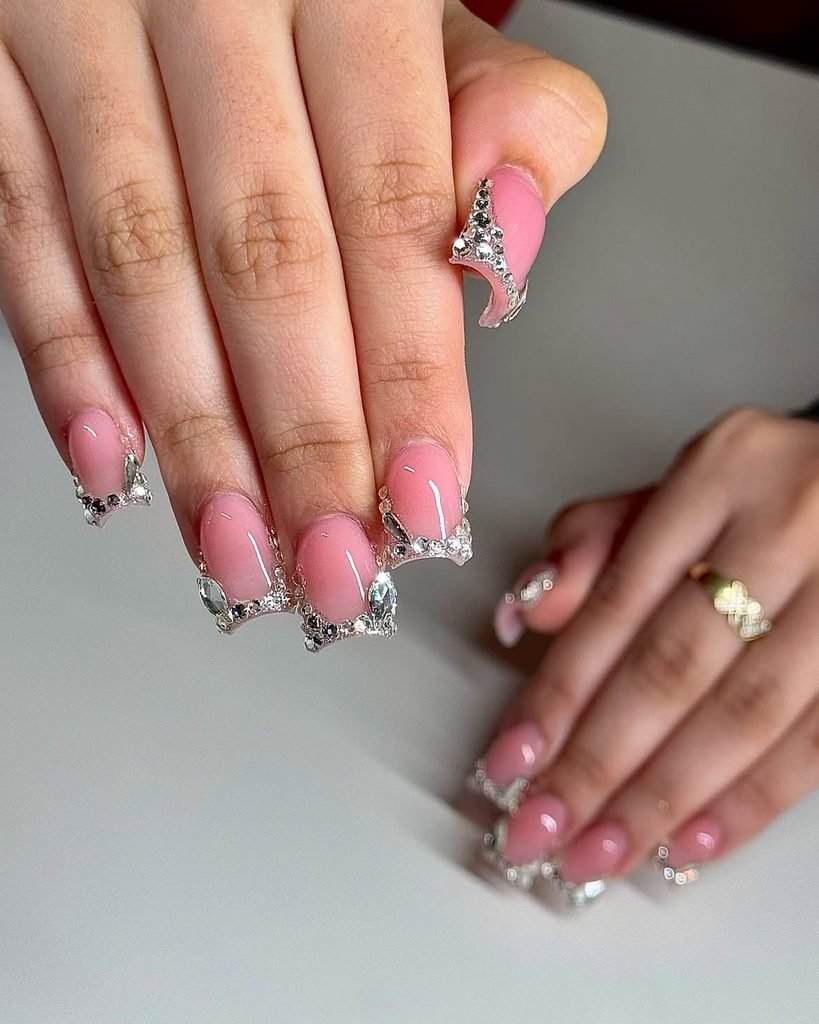
Short square nails use a sheer cool-pink base beneath a single narrow row of clear crystals placed along each straight free edge. Tiny round stones create most of the line, while one slim baguette crystal appears at the center of each thumb. The result reads as a reflective micro-tip rather than a thick band of full-coverage bling.
This interpretation gives French tip nail designs a jewelry-like edge while preserving the practical short shape. Straight square tips provide a stable visual guide, but stones positioned at the free edge experience more knocks than cuticle details, so this is better for an event or careful wear. Ask for the smallest available flat backs and a rhinestone smile line that does not extend beyond either sidewall.
How to Apply
- Prepare short square nails and apply a smooth sheer cool-pink base.
- Paint a very narrow line of rhinestone gel or suitable adhesive immediately behind each free edge.
- Place tiny round crystals from the center outward, adding one horizontal baguette crystal to each thumb.
- Cure or dry securely, then seal only around the crystal bases and cap any exposed free edge.
4. Asymmetrical Sidewall Crystal Cascade
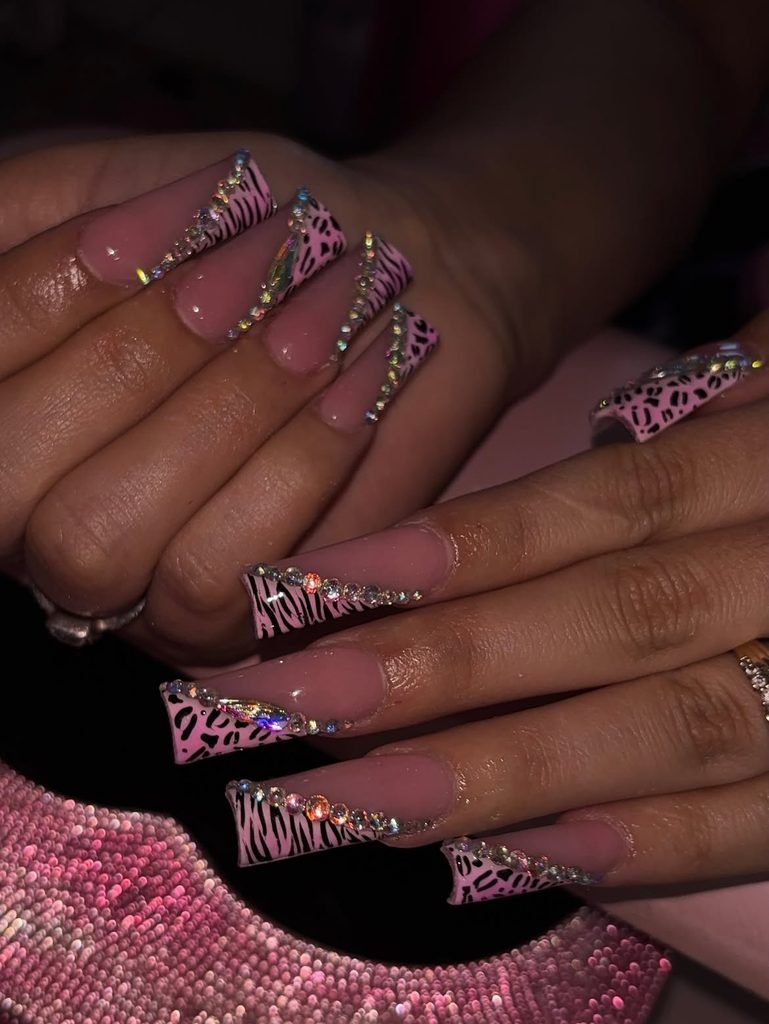
Medium almond nails are glazed in milky apricot, then decorated along one sidewall with an uneven stream of clear and pale-champagne stones. Each cascade begins with a teardrop crystal near the cuticle and narrows into micro rounds toward the tip. The opposite half of every nail remains empty, emphasizing the diagonal movement and warm transparent base.
The asymmetry makes this balanced rhinestone cluster more expressive than a centered cuticle accent without covering the entire nail. It flatters square shapes because the descending stones reinforce their taper, and the champagne reflections pair naturally with gold jewelry, satin, cream, or warm evening colors. Alternate the decorated side from finger to finger so the full hand feels composed. A technician should also keep every stone inside the nail perimeter to reduce catching.
How to Apply
- Apply a sheer pink base to long square nails and finish the color layers completely.
- Brush a slim diagonal path of clear gem gel along an alternating sidewall on each nail.
- Anchor a small teardrop crystal near the cuticle, then taper the cascade with champagne and clear round stones.
- Cure the placement and reinforce the sides of each stone without covering their reflective surfaces.
5. Graduated Rhinestone Ombré Tips
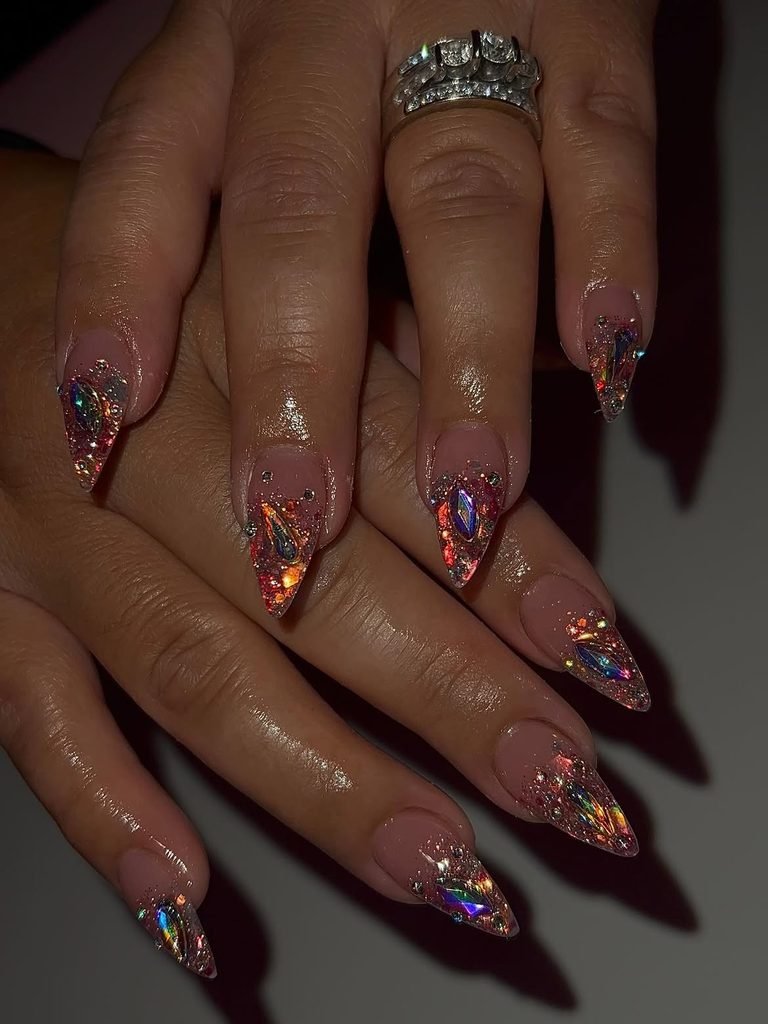
Long almond nails fade from a translucent pink nail bed into clear glass-like tips covered with a graduated crystal fade. Dense micro rhinestones gather at the free edges, then become progressively smaller and farther apart toward the center. Several pale-lilac stones interrupt the clear sparkle, but the cuticle third stays completely bare and glossy.
The change in density creates an ombré effect without relying on blended polish, giving the extended tips a frosted, dimensional finish. It suits proms, milestone birthdays, concerts, and formal celebrations where a higher-impact manicure makes sense. Transparent extensions keep the design visually lighter, yet this is not a low-maintenance set: tip-heavy stones are exposed to regular impact, and the long structure must be balanced correctly by a trained technician.
How to Apply
- Build or fit balanced long almond clear extensions and apply a translucent pink tint over the nail-bed area.
- Spread rhinestone gel across the clear tips, keeping the product thinner as it approaches the nail center.
- Pack clear micro stones densely at the edges, then space smaller clear and pale-lilac crystals upward.
- Cure thoroughly and trace gel around the exposed bases, leaving the facets clean.
6. Full Pavé Accent Nail
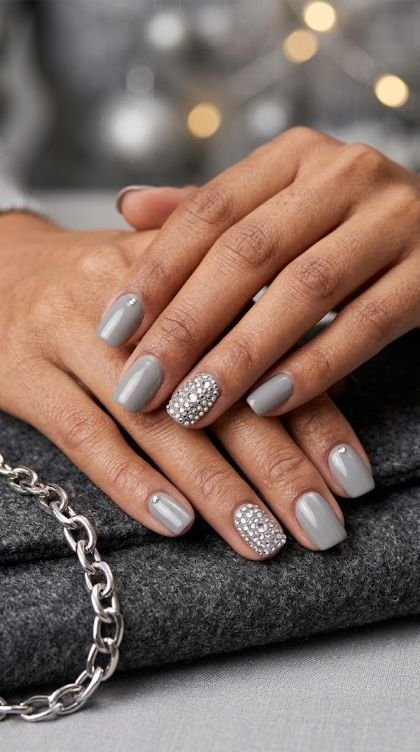
Short squoval nails are painted opaque dove grey, with the ring finger transformed into a tightly fitted pavé surface of clear micro crystals. Small stones fill gaps around a few larger rounds, creating continuous sparkle without pieces projecting beyond the sidewalls. The other nails remain glossy and undecorated except for one tiny crystal near each thumb cuticle.
A single full-coverage accent provides the intensity of full rhinestone nails without placing raised texture on every finger. Dove grey cools the brilliance and makes the manicure useful for cocktail events, winter celebrations, or monochrome outfits. The effect depends on precise packing: visible adhesive gaps look unfinished, while stones overlapping the edges will snag. Because complete pavé needs strong adhesion and patient placement, a salon or custom press-on is more realistic than hurried freehand application.
How to Apply
- Paint short squoval nails with two thin coats of opaque dove-grey gel or lacquer.
- Cover the ring-finger surface with compatible rhinestone gel, avoiding the skin and exposed sidewalls.
- Place several small focal stones, then fill all surrounding spaces with clear micro crystals before curing.
- Add one tiny cuticle crystal to each thumb and reinforce the pavé perimeter without flooding the facets.
7. Crystal Daisy Garden Nails
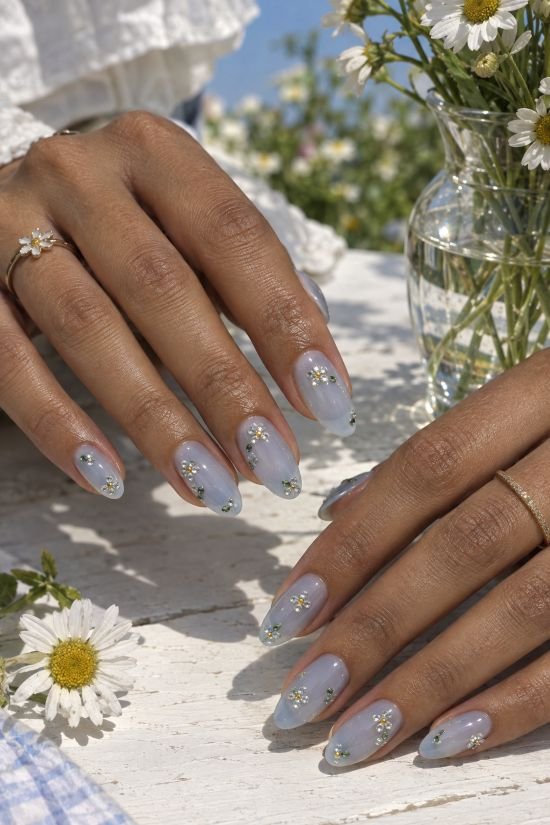
Medium oval nails begin with a translucent pale-blue base scattered with small rhinestone daisies. Each flower uses five clear micro crystals as petals around one butter-yellow center stone, while a few tiny green gems suggest leaves near selected blooms. The flowers sit at different heights and never exceed two per nail, leaving enough blue visible to keep the garden airy.
This design turns rhinestones into recognizable artwork instead of using them only as borders or accents. Oval nails support the rounded petals, and the cool blue background makes the yellow centers readable without introducing painted outlines. It is playful for spring events, showers, or garden parties, but flower spacing matters: repeating the same placement on every finger will look stamped, while too many stones will obscure the rhinestone flower shapes entirely.
How to Apply
- Apply a translucent pale-blue base to prepared medium oval nails and cure or dry fully.
- Mark varied flower centers with tiny dots of rhinestone gel, keeping no more than two blooms on a nail.
- Place one butter-yellow center stone and five clear micro-crystal petals around each, adding a few tiny green gems as leaves.
- Cure or dry the design and seal carefully around every stone base.
8. Rhinestone Bow Ribbon Nails
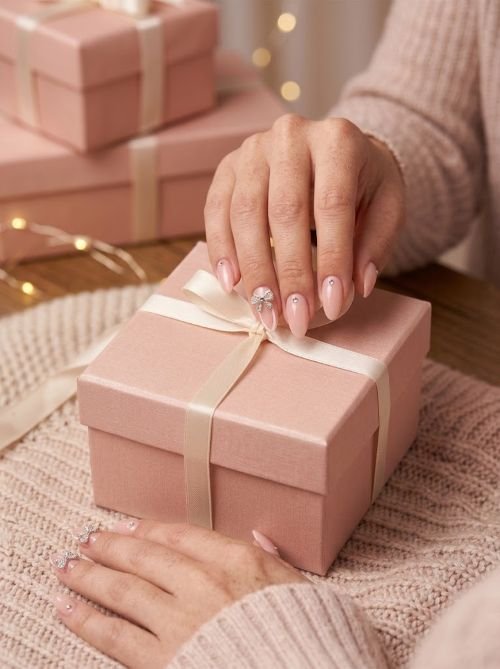
Medium almond nails wear a sheer ballet-pink base with slim white ribbons painted lengthwise across two accent fingers. At each ribbon crossing, two tiny teardrop crystals form bow loops around a round clear center stone; two micro-crystal tails descend below. The remaining nails carry one isolated pink crystal near an alternating sidewall for quiet continuity.
This coquette-inspired version uses crystal shapes to construct the bows instead of attaching bulky premade charms. The flatter architecture is easier to wear, while the narrow painted ribbons keep the composition delicate rather than costume-like. Almond nails give the bows enough vertical space and suit birthdays, bridal showers, or romantic dinners. Ask for small teardrops with their pointed ends facing inward; inconsistent orientation will make the rhinestone bow nails look accidental rather than symmetrical.
How to Apply
- Apply a sheer ballet-pink base to medium almond nails.
- Paint slim white ribbon lines on two accent nails and let them set before adding adhesive.
- Build each bow from two inward-facing teardrop crystals, one round center stone, and two descending micro-crystal tails.
- Add one tiny pink sidewall crystal to the remaining nails and secure every perimeter cleanly.
9. Pearl-and-Crystal Bridal Nails
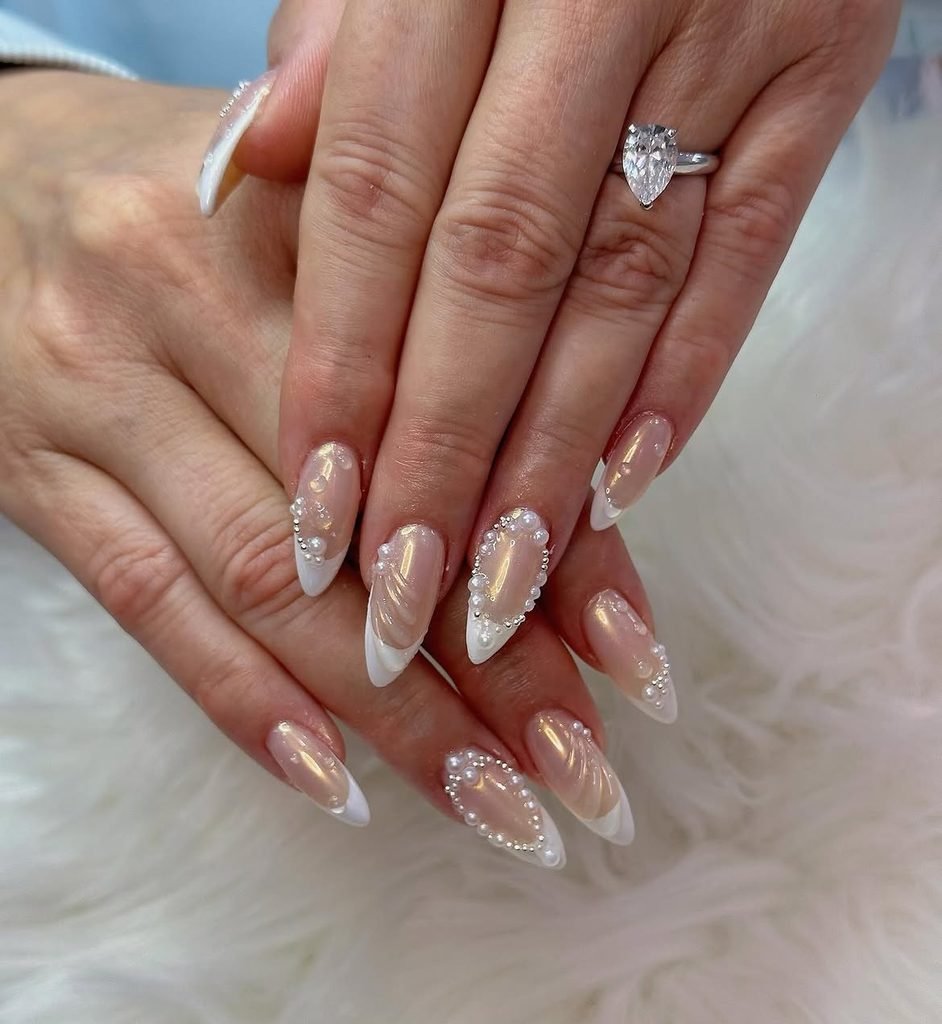
Medium oval nails are coated in milky ivory, then ornamented with tiny flat-backed pearls and clear crystals on two accent fingers. The embellishments form a tapered cluster above each cuticle, beginning with one pearl and narrowing into three micro rhinestones. The remaining nails have a soft pearl glaze but no raised decoration, preserving a calm bridal finish.
Mixing smooth pearls with faceted crystals creates contrast without requiring a heavily jeweled set. The oval silhouette feels gentle beside lace, satin, or clean crepe dresses, while concentrating the texture on two nails reduces snagging around delicate fabric. Readers comparing pearl nail ideas can use this as the more reflective option. For coordinated wedding parties, the same restrained palette also complements many bridesmaid nail ideas.
How to Apply
- Apply two thin layers of milky-ivory gel or lacquer to medium oval nails, adding a fine pearl glaze if desired.
- Place a small amount of compatible adhesive above the cuticles of two accent nails.
- Anchor one tiny flat-backed pearl in each cluster, then taper the design upward with three clear micro rhinestones.
- Set the embellishments fully and seal around their bases without coating the pearl or crystal faces.
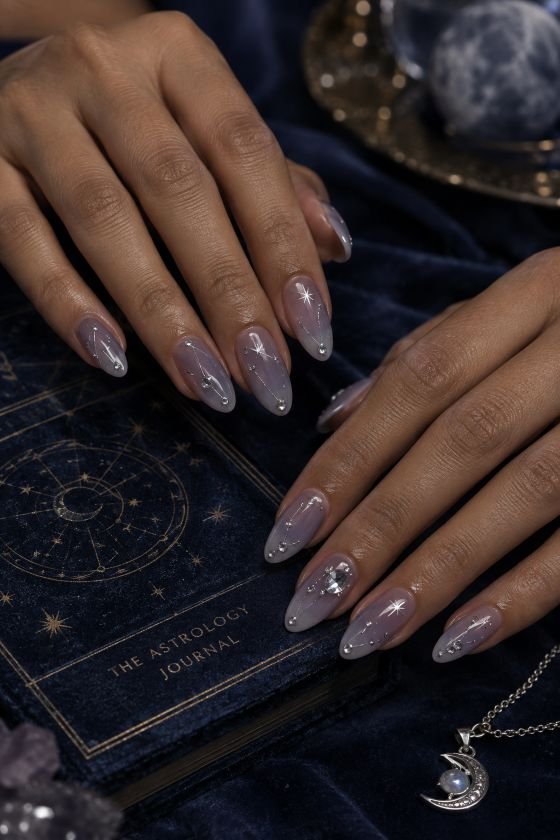
10. Silver Constellation Rhinestone Nails
Medium almond nails use a translucent smoky-lavender base crossed by sparse constellations of clear and silver rhinestones. Fine metallic lines connect only selected stones, while tiny painted starbursts fill several larger gaps. Each nail shows a different formation, but the designs travel diagonally in the same direction so the full set retains a coherent rhythm.
The open arrangement lets individual reflections resemble points of distant light rather than a dense glitter surface. Smoky lavender feels softer than black and works for evening events, winter parties, or anyone drawn to celestial details without literal moons on every finger. Use flat micro stones for the smaller stars and reserve one larger crystal for two accent nails. Consistent diagonal movement is what keeps these rhinestone constellation nails composed rather than randomly scattered.
How to Apply
- Apply a translucent smoky-lavender base to medium almond nails and finish the color layers.
- Paint several fine diagonal silver connections, varying the constellation pattern on each nail.
- Secure clear and silver micro rhinestones at selected line endings, adding only two larger focal crystals across the set.
- Paint a few tiny starbursts, then cure or dry and seal around the stone bases.
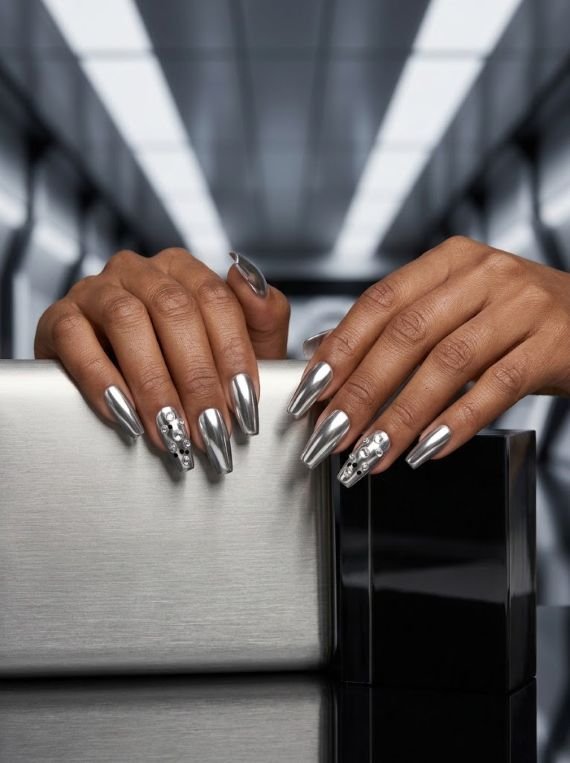
11. Floating Crystals on Chrome Nails
Medium coffin nails are covered in smooth liquid-silver chrome, with clear round rhinestones appearing to float above the mirror finish. Each nail carries only two or three stones positioned at different heights, and tiny circles of unchromed black gel beneath them create subtle shadows. The squared tips remain completely clear of embellishment, protecting the sharp reflective outline.
Chrome and crystals both react strongly to light, so disciplined spacing prevents the two effects from competing. The dark halos separate each transparent stone from the metallic background and make the placement readable in photographs. This is an editorial choice for parties, concerts, or fashion events rather than a discreet everyday manicure. Readers collecting more social-led combinations can explore these viral TikTok nail designs, but the floating crystal placement should stay intentionally sparse here.
How to Apply
- Prepare medium coffin nails, apply a compatible dark base and chrome system, and seal the mirror surface as directed.
- Paint two or three tiny black gel shadows at varied heights on each nail and cure them.
- Place one clear flat-back rhinestone over each shadow with transparent rhinestone gel.
- Cure securely and trace the gel around the bases without clouding the chrome or facets.
12. Velvet Cat-Eye Gem Halo Nails
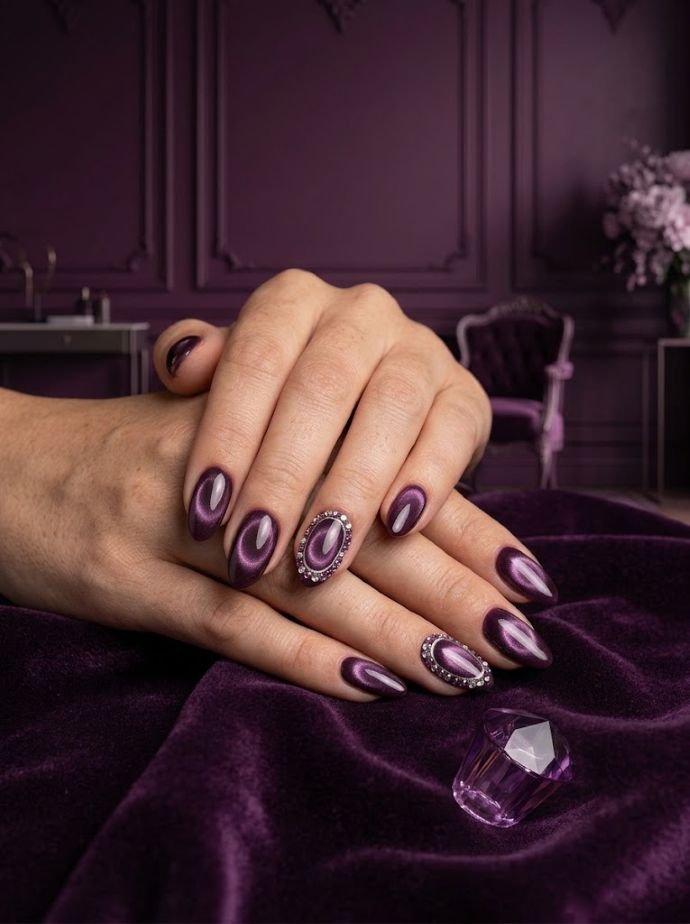
Medium almond nails glow with deep plum magnetic gel shaped into a soft oval highlight at each center. A narrow halo of tiny amethyst and clear rhinestones surrounds the brightest area on two accent nails, leaving a slim gap between the moving pigment and stones. The other nails retain uninterrupted velvet cat-eye depth beneath a glassy finish.
The crystal halo frames the magnetic reflection instead of covering it, allowing both techniques to remain visible as the hand moves. Plum and amethyst suit evening dinners, autumn events, and winter celebrations, although the same architecture could be recreated in emerald or navy. This is best handled by a technician familiar with magnetic pigment and gem gel. For more finish variations, review these cat-eye nail ideas before choosing the base color.
How to Apply
- Apply a dark plum base to medium almond nails, curing each layer according to the gel system.
- Work one nail at a time with plum magnetic gel, pulling the pigment into a centered oval highlight before curing.
- On two accents, draw a narrow ring of rhinestone gel around the highlight and alternate tiny amethyst and clear crystals.
- Cure the halos and finish the exposed gel surfaces without covering the stones.
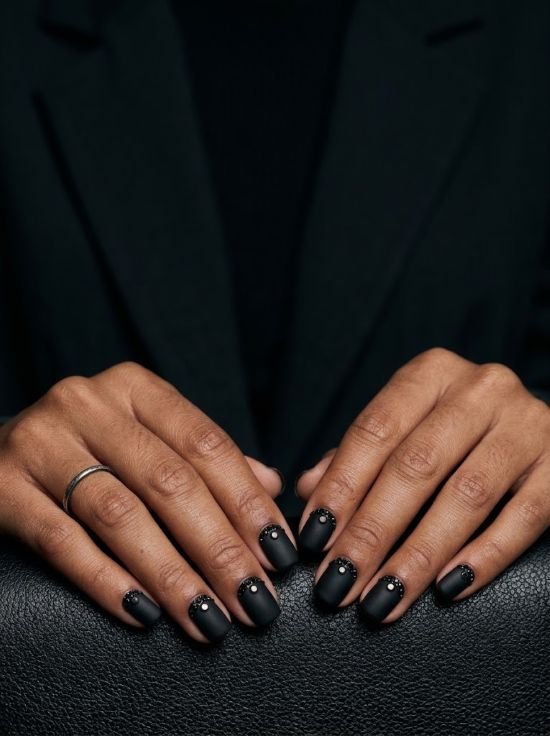
13. Matte Black Jet-Crystal Cuffs
Short square nails are coated in velvety matte black and finished with narrow cuffs of glossy jet-black rhinestones above alternating cuticles. One tiny gunmetal stone sits at the center of each cuff, revealing the curved placement when the tonal black crystals disappear into shadow. The upper nail surfaces stay bare, emphasizing the contrast between soft matte color and sharp faceted detail.
This is a restrained route into gothic nail ideas that relies on texture instead of crosses, webs, or seasonal symbols. The compact square shape keeps the monochrome design practical, while the low cuffs feel closer to dark jewelry than traditional sparkle. Jet stones reflect less light than clear crystals, so the gunmetal centers are important. Keep the matte top coat away from every facet or the deliberate tonal crystal contrast will become cloudy.
How to Apply
- Paint prepared short square nails opaque black and finish the exposed color with a smooth matte top coat.
- Apply a narrow curve of compatible clear gem gel above alternating cuticles.
- Arrange tiny jet-black rhinestones into each cuff and place one gunmetal micro stone at its center.
- Cure securely, then reinforce the stone edges with clear product while protecting the matte nail surface.
14. Ruby Jelly Crystal-Drip Nails
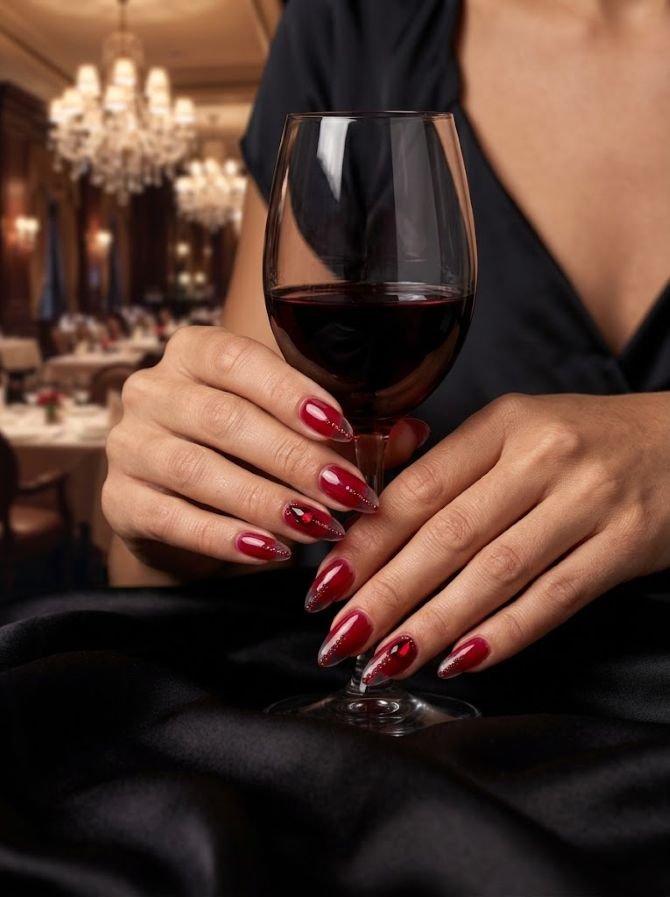
Medium almond nails are layered with translucent ruby-red jelly, then edged with narrow clear tips. Lines of red rhinestones descend unevenly from the free edges, ending in one teardrop crystal on two accent nails and micro rounds elsewhere. The trails vary in length but remain slim, allowing the luminous red base to show between every reflective crystal drip.
This design creates a liquid impression through stone placement rather than raised gel droplets. The monochromatic red palette feels polished enough for date nights, winter parties, or dramatic evening styling, while the clear edges prevent the color from becoming a solid block. Teardrop stones should point downward and sit well inside the almond perimeter. If you work frequently with your hands, shorten every trail and omit the larger drops to reduce impact and snagging.
How to Apply
- Apply two or three thin layers of translucent ruby-red jelly to medium almond nails, preserving narrow clear tips.
- Draw slim irregular trails of rhinestone gel downward from each free edge.
- Place red micro crystals along the trails and add one inward-positioned teardrop to two accent nails.
- Cure the complete layout and secure the perimeters without coating the red facets.
15. Emerald Marquise Cluster Nails
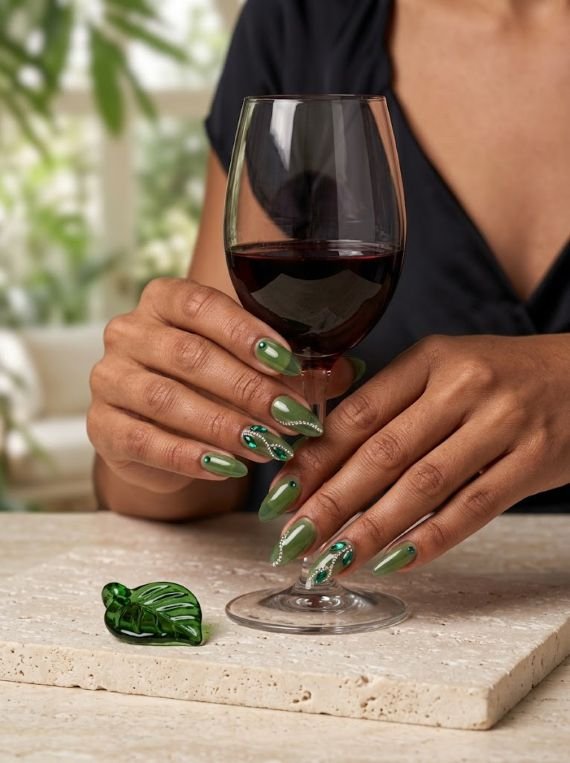
Long oval nails feature a translucent moss-green base with leaf-like clusters built from emerald marquise rhinestones. Two tapered stones meet at their pointed ends to form each leaf, while tiny clear rounds trace short curved stems along three accent nails. The remaining fingers stay glossy green with one isolated emerald crystal positioned low near an alternating sidewall.
Marquise stones naturally create botanical movement, making this arrangement distinct from painted leaves or ordinary round-gem scatter. The long oval surface accommodates their length without forcing the clusters against the edges. Emerald feels rich beside cream, black, chocolate, and gold, so the manicure moves easily between garden events and formal evenings. Rotate the paired stones carefully and keep the stems sparse; too many large leaves would make the marquise crystal cluster bulky and visually crowded.
How to Apply
- Apply a translucent moss-green base to long oval nails and cure or dry it fully.
- Paint three sparse curved stems with compatible clear gem gel on selected accent nails.
- Form each leaf from two emerald marquise rhinestones meeting point to point, then add tiny clear stones along the stems.
- Add isolated emerald sidewall crystals to the remaining nails and secure all outer edges.
16. Sapphire Baguette Grid Nails
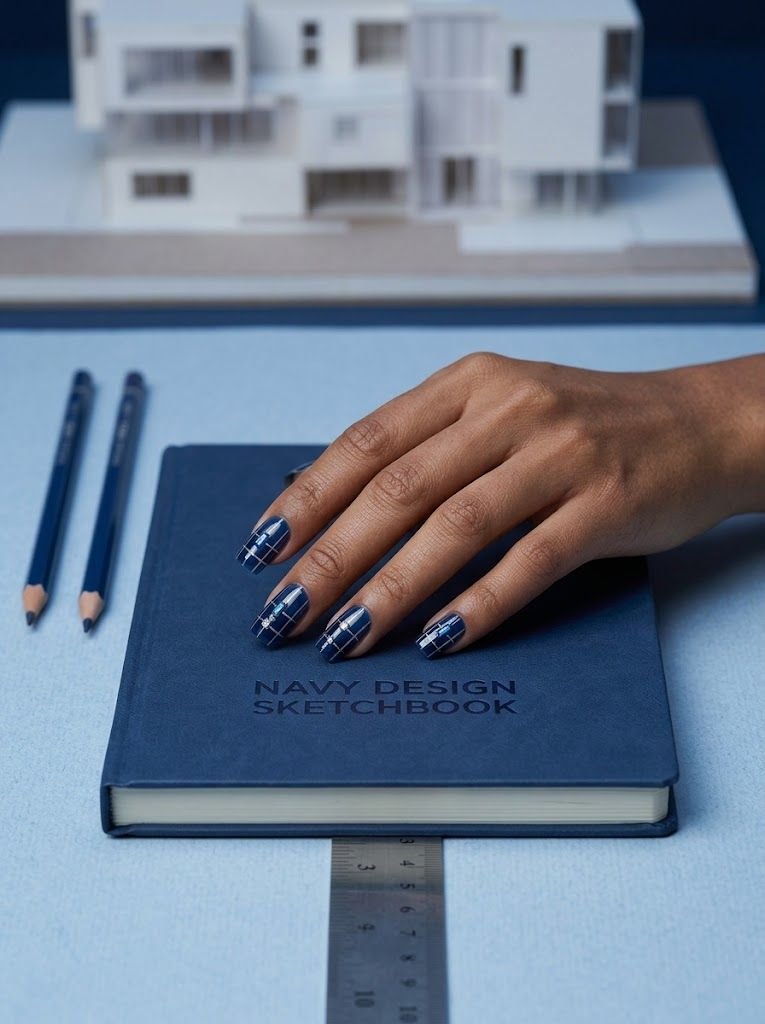
Medium square nails are painted translucent midnight blue and divided by slim silver lines into open geometric panels. Small sapphire-blue baguette rhinestones occupy selected intersections, all aligned either vertically or horizontally, while tiny clear squares fill two corner spaces. No panel is completely filled, preserving the blue glass effect and emphasizing the baguette crystal grid.
The straight nail shape supports the structured layout and gives rectangular stones a logical orientation. Cool silver outlines sharpen the sapphire color, producing a tailored result for galas, winter dinners, or a navy evening outfit. This is demanding to execute because even slight misalignment becomes obvious within a grid. Map the lines first, use uniformly sized flat-back baguettes, and keep embellishments away from the squared edge so the geometry stays crisp during wear.
How to Apply
- Layer translucent midnight-blue gel or lacquer over prepared medium square nails.
- Draw a restrained grid of slim silver lines, leaving several large open blue panels on every nail.
- Secure sapphire baguette rhinestones at selected intersections, aligning each stone precisely with the grid.
- Add two tiny clear square stones across the set, then seal around all embellishment bases.
17. Hot-Pink Y2K Mixed-Gem Nails
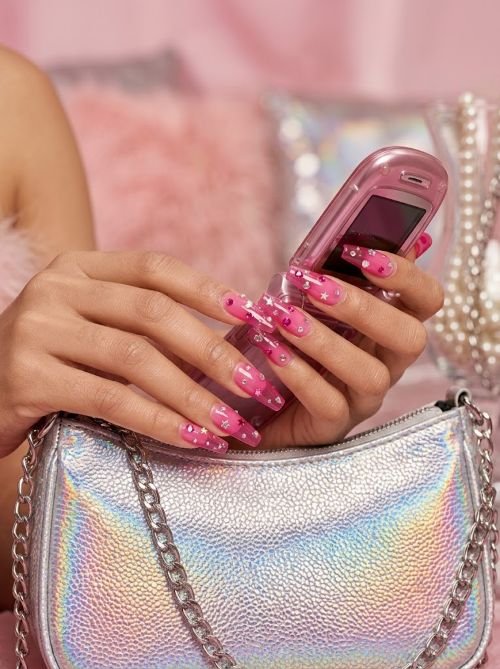
Long tapered-square nails combine translucent hot-pink jelly with an irregular mix of clear, fuchsia, and iridescent rhinestones. Tiny stars, hearts, round stones, and one square gem are distributed like collectible stickers, but each nail retains visible pink between the elements. Fine silver dots connect several pieces without turning the surface into an uninterrupted sparkle.
The playful scale and mixed shapes give these Y2K rhinestone nails their nostalgic character, while controlled spacing makes the revival feel intentional. Allure’s gem-nail coverage similarly connects colorful stones with bedazzling-era craft. They suit birthdays, concerts, vacations, and nights when a manicure can behave like an accessory. If you are also considering pink glitter nails, skip glitter beneath this busy layout and let the gems supply the sparkle. Custom press-ons make the varied arrangement easier to plan.
How to Apply
- Apply two thin coats of translucent hot-pink jelly to long tapered-square nails.
- Plan a different mixed-gem arrangement on each nail, preserving visible pink between all pieces.
- Secure clear, fuchsia, and iridescent round, star, heart, and square flat-back stones with compatible gem gel.
- Add sparse silver dots, cure the design, and reinforce the embellishment edges without covering them.
18. Gold Bangle-and-Crystal Nails
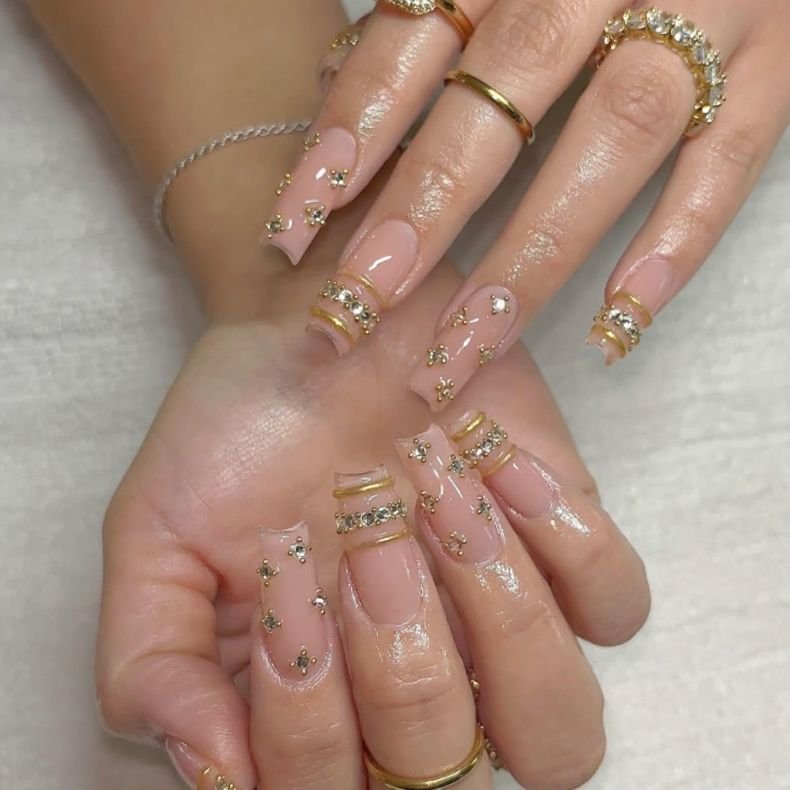
Medium coffin nails use a creamy caramel base crossed by two or three slim raised gold bands on each finger. Tiny clear and amber rhinestones sit between selected bands like stones set into stacked bangles, while several nails include one narrow arc of gold microbeads. The decoration travels across the nail rather than lengthwise, emphasizing the broad tapered silhouette.
This jewelry-inspired manicure uses builder-gel structure, metallic chrome, and crystals as one coordinated system. Caramel softens the reflective hardware, making the result rich rather than icy, and the horizontal bands suit parties, cultural celebrations, or formal evening wear. It requires salon-level control: raised lines must cure completely and remain low enough for comfort. Limit the bangle nail art to three bands per finger so the coffin profile does not become thick or top-heavy.
How to Apply
- Apply a creamy caramel color to structurally balanced medium coffin nails and cure it fully.
- Sculpt two or three low transverse bands with compatible builder gel, curing each according to the system.
- Finish the bands with gold chrome, then secure tiny clear and amber rhinestones between selected lines.
- Add one restrained microbead arc where planned and seal all bases without burying the crystal facets.
19. Rhinestone Heart Outline Nails
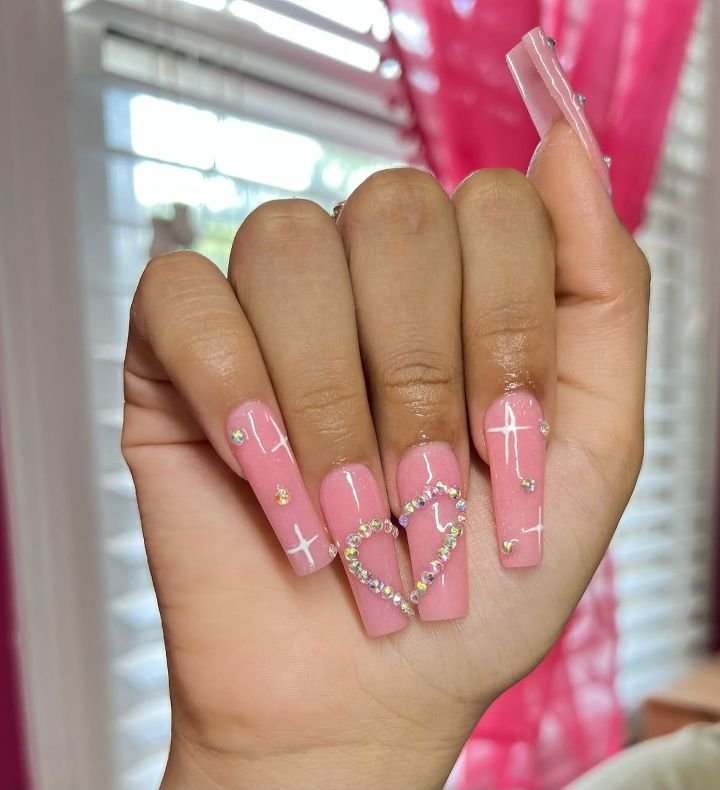
Long square nails have a translucent strawberry-pink base with open hearts outlined in tiny rose and clear crystals on two accent fingers. The stones follow a clean symmetrical curve but leave the center completely transparent. Remaining nails carry a single rose crystal near the lower sidewall, alternating left and right across the hand for a subtle repeating detail.
An outlined heart looks lighter than a solid charm and allows the base color to remain part of the artwork. The almond taper complements the pointed lower curve, making this a natural choice for date nights, anniversaries, birthdays, or Valentine’s season. Keep each crystal heart outline small enough to sit within the central nail area; stones near the sidewalls or cuticle skin are more likely to catch and can distort the intended symmetry.
How to Apply
- Apply a translucent strawberry-pink base to long square nails and cure or dry completely.
- Lightly map two small open-heart outlines on the accent nails with dots of rhinestone gel.
- Alternate tiny rose and clear crystals around each outline, beginning at the bottom point and working upward evenly.
- Add single sidewall crystals to the remaining nails, set the adhesive, and seal around all bases.
20. Short Square Corner-Crystal Nails
Extra-short square nails are finished in glossy milky taupe with three micro rhinestones tucked into one lower corner of each nail. A clear, champagne, and pale-smoke stone form a compact triangle, and the decorated corner alternates from left to right across the hand. Straight free edges remain completely bare, preserving the manicure’s neat everyday profile.
This is one of the most practical options for short square nails because the crystals sit low, remain inside the sidewalls, and occupy very little surface area. Alternating the placement prevents the small clusters from looking repetitive, while taupe works with office clothing, denim, knitwear, or evening neutrals. Use uniformly tiny flat backs and a snag-resistant position; a larger focal gem would overwhelm the compact nail and interfere with the understated scale.

How to Apply
- Shape the natural nails into extra-short soft squares and apply two thin coats of milky taupe.
- Place a small triangle of compatible adhesive in one lower corner of each nail, alternating sides.
- Arrange one clear, one champagne, and one pale-smoke micro rhinestone inside every adhesive area.
- Allow the stones to set fully and seal around their edges without extending product onto the skin.
21. Coffin Crystal Frame Nails
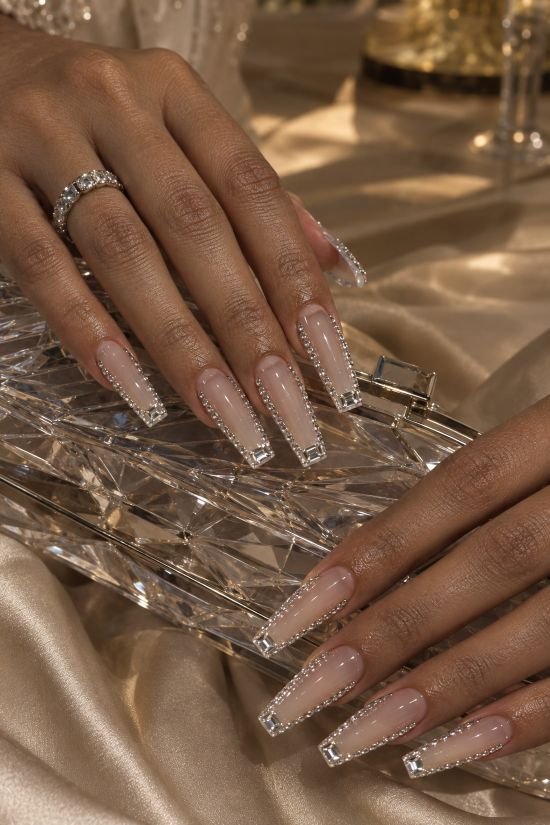
Long coffin nails begin with a sheer beige base outlined by a narrow frame of clear micro rhinestones. The frame follows both sidewalls and the squared free edge but stops before reaching the cuticle, leaving a deliberate open gap at the base. One elongated rectangular crystal sits horizontally at the center of each tip, reinforcing the architectural shape.
Unlike full pavé, the crystal border preserves a transparent center and uses the coffin nail shape as part of the design. The result photographs beautifully for formal parties, performances, or a statement bridal set, but it requires careful structure and precise edge placement. Every stone must remain inside the perimeter; even slight overhang can catch on fabric. The open cuticle gap also prevents the crystal nail frame from appearing visually closed or heavy.
How to Apply
- Build or fit structurally sound long coffin nails and cover them with a sheer beige tint.
- Trace both sidewalls and the free edge with a narrow line of compatible rhinestone gel, leaving the cuticle open.
- Position clear micro rhinestones around the frame and center one horizontal rectangular stone at each tip.
- Cure completely, inspect for edge overhang, and reinforce the inner perimeter without flooding the transparent center.
22. Stiletto Chandelier Rhinestone Nails
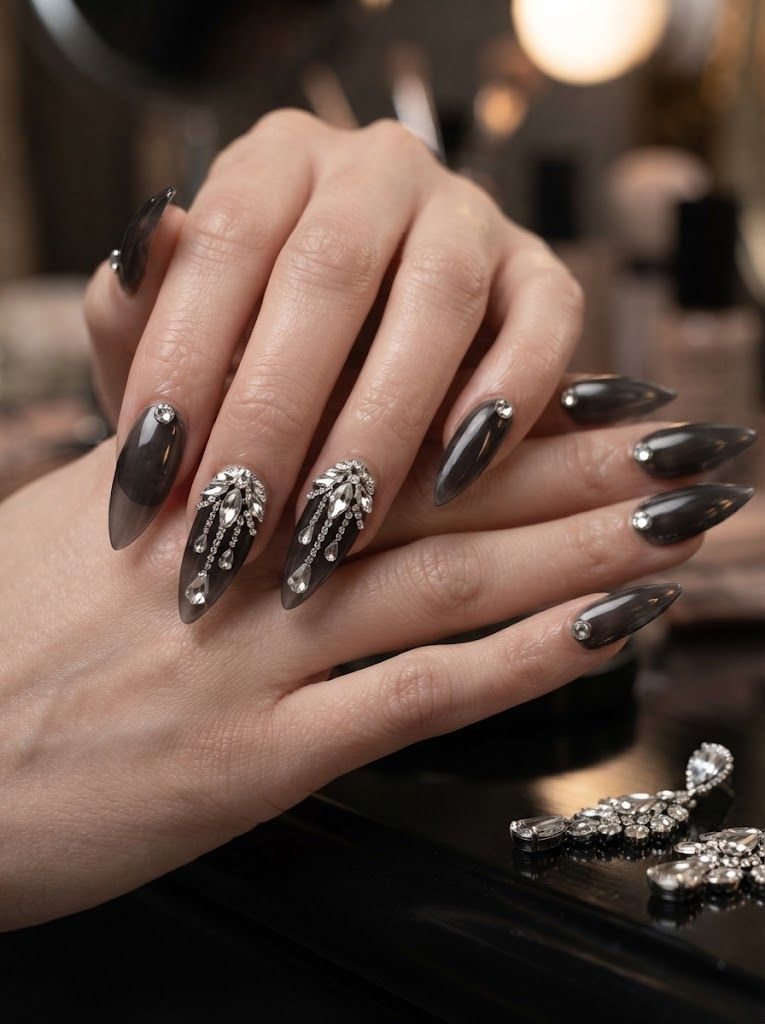
The long stiletto nails are coated with translucent charcoal color with chandeliers created on three accent fingers starting from the cuticle area of each one. Every piece is formed by first creating the round clear crystal, then widening it with marquise shapes and finishing with narrow teardrop stone directed toward the nail tips. Silver microbeads form connections between the crystals, and the rest of the nails have only one crystal on the end.
The reverse composition corresponds with the sharpness of the stiletto and makes the nails into a conscious evening accessory. Charcoal is used because it makes the clear stones appear shining without the strength of black, making the design appropriate for parties, performances, and editorial work. The longer nails and bigger stones need professional construction, careful curing, and safe wearing. The chandelier crystal design must be kept flat to follow the peak and not be piled up to make an unstable tower.
How to Apply
- Build balanced long stiletto extensions and apply an even translucent charcoal glaze.
- Map three centered chandelier arrangements from the cuticle toward the tip with strong compatible gem gel.
- Place a round crystal, paired marquise stones, silver microbeads, and one downward-pointing teardrop in each arrangement.
- Cure thoroughly, add single base crystals to the remaining nails, and reinforce every perimeter cleanly.
23. Rainbow AB Crystal Mosaic Nails
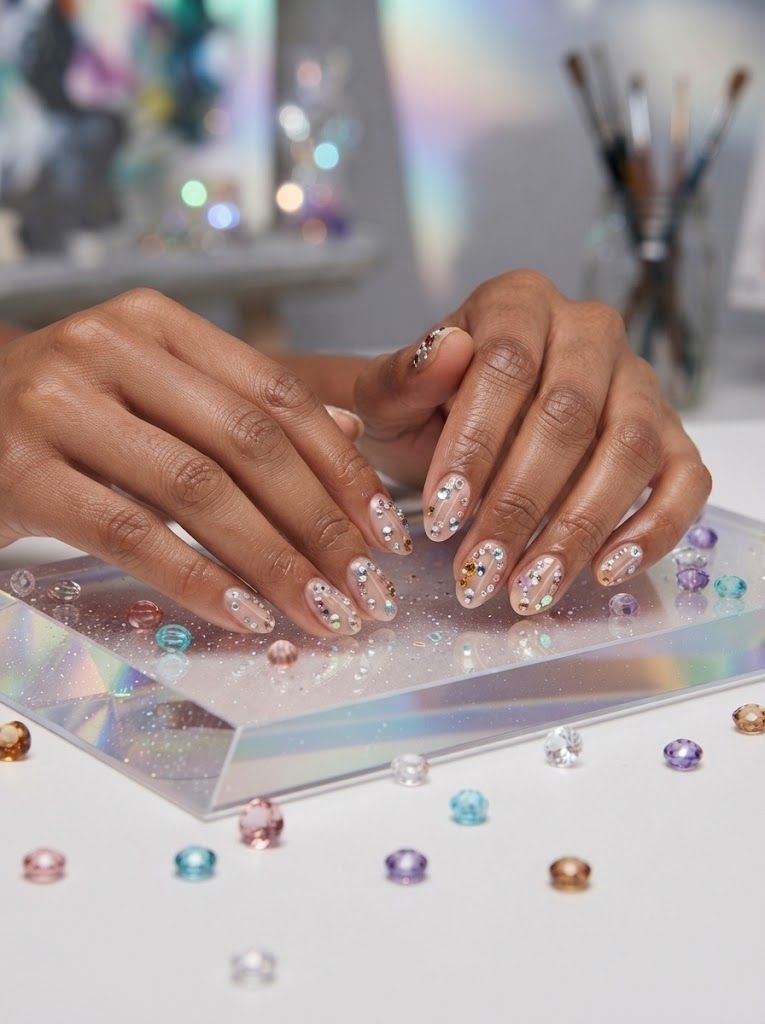
Medium oval nails use a transparent neutral base covered with spaced rhinestones in clear, rose, aqua, amber, violet, and Aurora Borealis crystals. Round, square, and tiny teardrop stones fit together like irregular mosaic pieces, but slim clear channels remain between them. The density varies slightly by nail while the complete hand maintains an even distribution of every color.
This finale delivers maximal color without relying on glitter polish or painted pattern. The AB stones shift under different lighting, while the solid-colored gems keep the palette legible instead of turning every reflection into the same rainbow flash. Oval nails soften the mosaic and offer enough width for mixed shapes. A full salon set or custom press-ons will make planning easier; uncontrolled placement can quickly become top-heavy, so distribute larger stones across the hand rather than concentrating them on one finger.
How to Apply
- Apply a clear neutral tint to medium oval nails and complete the base surface.
- Plan the largest clear, rose, aqua, amber, violet, and AB stones across the full hand before using adhesive.
- Secure round, square, and tiny teardrop rhinestones in irregular mosaic layouts, preserving slim clear channels.
- Cure or dry thoroughly and seal around each stone while leaving every reflective facet exposed.
How to Choose Rhinestone Size and Placement
Start with nail length and daily use, not the largest stone in the tray. Tiny flat-back rhinestones suit short nails, French lines, cuticle curves, flower petals, and gap filling because they preserve visible nail surface. Medium rounds, marquise shapes, baguettes, and teardrops work better as focal pieces on almond, oval, coffin, or stiletto nails with enough width to support them. Larger crystals should usually remain on one or two structurally sound accent nails.
Placement affects both proportion and wear. Cuticle details and lower sidewall clusters are generally more protected than stones placed directly on the free edge. Keep every embellishment inside the nail perimeter, away from surrounding skin, and follow the direction of the shape: vertical clusters lengthen, transverse bands widen, and tip-heavy pavé emphasizes the free edge. Before applying adhesive, arrange the complete design on a palette or press-on stand and check how all five nails balance together.
How to Keep Rhinestones Secure Without Dulling Them
Reliable rhinestone nail art begins with a properly prepared, completely finished color surface and an adhesive suited to the manicure system. Small stones may be placed with dedicated nail adhesive, while heavier clusters commonly need a thicker rhinestone gel that supports their bases without running. Apply one nail at a time, press each flat back into enough product to create contact, and cure or dry exactly as its manufacturer directs. Products should never touch the surrounding skin.
Do not brush a heavy coat over the crystal faces. It rounds their facets, traps residue, and replaces sharp sparkle with a cloudy dome. Instead, use a detail brush to seal around each perimeter while keeping the upper surface clean. Kiara Sky’s professional rhinestone application guide gives the same central advice. Wear gloves for cleaning, avoid using decorated nails as tools, and repair a loose stone rather than waiting for the cluster to catch and tear away.
Final Thoughts
The best rhinestone nail art is not always associated with the most decorated nails. One rhinestone can highlight the nude manicure, one can transform the cuticle half-moon into jewelry, and a mosaic will work perfectly only if colors, sizes, and spaces are properly controlled. First, determine where and which rhinestones can be used for each nail, and then think about how many textures you can afford to have in the manicure procedure. This decision is more important than replicating everything that you see on the photo.
Show the whole hand picture to the professional, and mark all the details you need to add: base color, type of crystals, size of the stones, density, and finish. In case you type often, work with delicate fabrics, and you do not want any extra maintenance, use small micro stones near cuticles and lower parts of the sidewalls. Reserved coffin, stiletto nails, and completely pavé can be used when you have enough time to maintain them.