Nail Designs · The nail edit
21 Black Nails That Never Go Out of Style
Black nails suit many settings. They contrast well against a bare office desk, a gray train platform, and a dance floor, and not many colors...
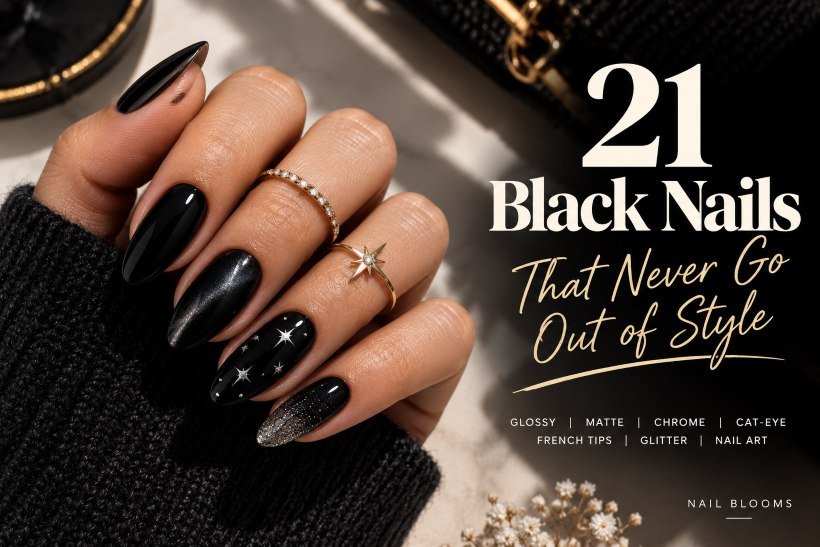
Black nails suit many settings. They contrast well against a bare office desk, a gray train platform, and a dance floor, and not many colors can do that. They suit short natural nails and long extensions, in polish, gel, powder, or press-on nails. It is due to the diversity of applications that a simple black manicure always finds its place again while other fashions have their seasons.
Here you will find 21 black nail designs ranging from a glossy solid-color oval to chrome, velvet, lace, and some sheer nails that are almost not black at all. Each one offers you a nail shape and length, a realistic approach to create it, and an honest admission whether it is a DIY manicure or done in a salon. Start your choice from nail length and then pick the effort level.
1. Glossy Black Creme on Short Natural Ovals
Begin with the obvious choice. Short oval nails, filed beyond the tip of the finger, painted from side to side in an ebony creme and topped off by an impeccable top coat. This manicure is simple and sophisticated; there is no design and no embellishment required because the finish says it all. Allow for a hairline gap between the polish and the cuticle.
Opaque black conceals the natural nail color, but a glossy finish can still highlight uneven edges and brush marks. This home method uses regular nail lacquer: apply thin coats and let each air-dry as the label directs. A lamp is only for a compatible gel system, with that system’s specified curing instructions. Our oval nails ideas cover other ways to wear this shape. This is the easiest look in the list to do at home.

How to Apply
- Shape short ovals, wipe off the oils with a lint-free pad, and brush on a thin base coat.
- Paint one thin coat of creme black, starting a hair away from the cuticle.
- Let the first lacquer coat air-dry as directed, then add a second thin coat if needed for even coverage.
- Clean the edges with a small brush dipped in remover, then seal with a high-shine top coat.
2. Matte Black on Short Squares
Keep the nails short, trim the tips squarely, and give them a matt surface by foregoing any shine for a matte, velvet-like appearance. The black color absorbs rather than reflects light, giving the nails a look similar to slate stones or a schoolroom blackboard. The sharp lines and squared corners look distinct on the matt background.
A matt surface comes with two special traits. It gets oily and finger marks more quickly than a gloss surface, so always clean your hands before touching it up. And never try to create a matt appearance with a black glossy color using a nail file; it only creates scratch marks. If you like square shapes, the short square nails guide has more to try. When the finish starts to look shiny at the edges, brush on a fresh matte coat.

How to Apply
- File short squares with straight tips and apply a thin base coat.
- Paint two thin coats of black creme and let them dry completely, since a damp base turns blotchy under matte.
- Brush on a matte top coat in one pass and avoid going back over wet spots.
3. Black Velvet Cat-Eye on Medium Almonds
Velvet cat-eye nails are similar to black fabric, but with a narrow ribbon of light shining through it. This design covers the medium almond-shaped nails with the ribbon placed in the middle of the nail and moving when you move your hand. The background is a deep black, while the shine remains subtle and silvery and not flashy.
This is achieved using the magnetic gel nail polish. A technician applies the gel polish and places a magnet above it before curing and then cures the polish under a lamp. The placement of the magnet determines where the stripe will appear; therefore, the steadiness of the hand is very important. For this gel version, a trained technician should use compatible products and the specified lamp and curing schedule. Predecorated press-ons offer the look without performing the magnetic gel application yourself. For more finishes with this glow, browse our cat eye nail ideas.

How to Apply
- Ask your technician for a black magnetic gel, or buy a kit with a magnet wand and a compatible lamp.
- Apply a gel base coat and cure it, then brush on a thin layer of the magnetic black.
- Hold the magnet near the nail for a few seconds to pull the band into place, then cure right away.
- Finish with a gel top coat and cure again.
4. Black Micro French over a Sheer Nude Base
Now imagine a French manicure that had attended an art gallery opening. It’s a sheer, milky nude for the base, with a hairline of black following the curve of the nail on each free edge, painted on short natural nails. The line is kept at about a millimeter width, and it appears to be a line rather than a tip.
This is the perfect starting point if you think the solid black is too much for you. The nude base makes your hands look light, while the thin line creates a graphic effect. Use a fine liner brush or even a thin piece of tape for better results. Place your painting hand on the other hand and wipe most of the polish from the brush. Our French tip nail designs show thicker versions for more contrast. Plan to redo a nail or two.

How to Apply
- Apply a base coat, then two thin coats of sheer milky nude, and let them dry.
- Load a fine liner brush with black, then wipe most of it off on a paper towel.
- Draw a thin line along the free edge of each nail, following its curve.
- Fix wobbly spots with a cleanup brush, then seal with glossy top coat.
5. Reverse French: A Black Crescent at the Cuticle
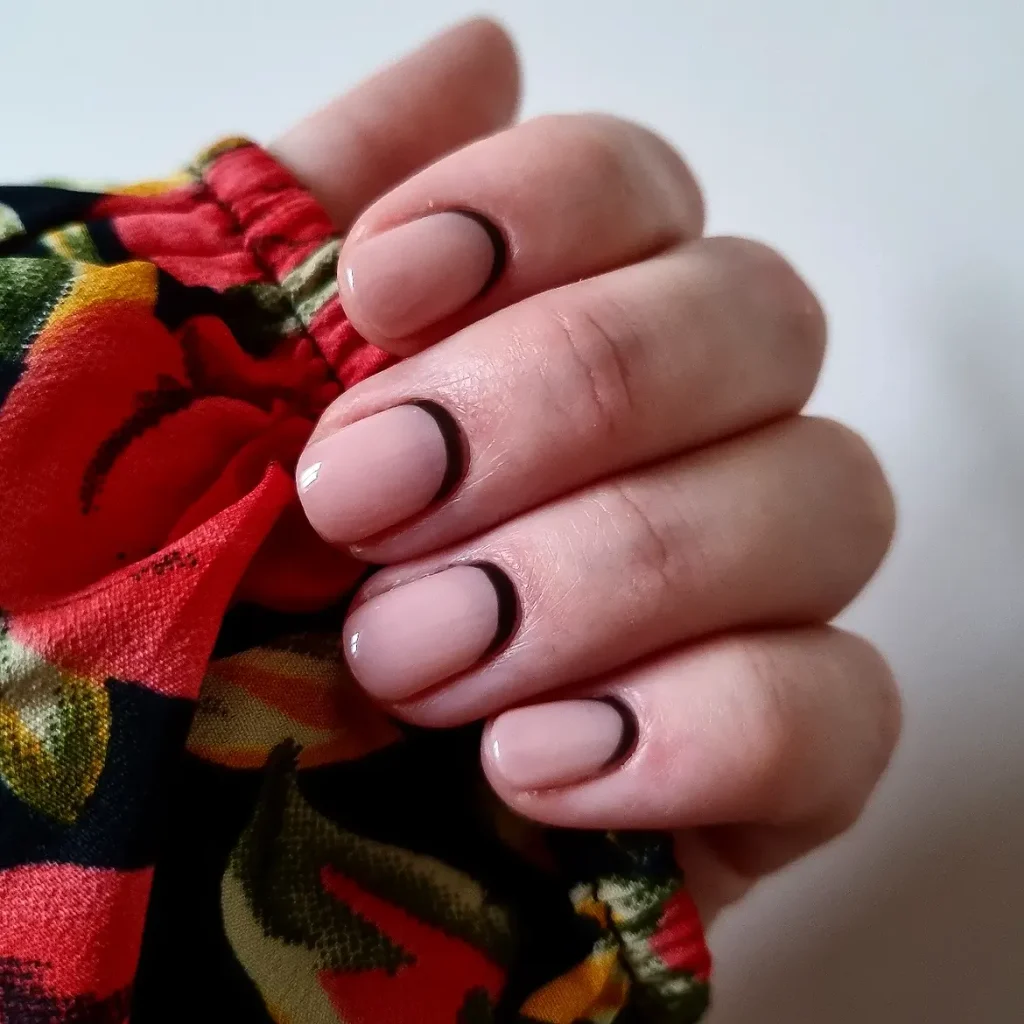
Switch the French with the black for the base. Each nail has a slender black half moon near the edge of the cuticle with the rest of the nail left either milky white or light cream in color. Since the curve will follow the curve in your nails, the effect of the black is going to resemble an intentional bordering frame. Squoval nails of medium length give sufficient space for your crescents to shine.
This look is not as forgiving in reality as it seems on a picture as the arc will have to be done according to the cuticle line. To recreate such crescent at home you can use nail stickers or vinyl to create a crescent effect and apply the sticker before applying the black over the dry cream base. While the polish is slightly wet remove the sticker.
How to Apply
- Shape medium squovals and apply two thin coats of milky cream, then let them dry fully.
- Press a crescent vinyl along each cuticle and rub the edge down.
- Brush black over the exposed arc in one thin coat.
- Peel the vinyl while the polish is still slightly wet, then top-coat once it has set.
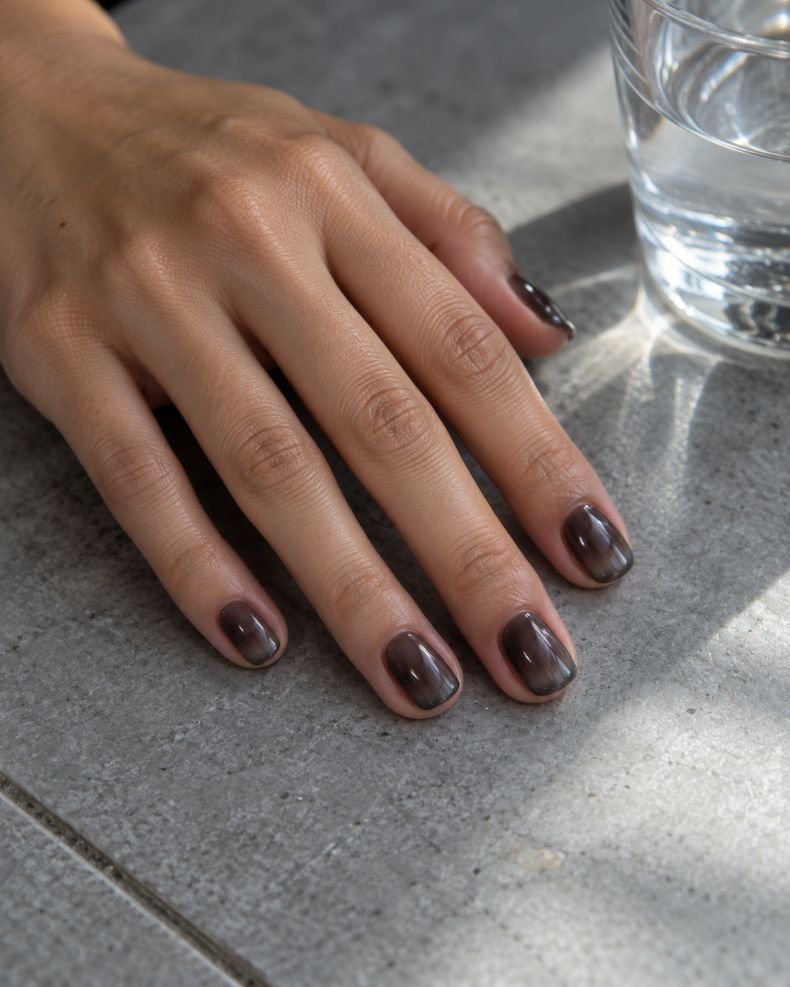
6. Smoked Sheer Black on Natural Short Nails
Black nails do not always have to be opaque. A sheer smoked black nail polish looks like tinted glass. The underlying layers of your nails are visible through a grayish black tone. The color appears grayish on tips, where there is no nail bed that provides a contrast underneath it. The nail reads as gray in daylight and becomes almost fully opaque indoors.
Find sheer or jelly type black polish, or just add one drop of black polish to clear polish on a palette. You might want to try the color on one nail only, since sheer blacks tend to build up quickly. You would get a smoke effect with two applications, while the third coat gives an opaque finish. Such an effect allows you to forgive the new regrowth, since the clear band around the cuticle blends seamlessly with the tint.
How to Apply
- Prep short natural nails and apply a thin base coat.
- Brush on one coat of sheer black, working quickly from cuticle to tip.
- Check the depth in daylight, then add a second coat if you want more smoke.
- Seal with a glossy top coat and cap the free edge.
7. Soft Black Aura on a Gray-Milk Base
An aura nail makes use of a blurred blob of the color in the center that gradually fades off towards the edges. In this case, the base is light-colored and milky gray while the black of the center creates an aura effect that looks like a stain of charcoal. Almond medium nails work perfectly fine here since the pointed shape complements the oval nature of the blurred blob. There are no distinct outlines, and the black part seems to float above the base.
The process should start from applying the black using a barely loaded makeup sponge. You put the black on the makeup sponge, pat it gently on the paper, and apply it gently to the middle of the nail in gradual layers. The excess black will make the blob look like a spot. Our winter aura nail designs show more color pairings.

How to Apply
- Apply base coat and two thin coats of milky gray, then let them dry.
- Dab black polish on a sponge and tap off the excess on a paper towel.
- Press the sponge onto the center of each nail, building the aura in two or three light passes.
- Soften the outer edge with a clean sponge corner, then add top coat.
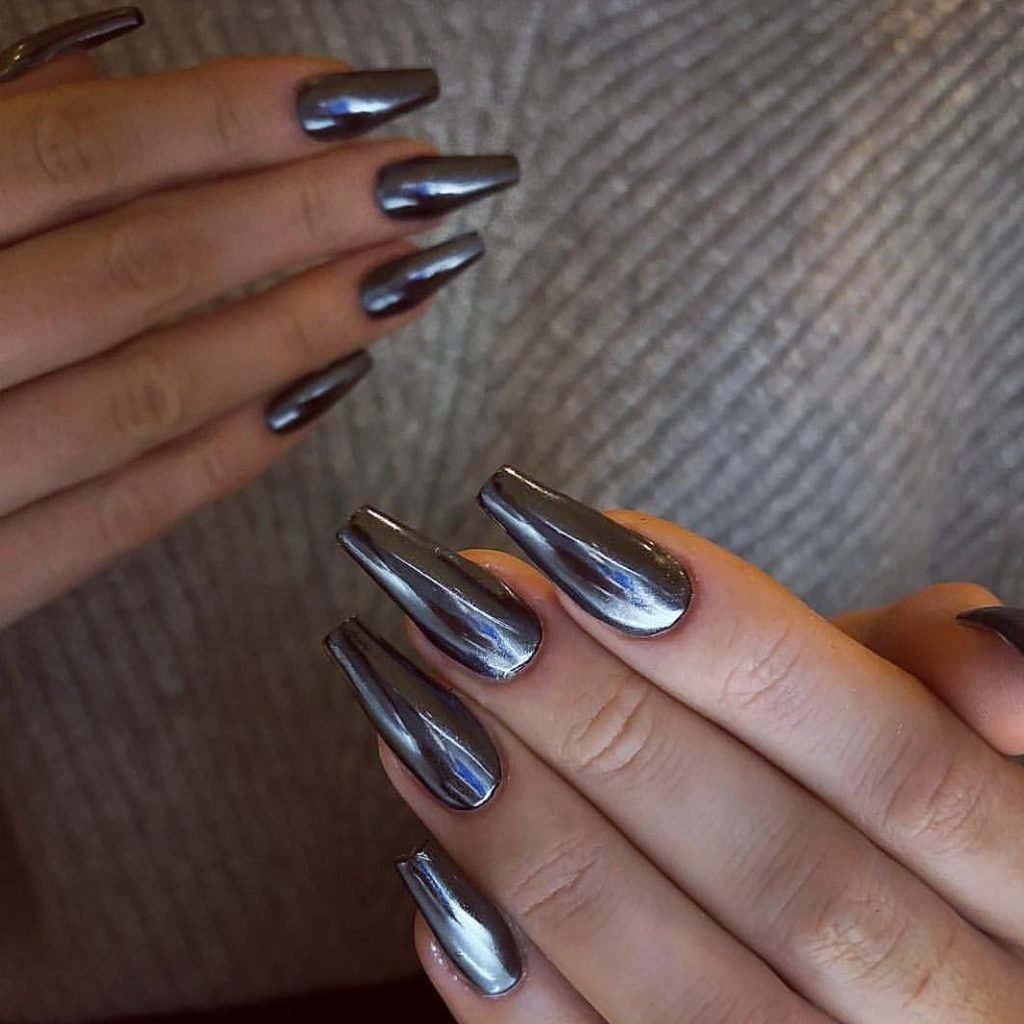
8. Black Chrome on Medium Coffins
Black chrome looks like polished obsidian or a wet road at night. The surface is dark, but it throws sharp gray and silver streaks that change with every turn of the hand. Medium coffin nails, tapered with a flat tip, give the mirror a long, straight stage, which is why chrome looks so good on them. It’s the most reflective black in this list.
Real chrome uses a fine chrome powder rubbed onto a cured gel layer under a no-wipe top coat, then sealed with another top coat. That’s a gel process, so it needs a lamp, and a technician will get a smoother mirror than most first attempts. Chrome-finish press-ons are a good home option. Remember that chrome shows every bump in the base, so smooth nails matter.
How to Apply
- Book a technician for medium coffin extensions or a gel overlay, or choose chrome-finish press-ons.
- Ask for a black gel base, cured and finished with a no-wipe top coat.
- Rub black chrome powder onto the cured surface with a sponge applicator until it looks mirrored.
- Seal with a clear gel top coat and cure again.
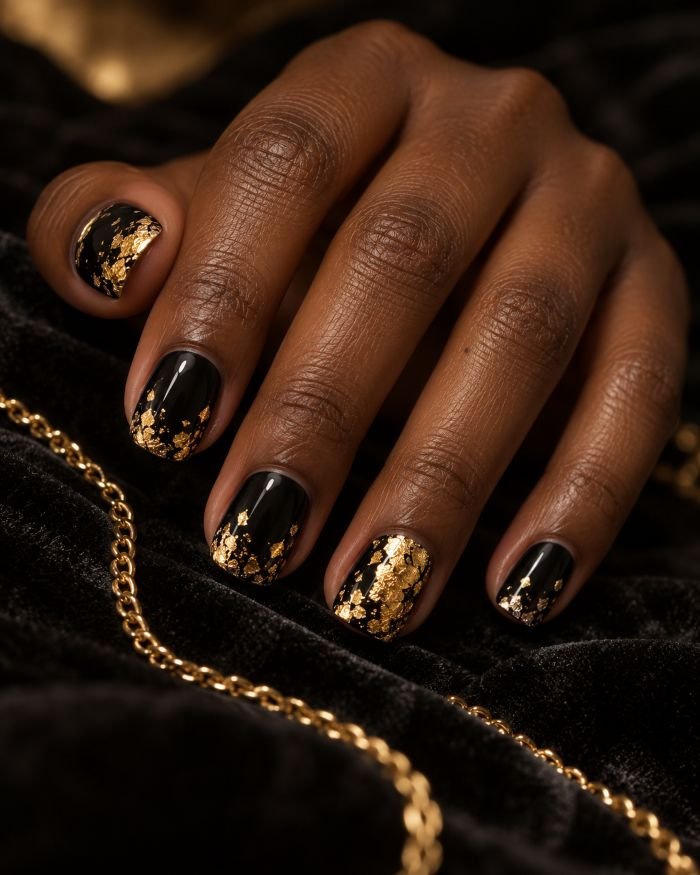
9. Black with Gold Foil Flecks on Short Squovals
Several pieces of gold foil change color from severe to warm. Flakes of gold foil are torn and appear on short squoval nails; they are concentrated mainly near the nail tip and move down on the thumb and ring fingers, so that the design seems unplanned. Each piece is lying flat under a glossy top coat, and the black underneath makes gold more vibrant against a light nail.
It is recommended to use foil in small portions. Apply clear gel or polish to the place where the flake should be placed, apply it using tweezers and then cover the nail. An excess of flakes will create the impression of confetti. The flakes may lift at the edges; therefore, an additional layer of top coat around the flakes is helpful. Gold hoops and a chain will match perfectly, and the entire design requires no artistic abilities.
How to Apply
- Paint short squovals with base coat and two thin coats of black creme, and let them dry.
- Dab a tiny amount of clear polish where each flake will go.
- Lift small foil pieces with tweezers, press them on, and smooth the edges with a brush.
- Seal with a thick glossy top coat, covering the foil edges completely.
10. Black-and-White Checkerboard Accent Nail
Checkerboard is the one pattern here you can read across a room. Put it on the ring fingers only, in tight squares of black and white, and keep the other nails in plain glossy black. Short square nails fit the grid best, since flat tips keep the lines tidy. The contrast is sharp, and one patterned nail per hand looks planned instead of busy.
Freehand checks are hard. A grid on a tiny nail takes patience, a very fine brush, and steady lines. Stamping plates or checkerboard decals give a cleaner result. Paint the white base, let it dry fully, then add the black squares. Stick to one accent nail per hand, or the grid starts to feel loud. It’s a good Friday-night nail that still passes in a daytime meeting.

How to Apply
- Paint all nails with a base coat, the ring fingers in white creme and the rest in black creme.
- Let the white nails dry fully, then apply a checkerboard decal, or use a fine brush to draw a grid of squares.
- Fill alternate squares with black, working slowly and cleaning the brush often.
- Seal all nails with a glossy top coat.
11. Black Lace over Sheer Pink
A web of fine black lace laid over sheer pink looks like a slip dress translated into nails. The pink keeps it soft, and the lace is drawn or stamped in thin black lines, with small scallops along the tip and tiny dots between them. Medium oval nails give the pattern enough width. It’s romantic, but the black stops it from turning sweet.
A stamping plate makes this realistic at home. Paint black polish into the lace pattern, scrape off the extra, pick it up with the stamper, and roll it onto a dry pink nail. You have to move fast, because the polish dries as you work, so expect a few tries. Lace decals are the easier route. Our lace nail ideas go deeper into variations. Add top coat only when the stamped black is dry, or it will smear.

How to Apply
- Paint medium ovals with base coat and two thin coats of sheer pink, then let them dry fully.
- Spread black stamping polish over a lace plate and scrape off the extra.
- Roll the stamper over the design and press it onto the nail in one motion.
- Let the pattern dry, then seal with glossy top coat.
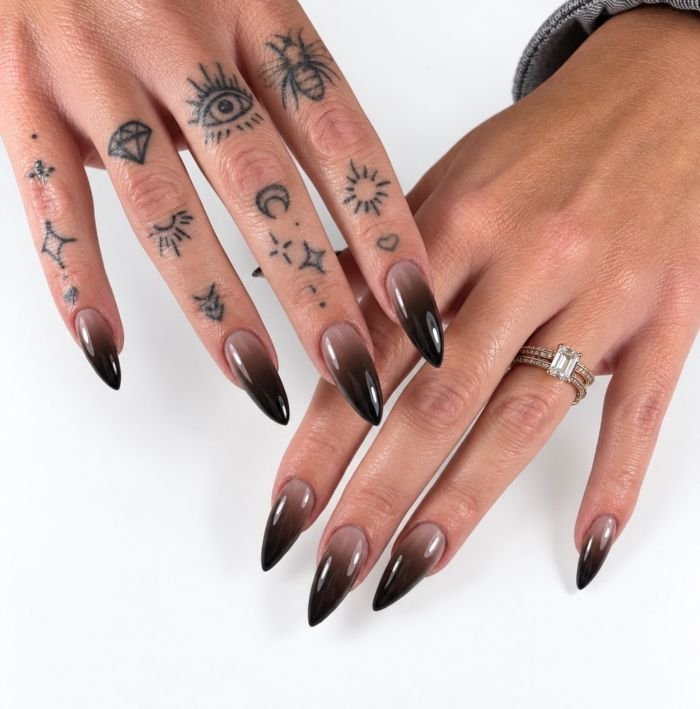
12. Black-to-Nude Ombré on Long Almonds
Here the black starts at the fingertip and fades up the nail into soft nude near the cuticle. The long almond shape stretches the gradient, so the fade has room to look smooth instead of choppy. At rest, the nails look dipped in ink. The nude end keeps the hand looking light, which helps if a full black set feels heavy.
Ombré is easiest with a sponge or an airbrush. Paint the nude base, then dab black along the tip and blend upward in thin layers, wiping the sponge between passes. A salon can do the gradient in gel, which looks smoother and lasts longer. Long nails also mean extensions or press-ons for most people. Our ombré nails ideas cover other color fades if you want to compare.
How to Apply
- Book long almond extensions or apply long almond press-ons, then paint a nude base and let it dry.
- Dab black onto a makeup sponge and tap off the excess.
- Press the sponge along the tips and pat upward in thin layers until the fade looks smooth.
- Finish with glossy top coat, which also smooths the sponge texture.
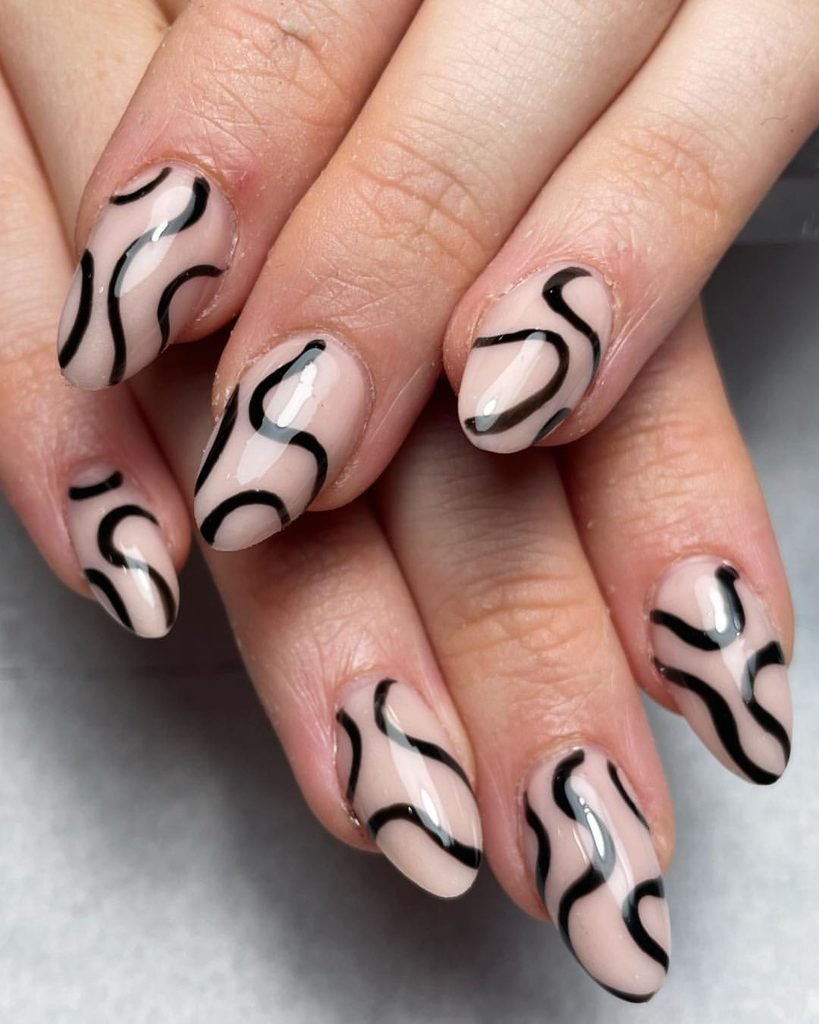
13. Loose Black Swirls on Bare Nude Ovals
Two or three thin black swirls wander across short oval nails that are otherwise left in sheer nude. The lines aren’t symmetrical. One curls near the cuticle, another crosses diagonally, and the empty space between them matters as much as the ink. The look feels like a sketch more than a finished drawing, and the nude base keeps it light enough for everyday wear.
Use a long, thin liner brush, and thin your black polish a little if it drags. Rest your pinkie on the table and move your whole forearm instead of just your fingers. If a line goes wrong, wipe it off and start again. No two nails need to match, which makes this a good first nail-art attempt, since mistakes read as style.
How to Apply
- Apply base coat and one or two thin coats of sheer nude to short ovals.
- Wait until the nude is fully dry, so the brush glides.
- Draw two or three loose curved lines per nail with a long liner brush, using different shapes on each finger.
- Seal with glossy top coat.
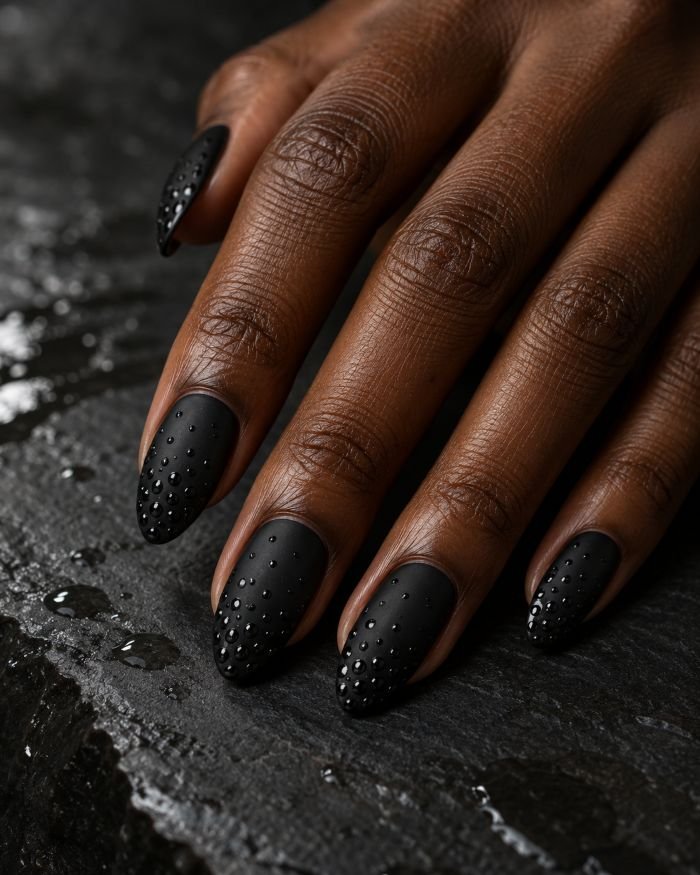
14. Matte Black with Glossy Dots
A flat matte black nail with small glossy black dots scattered across it looks like rain on a dark window. The dots are the same color as the base, so they only show when light hits them. Medium almond nails work well, with five to seven dots per nail in different sizes, clustered near the tip.
Paint the matte black first, then dab clear gloss top coat or glossy black gel on with a dotting tool in a few sizes. Let each dot sit a second before you lift the tool, so it forms a round bead. Gel dots stay domed, while lacquer dots dry flatter. It’s a salon-friendly design, though a patient beginner can manage it at home. Unlike the plain matte in design 2, here the shine becomes the pattern.
How to Apply
- Paint medium almonds with two thin coats of black and a matte top coat, then let them dry completely.
- Dip a dotting tool in clear gloss top coat or glossy black gel.
- Touch the tool to the nail and lift straight up, making dots in two or three sizes.
- Cure or air-dry the dots as your product directs, without touching the matte area.
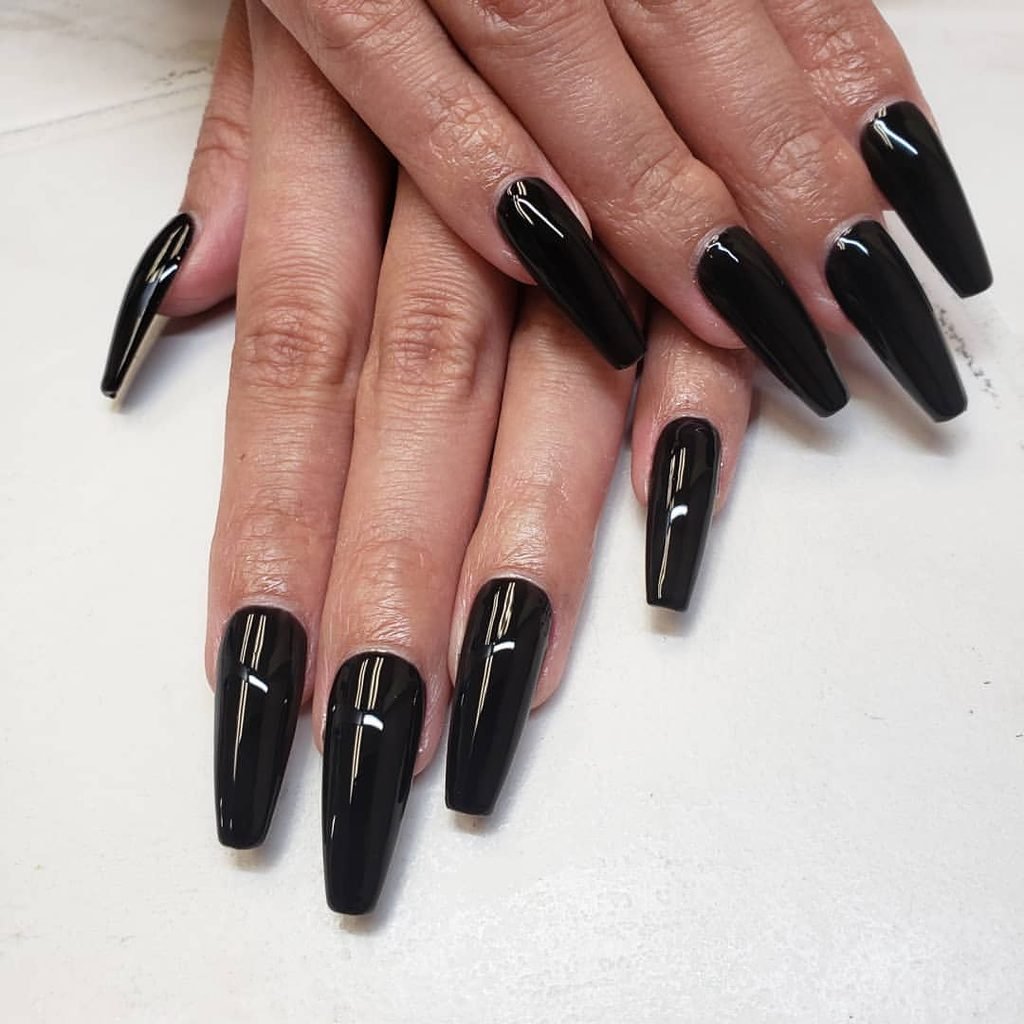
15. Long Black Coffin Press-Ons
Long coffin press-ons are the fastest way to a dramatic black manicure without a salon appointment. The nails are glossy black, tapered, and flat at the tip, with straight sides and an even curve. Because the shape comes pre-made, every finger matches. Length changes how you move, though. Typing, buttoning, and picking up coins all take a few days of practice.
Fit matters more than the look. Match each press-on to the width of your natural nail, and if you fall between sizes, choose the larger and file the sides. Prep with a light buff and an alcohol wipe, apply the adhesive as directed, and press from the cuticle outward. Press-ons aren’t a lesser option. They’re easy to reuse with adhesive tabs. Browse more length ideas in our coffin nail designs.
How to Apply
- Sort the press-ons by width and test each size against your nails.
- Buff the shine off your natural nails, wipe them with alcohol, and push back the cuticles gently.
- Apply adhesive tabs or glue as the kit directs and press each nail from the cuticle outward for about ten seconds.
- File any rough edges and avoid water for the first hour.
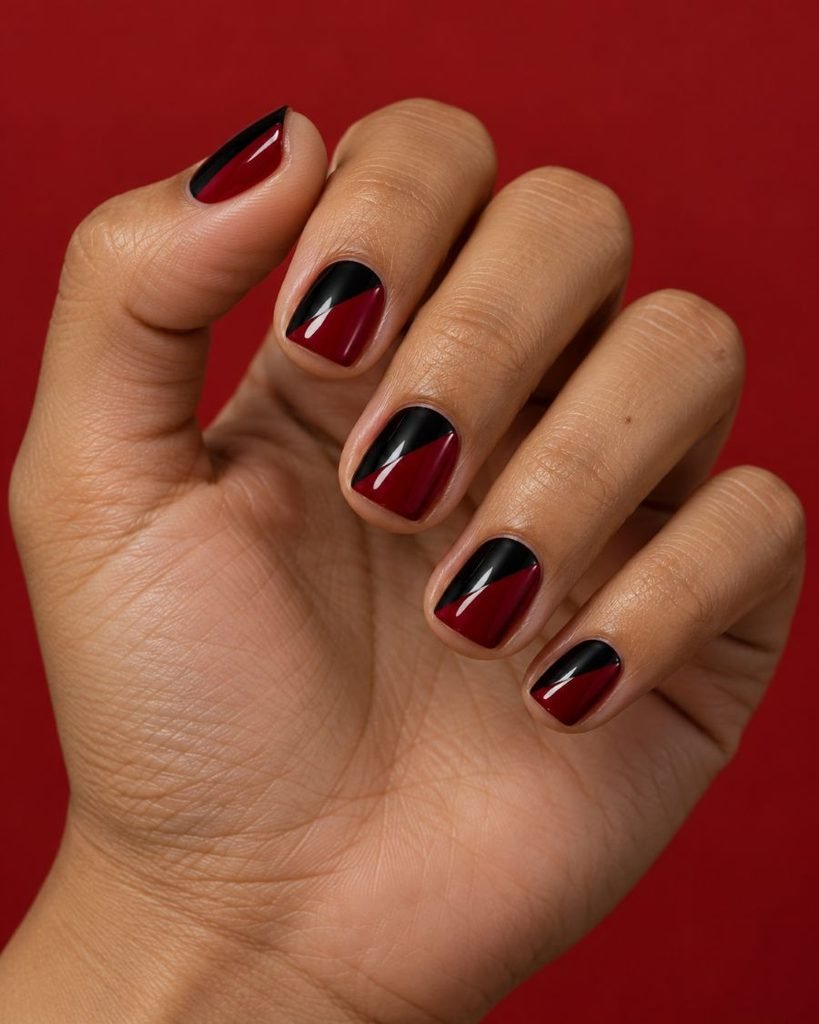
16. Black and Red Diagonal Split on Short Squares
Each short square nail splits along a diagonal, black on one side and deep cherry red on the other. The line runs from one upper corner to the opposite lower corner, and it stays crisp. Both colors are glossy creme, so they look like two panels of lacquered paint. Keep the direction the same on every finger, or the hand looks scrambled.
Red and black is a classic pairing, and the split makes it graphic without needing art skills. Use tape or nail vinyl to mark the diagonal, paint the first color, let it dry, then peel and paint the second. Slight bleeding under the tape is the usual problem, so press the edge down firmly. If you want something quieter, try black with a thin red line instead of a full split.
How to Apply
- Apply base coat to short squares and let it dry.
- Lay a strip of tape or vinyl diagonally across each nail and press the edge down.
- Paint the uncovered half in cherry red, let it dry, then remove the tape.
- Cover the red half with tape, paint the other half black, and finish with a glossy top coat.
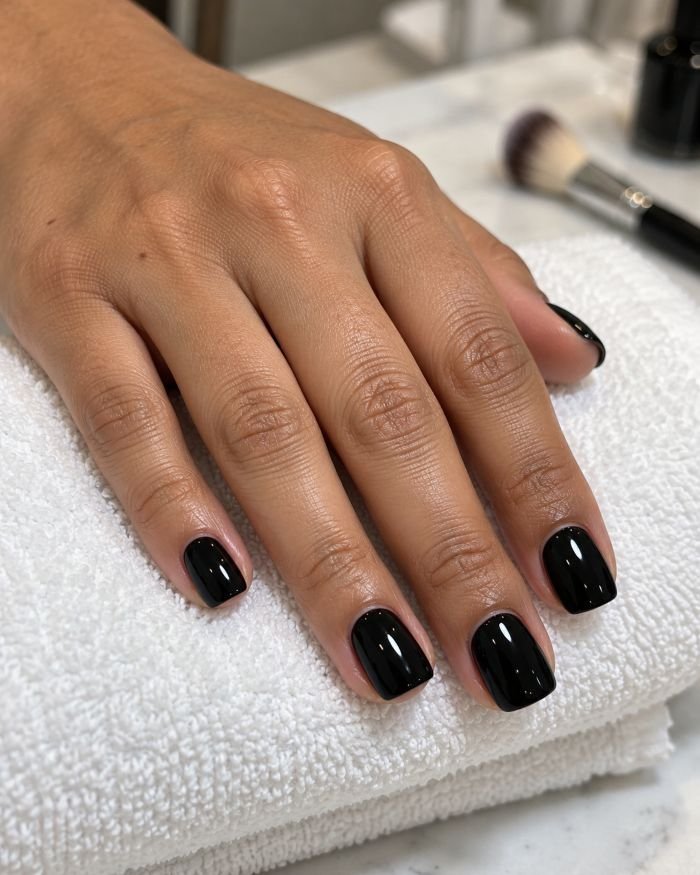
17. Black Dip Powder on Short Squares
Dip powder gives black nails a thicker, sturdier shell. On short squares, the color looks deep and slightly rounded, with a glossy finish once sealed. The shape stays strong even if you use your hands a lot. Because the layer is thicker than regular polish, the edges look softly domed, almost like an overlay.
The process uses a base adhesive, a dip into colored powder, a brush-off of the extra, and a seal with activator and top coat. It’s popular with people whose regular polish chips fast. Removal is the catch: it’s usually soaked off in acetone and gently filed, and rough scraping can damage the nail. Ask your technician how removal works before you book. Skip it if you prefer a thin, natural feel.
How to Apply
- Ask for dip powder in black and make sure the technician prepares and shapes your short squares.
- The technician brushes on adhesive and dips each nail in the black powder, then taps off the extra.
- Repeat the dip once or twice for coverage, then apply activator and file the surface smooth.
- Finish with a high-gloss top coat, and ask how to remove it safely.
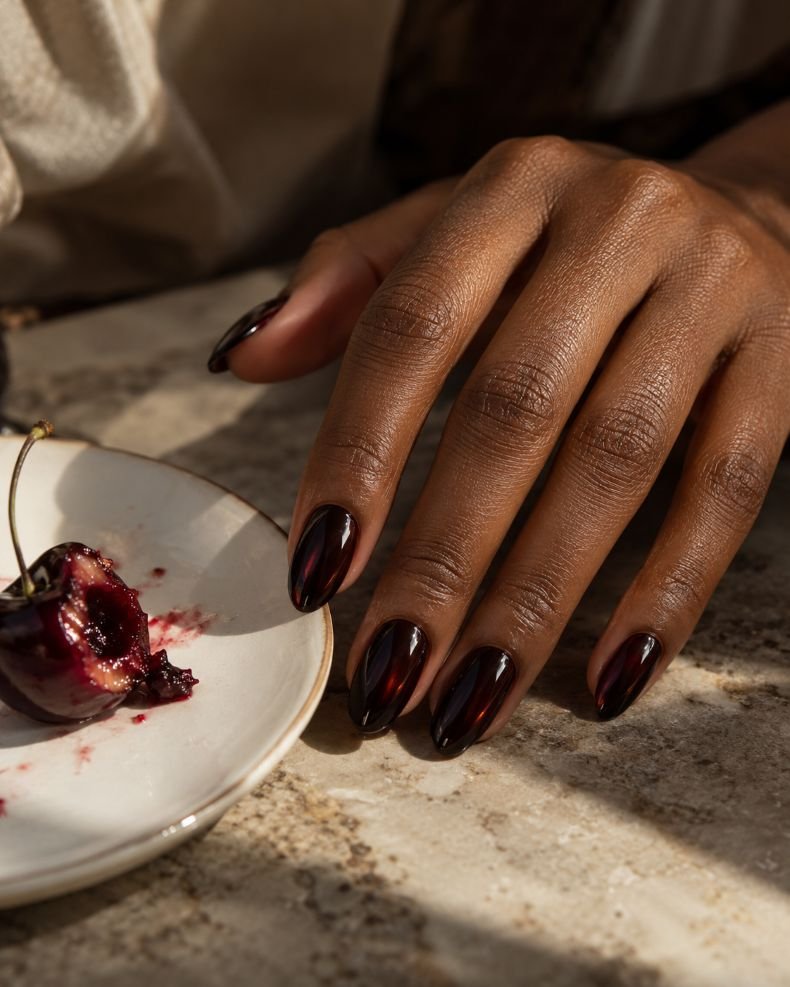
18. Black Cherry Glaze
This one is black with a secret. Start with a true black base, then lay a thin, sheer wine-red layer on top. In shadow, the nail reads black. By a window, it flashes red-brown, like the dark skin of a cherry. Medium almond nails carry it well. To be accurate, the surface is black with a red glaze, not a flat deep red.
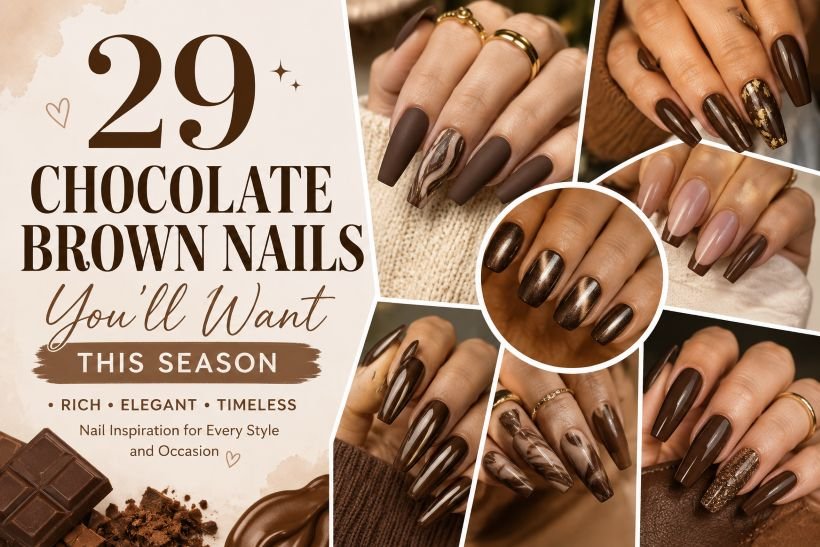
It suits anyone who finds jet black too flat. Brush the glaze on lightly so the black still leads, and stop at two thin coats. The glaze changes the mood more than the color, so the nails look warmer and a little more formal. Silver or rose gold jewelry both work. If you prefer an even softer dark tone, our chocolate brown nails cover warmer options.
How to Apply
- Apply base coat and two thin coats of creme black to medium almonds, and let them dry.
- Brush one thin layer of sheer wine-red over the black.
- Check the color in daylight and add a second sheer layer only if the red is hard to see.
- Seal with a glossy top coat.
19. Tiny Silver Stars on Black Medium Ovals
Think of a night sky pressed onto the nail. On medium oval nails in glossy black, a handful of tiny silver stars and a few specks sit scattered unevenly, thicker near the tips and sparser toward the cuticle. A couple of the stars are four-point sparkles, and the rest are dots. Silver shows better than gold here because it reads cooler against black.
Star stickers or decals are the practical route, since painting a fine star freehand is hard. Place them with tweezers, press them down, and seal with top coat. Keep the count low. Five or six per hand looks like a night sky, and twenty looks like a craft project. It’s an evening look, and it fits a concert far better than a board meeting.

How to Apply
- Apply base coat and two thin coats of black creme, and let them dry fully.
- Pick up tiny silver star decals with tweezers and place five or six across each hand.
- Press each star down with a small silicone tool or a clean fingertip.
- Seal with two layers of top coat to cover the sticker edges.
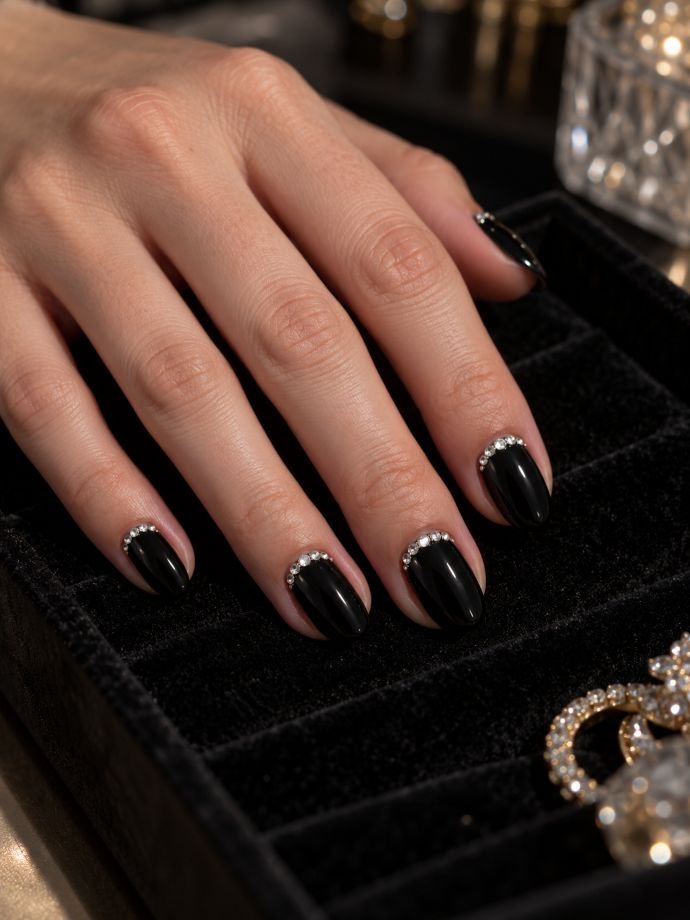
20. Black Almonds with a Micro Gem Line at the Cuticle
A single row of tiny clear crystals follows the cuticle line on short almond nails in glossy black. The stones are about the size of a pinhead, and they sit close enough to read as one sparkling edge. The rest of the nail stays plain. From a distance, you see the black. Up close, the cuticle glitters like a fine necklace.
Set the gems with a wax pencil or tweezers into a dab of builder gel or nail glue, then seal around them. Keep them off the cuticle skin so they don’t catch and lift. Because the stones sit at the base, regrowth shows quickly, so plan on refreshing the set in two or three weeks. For heavier sparkle, take a look at our rhinestone nails collection.
How to Apply
- Paint short almonds with base coat and two thin coats of black, then top-coat and cure or dry them.
- Place a tiny line of builder gel or nail glue along the cuticle area, keeping it off the skin.
- Set the micro crystals one by one with a wax pencil, pressing them gently into the line.
- Cure or dry as your product directs, then seal around the stones.
21. Black Base with a Fine Silver Glitter Fade at the Tips
Fine silver glitter gathers at the free edge of short oval nails and fades downward into plain black, thinning out about halfway up. The glitter is micro-fine, so it sparkles instead of glaring. In low light it looks like frost on a dark window. The top coat leaves the surface smooth, with no gritty edges.
Press the glitter onto tacky polish with a sponge or fan brush, concentrating on the tip and tapping toward the middle. Two thin layers hold better than one thick layer. For chunkier sparkle, see our glitter nails guide. Glitter takes longer to remove than creme polish, so soak a cotton pad in remover, hold it on each nail for a while, then wipe instead of scrubbing.

How to Apply
- Apply base coat and two thin coats of black creme to short ovals.
- While the last coat is still slightly tacky, press fine silver glitter along the tips with a sponge.
- Tap the glitter upward to fade it toward the middle, building a second layer where needed.
- Brush away the loose bits and seal with two thin coats of top coat.
Which Shade of Black Should You Choose?
However, the color of black polish can vary too and there are different shades of black polish. Pure and flat creme called jet black will suit short nails perfectly. A blue-black is characterized by the presence of a cooler undertone and usually suits light and cool skin well. A soft black or a grayish charcoal is warmer and suits warm and darker skin well. You may consider this advice as a guide but try to apply black polish and choose the one that makes your skin appear brighter.
After choosing the color, it is time to select its level of opacity. If you prefer sheer or jelly black nail polish, you will be able to see the surface of your nail through polish (for instance, design 6). Opacity of an opaque creme nail polish is high, and it appears to be graphic (for instance, design 1). In case the look of charcoal is too sharp for you, you may choose deep espresso brown.
Which Nail Shapes and Lengths Suit Black Nails?
Black highlights the shape of the nail, so it is especially important. Short oval shapes and short square shapes appear neat in black and are short enough to keep the color light. Black looks elegant and slightly sharp on almond nails, and our ideas for almond nails demonstrate such shape of the nail very well. Black on coffin nails and stiletto nails is always a statement design and requires nails extensions or press-ons.
Long black nails tend to be heavy, but this look can be lightened by creating designs on a nude base, French line or sheer finish. Rounded oval nails help shorten short and wide nails, and square nail shapes can create width for narrow nails. Length affects usability, because chips can become visible at the tip more on long nails and less on short nails. Choose first the shapes that suit your life well and then the finish of them.
Can You Wear Black Nails to Work or a Formal Event?
Black nails can be suitable for any type of job. But different employers have different requirements concerning dress code. If you work with customers or deal with food, you should know what types of nails your boss will allow you to wear at work. Usually, short, tidy black ovals or black micro French look very neat in offices. Chrome nails and long coffin designs may seem inappropriate to conservative employers; loud nail art may also not be accepted.
To visit weddings and formal dinners, you can wear glossy black nails with one additional decoration, such as a gem line on design 20. Chrome nails, velvet nails, and star nails will match perfectly to your evening dress. If you are going to attend some concerts or evening parties, you should pay attention to our Concert Nail Design guide. The beauty of black nails is not seasonal. It will look great with summer whites or with the winter coat.
How Do You Stop Black Polish from Staining and Chipping?
Dark polish is responsible for yellow nails, and indeed there is some truth behind this. An expert in nail care, quoted in Makeup.com, claims that staining is usually caused by dark colors such as deep reds and blues and that a base coat will prevent stains. Marie Claire further states that the darker the shade, the more easily it will stain, but that the stain is just on the surface. Therefore, always use a base coat. In case your nails are stained, light buffing will help. If the color isn’t associated with the polish, seek advice from a dermatologist because there could be other reasons why the nails are yellowing.
In order to avoid chips, cap the free edge with a top coat, apply thin coats, and change the top coat every few days. Removal of regular polish requires holding a soaked cotton pad on each nail, followed by wiping rather than scrubbing. Gel, dip powder, and chrome removal processes differ, and therefore, follow instructions provided with the product.
Final Thoughts
It is precisely their simplicity that makes black nail art last so long. Choose a style, a texture, and an element, and everything else comes automatically. Should you have never tried black before, give the glossed short oval or the micro French nails a week’s test drive. Should you be a fan of black nail art already, try your hand at the velvet cat-eye or the smoked sheer. It all depends on a thin coat, base coat, and top coat. Bring a photo of what you like, and state your preference as to whether it should be matte, glossy, or sheer black.
Ready to make black nails your next signature look? Whether you prefer a clean, understated manicure or something with chrome, glitter, or creative nail art, save your favorite design and preview how it might look on your hands before your next salon visit.
Preview Your Black Manicure

Bloomie
Bloomie (I) is the founder and author of Nail Blooms, a nail inspiration website dedicated to manicure ideas, nail art, colors, shapes, and emerging beauty trends. My interest in nails began with a simple habit of collecting beautiful manicure ideas and exploring different styles, from timeless nude shades and French tips to creative nail art and seasonal looks. What started as a personal interest gradually grew into Nail Blooms, a space created to make discovering nail inspiration easier and more enjoyable. At Nail Blooms, My goal is to help readers give new ideas, find different possibilities, and feel inspired when choosing their next manicure.
About the editor ↗