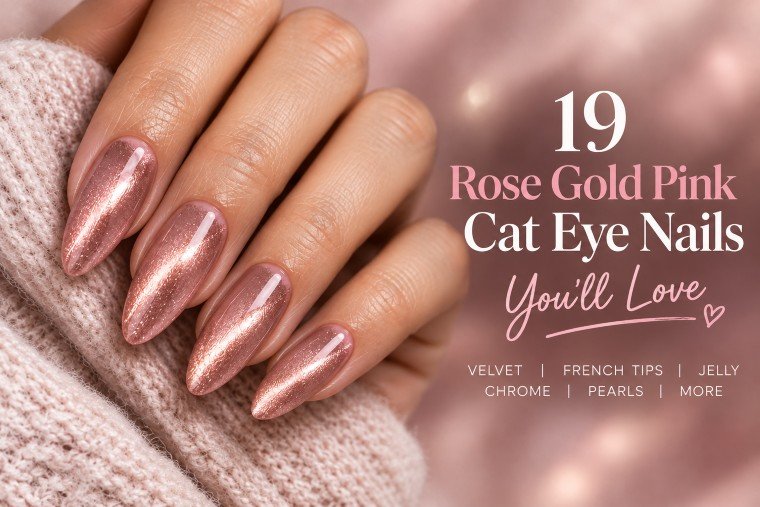
19 Rose Gold Pink Cat Eye Nails You’ll Love
Sometimes the detail that sells a manicure is the one you only see when you reach for your coffee. Pink looks soft with your hand resting flat; turn your wrist, and a ribbon of rose gold travels across the nail. That change in the reflection is what makes rose gold pink cat eye nails so satisfying to wear. The base supplies the blush, while the magnetic finish decides where the light gathers.
This collection explores that pairing through short velvet manicures, precise French tips, translucent layers, and more intricate salon art. Each design describes the actual pink and metallic tones, so you can choose a reference that suits your nails and the finish you want. The gel application steps assume a compatible base, color, top coat, and curing lamp; follow the product directions for each layer. A guide to magnetic lacquer follows the designs if you prefer a manicure that air-dries.
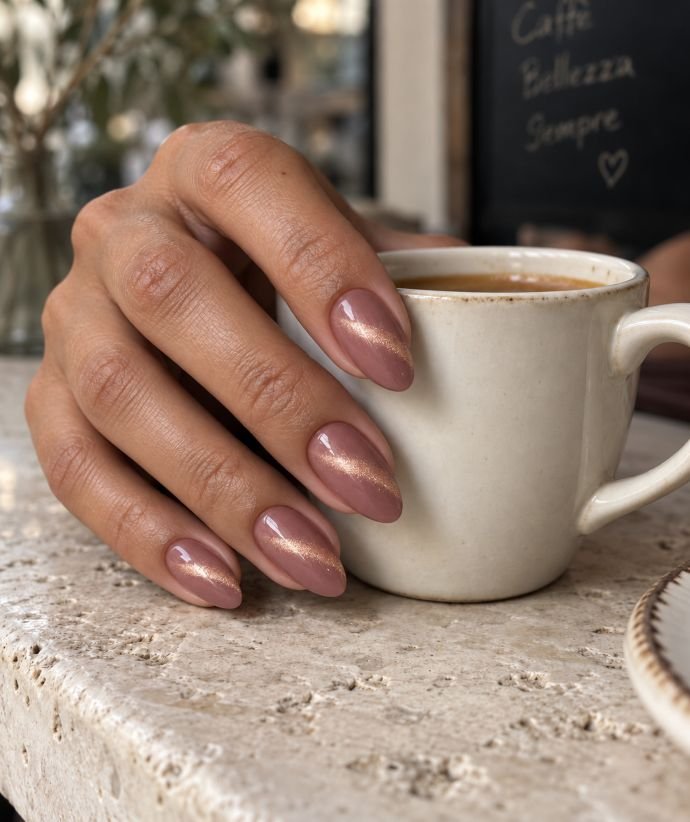
1. Classic Diagonal Rose Gold Cat-Eye Nails
A narrow rose-gold reflection cuts diagonally through dusty pink, with deeper color visible on either side. The band has a bright center and softly fading edges, giving medium almond nails the appearance of polished stone. All five highlights follow a similar angle, although their brightness changes with the curve of each finger. The surface stays smooth and glossy, with no raised detail interrupting the reflection.
Start here if you want rose gold cat-eye nails that make the magnetic effect easy to see. The almond taper gives the diagonal somewhere to travel, while the muted base keeps the result wearable with a plain shirt or a dark evening dress. At the salon, ask to see the chosen polish magnetized over your preferred pink first; the finished swatch tells you more than the bottle color.
How to Apply
- Shape medium almond nails, apply the compatible base system, then add dusty-pink gel and cure as directed.
- Brush a thin, even layer of rose-gold magnetic gel over one nail.
- Hold the nail magnet above the surface at a diagonal, adjusting until the band is defined; cure, then repeat on the remaining nails.
- Apply a glossy gel top coat and cure according to its instructions.
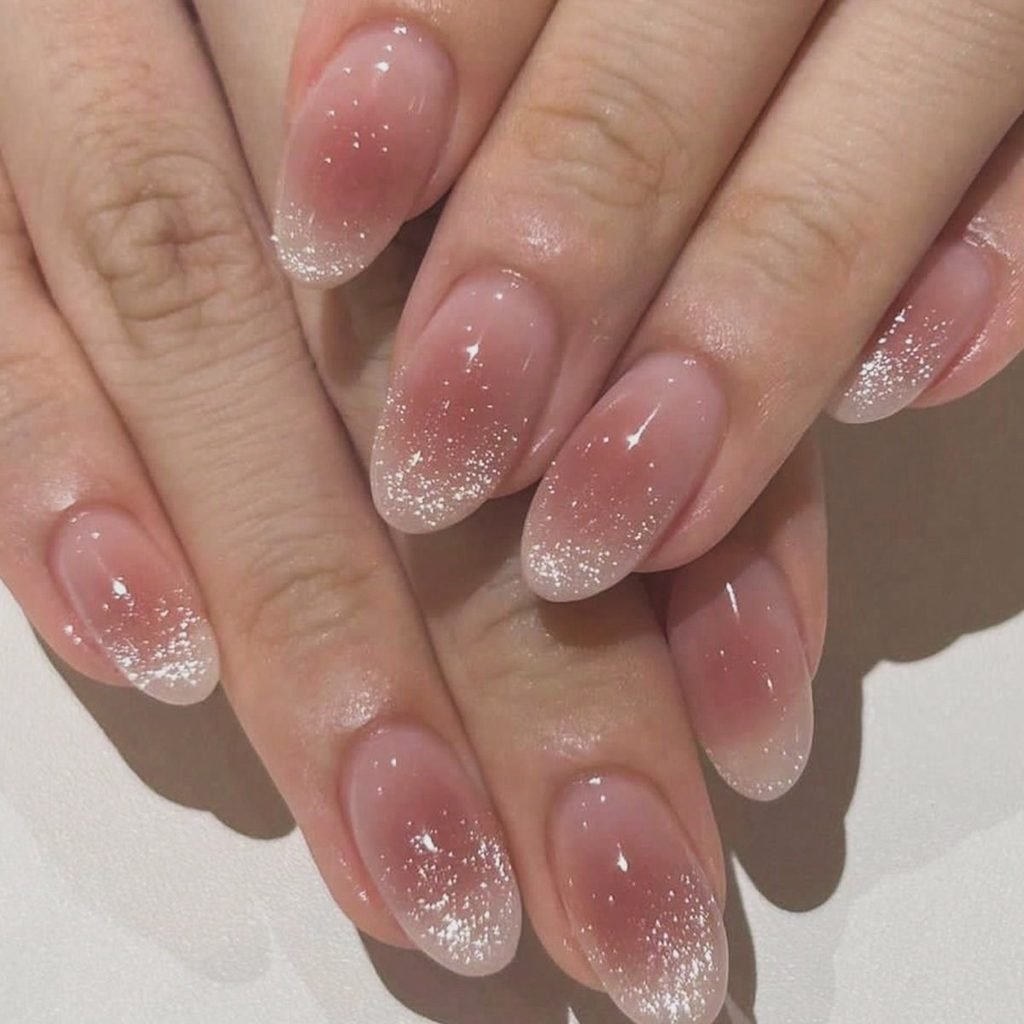
2. Short Blush Velvet Nails
At first glance, this manicure looks like sheer blush polish. A slight turn of the hand reveals a broad rose-gold glow that spreads across the center of each short round nail. The perimeter remains a little darker and more transparent, giving the reflective area a softly cushioned appearance. There is no painted outline or accent nail; the light creates enough variation across the hand on its own.
These short pink cat-eye nails fit naturally alongside quiet luxury manicures, especially when you want something subtle that still rewards a closer look. Keep the free edges consistently short so the glow feels balanced across all five fingers. Fine magnetic shimmer suits this treatment better than conspicuous flakes. Ask for a broad velvet effect and bring a moving reference if possible, since a still photo captures only one moment of the reflection.
How to Apply
- Prepare short round nails and apply a sheer blush gel base over the appropriate base coat; cure.
- Add a thin layer of fine rose-gold magnetic gel to one nail.
- Use the magnet arrangement recommended for that formula’s velvet effect, adjusting around the nail until the reflection spreads broadly; cure each nail after shaping the effect.
- Finish with a smooth glossy top coat and cure.
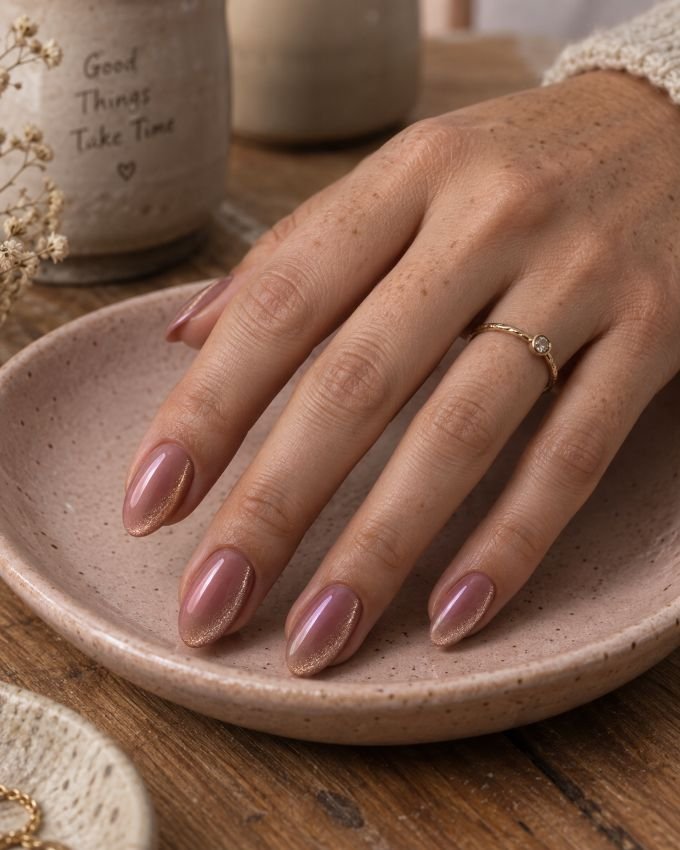
3. Rose Gold Crescent Cat-Eye Nails
The brightest part of this manicure hugs one side of the nail. A curved rose-gold highlight sweeps from the lower sidewall toward the tip, leaving a larger field of muted pink beside it. Medium oval nails echo that curve, and a clear glossy finish gives the reflection a smooth, rounded depth. The crescent remains softly blurred at its inner edge, like light falling across a curved piece of metal.
This is a useful choice when you like the movement of dusty rose cat-eye nails but want a less central highlight. Among different oval nail ideas, the shape works particularly well here because the artwork follows its natural outline. Ask your technician to test the magnet position before curing. The crescent should remain visible as the finger turns, even though its width and brightness will change with the light.
How to Apply
- Apply the base system and muted rose-pink gel to medium oval nails, curing each required layer.
- Cover one nail with a thin coat of rose-gold magnetic gel.
- Position the magnet beside a sidewall and adjust its angle to develop a curved reflection; cure once satisfied and repeat across the set.
- Seal with glossy gel top coat and cure.
4. Rose Gold Magnetic French Tips
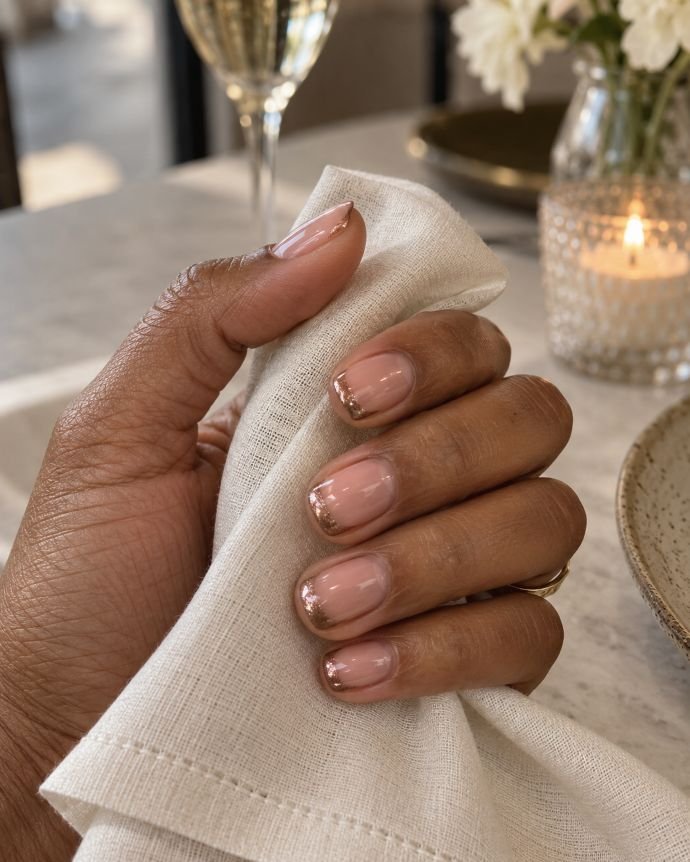
Most of the nail stays translucent pink, with rose-gold magnetic polish reserved for the free edge. The tips are wide enough to reveal a shifting reflection, then curve into shallow smile lines at the sides. On short soft-square nails, the straight edge keeps the metallic detail tidy. A glossy top coat runs over the whole surface, giving the sheer nail bed and reflective tip the same smooth finish.
For rose gold cat-eye French tips, proportion matters more than extra artwork. A hairline tip may leave too little room to appreciate the magnetized shimmer, while a deep tip can overwhelm a short nail. Aim for a narrow but clearly visible band. Our short square nail ideas offer more ways to work with this length. Choose a rosy base that blends comfortably with the nail bed so the warm tips remain the focal point.
How to Apply
- Shape short soft-square nails and apply a translucent rosy base over the compatible base coat; cure.
- Paint shallow French tips with rose-gold magnetic gel, keeping their depth consistent.
- Magnetize each painted tip while it is uncured, then cure before moving to the next nail.
- Apply a glossy top coat across each nail and cure as directed.
5. White Micro-French Pink Velvet Nails
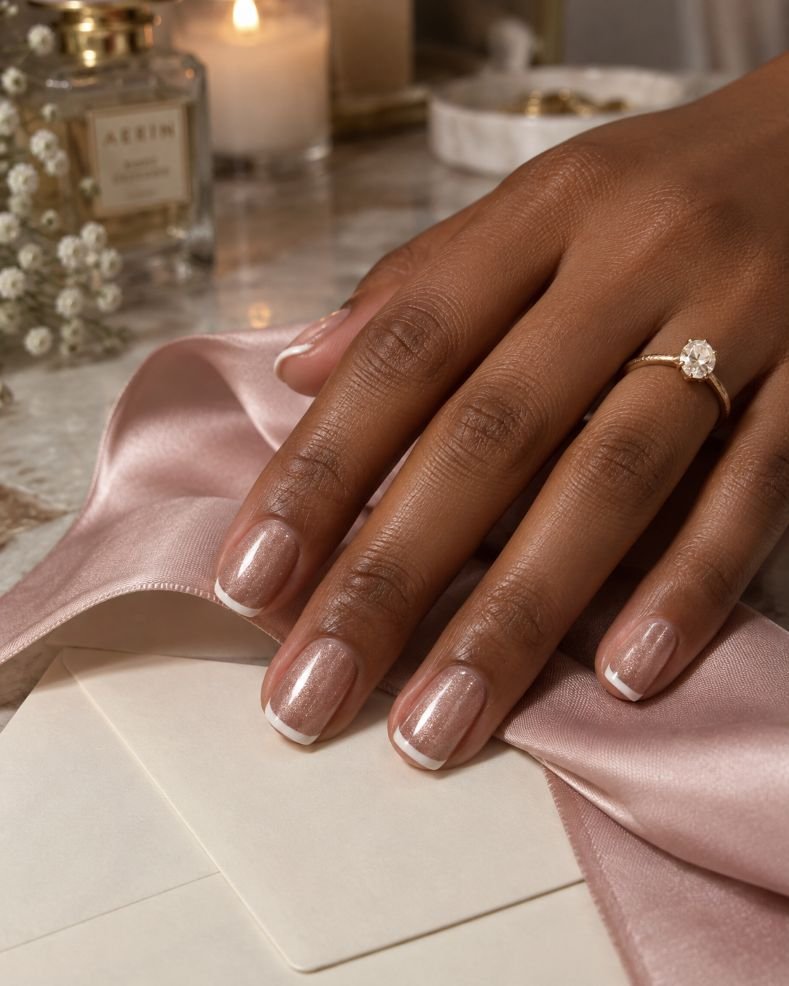
A fine white line traces the edge of each squoval nail, sitting above a full wash of pink and rose-gold velvet. The magnetic glow fills the nail bed, while the tip stays crisp and opaque. With the corners gently rounded, the white outline follows the shape without looking angular. The warm reflection is strongest through the middle of the nail and softens toward the cuticle beneath a glossy finish.
White gives these pink cat-eye French tip nails a familiar structure, making them an easy reference to bring when you usually order a classic French manicure. They also belong in a considered selection of bridesmaid nail ideas: the pink can be adjusted to the dress palette while the tip remains consistent across different nail lengths. Keep the white line thin enough that it frames the velvet without hiding the glow near the free edge.
How to Apply
- Prepare short-to-medium squoval nails and apply a sheer pink base, curing as required.
- Add rose-gold magnetic gel, shape a broad velvet reflection on each nail, and cure.
- Paint a fine white line along each free edge with a liner brush; cure the linework.
- Apply a clear glossy top coat and cure.
6. Pink Jelly Glass Cat-Eye Nails
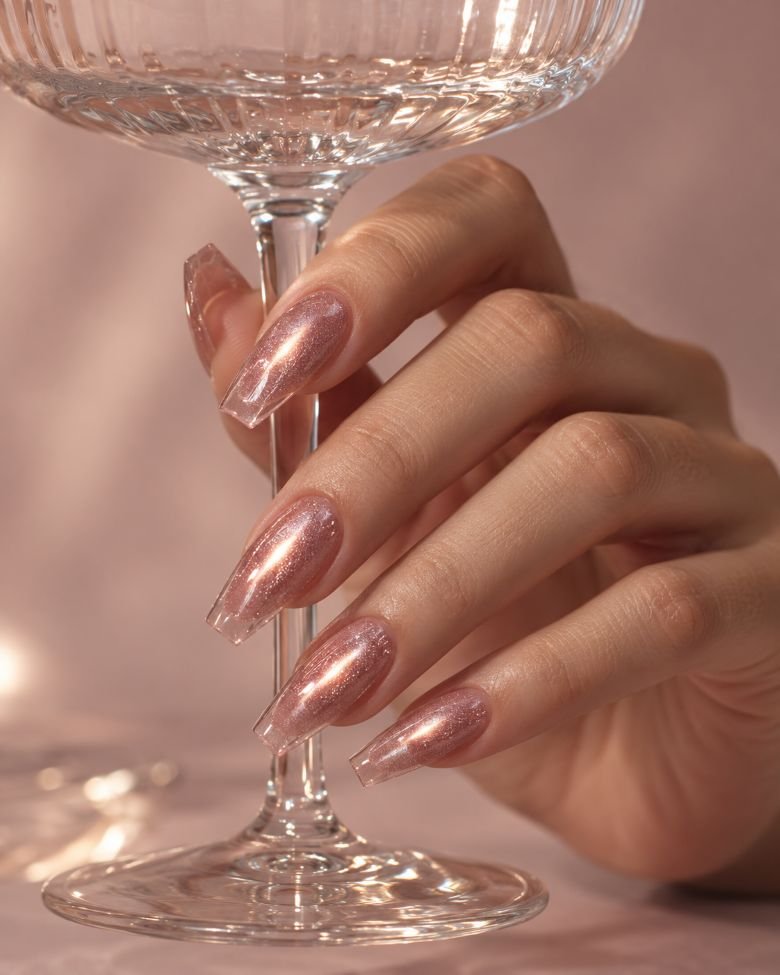
You can still glimpse the free edge through these medium coffin nails. A transparent pink tint surrounds fine rose-gold magnetic shimmer, making the reflection appear suspended below the surface. The color deepens gently where the pink layers overlap, while the tapered sides keep the squared tips from looking heavy. A broad central glow, rather than a sharply defined stripe, lets the translucent depth remain the main feature.
The appeal of pink jelly cat-eye nails depends on restraint with the color layers. An opaque pink coat would conceal the effect you are trying to show, so ask for a thin jelly wash and inspect it before adding more. This longer shape gives the glassy finish room to breathe, though medium oval nails offer a softer adaptation. A salon is the more practical route if the reference also requires extensions or careful correction of the nail structure.
How to Apply
- Prepare structurally sound medium coffin nails or extensions and apply a compatible sheer pink base; cure.
- Apply fine rose-gold magnetic gel, arrange a broad central glow, and cure each nail.
- Add a thin transparent pink jelly layer that leaves the reflection visible; cure as directed.
- Finish with a clear glossy top coat and cure.
7. Vertical Rose Gold Ribbon Nails
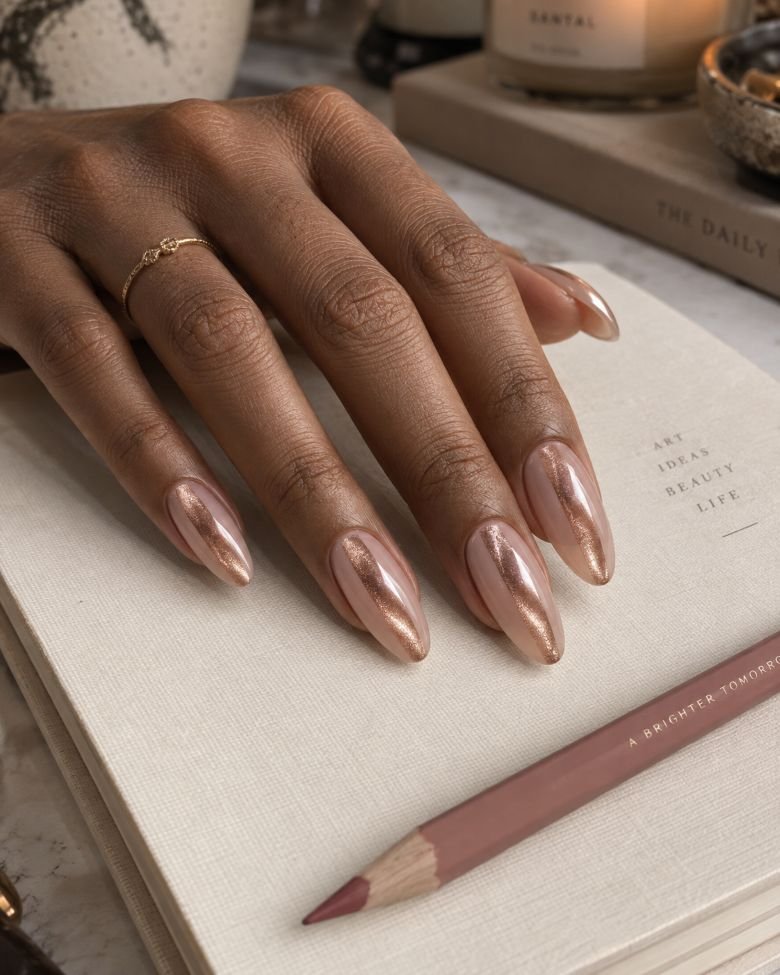
One broad metallic ribbon runs lengthwise down each long oval nail, surrounded by generous margins of sheer pink. Its painted edges are clean, but the rose-gold magnetic reflection inside remains soft and mobile as the viewing angle changes. The ribbon stops just short of the cuticle and follows the rounded tip. Gloss covers both the transparent sides and the reflective center, keeping the surface visually continuous.
The open sides make these longer nails feel lighter, particularly when your usual manicure is a sheer neutral. They also give the magnetic color a definite boundary, which separates this design from an ordinary central cat-eye stripe. Ask the artist to paint the magnetic ribbon first and shape its reflection within that area. A fine brush controls the width; moving the magnet alone will not create the clean pink margins. Keep rings simple enough to let the vertical lines remain noticeable.
How to Apply
- Prepare long oval nails and apply a sheer pink gel base over the appropriate base coat; cure.
- Use a detail brush to paint a broad central ribbon of rose-gold magnetic gel, leaving both side margins clear.
- Shape the reflection inside the wet ribbon with a magnet and cure each nail individually.
- Cover the full nail with a glossy top coat and cure.
8. Rosewood Cat-Eye Nails With Fine Pink Contours
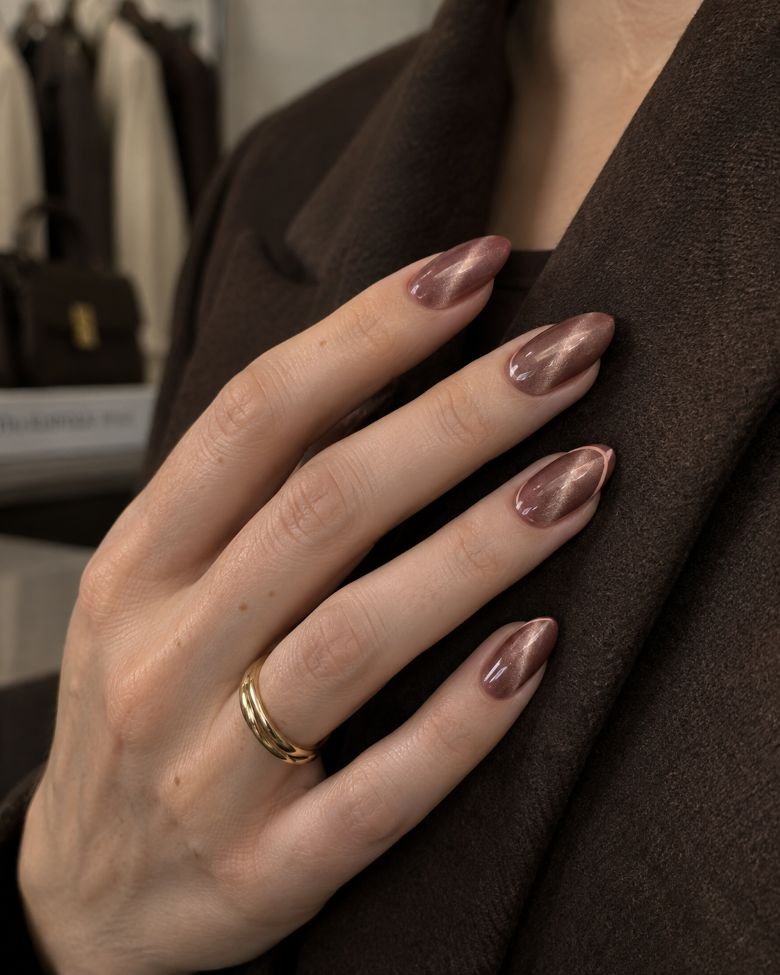
Rosewood gives the rose-gold reflection a deeper background, with the color falling somewhere between muted pink and soft brown. Medium almond nails carry a wide diagonal glow, while two accents add a fine blush line that curves around part of the perimeter. Those lines remain deliberately incomplete, leaving the tips open. The combination of a darkened base, warm shimmer, and pale linework produces a clear hierarchy beneath the gloss.
Choose this version when baby pink feels too sweet for your wardrobe. The rosewood base looks coherent with chocolate tailoring, faded black denim, and cream knitwear, and the blush contours keep the palette connected to pink. An artist can also adapt this design across uneven nail beds: the incomplete outlines can change in length without looking accidental. Ask for thin contours so they support the reflective band instead of dividing the nail into sections.
How to Apply
- Apply rosewood gel to prepared medium almond nails over a compatible base coat and cure.
- Add rose-gold magnetic gel, arrange a broad diagonal reflection, and cure each nail.
- Paint fine, incomplete blush-pink contours on two accent nails and cure the artwork.
- Seal the set with a glossy gel top coat and cure.
9. Rose Gold Velvet Half-Moons
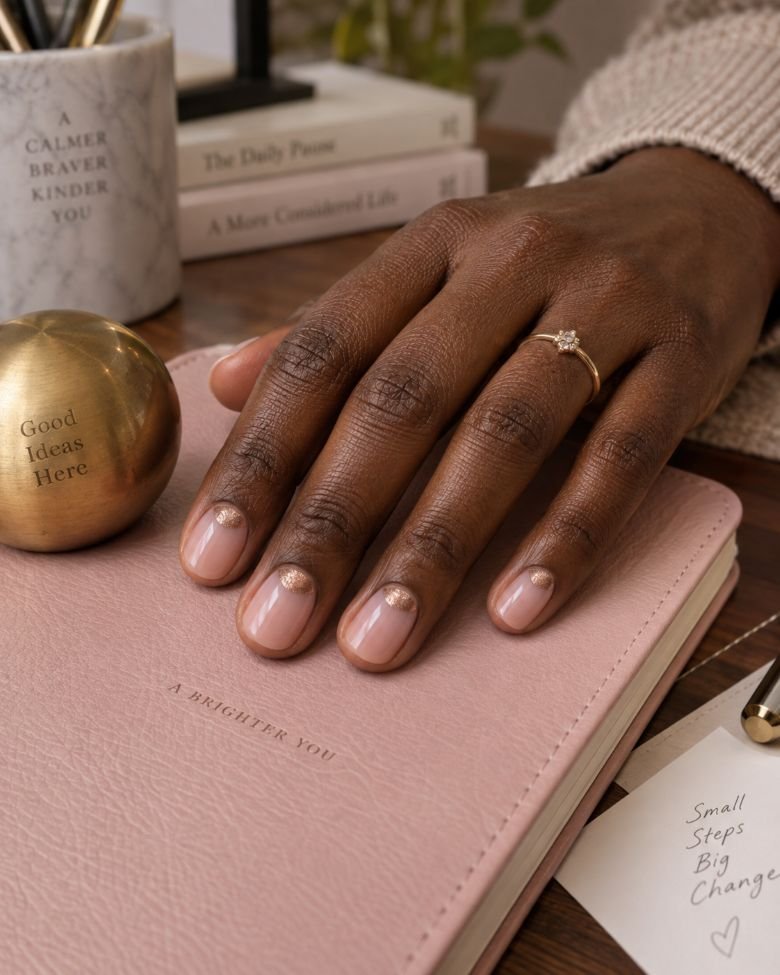
Small rose-gold crescents sit just above the cuticles, following the curve of each short round nail. The rest of the surface is a soft, glossy blush pink with enough transparency to show the natural nail beneath. Within each painted half-moon, the magnetic shimmer gathers into a gentle glow. The crescents have a consistent depth across the hand, keeping the decoration deliberate even on the smallest nail.
Placing the detail low on the nail offers another way to wear short rose gold cat-eye nails when you have very little free edge for a French tip. The rounded shape repeats the cuticle curve, which makes the whole manicure feel considered. Leave a neat margin between polish and skin; the metallic color makes uneven application easier to spot. Because the design sits close to the cuticle, expect that margin to become more noticeable as the nail grows.
How to Apply
- Prepare short round nails and apply a sheer blush gel base, curing the necessary layers.
- Paint shallow half-moons of rose-gold magnetic gel above the cuticles with a small detail brush.
- Adjust the magnet beside each painted crescent to develop a soft reflection; cure each nail.
- Apply a clear glossy top coat over the entire nail and cure.
10. Angled Pink and Rose Gold Velvet Tips
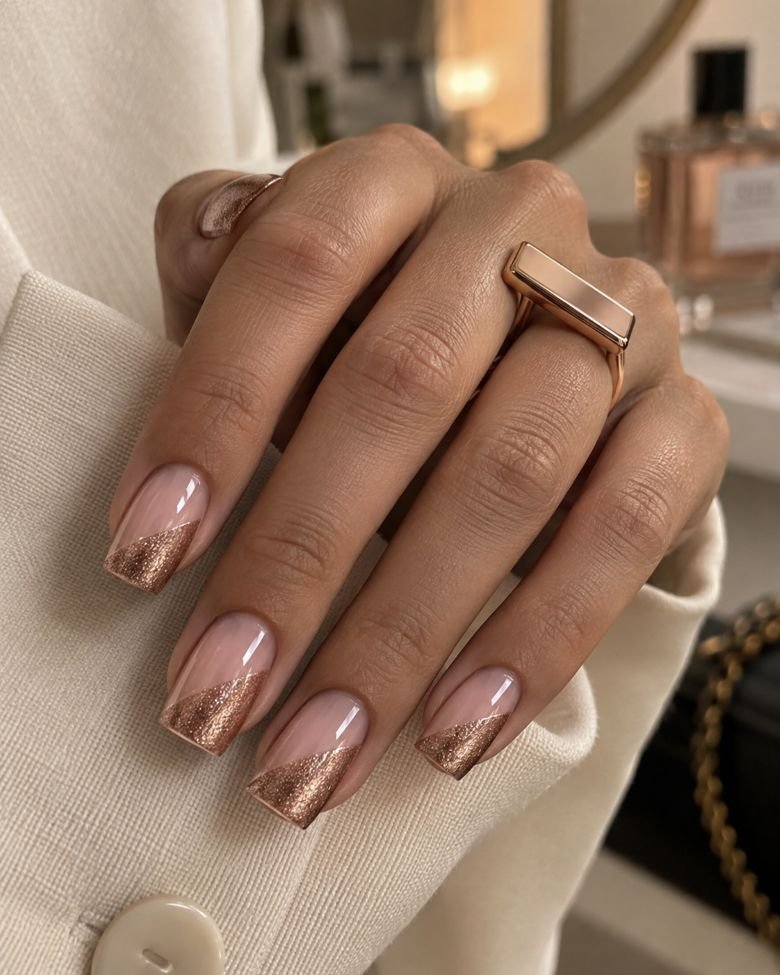
A diagonal boundary divides each medium square nail into translucent pink and shimmering rose gold. The metallic area begins low on one sidewall and rises toward the opposite corner, forming an angled tip with enough width to show a velvet reflection. The same direction repeats across the hand. Both areas are glossy, so the main contrast comes from their transparency and the clean slant between them.
Square tips give this angled French manicure a graphic quality that feels particularly good with a tailored cuff or a simple rectangular ring. It is a stronger design than a narrow French line, but the open pink area prevents the metallic section from taking over. The artist should check the diagonal from a full-hand view before curing. A slight adjustment for a narrower pinkie nail will usually look more balanced than forcing exactly the same measurements onto every finger.
How to Apply
- Apply translucent pink gel to prepared medium square nails over the compatible base coat and cure.
- Paint a diagonal tip section on each nail with rose-gold magnetic gel, refining its boundary with a detail brush.
- Shape a broad magnetic glow within each section and cure one nail at a time.
- Finish the full set with a glossy top coat and cure.
11. Crossed Rose Gold Magnetic Ribbons
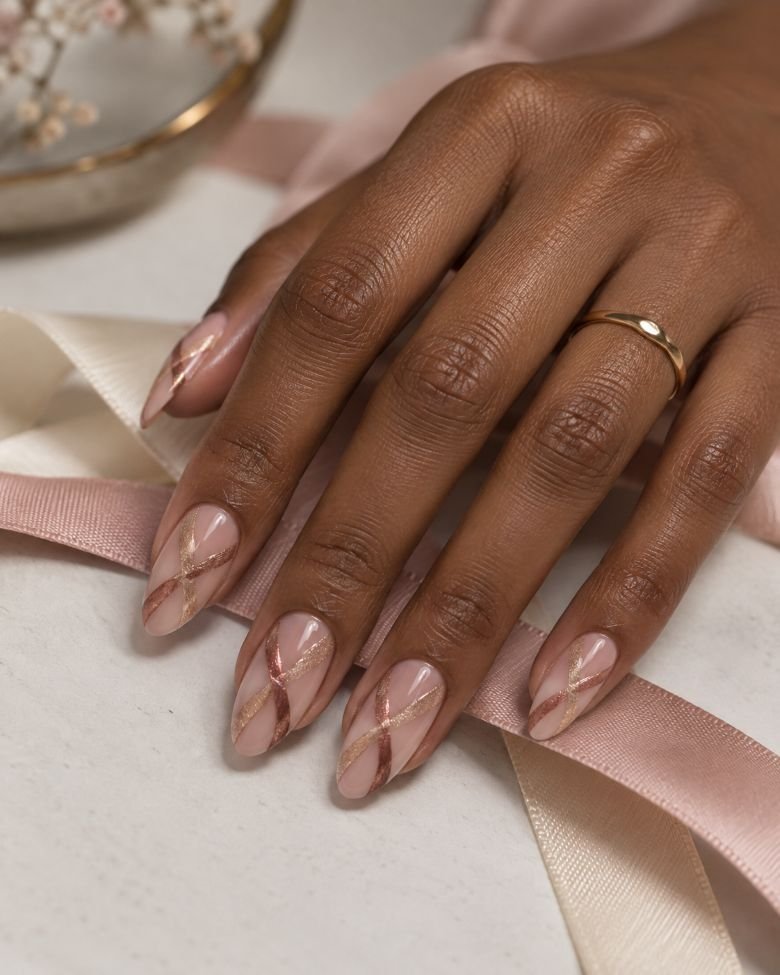
Two narrow ribbons cross over a sheer pink base, forming an off-center X on each medium almond nail. One ribbon carries a pale champagne-rose reflection; the other is a slightly deeper copper pink. Their edges stay defined where they overlap, while the magnetic shimmer inside each strip gives the crossing depth. Plenty of translucent nail remains visible around the ribbons, and the whole set has a smooth glossy finish.
Choose this architectural option if you enjoy pink cat-eye nail art with defined shapes. The placement can vary across the hand without losing the repeated crossing motif. It takes separate painted and cured layers to preserve that structure, so treat it as a salon reference unless you already handle detailed gel work confidently. Keep the ribbons relatively narrow; two broad metallic blocks would hide the pink base that makes the crossing easy to read.
How to Apply
- Apply a sheer pink base to prepared medium almond nails and cure.
- Paint the first diagonal ribbon with champagne-rose magnetic gel, shape its reflection, and cure.
- Paint a second copper-pink magnetic ribbon across the first, magnetize it separately, and cure.
- Apply clear glossy top coat to smooth the layered artwork and cure as directed.
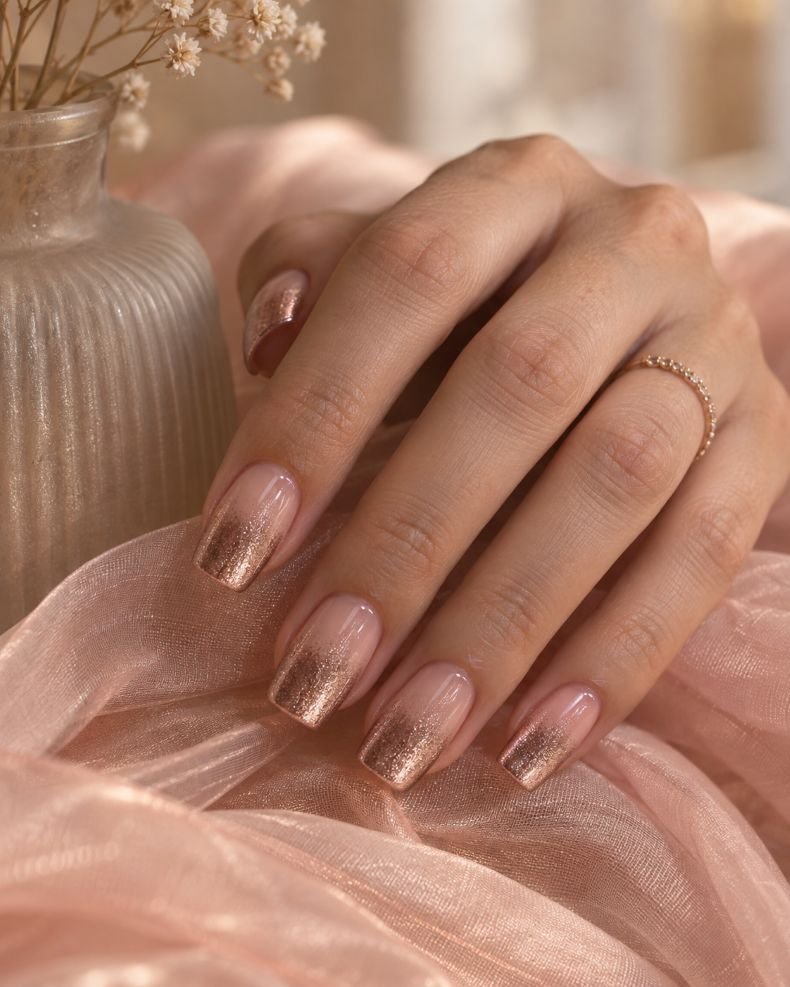
12. Blush-to-Rose Gold Velvet Ombré
Color gathers gradually toward the tips of these medium soft-square nails. The cuticle area stays sheer blush, followed by a faint veil of warm shimmer that becomes fuller rose gold at the free edge. There is no obvious line where one area ends. A broad magnetic glow runs through the colored portion, giving the gradient a second layer of movement beneath the glossy surface.
For pink cat-eye ombré nails, the fade should still be visible when the brightest reflection moves out of view. That requires a painted gradient as well as magnetized pigment; a light band on one solid color will give a different result. Ask for the metallic coverage to start softly around the middle of the nail. This placement leaves the pink base prominent and gives you a useful compromise between a full metallic manicure and a sharply bordered French tip.
How to Apply
- Apply a translucent blush base to prepared medium soft-square nails and cure.
- Brush rose-gold magnetic gel over the tip, feathering it thinly toward the middle to create a gradual fade.
- Shape a broad reflection within the uncured gradient and cure each nail; keep any additional layers within the product’s instructions.
- Seal with a smooth glossy gel top coat and cure.
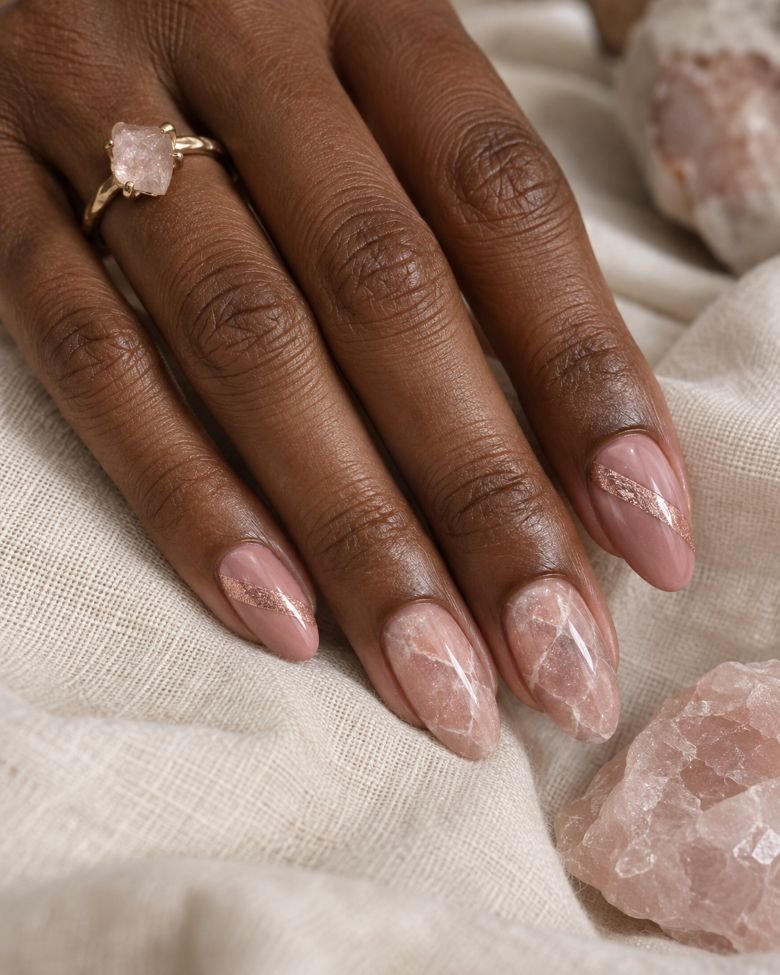
13. Rose Quartz and Cat-Eye Accent Nails
Fine milky veins drift through two translucent pink accent nails, resembling the cloudy interior of rose quartz. The remaining medium ovals wear dusty pink beneath diagonal rose-gold magnetic bands. Small areas of warm shimmer also peek through the marbled accents, connecting them to the rest of the set. Everything sits beneath a clear glossy finish, so the stone effect comes from the layering and irregular lines.
The quieter quartz accents give your eye somewhere to rest between the brighter reflections. Keep the veining sparse and slightly broken; a dense network of white lines would make the manicure feel busier than the soft palette suggests. This pairing suits someone who likes rose gold nail designs with detail visible at close range. Bring a reference that shows the entire hand, because the balance between marbled and magnetic nails matters as much as the artwork on either accent.
How to Apply
- Prepare medium oval nails, apply a translucent dusty-pink base, and cure.
- Add rose-gold magnetic gel; create defined diagonal bands on three nails and a softer glow on two accents, then cure.
- On the accents, layer sparse milky-white veins with a thin transparent pink wash, curing each product as directed.
- Seal the complete set with a clear glossy top coat and cure.
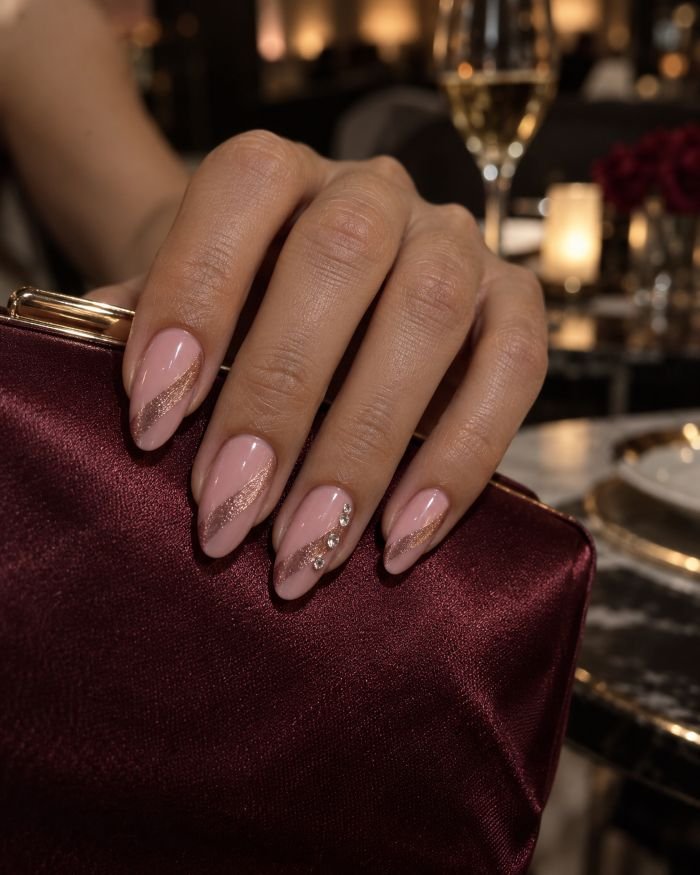
14. Pink Cat-Eye Nails With a Crystal Trail
Three tiny clear crystals follow the edge of a rose-gold band on the ring fingernail, like separate points of light beside a wider reflection. The other medium almond nails keep their blush-pink magnetic finish uninterrupted. Each diagonal band follows the same direction, and the crystals stay low against the nail. A glossy surface surrounds the embellishments while their faceted faces remain clear.
Restraint makes rose gold cat-eye nails with rhinestones easier to appreciate. The stones add a sharper flash, while the magnetic pigment supplies the softer movement around them. If you already wear a substantial ring, place the crystal trail on your index finger instead so the details have room. Our rhinestone nail ideas offer other placements to compare. For this version, choose small flat-backed stones and ask the technician to check that their edges are securely seated before finishing.
How to Apply
- Apply a blush-pink base to prepared medium almond nails and cure.
- Add rose-gold magnetic gel, form matching diagonal highlights, and cure each nail.
- Secure three small flat-backed crystals beside the ring nail’s highlight with a compatible nail adhesive or gem gel, setting it according to its instructions.
- Finish the surrounding nail with a compatible glossy top coat, keeping the crystal faces clear, and cure if required.
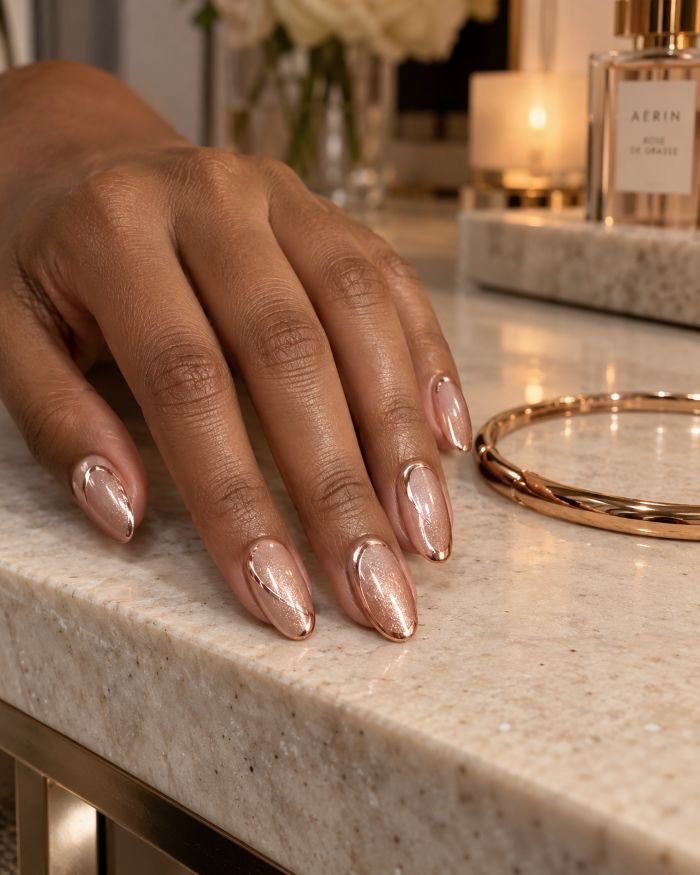
15. Pink Velvet Nails With Rose Gold Chrome Outlines
Two kinds of reflection share these medium oval nails. A soft rose-gold magnetic glow spreads through the pink base, while a narrow chrome arc follows part of the sidewall and tip. The mirror-bright outline stops before completing a full border. Its sharp edge stays legible beside the finer shimmer, and the glossy surface lets both finishes catch the light without adding bulky decoration.
The distinction between chrome and cat-eye nails is useful here: the outline gives a crisp metallic edge, while the magnetic layer creates the softer internal reflection. This is a detailed salon request because isolated chrome needs controlled placement and compatible layers. Ask for the outline to remain fine, especially on the pinkie. A thick metallic frame can shrink the visible pink area. The finished set pairs easily with a single polished bangle, which repeats the contrast between curved metal and soft color.
How to Apply
- Prepare medium oval nails and apply a sheer pink base, curing as directed.
- Apply rose-gold magnetic gel, shape a broad velvet glow, and cure.
- Use a compatible isolated-chrome system to create fine rose-gold arcs along selected sidewalls and tips; follow that system’s cure and pigment-removal directions.
- Seal the chrome and surrounding nail with the recommended glossy top coat and cure.
16. Satin Pink and Glossy Rose Gold Split Nails
The difference shows most clearly when light falls across the hand: one half of each soft-square nail stays softly satin, while the other flashes rose gold. A diagonal line separates opaque dusty pink from the glossy magnetic section. The shimmer has a broad velvet appearance within its half of the nail, and the pink remains completely plain. There are no outlines or embellishments to distract from the two finishes.
This is an appealing way to try rose gold velvet nails if an entirely reflective manicure feels too dressy for everyday wear. The satin pink gives the metallic area a quieter neighbor and looks particularly good beside a textured knit. Application needs a little patience at the dividing line. Ask for the matte or satin top coat only over the plain pink; carrying it across the magnetic section would change the clear, glossy reflection that gives this design its contrast.
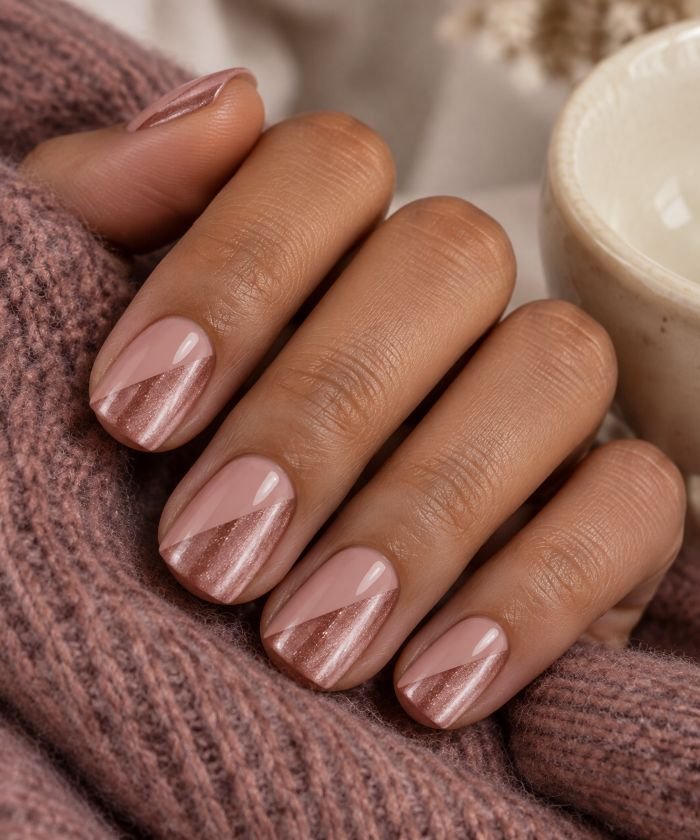
How to Apply
- Apply opaque dusty-pink gel to prepared short-to-medium soft-square nails over the appropriate base coat; cure.
- Paint one diagonal half with rose-gold magnetic gel, shape a broad reflection, and cure.
- Apply a glossy top coat across the full nail and cure.
- Using compatible products, apply satin gel top coat only to the plain pink half, refine the dividing edge, and cure.
17. Tonal Pink Cat-Eye Swirl Nails
Blush and dusty-rose waves travel lengthwise across medium almond nails, separated by slender channels of translucent pink. Both painted colors contain warm rose-gold magnetic shimmer, so the swirls catch light at slightly different angles. Their routes vary across the hand: one nail has a broad central bend, another carries the color closer to a sidewall. A smooth glossy finish keeps the curved compositions looking fluid.
The limited palette gives this pink cat-eye nail art enough consistency to handle an uneven pattern. You can enjoy the movement of swirls without bringing five different colors into the manicure. It is also a good reference for someone who likes abstract art but finds opaque waves too flat. Ask the artist to preserve the clear channels and magnetize each painted section before curing. The shapes come from the brushwork; the magnet adds depth inside them. Extra glitter would blur that distinction.
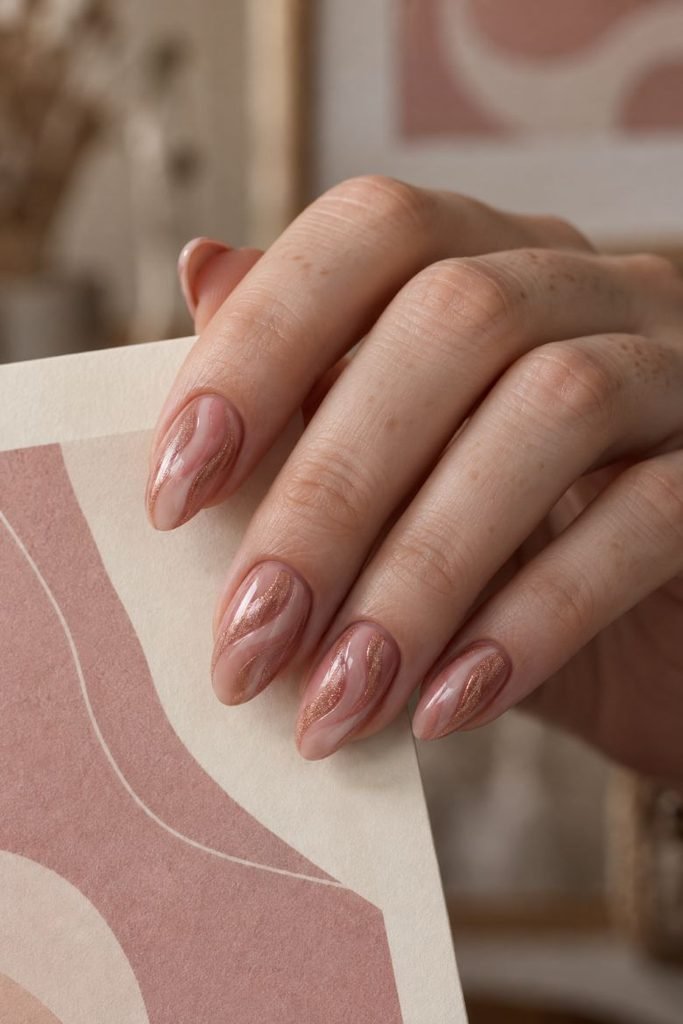
How to Apply
- Apply a translucent pink base to prepared medium almond nails and cure.
- Paint a flowing blush-pink magnetic wave on each nail, arrange its warm reflection, and cure.
- Add a dusty-rose magnetic wave beside it, leaving a narrow clear channel; magnetize the new section and cure.
- Finish the complete artwork with a clear glossy top coat and cure.
18. Champagne Pink Velvet Nails With Pearl Accents
Pale champagne warmth runs through a sheer pink base, producing a fine rose-gold velvet reflection on short oval nails. Two tiny flat-backed pearls sit near the cuticles of the index and ring fingers. The remaining nails stay undecorated, with the magnetic glow spreading gently through their centers. Gloss surrounds the pearls, whose softly luminous surfaces offer a small change in texture against the reflective polish.
For pink cat-eye wedding nails, this version keeps the details small enough to work beside lace, embroidered fabric, or an ornate ring. The short oval shape also makes the embellishments feel proportionate to the hand. Compare different pearl nail ideas before deciding on placement, and choose a cream or white pearl according to the surrounding outfit rather than assuming they are interchangeable. A low profile matters here: oversized pearls would pull attention away from the subtle champagne-pink finish.
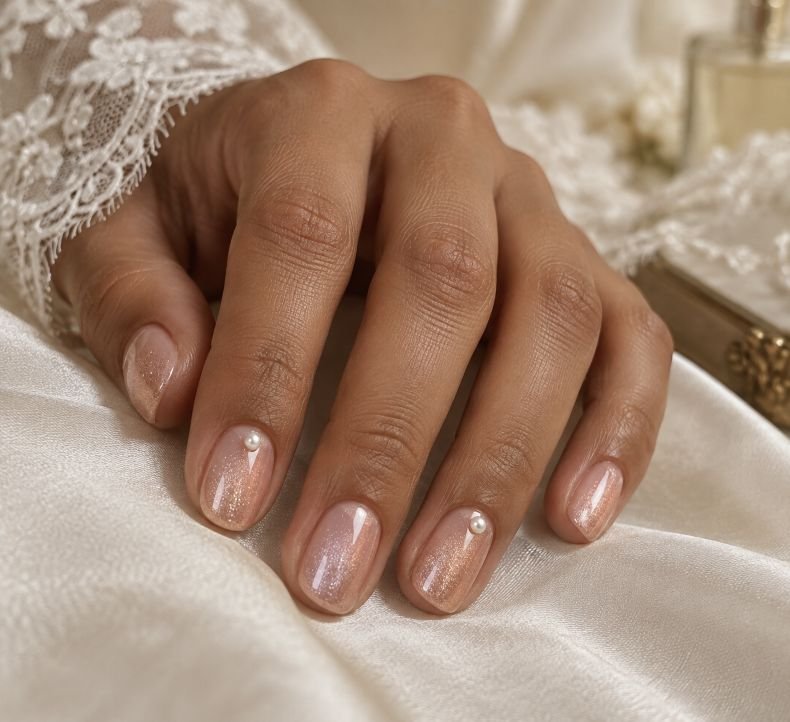
How to Apply
- Apply a sheer pink gel base to prepare short oval nails and cure.
- Add fine champagne-rose magnetic gel, create a broad velvet reflection, and cure each nail.
- Secure one tiny flat-backed pearl above the cuticle on the index and ring nails, using compatible nail adhesive or gem gel as directed.
- Apply a glossy top coat around the pearls without covering their faces, finish the remaining nails, and cure if required.
19. Rose Gold Cat-Eye Nails With Floating Ovals
On two accent nails, small rose-gold magnetic ovals appear to float inside a sheer pink base. Their painted boundaries are clean, with space above, below, and beside each shape. The other medium almond nails carry a full pink velvet finish with the same warm reflection. Clear gloss smooths the entire set, keeping the oval accents flat while their magnetized centers supply an illusion of depth.
This is the design to save if you want negative-space cat-eye nails with a more graphic arrangement. The two open accents interrupt the metallic coverage without introducing another color, and their rounded forms relate naturally to the almond shape. Ask for each oval to be painted first, then magnetized within its boundary. A normal cat-eye band across the whole nail will not produce the same isolated shape. Keep the placement slightly off-center for a relaxed composition that still looks intentional from a distance.
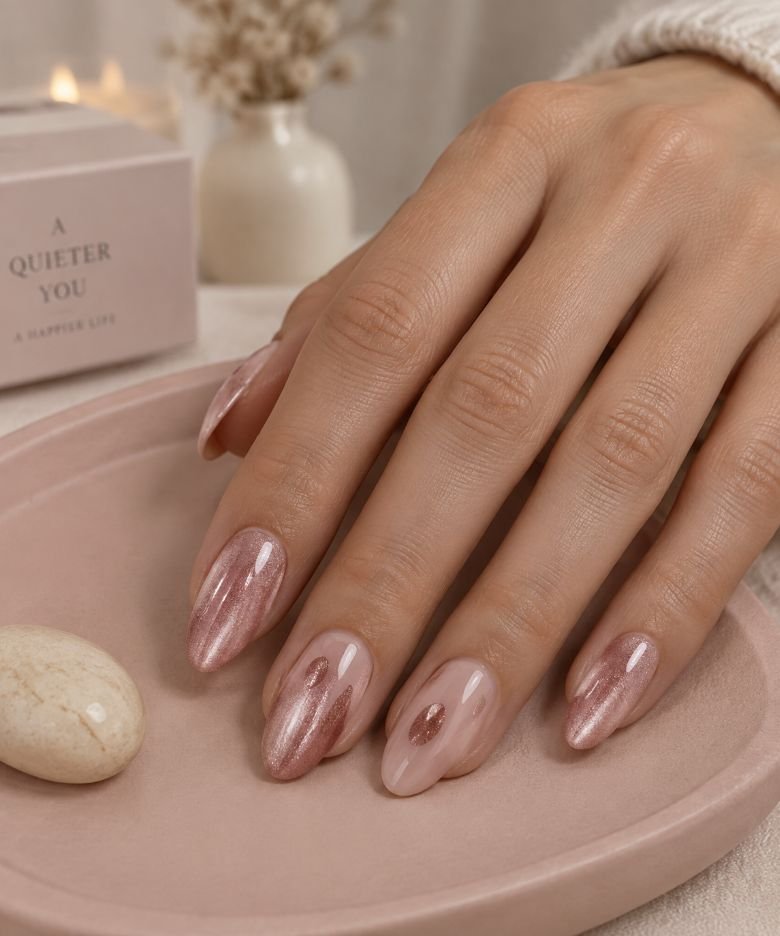
How to Apply
- Prepare medium almond nails, apply a sheer pink base, and cure.
- Give three nails a full layer of rose-gold magnetic gel, shape a broad velvet reflection, and cure.
- Paint a small rose-gold magnetic oval on each of the two remaining nails, leaving open pink space around it; magnetize and cure each accent.
- Apply a clear glossy top coat across the set and cure.
Choosing Between a Cat-Eye Stripe and a Velvet Glow
A cat-eye stripe concentrates the reflection into a visible band, leaving deeper color beside it. A velvet finish spreads that reflection more broadly, giving the nail a softly rounded, luminous appearance. Both belong to the magnetic-polish family. Daily Charme, for example, places its rose-gold C03 Precious gel within an Original Velvet Cat Eye collection. The finish you see depends on the formula and how the magnetic effect is arranged.
For your appointment, describe the width and position of the highlight: a diagonal stripe, a curved edge, or a broad glow through the center. Bring a short video if the movement is what caught your attention. Chrome has a different role, adding a surface reflection that can be used for an outline or glaze; ordinary glitter adds individual sparkles. Those details can accompany a magnetic manicure, but the magnetic layer supplies the shaped internal reflection. Velvet nails can still have a smooth, glossy surface.
Choosing a Pink Base, Nail Shape, and Length
Begin with the pink you want to see when the brightest reflection moves away. Blush gives the manicure a lighter, more translucent character; dusty rose makes it feel more muted; rosewood adds depth. Then check the magnetic color itself. A polish can have a pink base and a silver reflection: ILNP’s Pink Suede, for instance, is described with silver magnetic sparkle. For this collection’s warmer look, ask to see a swatch with a distinctly rose-gold reflection.
Choose the shape around the placement you like. Short round nails have room for a broad glow or small cuticle detail. Soft squares offer a clear edge for French tips and diagonal blocks, while medium almond and oval nails accommodate curves and ribbons. Extra length becomes useful when the design needs several separate areas. Compare the swatch in daylight and indoor light, and choose the combination you enjoy against your own hand rather than following a rigid undertone rule.
Creating the Cat-Eye Effect With Gel or Regular Polish
With magnetic gel polish, shape the effect before curing. Apply the compatible base and color layers as directed, add the magnetic layer, position the magnet, then cure once the reflection is where you want it. This sequence follows Daily Charme’s application directions; its C03 product is labeled for professional use. The magnet arranges the pigment, and the appropriate curing lamp sets the gel. Keep each layer within the manufacturer’s application instructions.
Magnetic lacquer offers an air-drying route. In Byrdie’s interview with Nails Inc founder Thea Green, the method works with wet polish, one nail at a time. Follow your lacquer’s directions for magnet placement, holding time, and top coat instead of borrowing a gel routine. A broad glow or single stripe is a sensible starting point. For crossed ribbons, isolated chrome, or elaborate accents, a nail technician or prepared magnetic-finish press-ons can make the chosen layout easier to manage.
Why the Magnetic Effect Looks Faint or Loses Definition
First, check that the polish is magnetic. A rose-gold shimmer shade may look similar in the bottle without responding to a magnet. Next, check the working layer: lacquer needs to remain wet, and gel needs to remain uncured while you arrange the effect. Adjust the magnet’s position and orientation without touching the polish, watching the reflection as you work. A broad velvet glow is also a valid result; it simply differs from a narrow stripe.
If you dislike the arrangement in uncured gel, the Daily Charme instructions describe brushing over it to reset the design before trying the magnet again. Once gel has cured, a magnet will not rearrange that layer. With lacquer, check the maker’s magnetizing and top-coat sequence if the band changes as the polish sets. Avoid piling on extra products to chase brightness. Test the technique on a swatch first, then compare it under the same lighting as your reference.
Final Thoughts
Choose the reflection first. A slim diagonal band gives pink a sharper edge; a broad velvet glow keeps it soft; magnetic tips leave more of the natural nail visible. Once that decision is made, the shape and any extra artwork become easier to choose.
The most useful reference for rose gold pink cat-eye nails shows the whole hand and the finish from more than one angle. Save the design you like, note the pink undertone and highlight placement, and ask your technician to show you a magnetized swatch. That small comparison helps turn an appealing photograph into a manicure you will enjoy wearing.