20 Oval Nails Ideas You’ll Want to Copy
Oval nails soften the hand without ending in the sharper point associated with almond nails. Their sides taper gradually into a rounded tip, creating enough length for detailed artwork while still feeling natural. Both InStyle’s oval-shape guide and Essie’s shaping guide distinguish the oval by its curved sides and smooth, centered tip rather than a blunt edge or narrow peak.
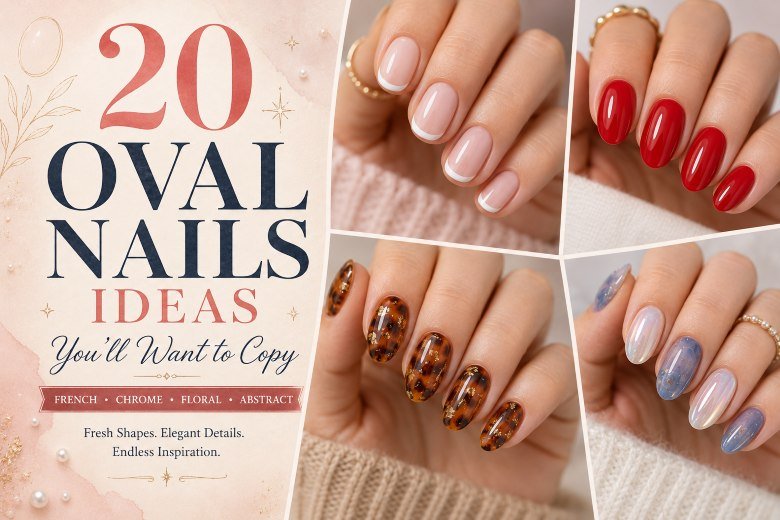
These oval nails ideas show how much the shape can do at short, medium, and longer lengths. The collection covers clean French details, solid lacquer, magnetic velvet, chrome, flowers, fruit, lace, tortoiseshell, gradients, graphic artwork, and seasonal colors, with practical guidance for choosing between a simple home manicure and a more technical salon design.
1. Milky Pink Micro-French Oval Nails
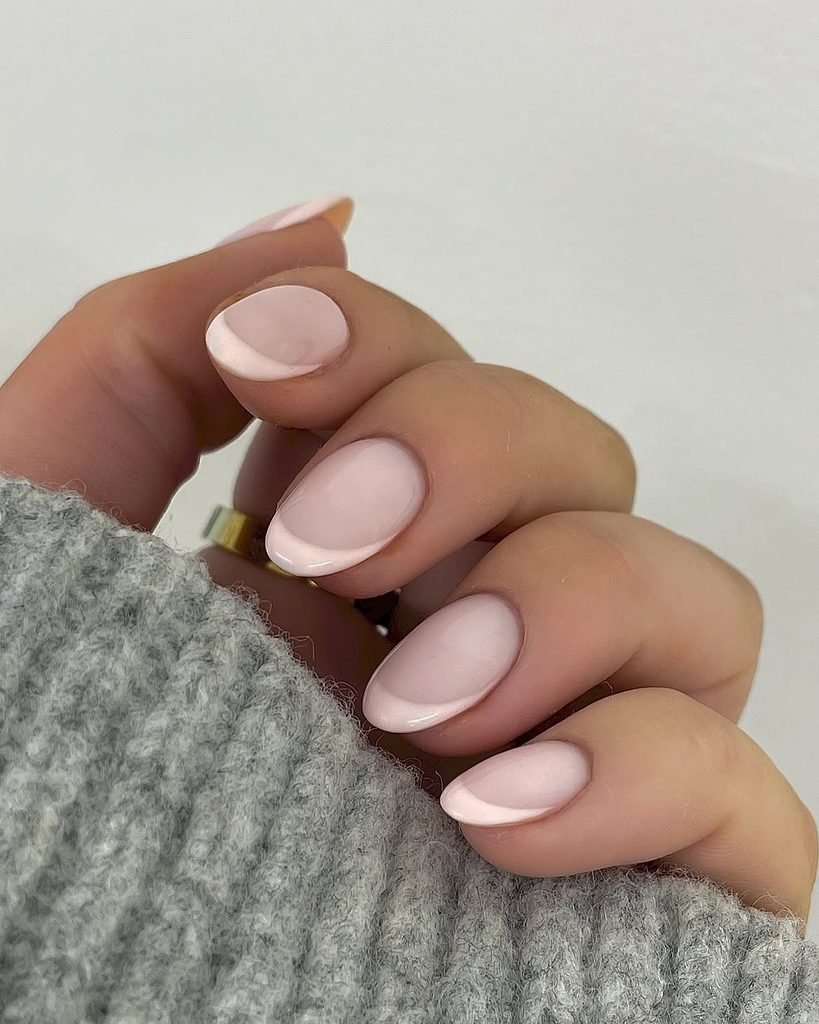
Short oval nails are painted with translucent milky-pink color and very thin soft-white French line on top of it. The tip is painted by following the round shape rather than going straight, also one of the nails has a tiny pearl dot at the cuticle area. The finish is glossy but the real nail is still slightly visible through the pink coat.
This is a perfect every day look for work, weddings, interviews, and everything else short oval nails are desired in. The narrow tips keep the shape slim while keeping most of the length, which is usually hard to manage when painting shorter oval nails. Painting thick white lines would make the short oval nails appear wider, so going for a thin French manicure with liner brush is a way to go.
How to Apply
- Shape the nails into short, symmetrical ovals and apply one or two coats of milky-pink polish.
- Draw a hairline soft-white tip that follows each rounded free edge.
- Place one tiny pearl dot above the cuticle of an accent nail.
- Seal the design with a clear glossy top coat.
2. Classic Cherry Red Oval Nails
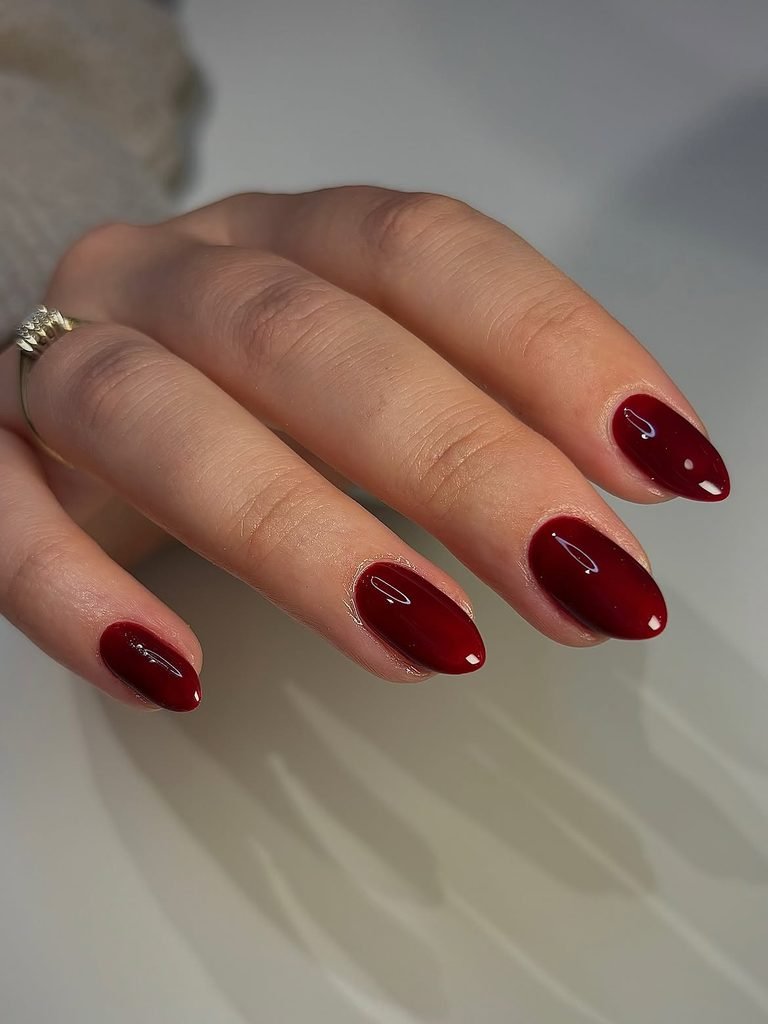
Medium natural oval nails are coated in a balanced cherry-red lacquer with a deep glassy shine. There is no accent nail, glitter, or added linework; the impact comes from even color, a clean cuticle margin, and five matching curves. The red sits between orange and burgundy, making it bright without appearing neon.
A classic red manicure gives the oval shape a clean, deliberate outline and works in every season. It suits dinners, formal events, holidays, and ordinary weeks when detailed artwork would feel unnecessary. Regular lacquer is entirely suitable for this look, but careful preparation matters because streaks and uneven sidewalls become obvious beneath a single bold color.
How to Apply
- File medium natural nails into matching ovals and apply a smoothing base coat.
- Paint two thin coats of cherry-red lacquer, leaving a narrow, even cuticle margin.
- Clean the sidewalls with a small brush dipped in remover if needed.
- Add a high-gloss top coat and cap the free edges.
3. Amber Tortoiseshell Oval Nails
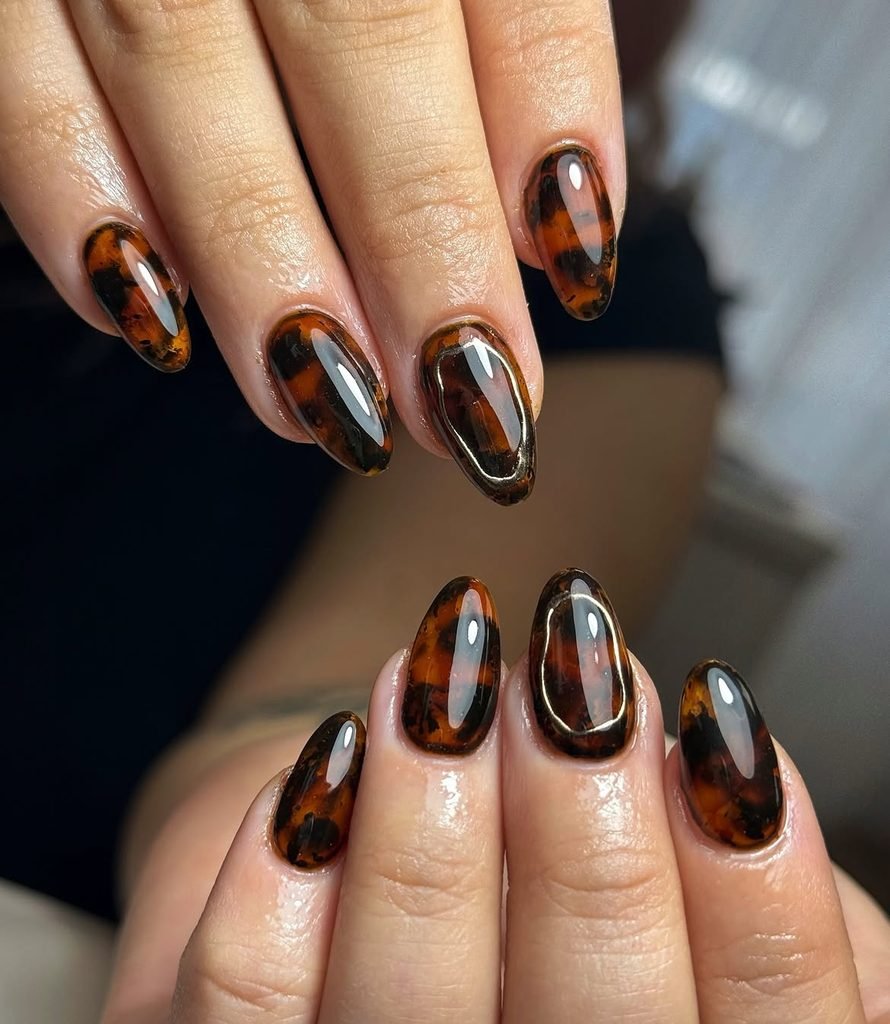
Short oval nails glow with translucent layers of honey amber, caramel, espresso brown, and small pools of softened black. The markings vary naturally across the set, and tiny pieces of warm gold foil appear beneath selected layers. A thick glass-like top finish gives the tortoiseshell nail art the depth of polished resin.
The rounded shape supports the organic pattern particularly well because there are no straight corners competing with the fluid markings. This manicure works beautifully in autumn, although the amber palette also pairs with denim, cream, black, and gold jewelry year-round. Blooming gel creates faster diffusion at a salon, while jelly polishes can be layered patiently at home.
How to Apply
- Apply a thin coat of amber jelly polish to short oval nails.
- Add irregular caramel, brown, and black pools, softening their edges without blending them into one color.
- Repeat the amber layer, deepen selected markings, and place sparse gold foil beneath the surface.
- Encapsulate the design with clear builder gel or a smoothing glossy top coat.
4. Blueberry Aura Oval Nails
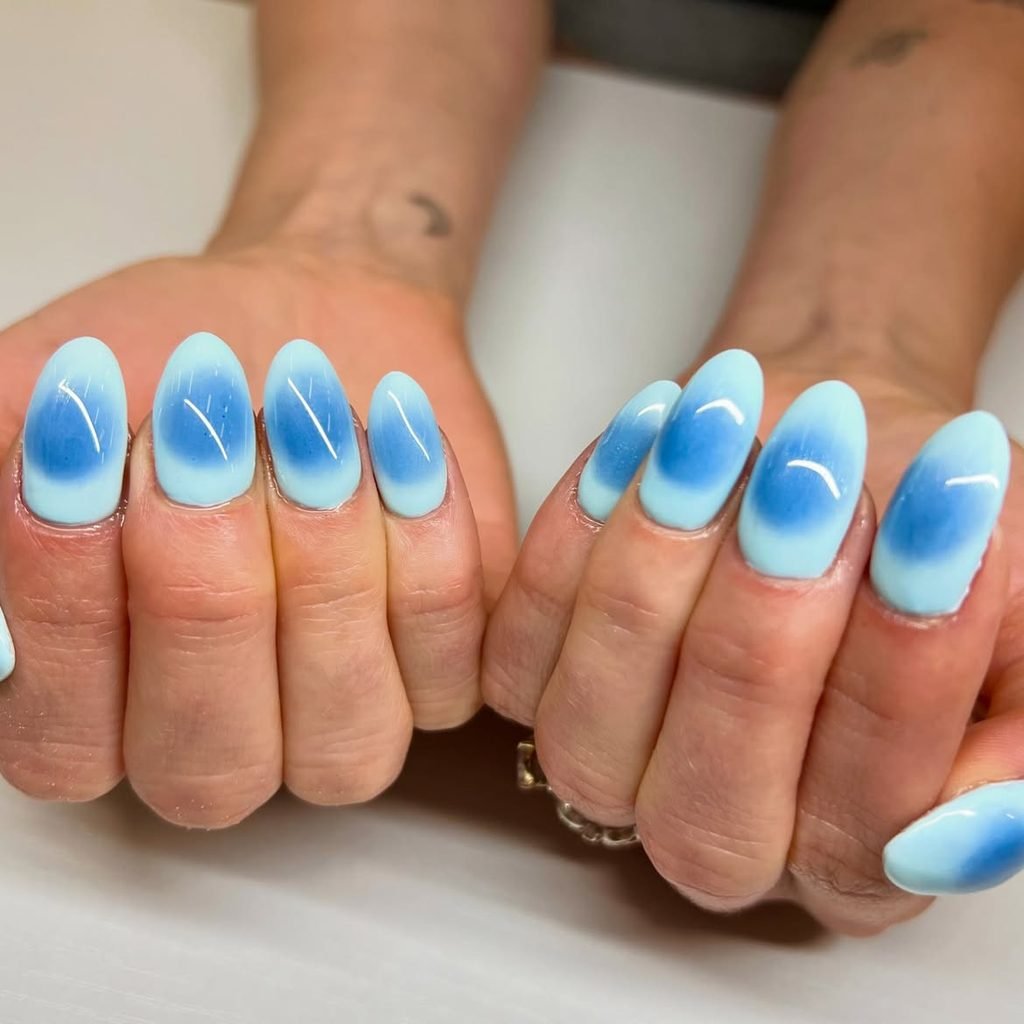
Medium oval nails begin with a translucent cool-pink base, then build into blurred periwinkle and blueberry-blue centers. The deepest blue remains concentrated in a small inner area, while the edges stay soft and nearly bare. Three fine silver star points add light without turning the aura nail design into a celestial theme.
The centered gradient visually lengthens the oval and gives the nail more depth than flat pastel polish. This color combination suits spring, summer, concerts, and cool-toned outfits in grey, white, denim, or lilac. A salon airbrush creates the smoothest fade, but a small cosmetic sponge works if almost-dry color is tapped on gradually.
How to Apply
- Apply a translucent cool-pink base to medium oval nails.
- Sponge a pale periwinkle cloud into each center.
- Deepen a smaller inner area with blueberry blue and add three fine silver star points across the set.
- Smooth the gradient beneath a glossy top coat.
5. Chocolate Velvet Cat-Eye Oval Nails
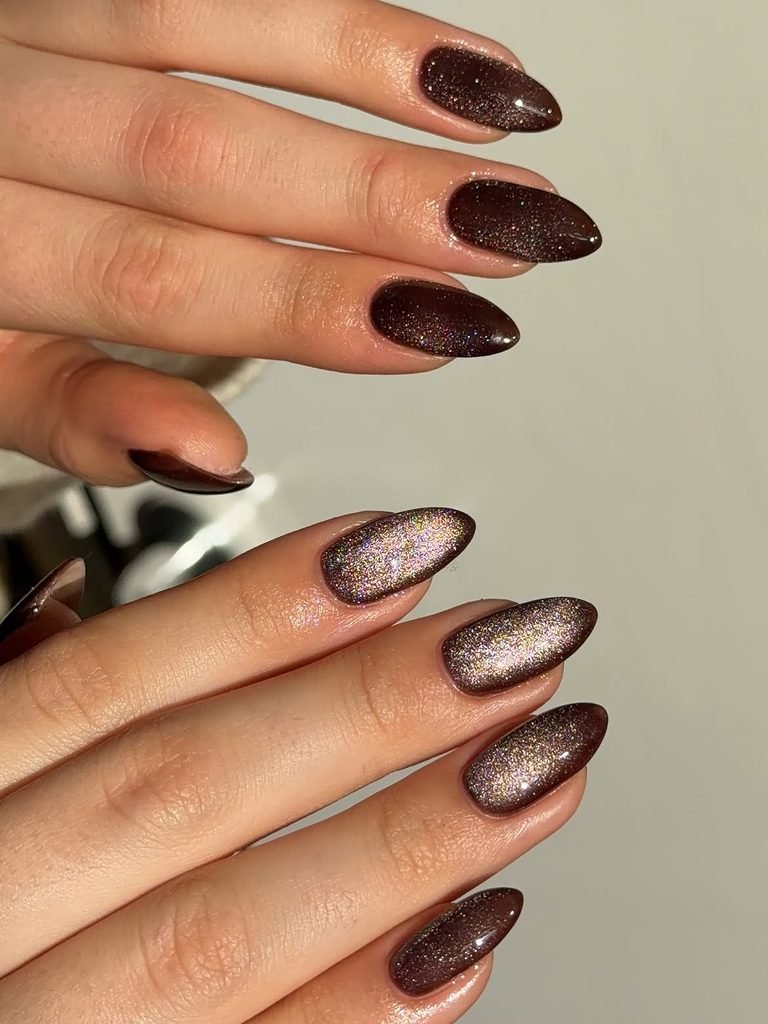
Short oval nails change from espresso brown to bronze and warm cocoa under the wide magnetic field. The product is pushed to the center to form a plush velvet cat-eye effect, leaving a thin dark-brown edge to define the oval shape. The finish is glossy but not harsh as the lighting effect mimics the look of fabric.
The dark neutral shade is great for fall and winter seasons but is less intimidating than the color black and goes well with warm neutrals like camel, cream, burgundy, or gold. Short oval nails draw the magnetic field into the center so that it looks more like a focused spot than an extended glow. To achieve the effect, one would need magnetic gel polish and a magnetic lamp as regular shimmer polishes will not react the same way.
How to Apply
- Apply dark espresso base gel to short oval nails and cure according to the system.
- Cover one nail with bronze-brown magnetic gel and guide the pigment into a broad central glow.
- Cure immediately, repeat one nail at a time, and refine the perimeter with dark brown.
- Finish with a clear glossy gel top coat.
6. Sheer Nude Nails With Gold Side Stripes
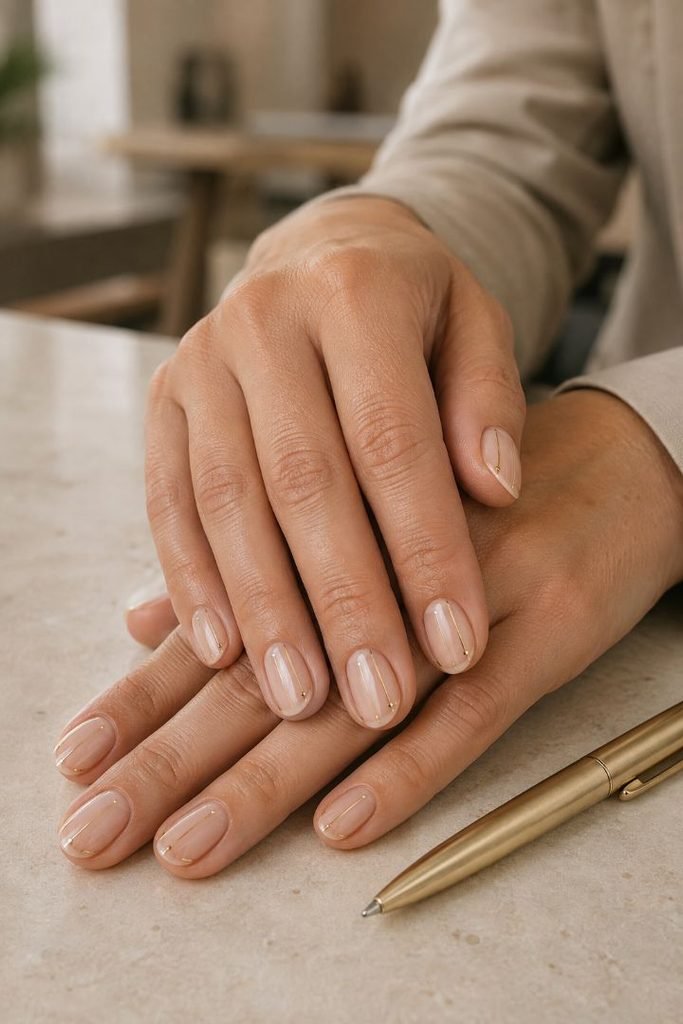
Short oval nails are left mostly bare under a transparent beige color. A fine line of gold paint runs along one side of each nail from the cuticle to the tip, and the direction of the lines is alternate on either hand. Two sides have one tiny golden dot at the end of the line to give this minimalist design some variety, highlighting the oval shape of the nails.
This manicure is perfect for office meetings, traveling, weddings, or any other occasions where the person desires something more notable than a regular French manicure. The vertical line illusion makes the short nails appear longer and can even camouflage some minor irregularities in the shape of the free edge. The metallic tape creates the most precise effect possible for a D.I.Y. design, but the ends should be cut and sealed to prevent lifting.
How to Apply
- Apply a translucent beige wash to short oval nails.
- Paint or place one fine gold line along an alternating sidewall on each nail.
- Add one small gold dot to the end of the line on two accents.
- Trim every tape edge if used and seal with a glossy top coat.
7. Mother-of-Pearl Chrome Oval Nails
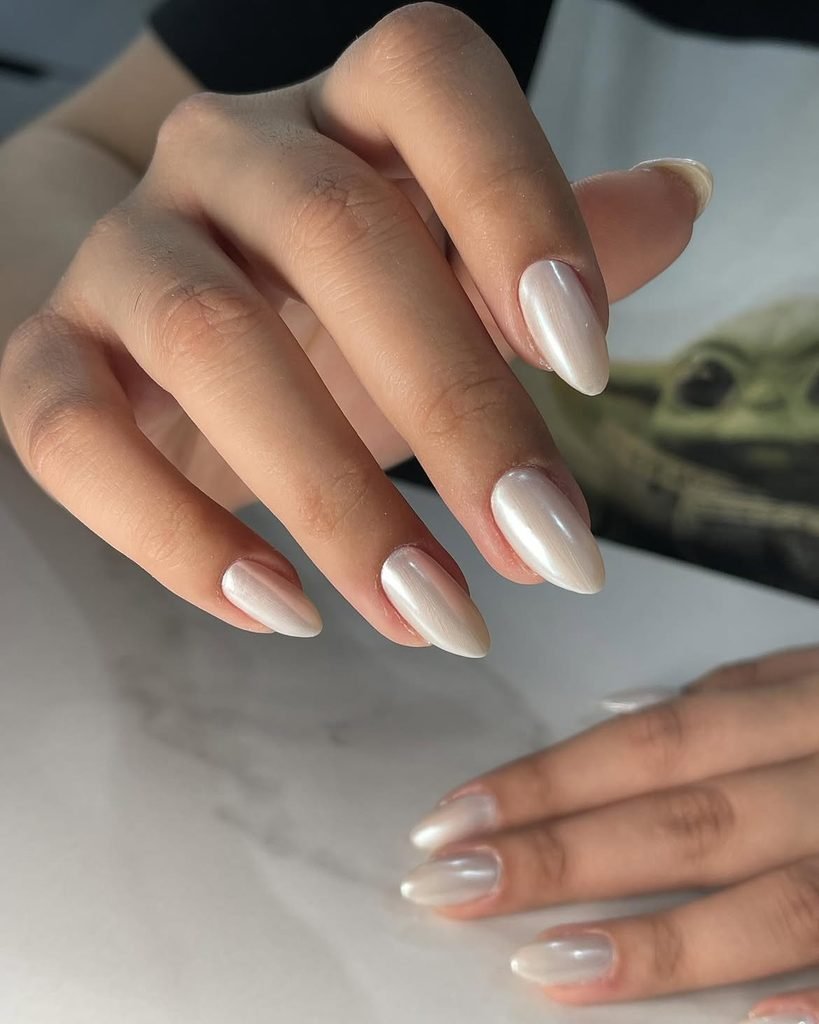
Medium oval nails are decorated with translucent milky-white polish and fine pearl chrome that change from cream to pale blue and pink. A few irregular fragments of opalescent foil can be seen through the top coat on two nails; nevertheless, there is no noticeable glitter. The effect is similar to the interior of a seashell, not a flat white metal.
This glamorous set is perfect for weddings, birthdays, summer dinners, and winter parties since the shade transforms according to the setting. Oval-shaped nails enhance the soft shell pattern and minimize the futuristic aspect of chrome. Chrome requires a suitable base to appear flawless, and pearlescent polish is an accessible alternative that lacks the strong reflection of metal flakes.
How to Apply
- Apply translucent milky-white gel to medium oval nails and cure.
- Place irregular opalescent foil beneath two accent surfaces and cover with another thin milky layer.
- Rub fine pearl chrome over a compatible cured top layer.
- Remove excess powder and seal every edge with a glossy top coat.
8. Pressed Wildflower Oval Nails
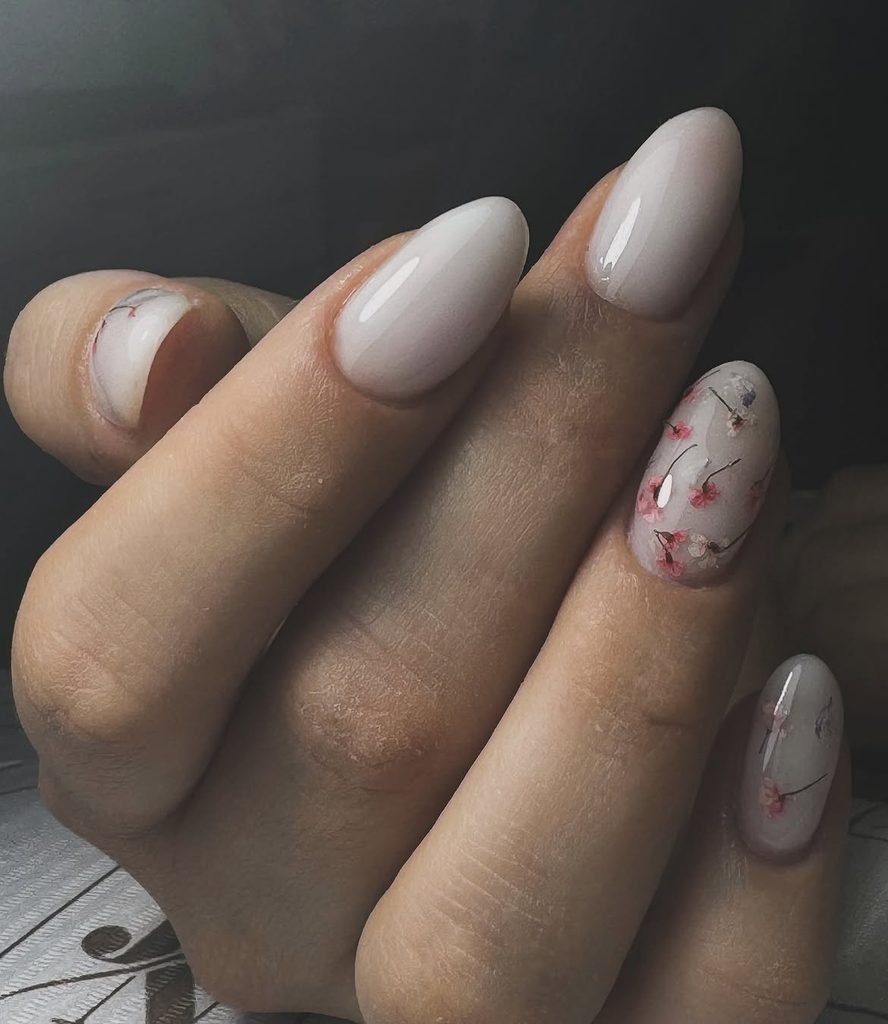
Medium oval nails use a clear nude base to showcase miniature pressed-flower details in muted purple, yellow, cream, and soft green. The stems angle differently across the set, and several petals appear partly hidden beneath a milky glaze. Tiny gold flecks sit between the flowers without forming a glitter background.
These floral oval nails suit spring, outdoor weddings, birthdays, and romantic outfits in linen or soft pastels. The oval’s uninterrupted curve gives each stem room to follow the nail naturally. Real dried nail flowers require careful encapsulation, while ultra-thin decals are less bulky and easier for home manicures.
How to Apply
- Apply a clear nude base to medium oval nails.
- Position thin dried flowers or decals at varied angles, keeping the cuticles and sidewalls clear.
- Add sparse gold flecks and brush a translucent milky glaze over selected petals.
- Encapsulate the botanicals beneath a smooth glossy layer.
9. Black Lace French Oval Nails
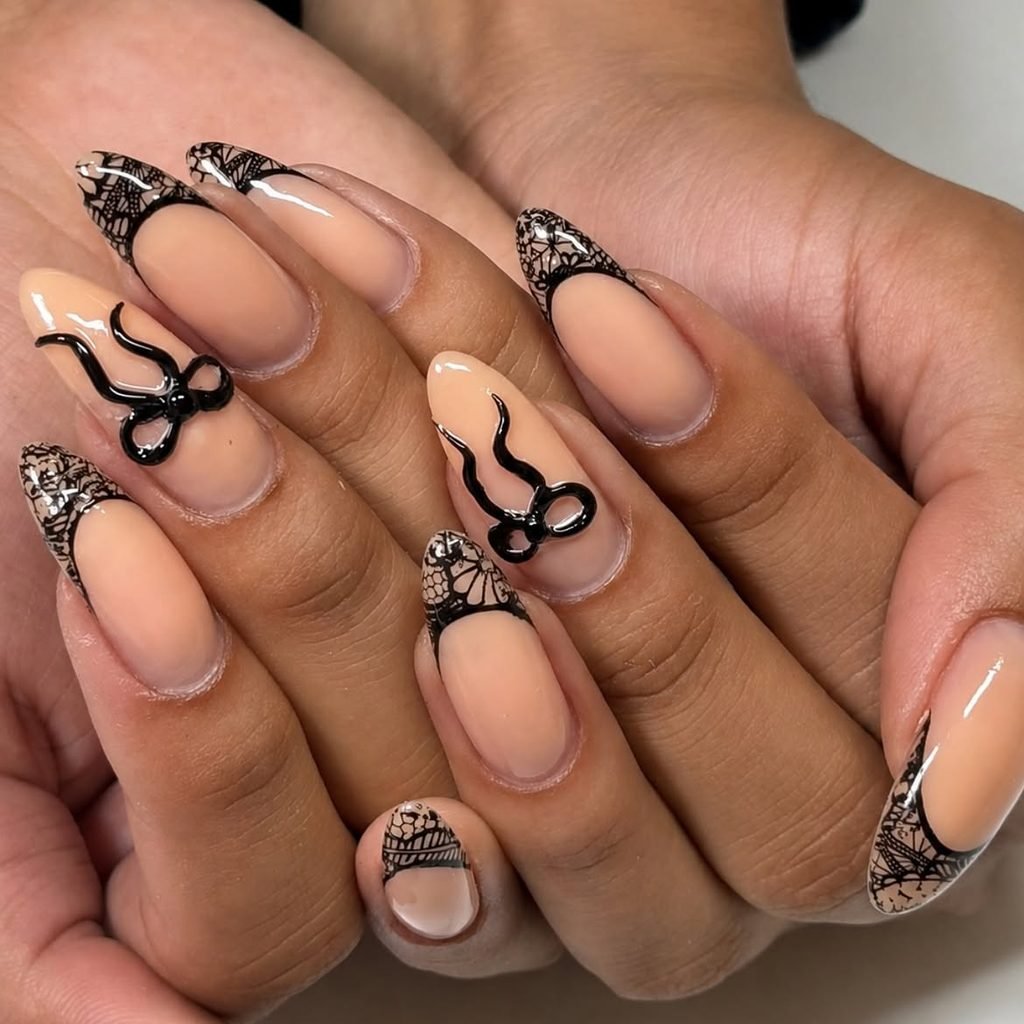
Medium oval nails begin with a sheer smoky-pink base and finish in black lace French tips. Fine mesh, scalloped edges, and tiny floral loops remain concentrated near the free edge, with one narrow strand extending down a sidewall on two accents. The lace is glossy against the translucent base, keeping every detail crisp.
This darker French manicure suits formal dinners, gothic weddings, evening events, and anyone who wants black nails without full coverage. The rounded oval tip gives the scallops a natural guide and softens the contrast. Stamping plates or lace decals are practical at home; freehand mesh requires an advanced liner technique and consistent spacing.
How to Apply
- Apply a sheer smoky-pink base to medium oval nails.
- Paint or stamp black mesh across the rounded tips.
- Add scalloped borders, small floral loops, and two fine sidewall extensions.
- Seal the lace carefully with a glossy top coat without dragging the pattern.
10. Color-Blocked Half-Moon Oval Nails
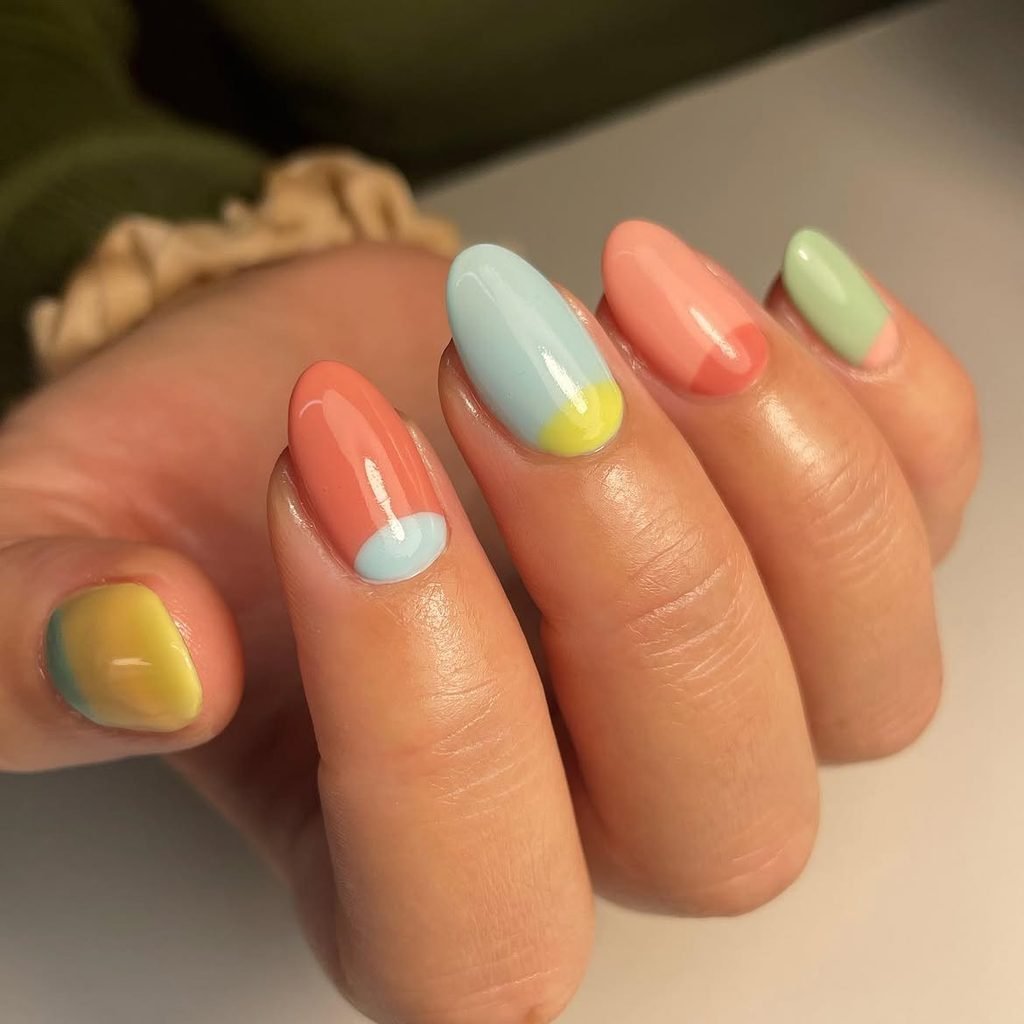
Short oval nails use terracotta for the tips, blush pink for the center, and an exaggerated amount of cream for the half-moons at the cuticles. Thin burgundy lines delineate the three sections, giving a minimalist geometric take on the traditional half-moon manicure. The colors are repeated in the same order to keep the ovoid shapes consistent throughout.
The palette is perfect for late summer and early autumn, but the style can be worn with denim, cream jumpers, or brown leather all year round. The emphasis on the arcs draws the eye to the ovals’ two ends. Curved reinforcement stickers would help recreate the effect at home so long as each color is sealed before moving on to the next.
How to Apply
- Paint short oval nails blush pink and let the base set.
- Use curved guides to create oversized cream half-moons near the cuticles.
- Paint terracotta tips and add fine burgundy separator lines around both color blocks.
- Finish with a leveling glossy top coat.
11. Jade Marble Oval Nails
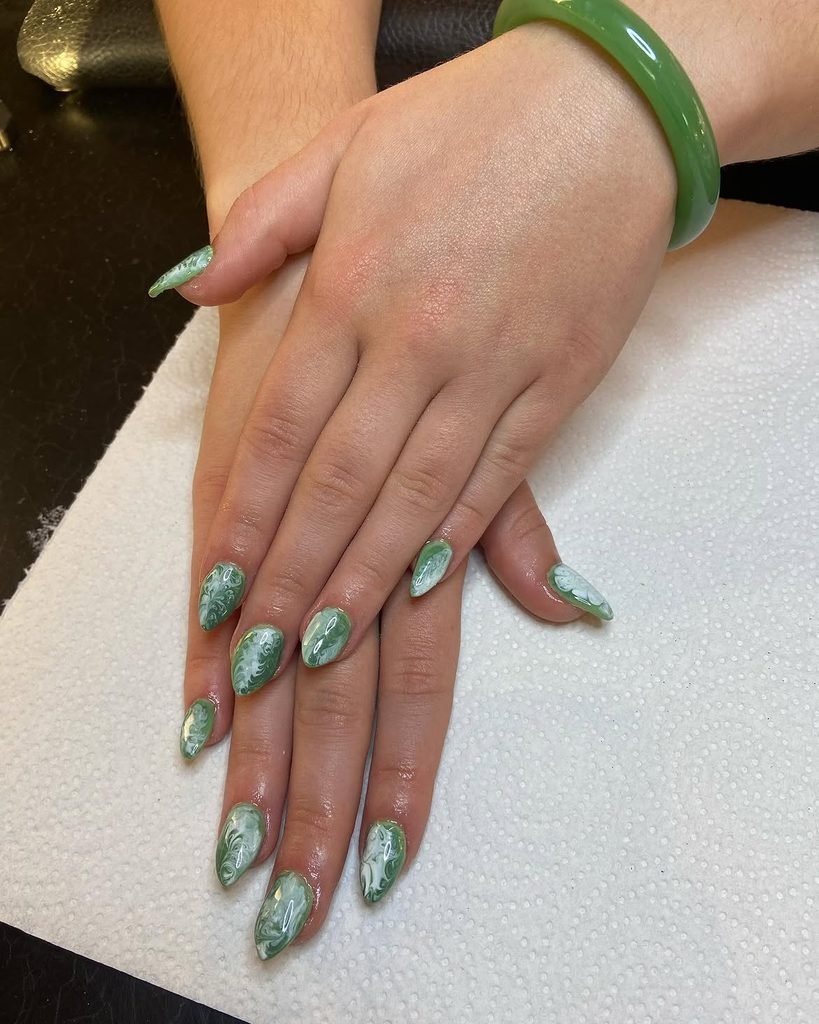
These medium oval nails resemble polished jade through layered sage, emerald, milky white, and translucent green. Fine gold veins cross only a few sections, while cloudy areas remain free of metallic detail to preserve the stone effect. A deep glossy finish makes the green marble nails appear smooth and slightly translucent.
The oval silhouette suits the pebble-like quality of this design and pairs beautifully with gold rings, cream tailoring, or darker green clothing. This can work year-round, though the earthy palette is particularly strong in autumn. Blooming gel helps colors diffuse organically at a salon, while a fine brush can pull softer veins through regular polish.
How to Apply
- Apply a pale translucent green base to medium oval nails.
- Swirl sage, emerald, and milky-white pools through the wet or uncured layer without fully blending them.
- Add sparse fine gold veins and soften selected areas beneath another green glaze.
- Encapsulate the marble with a deep glossy top coat.
12. Midnight Star Map Oval Nails
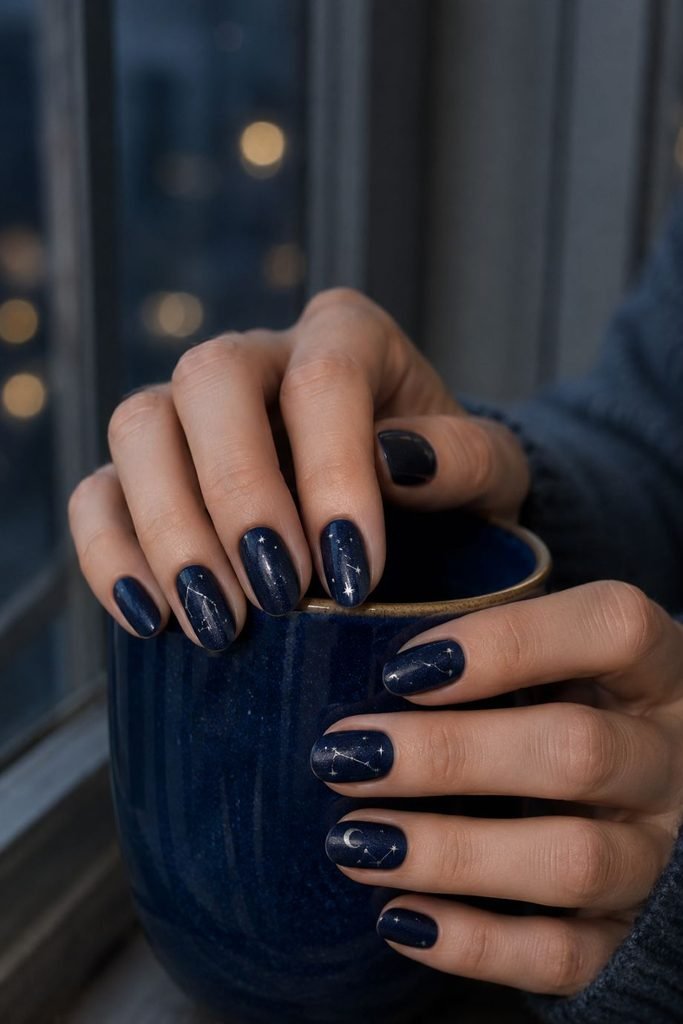
Medium oval nails are painted inky navy with extremely fine silver shimmer beneath hand-drawn star maps. Tiny silver dots connect through hairline paths on three nails, while the remaining nails carry one crescent and several isolated stars. The design stays sparse enough for the navy base to remain the dominant color.
These celestial oval nails suit winter, evening events, concerts, and silver jewelry. The medium length gives the mapped lines room to breathe without requiring extensions. A dotting tool and fine liner brush make the basic design possible at home, but decals will produce the most consistent small stars on both hands.
How to Apply
- Paint medium oval nails with two thin coats of inky navy shimmer polish.
- Place silver star dots in small uneven groups across three nails.
- Connect selected points with hairline paths and add one crescent plus isolated stars elsewhere.
- Protect the fine design with glossy top coat.
13. Citrus Jelly Oval Nails
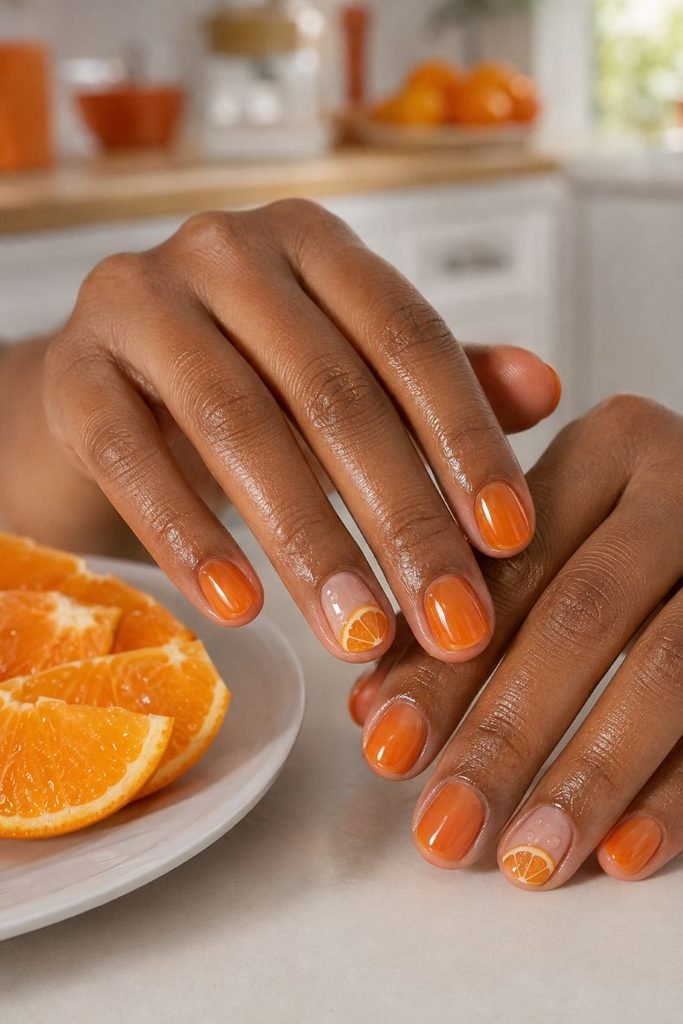
Short oval nails glow with translucent tangerine jelly polish, while two sheer accents display miniature orange slices near the sidewalls. Fine white membranes divide the segments, pale yellow centers add dimension, and several clear droplets sit above the fruit. The glossy transparent finish makes the citrus nail art look fresh rather than cartoonish.
This bright manicure works for summer holidays, brunches, and warm-weather outfits in white, denim, turquoise, or pink. Short oval nails echo the rounded fruit slices and keep the artwork practical. A dotting tool and fine brush can build the segments, while citrus decals offer a faster option for a home manicure.
How to Apply
- Paint most short oval nails with two thin coats of translucent tangerine jelly polish.
- Apply a sheer nude base to two accents and paint partial orange circles near the sidewalls.
- Divide the fruit with fine white membranes, add pale yellow centers, and place several clear droplets.
- Seal the set with a wet-look glossy top coat.
14. Sunset Ombré Oval Nails
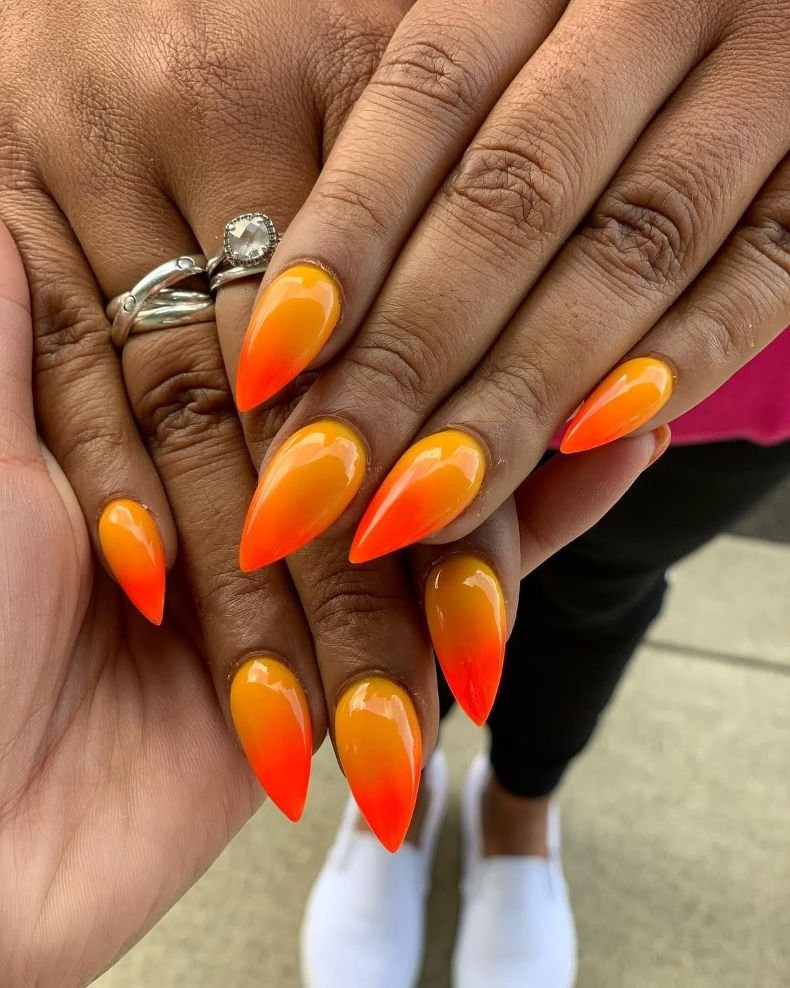
Medium oval nails move from coral near the cuticles through peach and golden yellow into a narrow lilac edge at the tips. The gradient is vertical and seamless, with no glitter or linework interrupting the sunset ombré. A glossy top coat intensifies the colors while keeping them translucent enough to avoid a heavy neon effect.
The oval shape makes this multicolor transition feel fluid because the rounded tip carries the final lilac shade without a hard stopping point. It suits vacations, festivals, summer evenings, and colorful dresses. A salon airbrush gives the most even fade, but several thin sponge layers can produce the same order of color at home.
How to Apply
- Apply a pale peach base to medium oval nails.
- Load coral, peach, yellow, and lilac in order onto a small sponge.
- Press the gradient onto each nail in thin layers, maintaining the same color direction.
- Clean the sidewalls and finish with glossy top coat.
15. Retro Polka-Dot Oval Nails
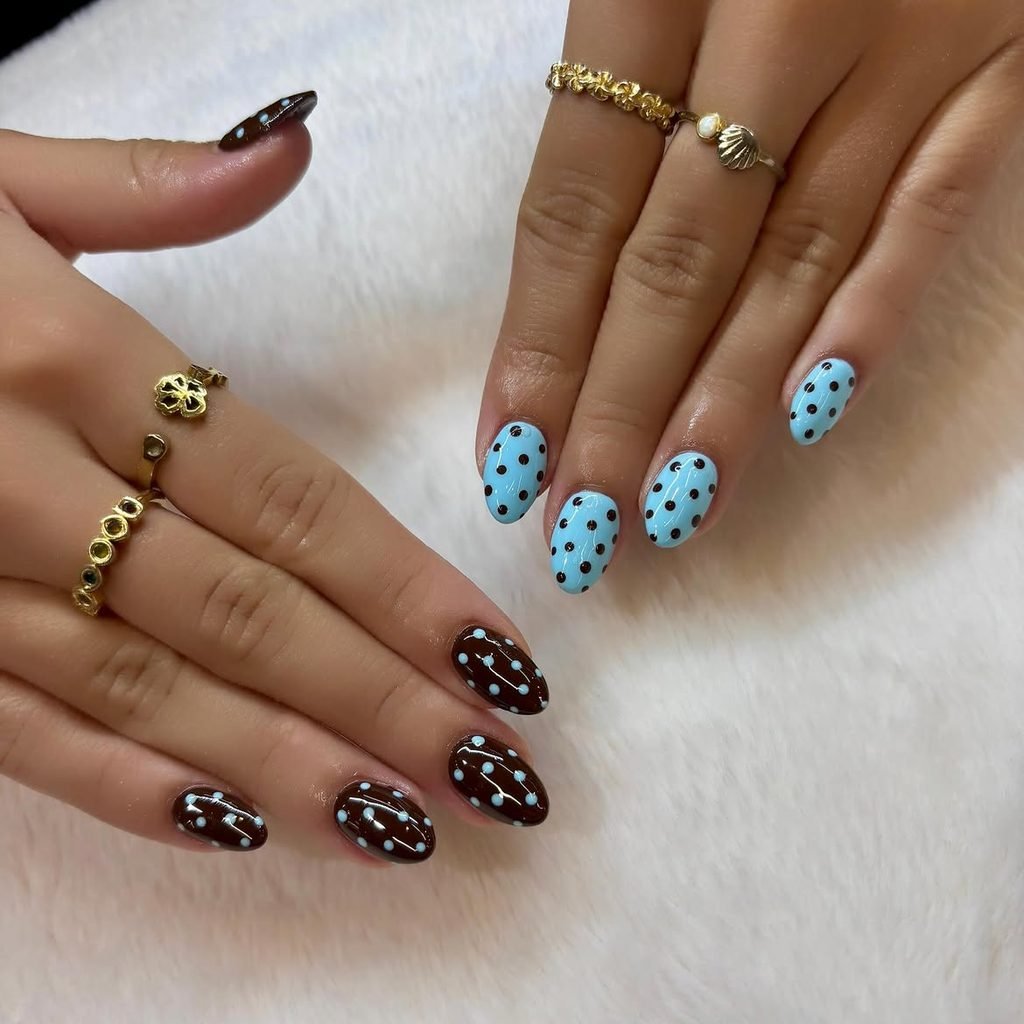
Short oval nails use a creamy beige base with neat dots in burgundy, mustard, forest green, and dusty blue. The dots vary between pin-sized and medium, with one off-center cluster on each nail rather than a full uniform grid. A satin finish gives the polka-dot manicure a softly retro appearance.
This design feels playful without becoming childish because the colors are muted and the spacing is controlled. It works for casual weekends, transitional seasons, and anyone learning nail art at home. A dotting tool produces rounder marks than a brush, and the design remains forgiving because both hands do not need identical placement.
How to Apply
- Paint short oval nails with two thin coats of dusty blue and brown.
- Place off-center dot clusters in brown, and dusty blue.
- Vary the dot sizes while leaving visible beige space around every cluster.
- Apply satin top coat for a soft retro finish.
16. Botanical Leaf-Tip Oval Nails
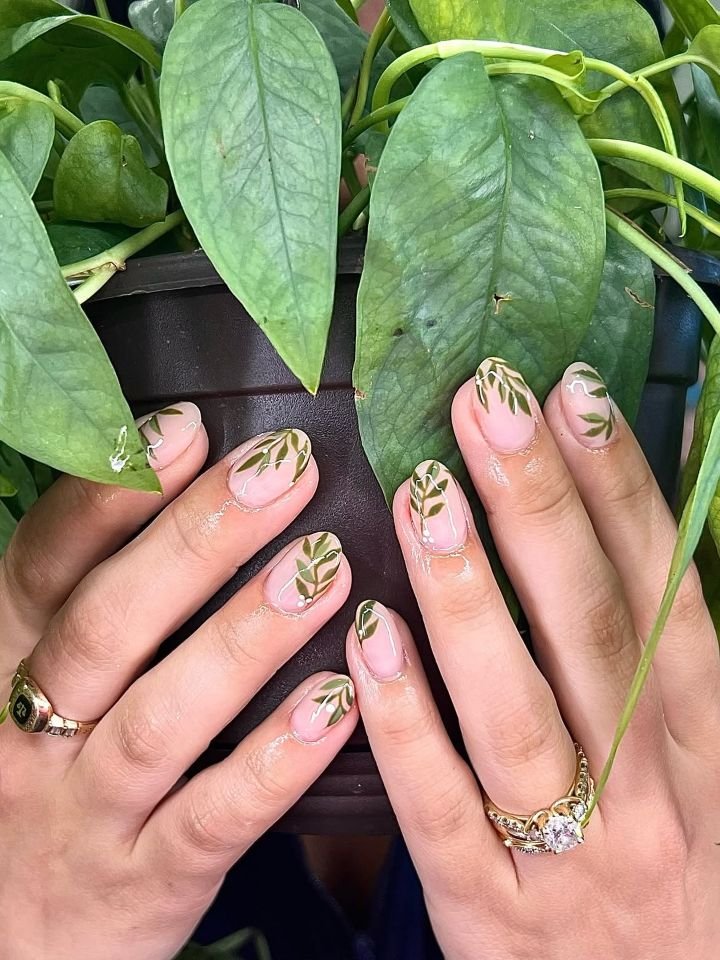
Medium oval nails start with a sheer blush base, then replace a conventional French line with small overlapping leaves in sage, olive, and deep green. Thin brown stems follow the rounded tips, while two leaves extend slightly down the sidewalls. Tiny cream dots fill occasional gaps without turning the design into a floral pattern.
These green oval nails work well in spring and autumn, especially with linen, knitwear, and earth-toned outfits. The curved leaf border reinforces the oval tip and offers more movement than a solid green French manicure. Leaf decals simplify the design, although short brush strokes are manageable for a patient DIY attempt.
How to Apply
- Apply a sheer blush base to medium oval nails.
- Paint thin brown stems that follow each rounded free edge.
- Add overlapping sage, olive, and deep-green leaves, extending two shapes down selected sidewalls.
- Dot several cream accents between the leaves and seal with glossy top coat.
17. Silver-Framed Oval Nails
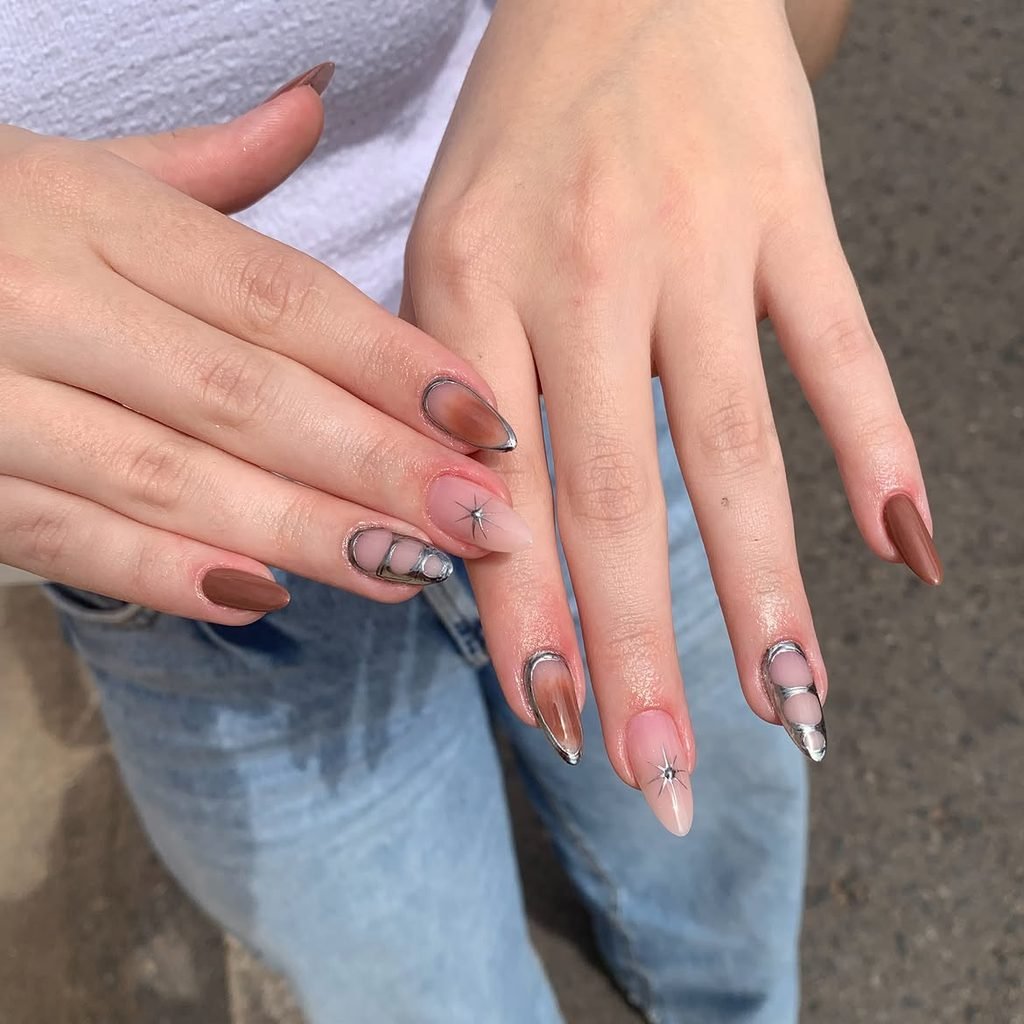
Medium oval nails are coated in translucent smoky nude and outlined from cuticle to tip with a hairline silver chrome frame. One side of each frame widens into a small liquid-metal curve, while the center remains completely bare of artwork. The reflective perimeter acts like jewelry around the oval silhouette.
This design is a modern alternative to a silver French tip and works for parties, minimalist outfits, or anyone who wants metallic detail without full chrome. Accurate outlines require a steady hand because uneven widths are obvious against the sheer center. Metallic art gel is simpler at home, while isolated chrome produces a more reflective salon finish.
How to Apply
- Apply a translucent smoky-nude base to medium oval nails.
- Paint a continuous fine line around each perimeter using compatible chrome gel or silver art gel.
- Widen one side into a small fluid curve while preserving the empty center.
- Seal the metallic borders carefully with glossy top coat.
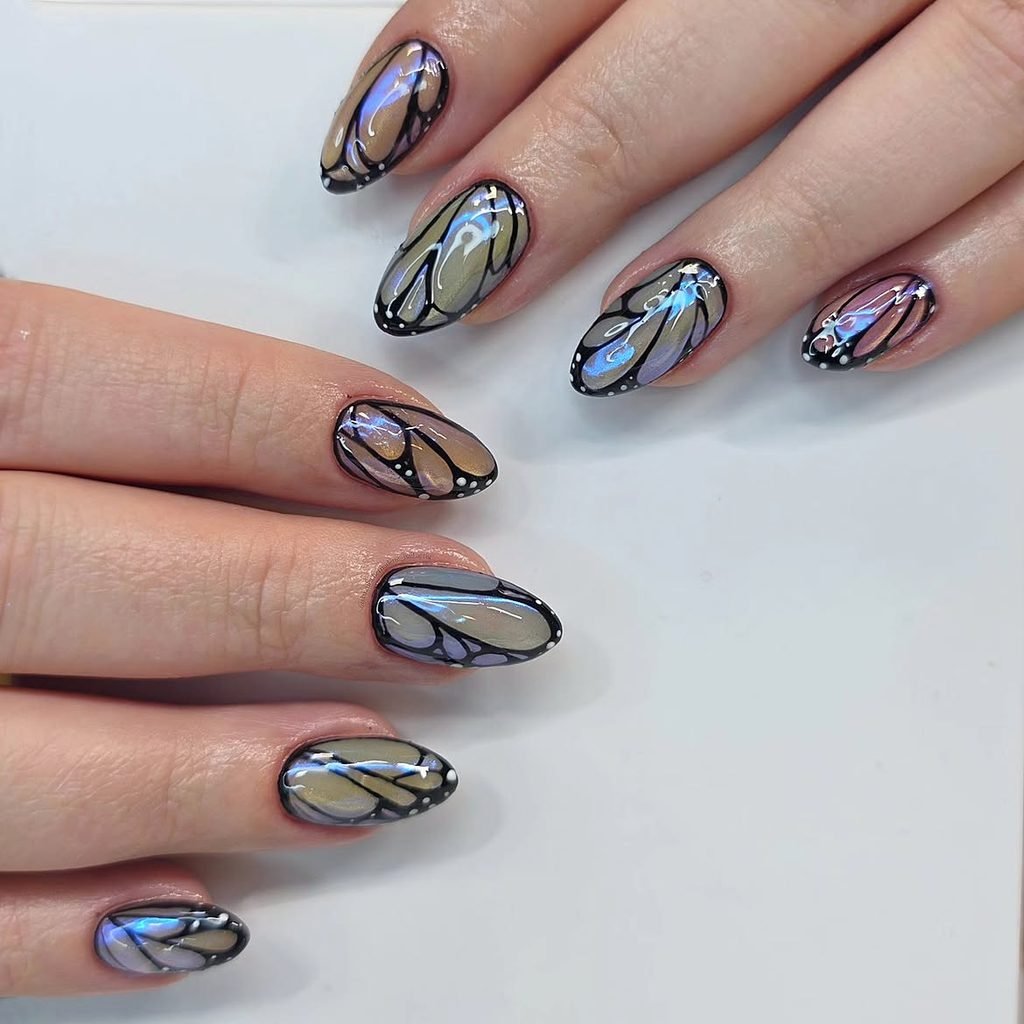
18. Iridescent Butterfly-Wing Oval Nails
Medium oval nails use a translucent smoky-lilac base beneath black butterfly-wing lines that divide the surface into elongated sections. Iridescent blue, violet, and teal foil glows inside selected panels, while tiny white dots trace the outer black border. The wing pattern appears across three nails, leaving two nails in sheer lilac with one small black curve.
This manicure suits festivals, concerts, birthdays, and anyone who wants detailed artwork without a long pointed shape. The oval tip mirrors the curve of a wing and gives the sections room to taper naturally. Fine stamping or custom decals are realistic home options, while hand-painted symmetry is a more advanced salon request.
How to Apply
- Apply a translucent smoky-lilac base to medium oval nails.
- Paint curved black wing veins across three nails, dividing the surfaces into tapered panels.
- Place iridescent blue, violet, and teal foil inside selected sections and dot white along the outer borders.
- Keep two nails simpler and seal the full set with glossy top coat.
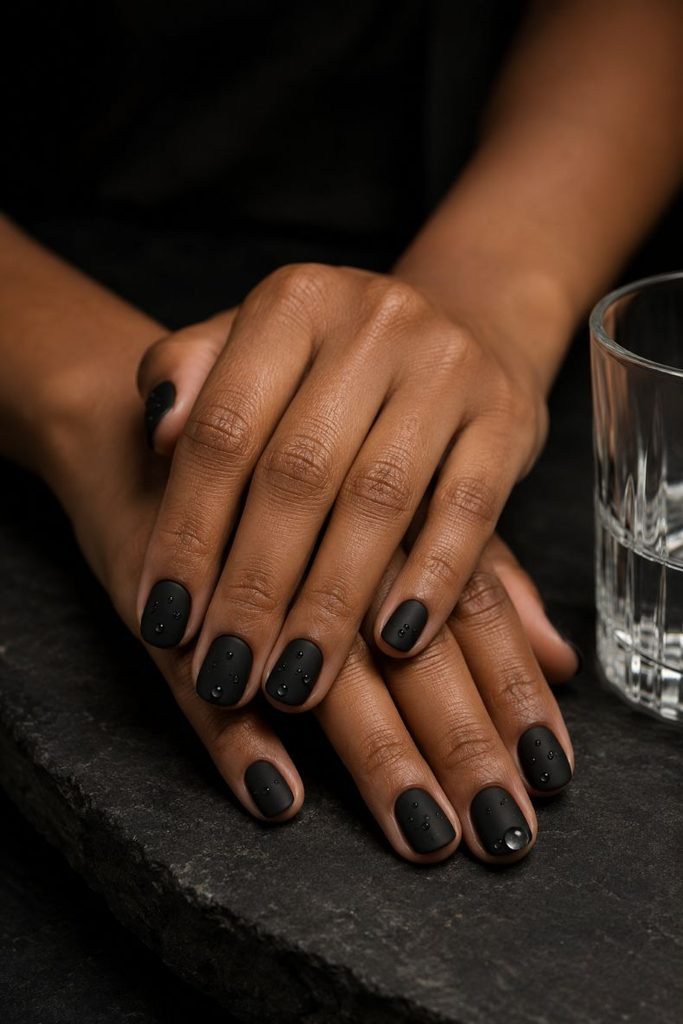
19. Matte Black Nails With Glossy Droplets
Short oval nails are painted opaque black and finished in velvety matte top coat. Clear raised droplets in different sizes sit across the surface, catching light like water on dark stone. The droplets are spaced irregularly, with one nail carrying only a single large bead near the tip.
The combination of one color and two textures gives these matte oval nails more interest than a plain black manicure without requiring illustrative art. They suit autumn, evening events, and monochrome outfits. The droplets should remain low and fully cured; flat glossy dots made with ordinary top coat are the simpler DIY interpretation if you do not use structured gel.
How to Apply
- Paint short oval nails opaque black and apply matte top coat.
- Place irregular clear droplets using a dotting tool and thick transparent art gel.
- Vary the droplet sizes and leave one nail with a single larger bead.
- Cure the raised details as directed, keeping the surrounding surface matte.
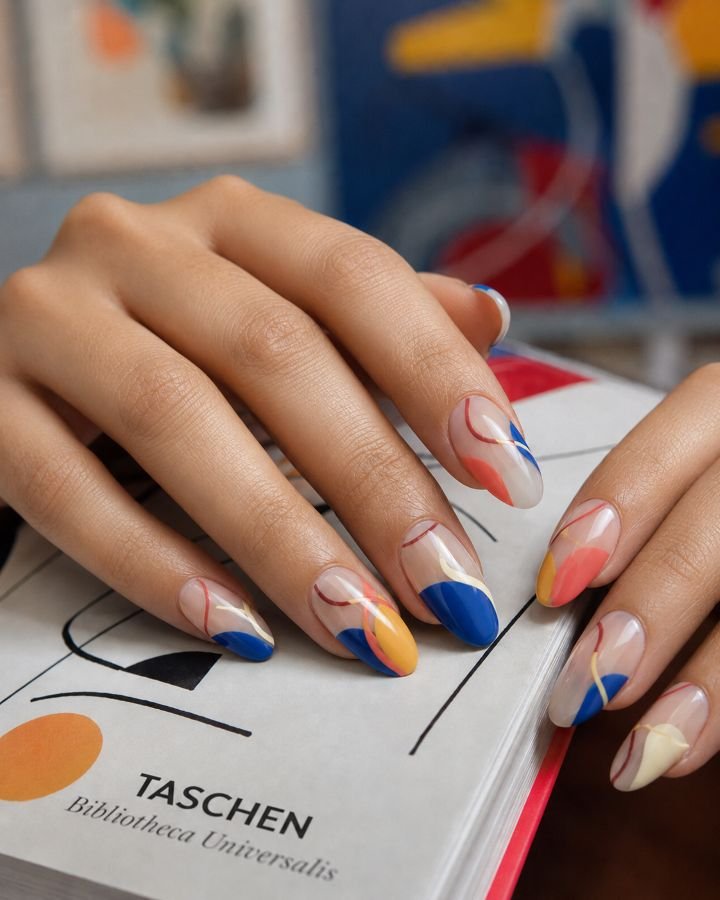
20. Coral and Cobalt Abstract Swirl Nails
Long oval nails use a sheer nude base beneath broad curved shapes in coral, cobalt blue, butter yellow, and cream. Fine burgundy outlines define selected edges, while other shapes overlap transparently to create new color at the intersections. Every nail carries a different composition, but the palette keeps the abstract nail art cohesive.
This expressive set works for vacations, galleries, festivals, and anyone who wants the oval shape to function as a full canvas. The rounded length lets each curve travel without the abrupt corners found on square nails. A salon artist can balance both hands without duplicating them, while press-ons make the complex composition easier to plan before application.
How to Apply
- Apply a sheer nude base to long oval nails.
- Paint broad curved shapes in coral, cobalt, butter yellow, and cream, varying the placement across the set.
- Overlap several translucent areas and outline selected edges with fine burgundy lines.
- Seal the compositions beneath a leveling glossy top coat.
Oval Nails vs. Round and Almond Nails
Oval nails sit between round and almond shapes. A round nail preserves more of its natural width and curves mainly across the tip, while an oval narrows gradually along the sides before reaching a smooth rounded end. Almond nails taper farther and finish in a soft point. OPI’s nail-shape guide describes oval nails as similar to almond but blunter, which is the distinction many unclear salon references miss.
What Length Works Best for Oval Nails?
A true oval needs at least a small amount of free edge so the sidewalls can taper before meeting the rounded tip. Short ovals work best with micro-French lines, solid colors, dots, stripes, and compact botanical details. Medium ovals offer the most versatility for aura gradients, lace, fruit, chrome, and stone effects. Long ovals provide room for large abstract art but may require an overlay or extension if the natural nail cannot maintain balanced sidewalls.
How to Shape Oval Nails?
Identify the middle of each free edge before filing to prevent the highest point of the curve from moving sideways. File both sides, narrowing them gradually and comparing them visually from above and from the fingertip. Then, connect the sides with one smooth semicircular movement. Essie’s instruction suggests shaping the sides first and rounding the tip, while OPI’s professional tip advises to file the nail according to the fingertip’s natural curve and check the shape from different angles.
Can Oval Nails Be Short?
Yes, but very short nails often look round since there is not enough free edge to taper sides. A little one or two millimeters beyond the fingertip is already enough to spot an oval. If extra length is not an option, consider focusing on a centered oval shape instead of trying to taper the sides too much in an attempt to achieve a French tip illusion. Too wide an oval negates the effect while making nails too narrow leaves less room for creativity.
Choosing Between DIY and Salon Designs
Solid lacquer, micro-French tips, dots, side stripes, simple leaves, and basic gradients are realistic home options. Tortoiseshell layers, magnetic velvet, isolated chrome, encapsulated flowers, detailed lace, and butterfly-wing art demand more control or specialized products. If a complex idea is outside your skill level, simplify the number of accent nails rather than shrinking every detail until the design becomes unreadable.
Final Thoughts
Oval nails are useful because the shape supports both restraint and detailed art. A glossy red manicure looks complete without decoration, while the same smooth curve can carry layered tortoiseshell, a botanical border, butterfly wings, or an abstract composition. The best design should reinforce the rounded silhouette instead of hiding it beneath crowded embellishment.
Choose the length first, and then the art: short ovals are best worked on with more precise corrections, medium ovals can accommodate almost any correction, while long ovals deserve extra space if the design requires it. Make sure to bring a reference picture that showcases the side view and the shape of the free edge as well as the manicure’s polish since an oval-shaped nail calls for a specific shape to be followed.