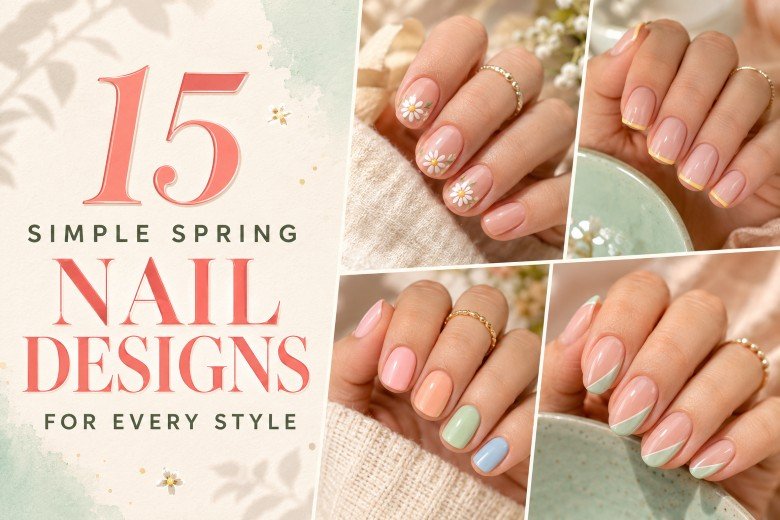
15 Simple Spring Nail Designs for Every Style
The simplest ways to achieve a good design include color and placement but not long extensions or salon tricks. The simple pastel tip, flower, several dots or block of color can be used independently and will make a nice nail art. Such an approach is particularly useful when working with natural nails because crowded design elements can distract from their shape and make even a little manicure messy.
The following collection includes simple spring nails for short round, oval, squoval, square, almond nails, as well as some ideas for medium length. Here you can find floral nails, pastel French tips, dot design, gingham, fruit, ombré, line art, and minimalist ideas for nail art. People looking for simple spring nail art for beginners will find realistic home techniques while each category will provide information about decal usage, guidelines, press-on nails or salon visit needed.
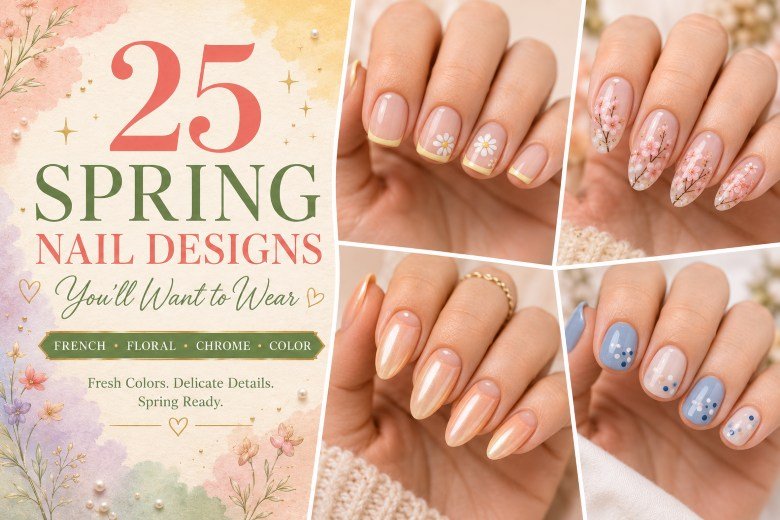
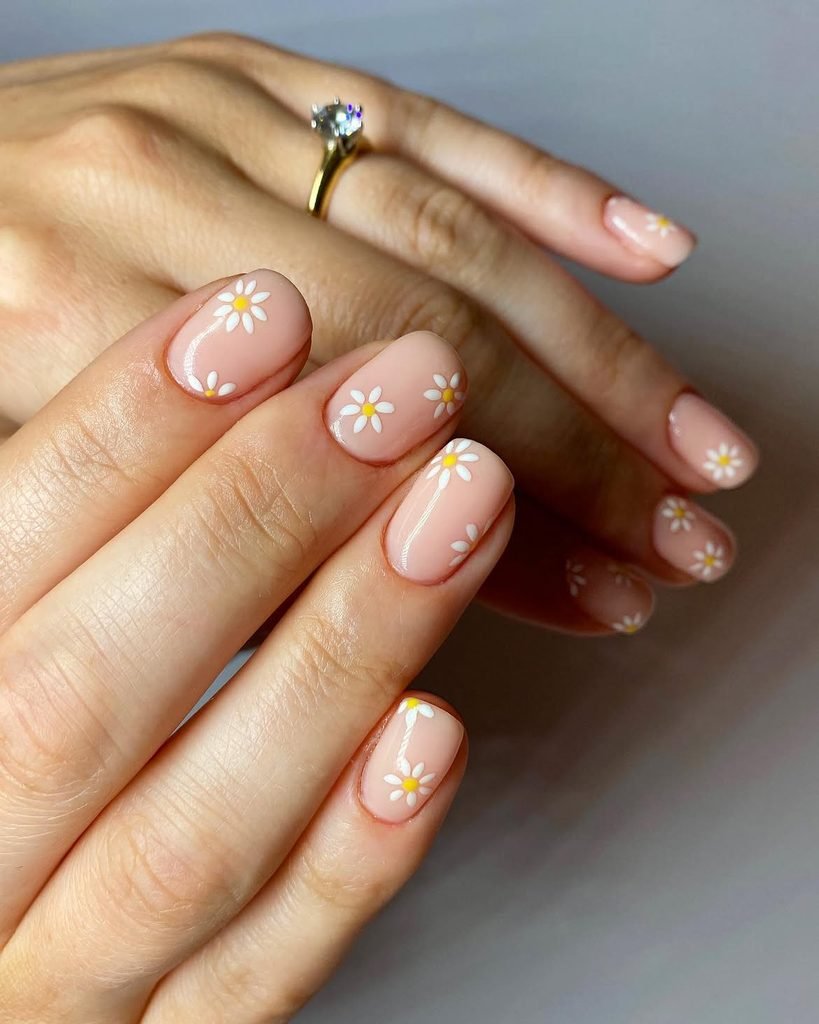
1. Milky Pink Nails With a Daisy Accent
Short oval nails receive two thin coats of milky pink, leaving a hint of the natural nail visible beneath the color. One small white daisy sits near the sidewall of each ring finger, with five rounded petals and a muted-yellow center. The remaining nails stay completely plain beneath a glossy finish, so the floral detail remains the focal point.
This is one of the most wearable simple flower nail designs for work, school, brunch, or a casual spring wedding. The single accent prevents short nails from looking crowded and makes the manicure much easier to reproduce on the non-dominant hand. A dotting tool or the rounded end of a clean bobby pin can form the petals; InStyle’s pastel nail guide also identifies dots and flower decals as approachable ways to create a similar home manicure.
How to Apply
- File the nails into short, even ovals and apply one or two coats of milky-pink polish.
- Place five small white dots in a circle.
- Add one muted-yellow dot in the center of each flower.
- Let the artwork set, then apply a clear glossy top coat.
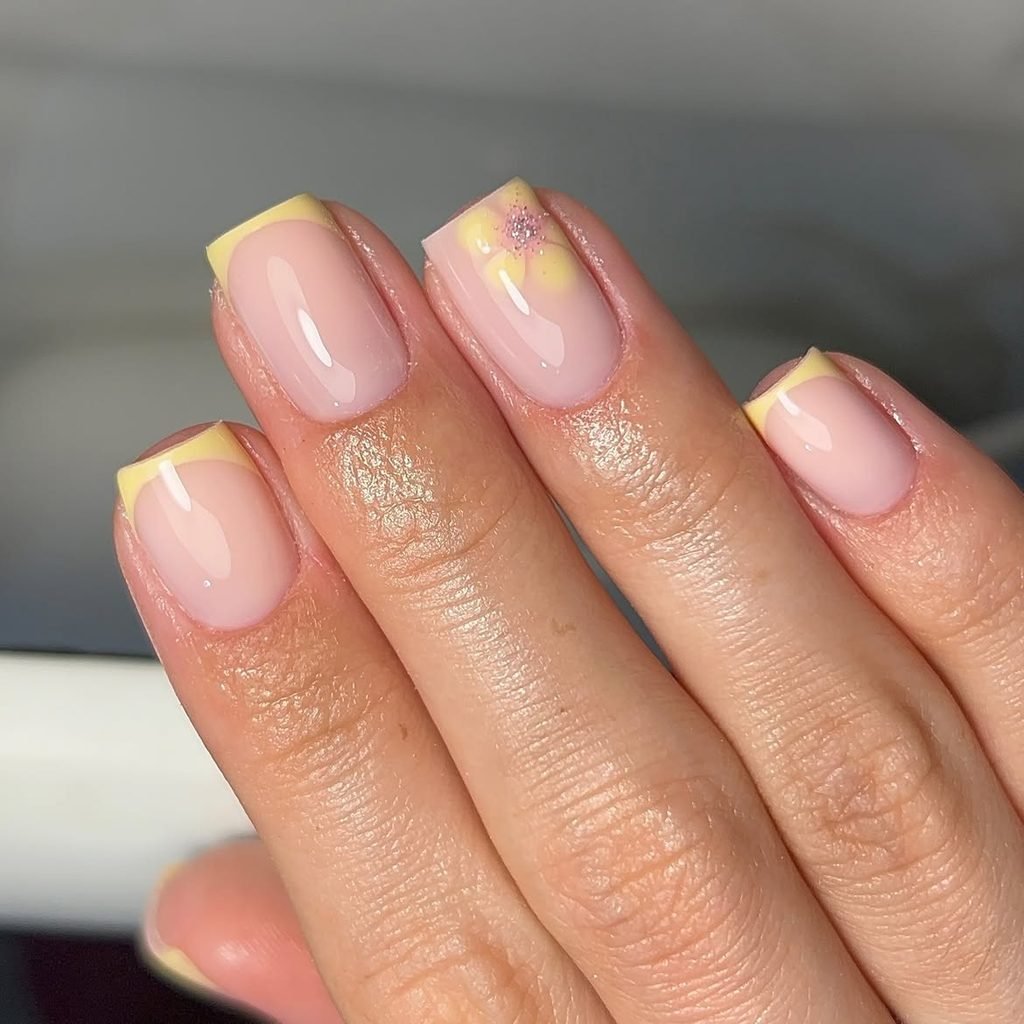
2. Butter Yellow Micro-French Tips
Short square nails begin with a sheer blush base and an exceptionally thin butter-yellow line along each free edge. The tips follow the natural width of the nail without extending deeply down the sidewalls, and one tiny white dot appears just above the smile line on each thumb. The finish is glassy, with no shimmer or additional artwork.
These spring French tip nails give a classic manicure a seasonal color update while remaining neat enough for everyday wear. Butter yellow is soft but more noticeable than white, and the narrow band preserves the visual length of a short square nail. French guides help beginners, although a long liner brush creates a thinner curve. These pastel French tips for short nails can be painted with regular lacquer or gel, depending on the wear time and finish you prefer.
How to Apply
- Apply a sheer blush base to clean short square nails.
- Draw a hairline butter-yellow tip across every free edge.
- Add one flower on the ring finger.
- Correct uneven edges and finish with a glossy top coat.
3. Soft Pastel Skittle Nails
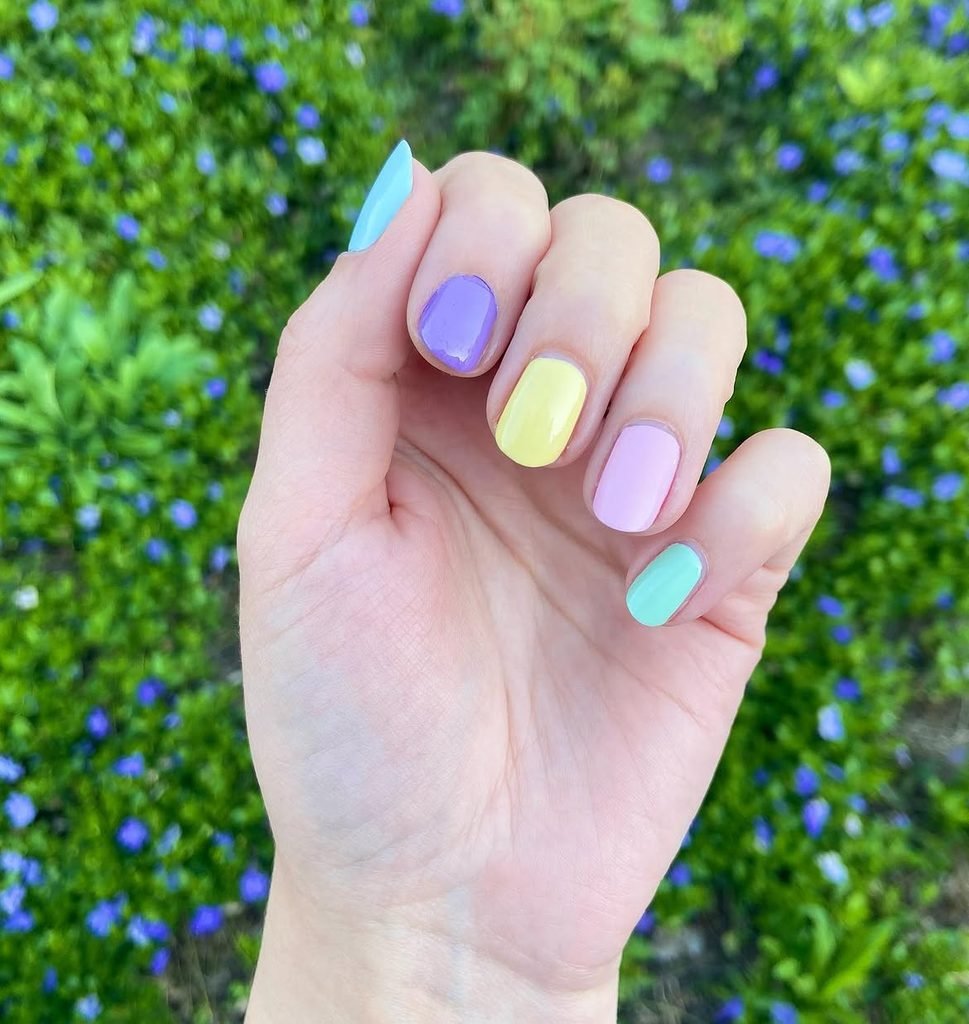
Short round nails are painted in five coordinated cream shades: blush pink, apricot, butter yellow, mint, and powder blue. Every color has the same opacity and high-gloss finish, with no accent nails or painted motifs. The matching formula and muted saturation make the set look deliberately balanced instead of like leftover colors placed at random.
This is the simplest way to wear pastel spring nails when choosing one shade feels limiting. It suits very short natural nails, takes no more drawing skill than a regular manicure, and can be adapted to warm or cool undertones by changing the pink, peach, or blue. Use thin layers and keep the cuticle margins consistent; uneven application is more distracting in a multicolor set because each nail is already being compared with the next.
How to Apply
- Prepare short round nails and apply a smoothing base coat.
- Paint one nail each in blush pink, apricot, butter yellow, mint, and powder blue.
- Add a second thin coat where needed to create matching opacity.
- Cover all five colors with the same high-gloss top coat.
4. Lavender Cuticle-Dot Nails
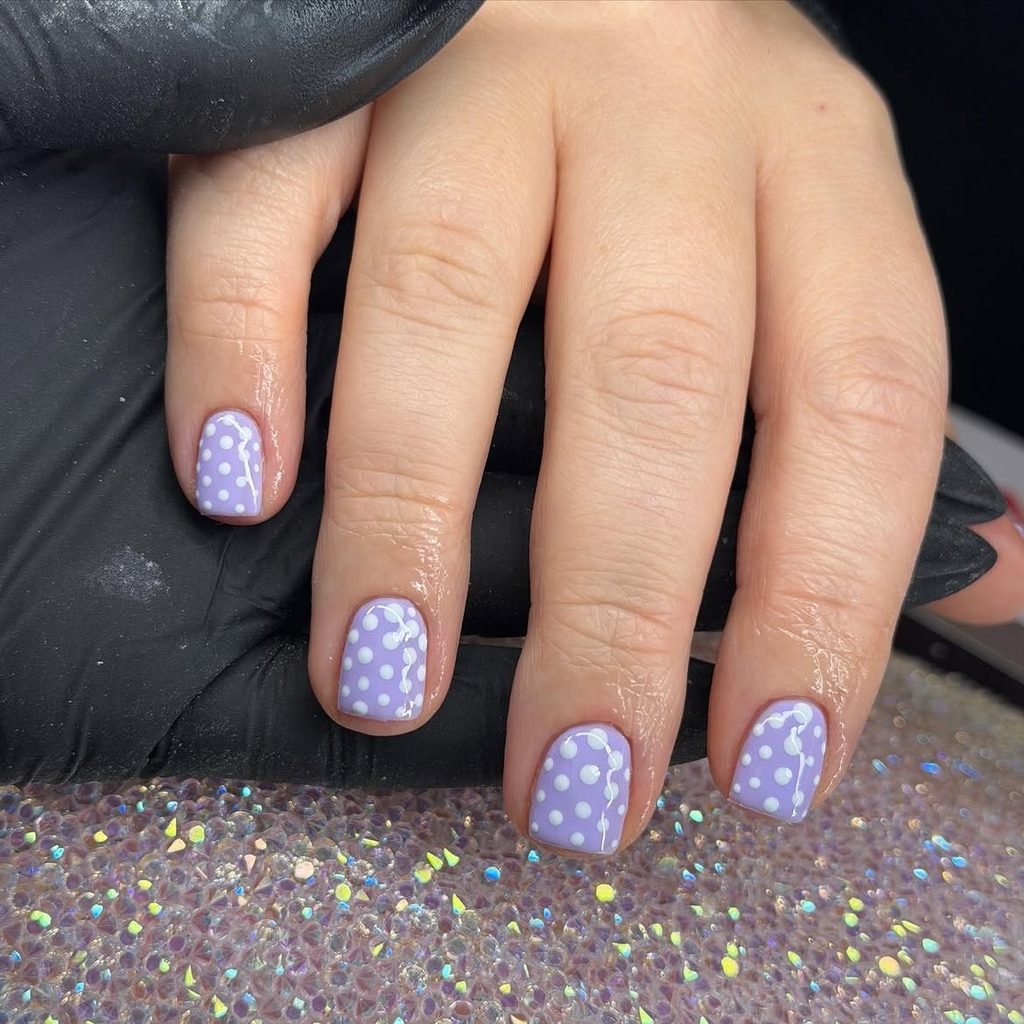
Short squoval nails use a translucent beige base with three tiny lavender dots following the curve of each cuticle. The middle dot is slightly larger than the two beside it, creating a simple graduated rhythm across the set. The rest of each nail remains bare-looking and glossy, allowing the natural nail shape to stay visible.
Among minimalist spring nails, this design is particularly useful for very short lengths because the detail sits low instead of consuming the free edge. It coordinates with workwear, denim, lilac knits, and silver jewelry without feeling overly decorative. For simple spring nail designs for short nails, the dots require little surface space and only one basic nail-art tool, while both hands can differ slightly without making the manicure look incorrect.
How to Apply
- Apply a translucent beige base to short squoval nails.
- Place one small lavender dot above the center of each cuticle.
- Add a smaller dot on either side, following the natural cuticle curve.
- Wait until the dots are set before covering them with a glossy top coat.
5. Mint Diagonal Side-Tip Nails
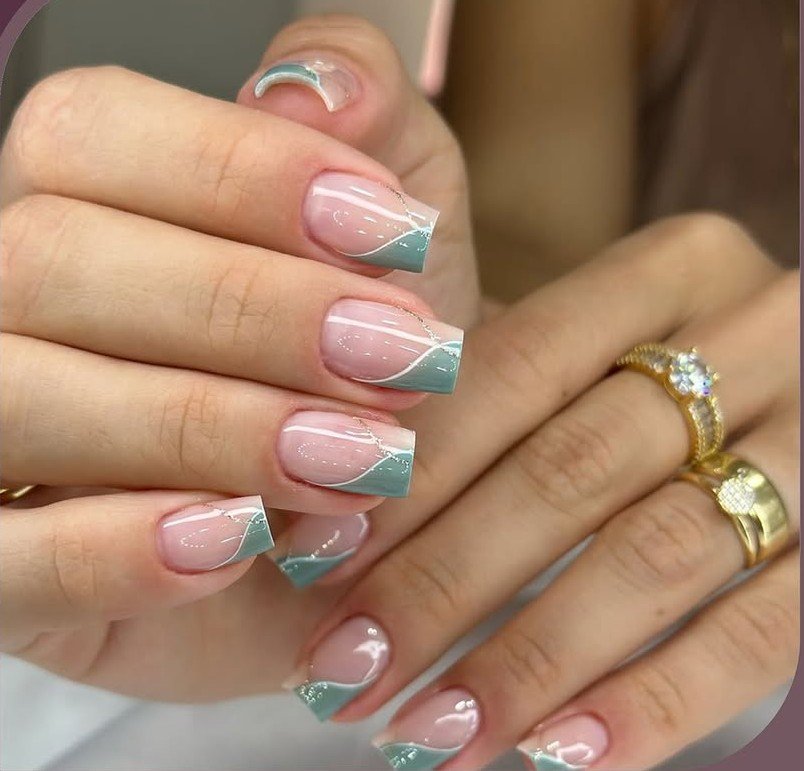
Short almond nails begin with a sheer pink base, then receive one mint-green diagonal tip sweeping from a low sidewall to the opposite edge. A hairline cream border follows the upper edge of the mint section, adding definition without turning it into a double French manicure. The diagonal changes direction on alternating nails to create a quiet sense of movement.
This modern variation works well for readers looking for short almond spring nails or a cleaner alternative to full mint coverage. The angled placement supports the tapered shape and disguises small differences in free-edge length. Stripping tape can establish the diagonal at home, but it should be removed while the color is still workable; mint press-ons are another practical option for anyone who wants perfectly repeated lines.
How to Apply
- Cover short almond nails with a sheer pink base.
- Paint alternating diagonal mint tips from one sidewall toward the opposite edge.
- Trace the upper edge of each mint section with a hairline cream border.
- Seal the design with a clear leveling top coat.
6. Baby Blue Cloud Accent Nails
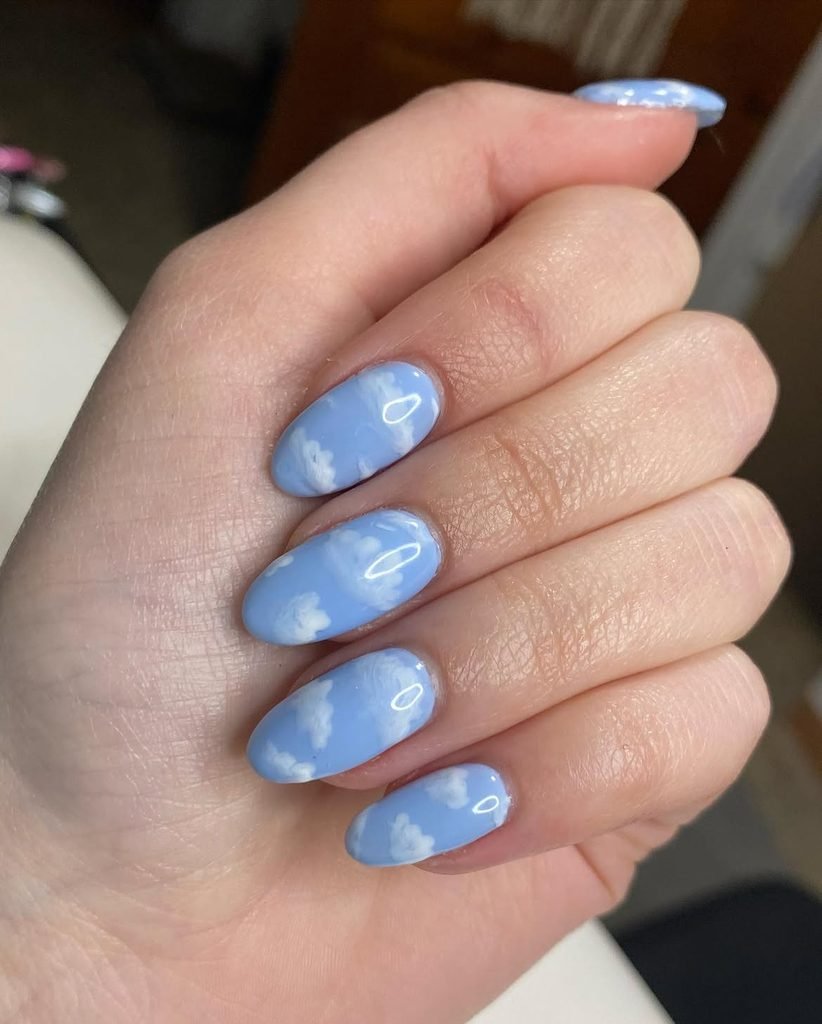
Short round nails are painted a creamy baby blue, while two accent nails use a sheer nude base with one small white cloud placed near the tip. Each cloud is formed from three or four overlapping rounded shapes rather than a detailed sky scene. A high-gloss finish keeps the opaque blue and sheer accents visually consistent.
This is one of the more playful cute spring nail ideas, but the limited number of clouds keeps it suitable for short adult manicures. Baby blue pairs easily with denim, white cotton, grey, and silver accessories, making the set useful beyond a single event. The clouds can be created with a dotting tool, a small brush, or decals; avoid adding stars, rainbows, and glitter at the same time, because the design stops being simple once several themes compete on a small nail.
How to Apply
- Paint most short round nails creamy baby blue and keep two accents sheer nude.
- Build one small cloud near each accent tip using overlapping white dots.
- Refine the lower cloud edge with a detailed brush if necessary.
- Apply a glossy top coat across the full manicure.
7. Peach Sponge Ombré Nails
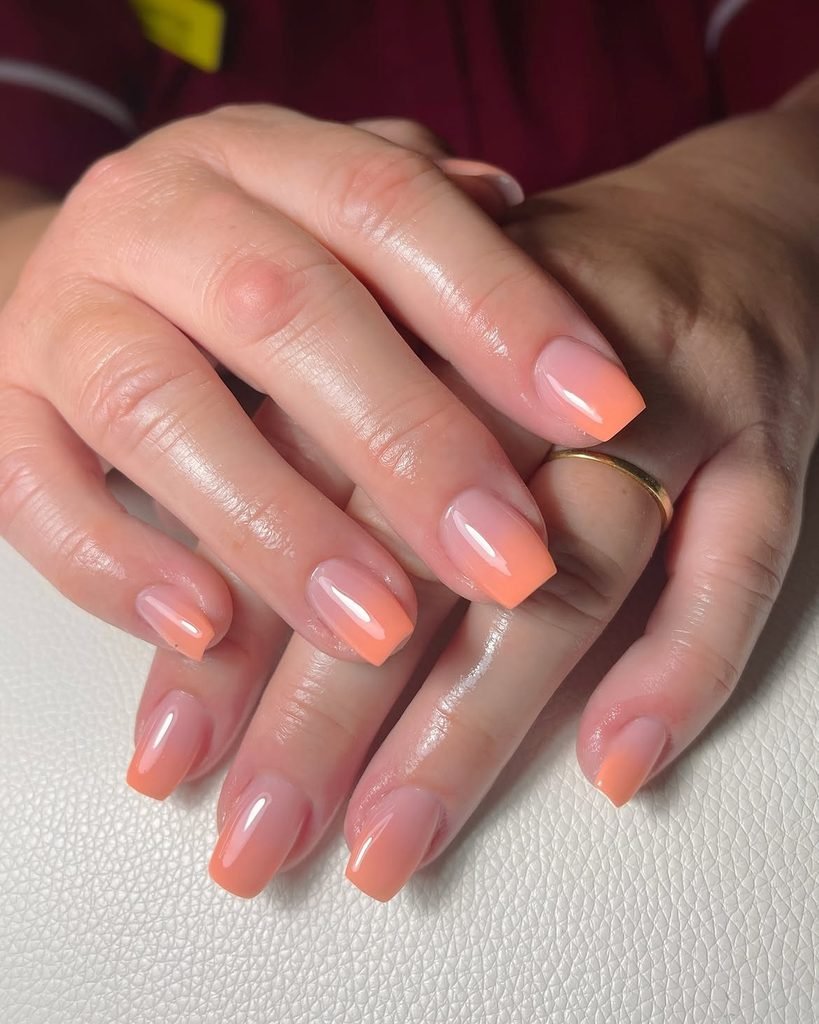
Medium oval nails fade from a translucent blush near the cuticles into peach and soft coral at the tips. The transition remains tonal rather than introducing several unrelated colors, and no shimmer or artwork interrupts the blend. A glossy top coat smooths the lightly sponged surface and gives the gradient a fresh sorbet appearance.
This is one of the most useful easy spring nail designs for someone who wants more dimension than solid polish without painting fine details. The oval shape supports the soft vertical fade, while the warm palette suits dinners, graduations, holidays, and everyday neutral outfits. OPI’s beginner nail-art guide uses a cosmetic sponge for ombré; the important part is building several thin impressions rather than trying to reach full opacity in one heavy layer.
How to Apply
- Apply a translucent blush base to medium square nails.
- Place overlapping bands of peach and soft coral on a small cosmetic sponge.
- Press the color onto each nail in thin layers, keeping coral closest to the tips.
- Clean the sidewalls and smooth the gradient with a glossy top coat.
8. Sage Leaf Line-Art Nails
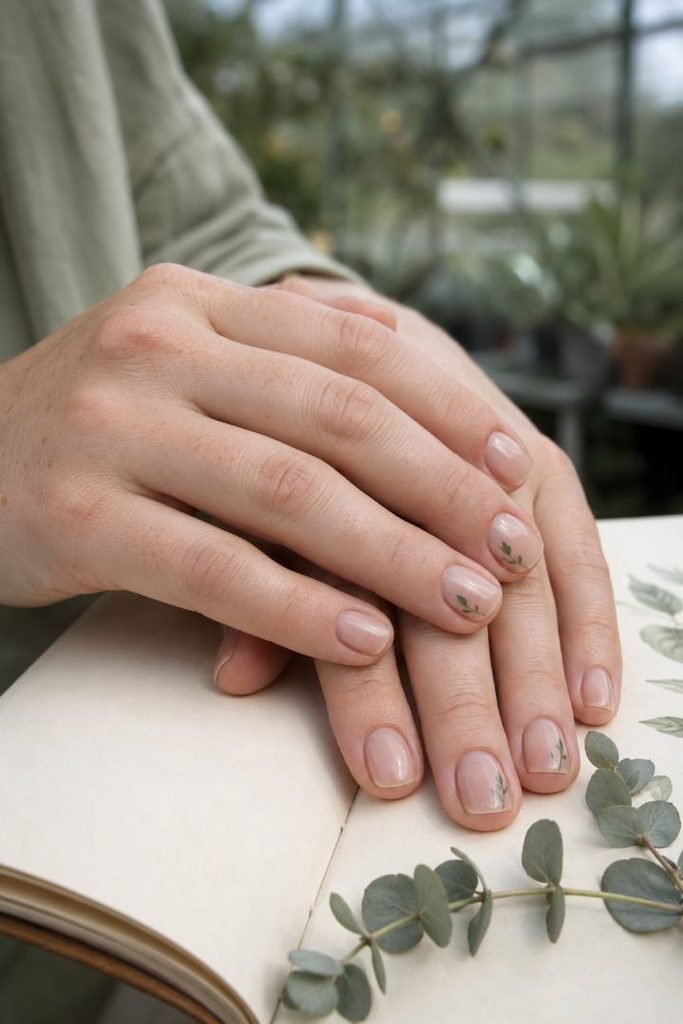
Short natural squoval nails remain nearly bare beneath a transparent neutral base. A single fine sage-green stem grows from one sidewall on three nails, carrying two or three simple almond-shaped leaves. The other nails stay plain, and the entire set is finished with a soft gloss rather than a thick glass-like coating.
These natural spring nails offer a botanical reference without filling the hand with flowers. The narrow vertical stems create useful length on a compact nail and pair well with linen, cream, tan, denim, and muted green clothing. A detailed brush gives the cleanest result, but fine leaf decals work if drawing with the non-dominant hand is difficult. Do not try to make every stem identical; small changes in height and direction make the line art look more organic.
How to Apply
- Apply a transparent neutral base to short squoval nails.
- Draw one fine sage stem from the sidewall of three nails.
- Add two or three simple pointed leaves along each stem.
- Keep the remaining nails plain and seal the set with a clear top coat.
9. Pink Gingham Accent Nails
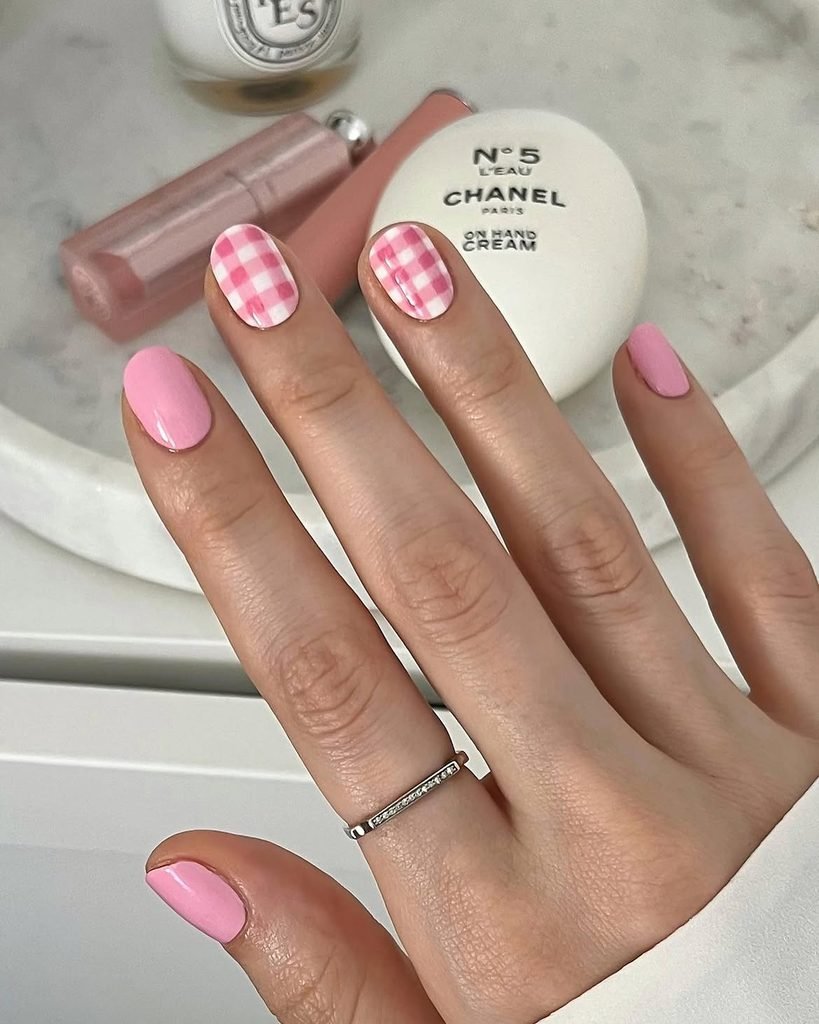
Medium square nails alternate between solid dusty pink and two cream accent nails patterned with a restrained gingham grid. Translucent pink vertical and horizontal bands overlap to form slightly darker squares, while the remaining cream spaces stay visible. The pattern appears on only two nails, preventing the repeated checks from dominating the hand.
This preppy design suits readers looking for simple gel nails for spring, picnic-inspired manicures, or a graphic alternative to flowers. Square nails provide straight edges that help the grid look orderly, though the same idea can work on press-ons if painting parallel lines feels too demanding. With regular lacquer, allow the base to set before adding striping tape; pulling a guide across wet polish will disturb the cream layer beneath it.
How to Apply
- Paint three medium square nails dusty pink and two accent nails cream.
- Add evenly spaced translucent-pink vertical bands across the cream accents.
- Cross them with horizontal bands, allowing the intersections to appear darker.
- Let the grid set before applying a leveling glossy top coat.
10. Tiny Cherry Nails
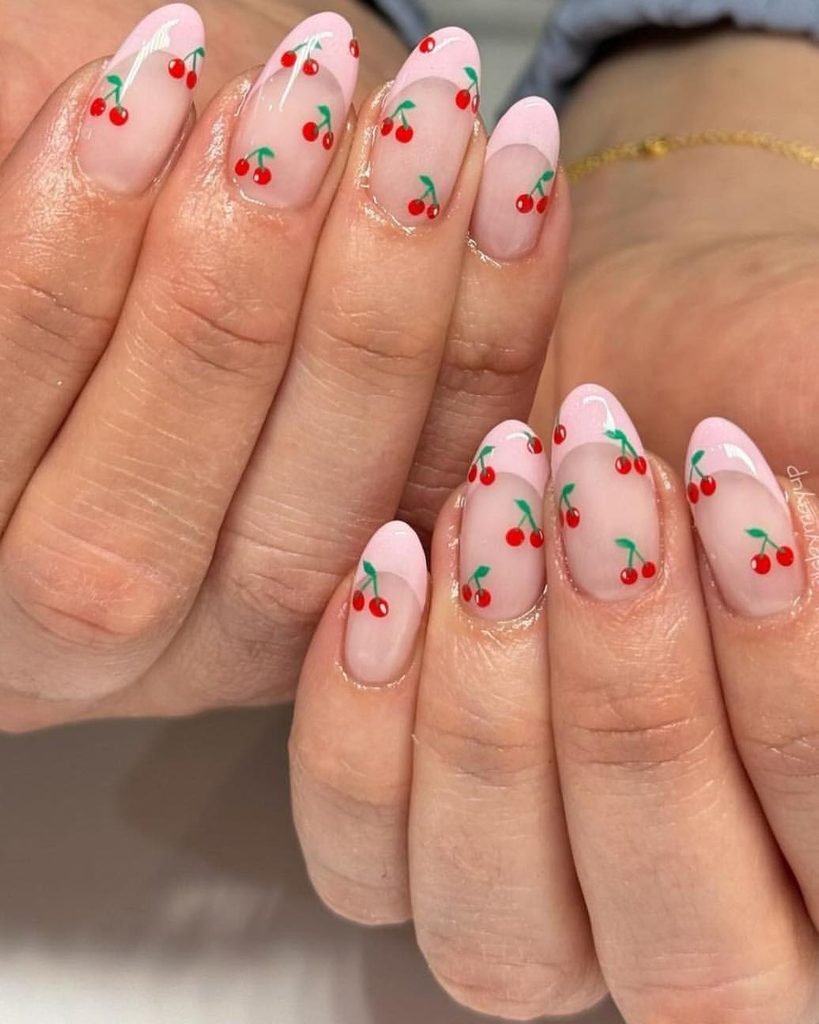
Short oval nails use a sheer pink base with one miniature pair of red cherries on each ring finger. Two small red dots form the fruit, fine green stems meet above them, and one tiny leaf angles to the side. The other nails receive narrow red half-moons at the cuticles, connecting the accents to the rest of the manicure without repeating the fruit everywhere.
This easy fruit nail art stays genuinely simple because the motif is built almost entirely from dots and short lines. It works for weekends, picnics, birthdays, and anyone who prefers a brighter detail than a daisy. A dotting tool and liner brush are enough for a DIY version, while cherry decals reduce the difficulty further. Keep the fruit small; oversized cherries quickly crowd a short oval nail.
How to Apply
- Apply a sheer pink base to oval nails.
- Create two small red dots on each ring finger and connect them with fine green stems.
- Add one tiny green leaf, then paint narrow red cuticle half-moons on the remaining nails.
- Finish with a clear glossy top coat.
11. Pastel Half-Moon Nails
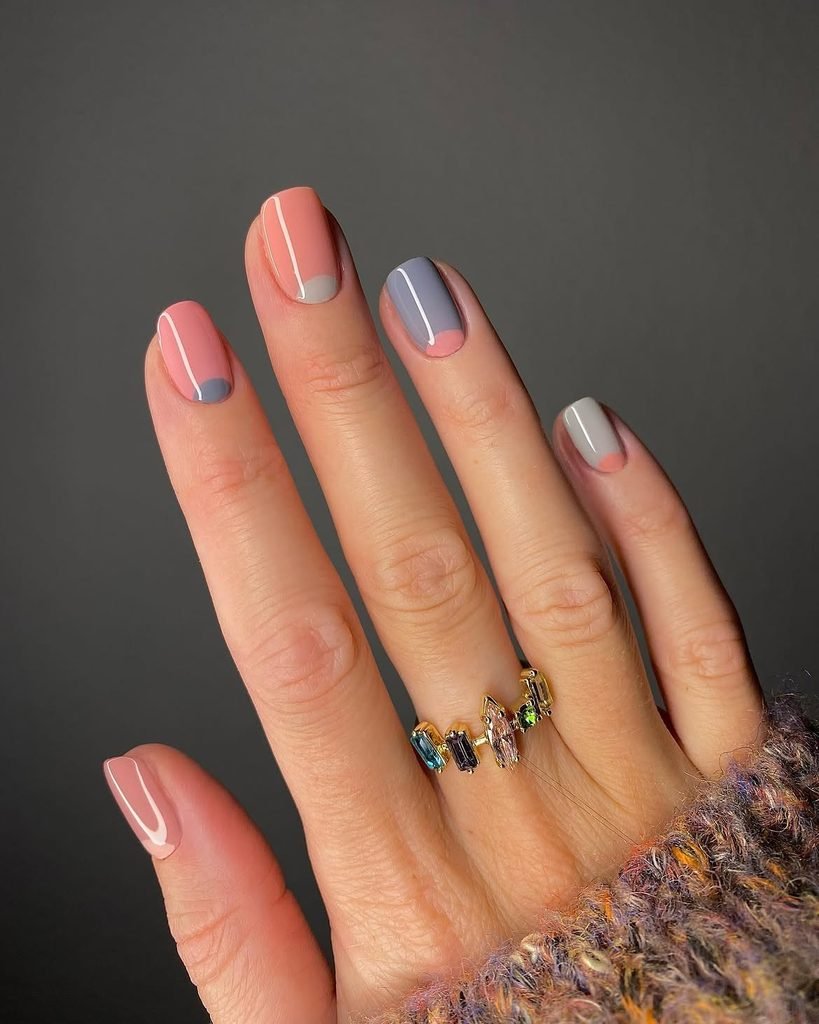
Short soft-square nails combine a translucent nude base with rounded half-moons in lavender, mint, butter yellow, and baby blue. Each nail uses one color at the cuticle, leaving the rest of the surface clear and glossy. The arcs are equal in height but not unusually deep, preserving plenty of visible natural nail.
These color-block spring nails provide more structure than dots while staying simple enough for home application. Curved reinforcement stickers can guide the half-moons, and the design grows out less obviously than full opaque coverage because the color already sits close to the cuticle in a deliberate shape. It is a practical option for short square nails, Easter gatherings, or anyone who wants several spring colors without a full Skittle manicure.
How to Apply
- Apply a translucent nude base to short soft-square nails and let it set.
- Position curved guides above the cuticles.
- Fill each half-moon with any pastel colours you love and remove the guides carefully.
- Refine the arcs and seal the manicure with a glossy top coat.
12. Pastel Wavy-Line Nails
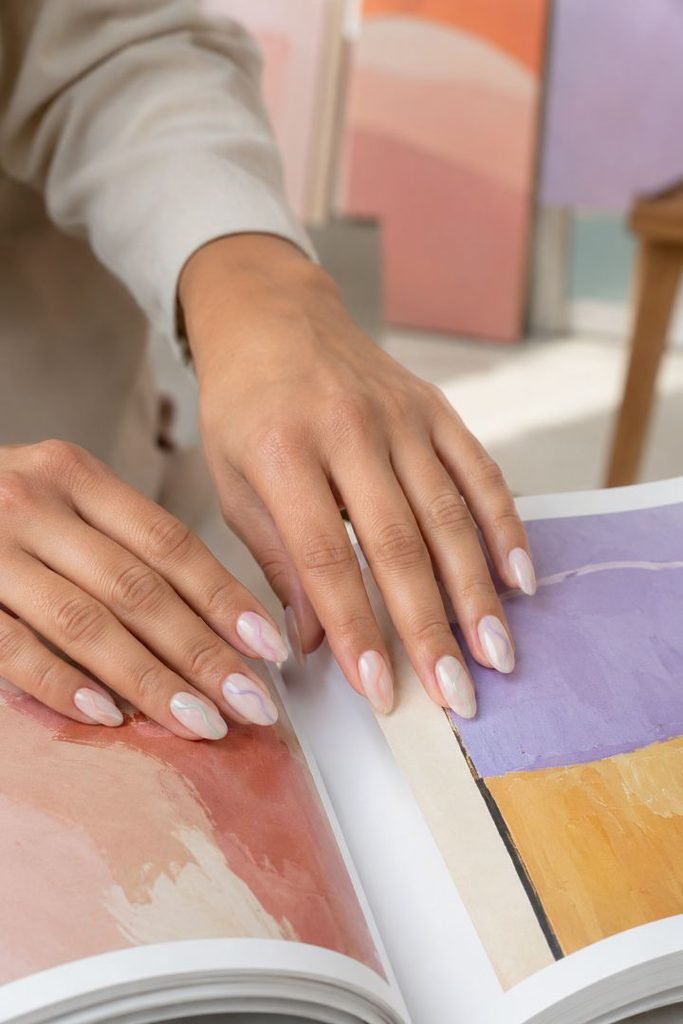
Medium almond nails have a sheer milky base crossed by one or two thin wavy lines in coral, lilac, mint, and powder blue. Each nail uses a different route, but the lines travel mainly from cuticle to tip and never overlap into a dense swirl. Several nails carry only one wave, keeping the negative space central to the design.
This is a useful simple abstract nail design for readers who want colorful spring nails without flowers, fruit, or French tips. The waves are intentionally uneven, so a home manicure does not depend on perfect symmetry. InStyle’s spring pastel coverage notes that irregular squiggles can be made with a few polish colors and a small rounded tool; for finer lines, use a liner brush and remove excess polish before touching the nail.
How to Apply
- Apply a sheer milky base to medium almond nails.
- Draw one or two thin vertical waves in coral, lilac, mint, or powder blue.
- Vary the placement while leaving generous clear space around every line.
- Allow the colors to set and finish with a glossy top coat.
13. Robin’s Egg Speckled Nails
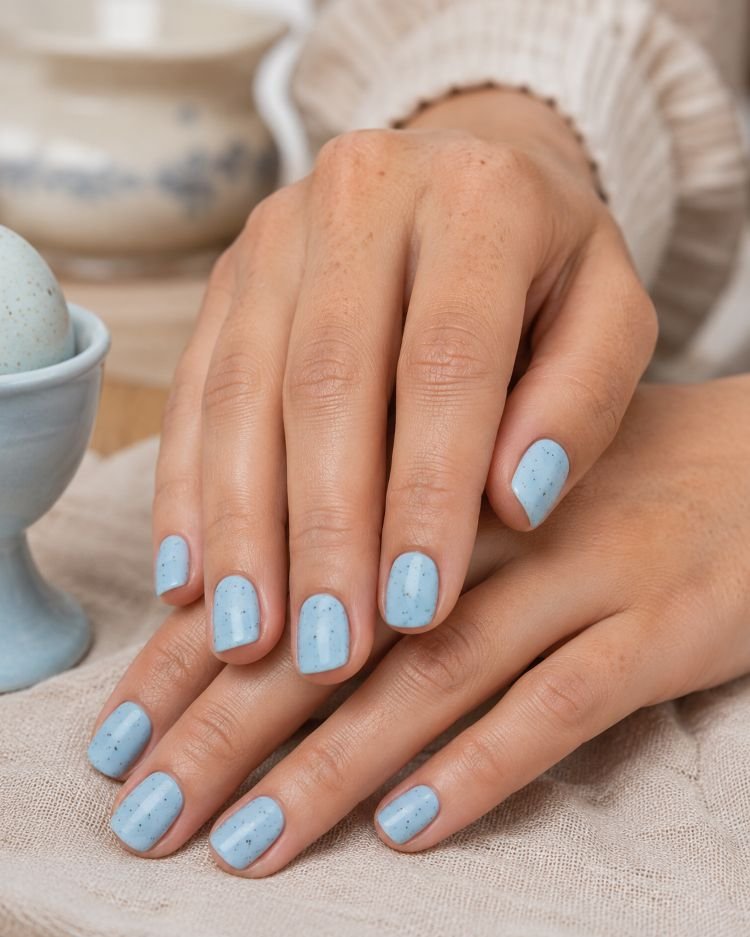
Short squoval nails are painted a soft robin’s-egg blue and scattered with extremely fine navy and brown speckles. The marks vary in size and spacing, with more base color than decoration remaining visible. A satin top coat reduces the shine slightly, giving the manicure the softly textured appearance of a natural eggshell without adding physical grit.
These short spring nails work as a nature-inspired option and can also serve as understated Easter nail art without using chicks, bunnies, or literal egg illustrations. The speckles are simple to create with a stiff detail brush or a purpose-made speckled topper, but surrounding skin should be protected from uncontrolled splatter. For the neatest result, tap individual irregular dots onto the nail rather than flicking polish across the hand.
How to Apply
- Paint short squoval nails with two thin coats of robin’s-egg blue.
- Add sparse navy and brown speckles in varied sizes using a small stiff brush.
- Keep some areas nearly clear so the blue base remains dominant.
- Finish with a smooth satin top coat.
14. Sheer Nude Nails With Pearl Cuticles
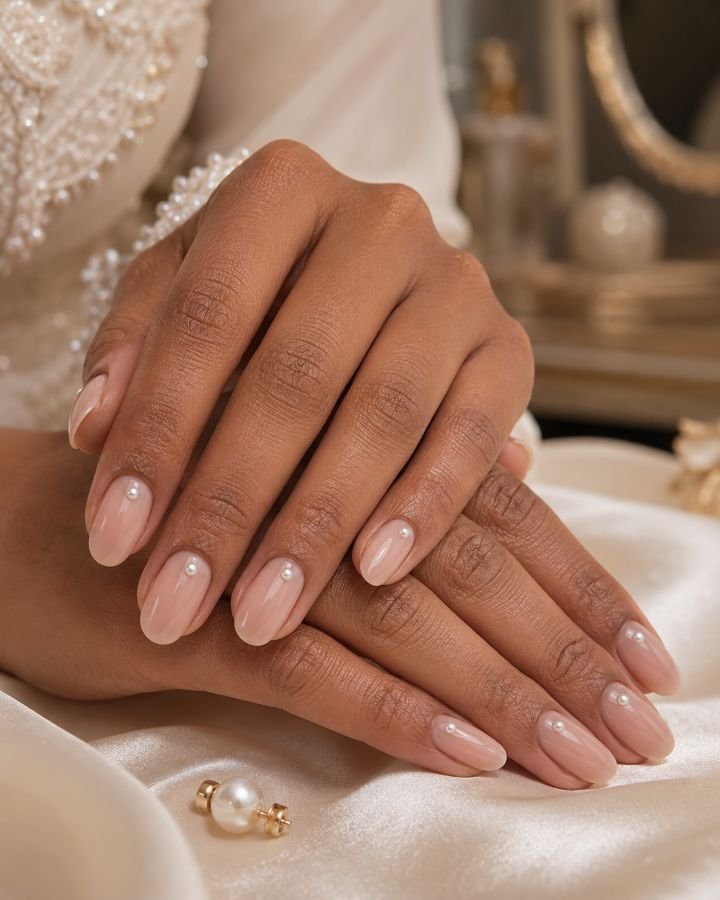
Medium round nails are covered in a sheer nude rosy color, and adorned with one little flat-back pearl at the middle of every cuticle line. All pearls are of the same modest size and lie down close to the nail instead of making raised groupings. Glossy coating encircles the ornaments but leaves their delicate lustrous surface open.
This is the most sophisticated choice in this collection for the readers looking for delicate spring nails or classy spring manicure suggestions for weddings, showers, dinner parties, and formal office gatherings. Sheer coating slowly grows out, and one pearl acts as minimalistic jewelry. Nail glue will stick this look to your nail temporarily, but pearl decals or custom press-on nails will be more comfortable because of less bulkiness. In case a pearl gets loose, you can either fix or replace it instead of continuously catching on clothes.
How to Apply
- Apply one or two thin coats of translucent rosy-nude polish to medium oval nails.
- Place one tiny flat-backed pearl at the center of each cuticle line using compatible nail adhesive.
- Press each pearl into position without pushing it onto the surrounding skin.
- Apply a top coat around the pearls while keeping their faces clear.
15. Glossy Coral Nails With Gold Dots
Short square nails are painted a clear, balanced coral that sits between pink and orange. One small gold dot appears near the lower sidewall of each nail, alternating from left to right across the hand. The manicure has no glitter base, foil, or additional lines; the contrast comes from the warm solid color and precise metallic detail.
This simple spring manicure is stronger than a pastel but remains easy to coordinate with denim, white, tan, turquoise, and gold jewelry. It suits readers who prefer bold color over florals yet still want a Pinterest-friendly detail. Regular lacquer is enough for the coral, and a dotting tool or tiny metallic decal can create the gold accents. Keep every dot small and similarly placed so the design reads as polished rather than unfinished.
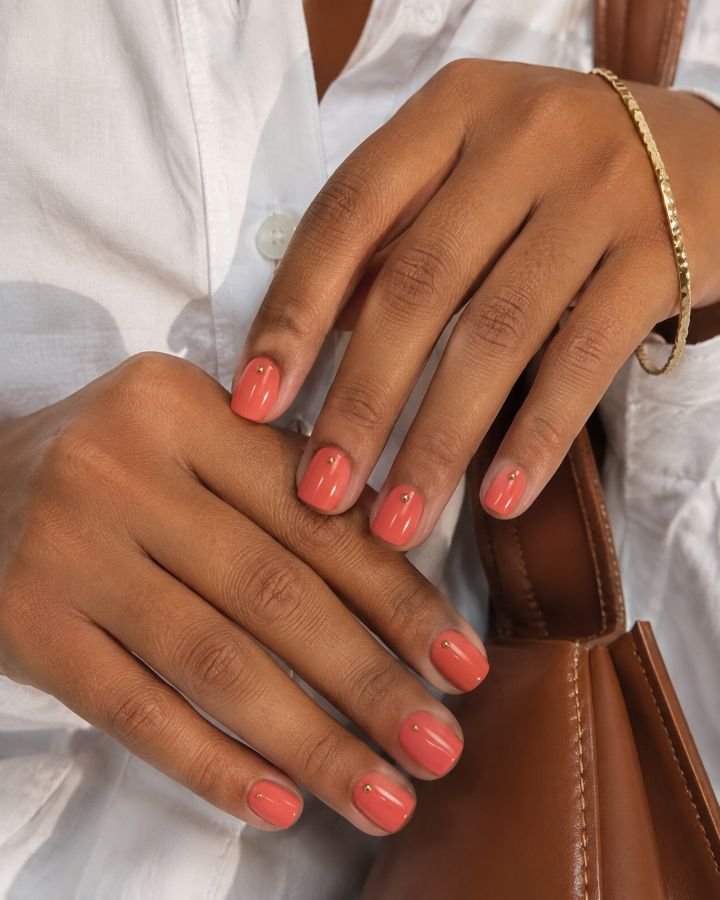
How to Apply
- Shape the nails into short soft squares and apply a suitable base coat.
- Paint two thin coats of glossy coral, keeping the cuticle margins even.
- Add one tiny gold dot near alternating lower sidewalls.
- Seal the color and dots with a high-gloss top coat.
Choosing Simple Spring Nail Designs for Short Nails
The most effective simple spring nail designs for short nails preserve visible base color. Tiny daisies, cuticle dots, micro-French tips, sidewall leaves, small fruit, and narrow half-moons add detail without dividing the nail into too many sections. Essie’s spring nail color and design guidance similarly recommends minimalist flowers and dots for short nails.
Shape is equally important as size. Round and oval-shaped nails complement curved shapes like dots, fruit, and little flowers; square and squoval nails serve as a good template for micro tips, gingham, and color blocks; almond-shaped nails are great for diagonal or side tip shapes that enhance the tapering effect of the nails. Never reduce the width of the sidewall just to fit a particular shape.
Beginner-Friendly Tools and Techniques
For easy spring nail art for beginners, a dotting tool, fine liner brush, cosmetic sponge, curved guides, cleanup brush, base coat, and top coat cover most of the designs in this article. Daisies, cherries, clouds, and cuticle dots can all be built from circles and short lines. A sponge creates the peach ombré, while reinforcement stickers or striping tape help with half-moons and gingham.
The real difficulty is usually timing, not the number of products. Ordinary lacquer should be set before tape or a guide is placed over it, and painted dots need time before the top coat is brushed across them. Work on one or two accent nails when using the non-dominant hand. Decals and press-ons are reasonable tools, not shortcuts that invalidate a simple manicure.
Spring Colors That Keep Simple Nails Interesting
Baby blue, lilac, mint, pale pink, butter yellow, and peach are closely connected to pastel spring nails, but a simple manicure does not need to stay pale. Coral, cherry red, sage, and a small amount of gold can provide clearer contrast while keeping the overall design edited. The relevant color should support the technique: soft shades preserve fine dots and line art, while stronger colors can carry a manicure with little or no artwork.
Keep the palette controlled. Two or three related colors are enough for gingham, ombré, fruit, or waves, and a five-color Skittle manicure works because each nail is otherwise plain. If a design already contains a pattern, adding chrome, glitter, gems, and several accent colors will not improve it; it will only make the result feel busier.
Final Thoughts
Being simple doesn’t mean being incomplete. The difference lies in editing, for example, a well-placed daisy, a symmetrical micro-tip, a proportional gradient or a coherent cuticle detail should look intentional from the full hand angle. These simple spring nail designs range from romantic to minimalist, from colorful to graphic, from playful to natural and formal styles, but do not necessarily require a technical salon set at each manicure.
Select the design depending on your nail length and the level of maintenance you are going to be able to handle. Small nails will need smaller design elements with more blank spaces, whereas medium nails will fit well with gradients, gingham or minimalistic waves. Provide a visual inspiration that would show all five nails together.