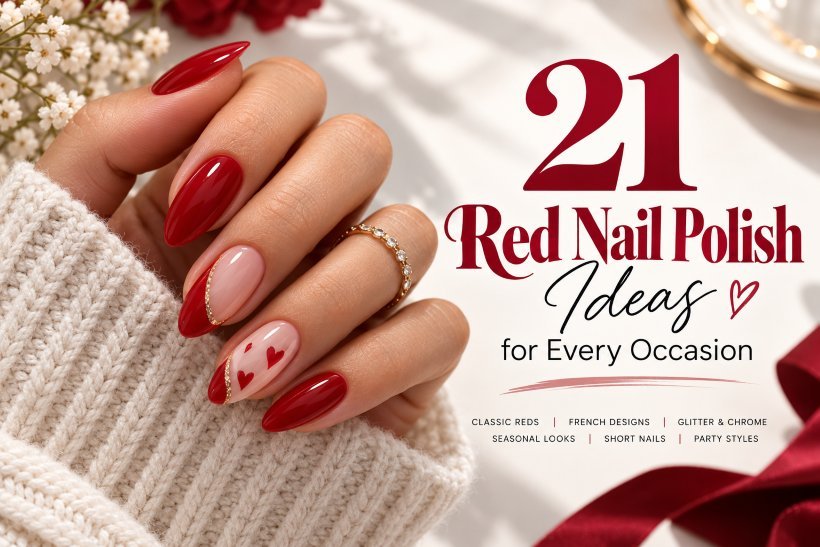
21 Red Nail Polish Ideas for Every Occasion
Red manicures can be clean and practical, softly sheer, dramatically dark, or detailed enough to feel like little works of art. From short natural nails to almond and coffin lengths, classic solids to French variations, reflective finishes to seasonal art, this nail polish red ideas collection runs the gamut with polished designs you can show your nail tech or adapt into press-ons.
Use the list as a mood board and decision guide. Each idea explains the colour balance, finish and upkeep level, then offers manicure-specific application steps. Whatever the occasion, whether you need office-friendly red manicure ideas, a party set or an easy short-nail option, there is a shape and technique here to suit.
1. Glossy True Red for Every Day
A blue-leaning true red on short squoval nails looks crisp, like a well-blotted lip. Keep the tip just past the finger pad. Smooth the corners with gentle filing. Use two light coats, so it looks like glass instead of thick paint. Finish with a shiny top coat that sits smooth from cuticle to edge.
Pick this red when you want a timeless look. It goes with denim, sharp tailoring, and a black dress. It will not steal attention from your outfit. The squoval shape feels easy for typing. It also tends to snag less than a long point. If you wash your hands a lot, reapply the shine after a few days. Since the shade is bold, small chips show up fast and are simpler to fix.
How to Apply
- Shape short, natural nails into a soft squoval. Wipe away surface oil. Add a thin base coat that helps smooth the nail.
- Paint two very thin coats of the blue-toned true red. Leave a small, even space near each cuticle. Also cap the free edge.
- Let it dry. Then add a glossy top coat. Place the brush on the nail and let it glide, but do not scrub near the cuticle.
- Clean any stray polish on the skin with a small angled brush and remover.
2. Cherry Red Almond Glam
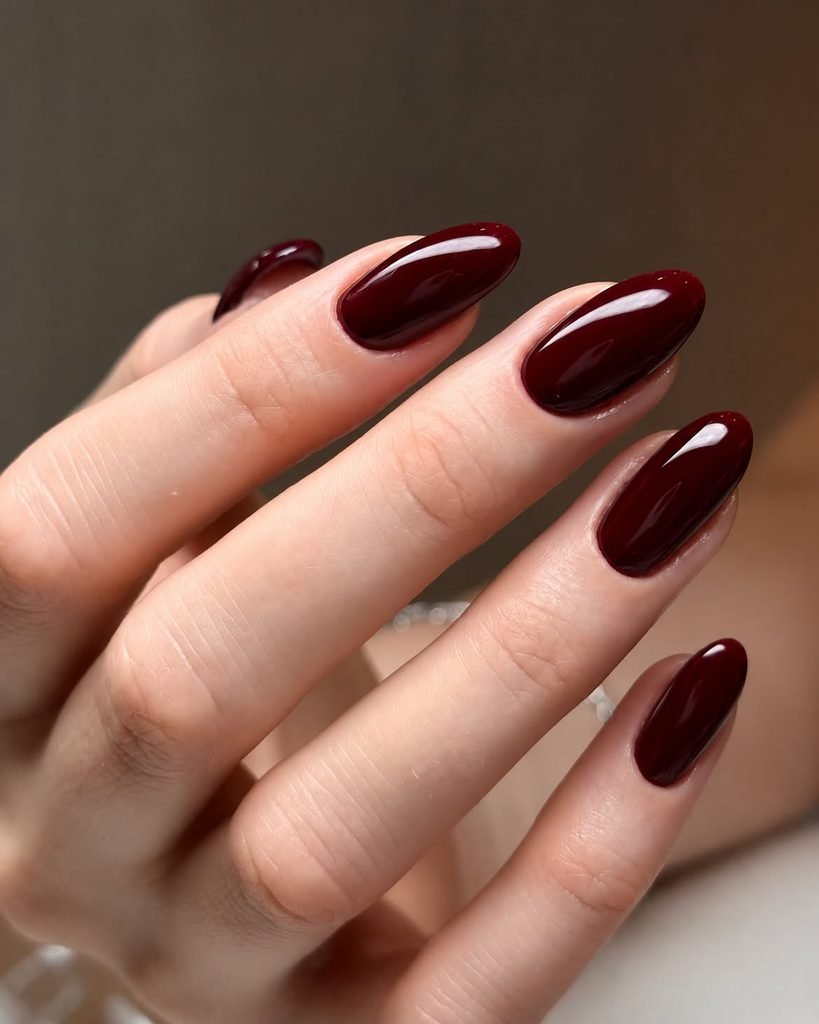
Medium almond nails in a vivid cherry red look a bit brighter and cleaner in the same color range. Pick a tone that feels slightly cool but still rich. Go for a smooth shine so the tapered tips look glossy, not dull. Keep every nail the same length. Paint the side edges neatly, so the almond shape stays classy, not skinny.
This cherry red set works for a dinner plan, a quick getaway, or any look that could use one bold accent. It also pops with cream knits, deep cocoa browns, or small gold hoop earrings. Since the length is not extra long, it still feels easy to wear. Still, an almond tip needs careful filing as it grows out. Have a nail pro check the shape from the side too. If the apex is even, the point will not look flat.
How to Apply
- File extensions or shape natural nails into a medium almond that feels balanced. Smooth the sidewalls before you use dehydrator and base gel.
- Put on one thin coat of opaque cherry red. Cure it per your gel instructions. Then add a second thin coat for full coverage.
- If the tip needs a small adjustment, use a fine file after curing. Finish by sealing with a high-shine top coat.
- Seal the free edge. After the last cure, rub in moisturizer on the skin around your nails.
3. Short Oxblood Rounds
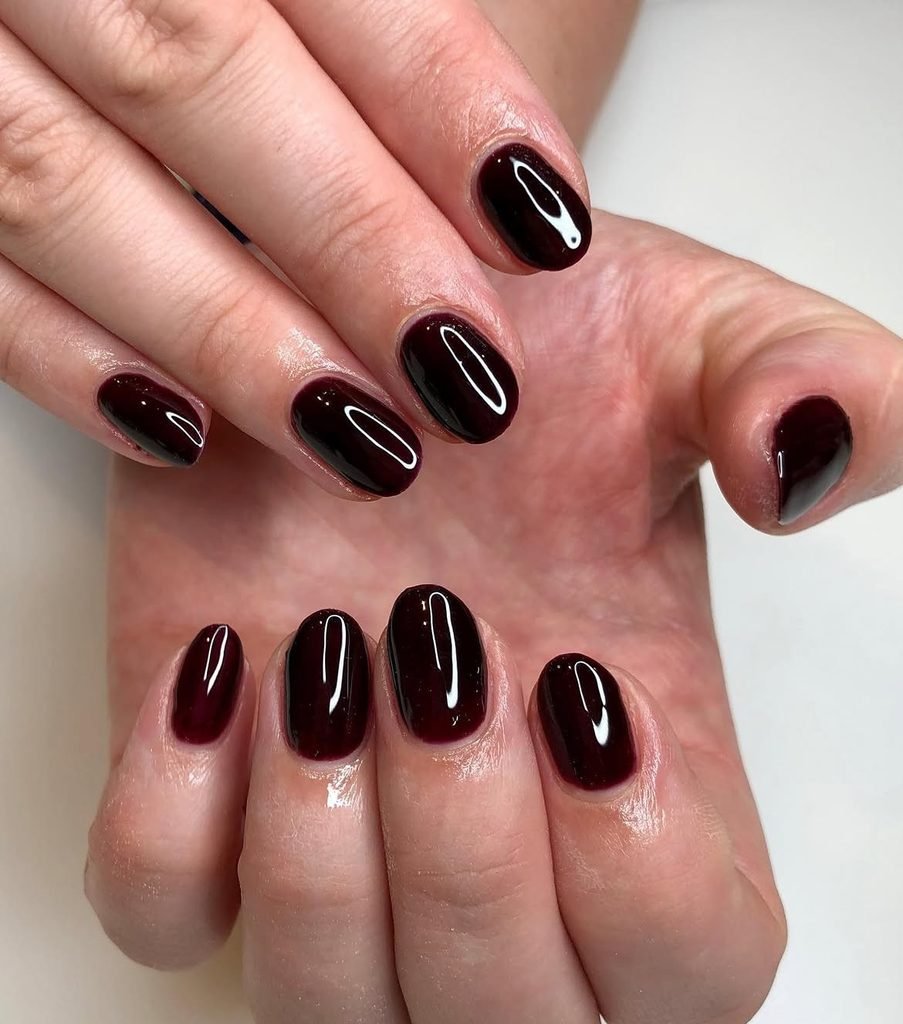
Oxblood on short, rounded nails turns red into a calmer, wine-like tone. Go for a brown-plum base, not a flat, nearly black burgundy. Keep the nail tip shape tight to the fingertip. The top should stay shiny and even so the color looks full. Skip a satin top coat, since it can make this shade look flat or dull.
This look fits a dinner plan, but it also works on busy workdays. Short rounded nails help a dark polish feel styled, not harsh. The deep color also matches camel, charcoal, denim, and antique gold. When the air gets cooler, it can still look neat. Light tip wear does not stand out as much against the rich pigment. If your nails bend or feel thin, use a flexible base so the rounded edges do not lift.
How to Apply
- File and shape nails into a short round. Keep both sides even, then buff the free edge gently.
- Put on a flexible base coat. Wait until it sets, then add one thin coat of brown-plum oxblood.
- Add a second coat only where the first layer looks see-through. Keep the edges clean and keep the smile line soft.
- Seal everything with a glossy top coat. Press it on the edge with a quick light swipe.
4. Micro Red French on a Blush Base
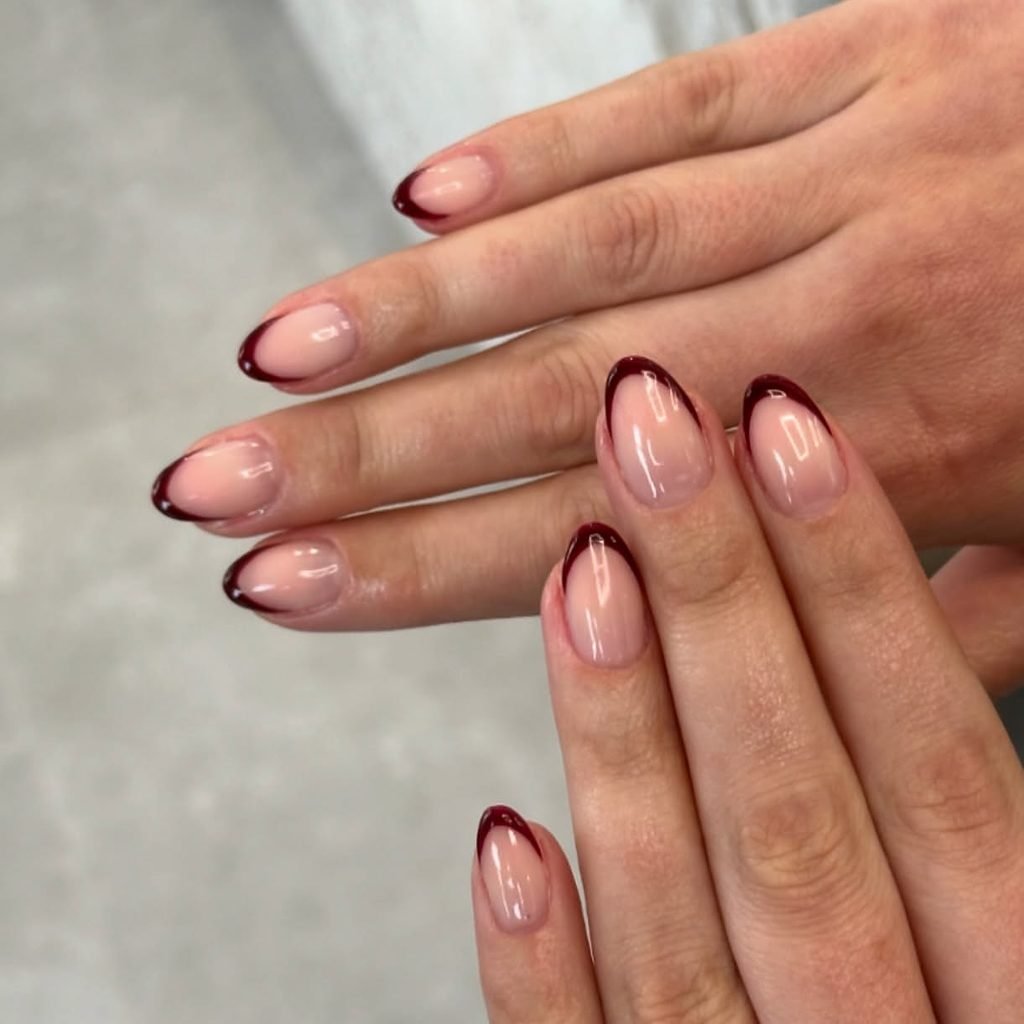
Oxblood on short, rounded nails turns red into a calmer, wine-like tone. Go for a brown-plum base, not a flat, nearly black burgundy. Keep the nail tip shape tight to the fingertip. The top should stay shiny and even so the color looks full. Skip a satin top coat, since it can make this shade look flat or dull.
This look fits a dinner plan, but it also works on busy workdays. Short rounded nails help a dark polish feel styled, not harsh. The deep color also matches camel, charcoal, denim, and antique gold. When the air gets cooler, it can still look neat. Light tip wear does not stand out as much against the rich pigment. If your nails bend or feel thin, use a flexible base so the rounded edges do not lift.
How to Apply
- File and shape nails into a short round. Keep both sides even, then buff the free edge gently.
- Put on a flexible base coat. Wait until it sets, then add one thin coat of brown-plum oxblood.
- Add a second coat only where the first layer looks see-through. Keep the edges clean and keep the smile line soft.
- Seal everything with a glossy top coat. Press it on the edge with a quick light swipe.
5. Reverse Red French Crescents
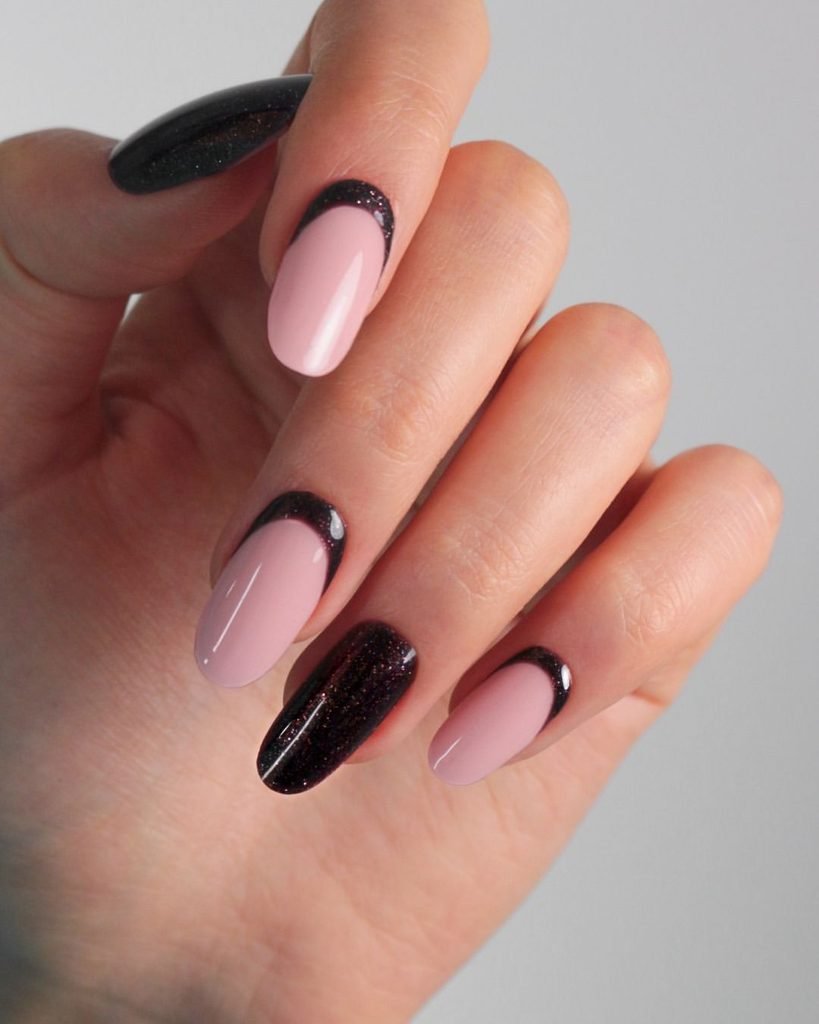
Flip the French look so the red half-moons sit by the cuticle. Use small red arcs over a warm nude oval nail. Leave a blank edge of nude between the crescent and the skin. Let the red fade a bit toward both sides so the shape matches the natural lunula. Keep the rest of the nail smooth, shiny, and calm. The red placement should stand out most.
This reverse French reads bold, even on short nails. It also grows out with less harsh contrast than a full red manicure. It fits well for a gallery event, a crisp outfit, or a simple set of jewelry. The lines need time. Use a detail brush or a half-moon guide. Do not try to paint a thick band in one quick pass. If your cuticle line is not even, make the crescents smaller. Rely on the nude base to keep the look balanced.
How to Apply
- File medium oval nails, then push back softened cuticles with care. Apply a thin warm nude base coat.
- Place a dot at the center of each lunula. Then draw two small red arcs around it with a fine detail brush.
- Tidy the inner edge with a clean-up brush while the polish is still easy to move. Keep the blank gap the same width.
- Let it cure or dry. Finish with a glossy top coat. Cover the red line fully, but keep it off the skin.
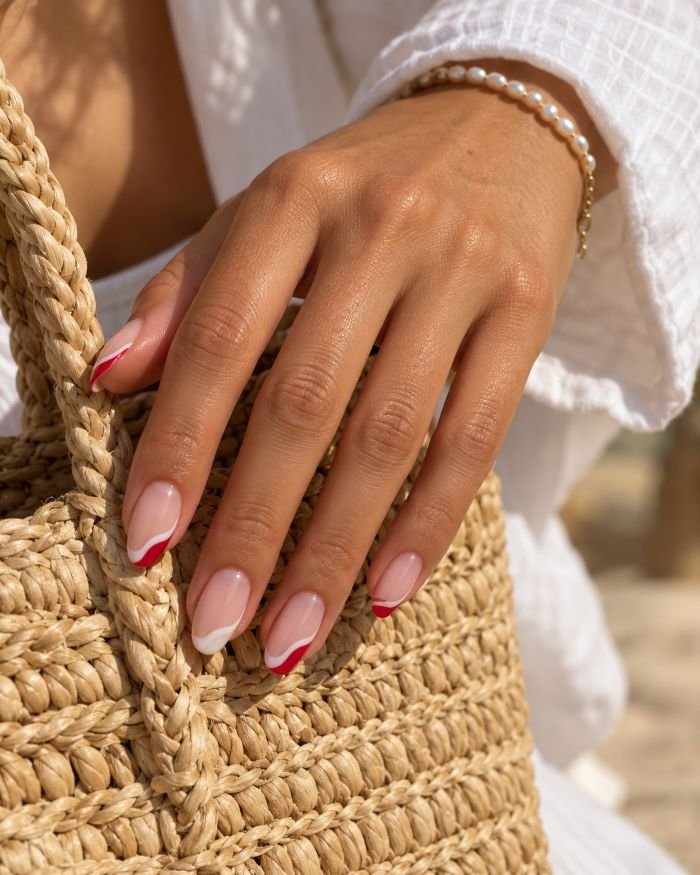
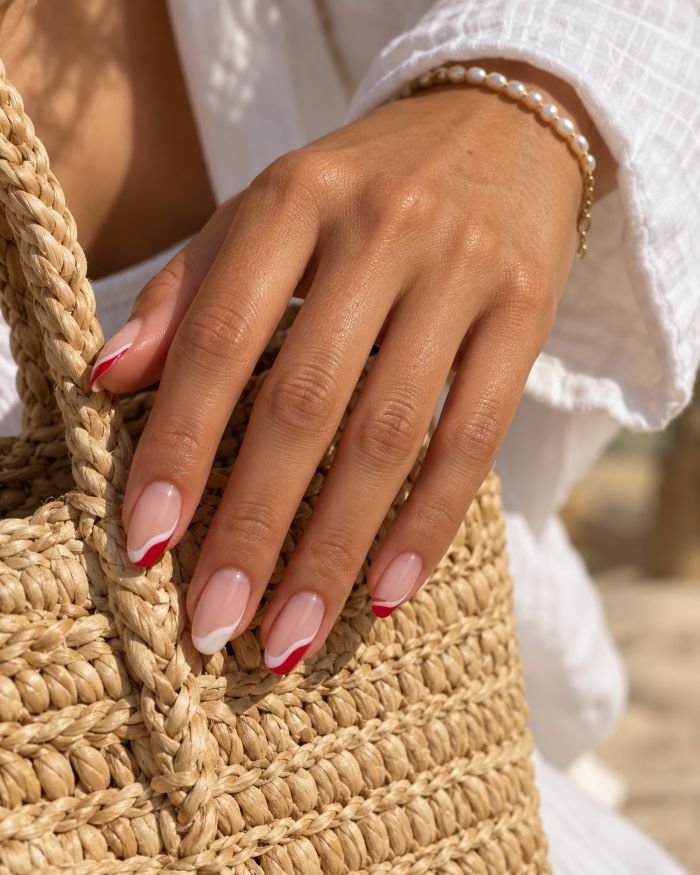
6. Red-and-White Wavy French
Set a light beige sheer layer as the backdrop. Add red and white waves that travel over the nail tips. Make the curves move softly. Do not let the pattern look sharp or jagged. On some nails, start with red first. On other nails, start with white first. The medium almond shape gives the waves space to look smooth. Use a shiny top layer so the red and white stay clear and clean.
This design reads fun for a picnic or a warm day out. The colors stay calm, so it does not feel like a costume. It looks good with plain white shirts, red sandals, and small pearl pieces. Use a liner brush. The whole look depends on steady, rounded lines. If you do not want that level of care, pick just two accent nails for the waves. Paint the rest in solid red. Leave a thin nude line between the colors so the tips do not blend together.
How to Apply
- First, get the medium almond nails ready. Add a sheer beige base. Cure or let it dry until the surface is fully smooth.
- Next, paint a thin curved red wave over each tip. Keep a small nude gap at the edge. Then place a white wave right next to it.
- Switch the order on alternating nails. Before the polish dries, tidy the sides so the lines stay neat.
- Finish with two thin glossy top coat layers. Let the first layer set fully. This helps stop smudging.
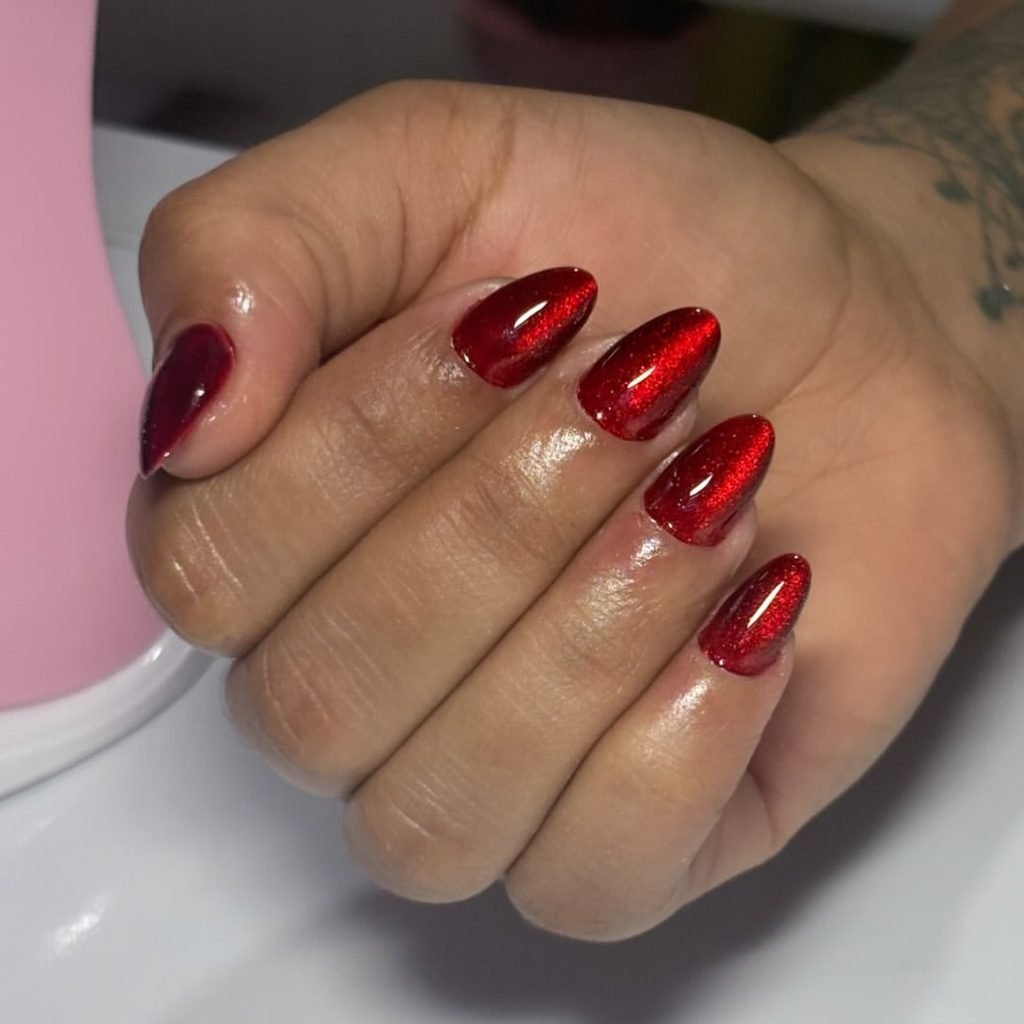
7. Ruby Velvet Cat-Eye
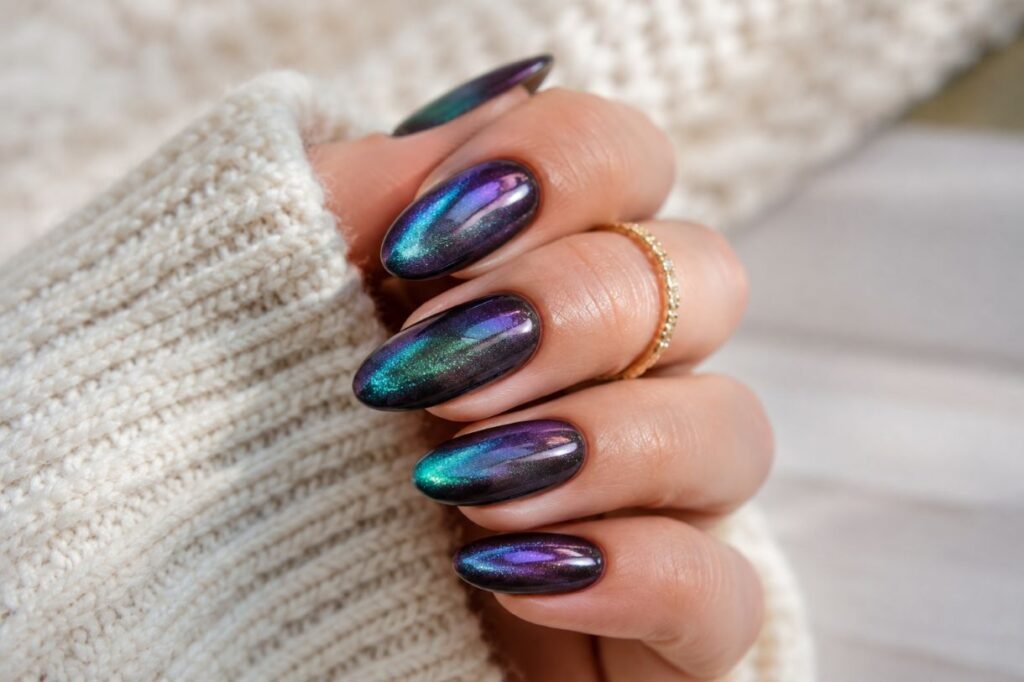
A magnetic ruby gel makes a soft velvet strip move over medium almond nails. Start with a deep red base that leans cool, like berry. Then guide the shine in a diagonal run. Do not set the same stripe spot on every nail. Leave the rest of the nail smooth and glossy. Keep the tip free of glitter texture.
This shade fits night looks. In dim light it reads almost flat, then it turns garnet and bright when your hand moves. It looks great with black satin, silver jewelry, and a plain cocktail ring. Since the cat-eye shift depends on steady product use and curing time, this is a better red style to book with a nail tech. A home kit can work too, if you already know how to keep the magnet in the right spot. For a similar reflective mood, look at the placement on rose-gold pink cat-eye nails.
How to Apply
- Shape medium almond extensions or your natural nails. Add a dark red gel base. Cure it fully before the magnetic step.
- Paint one coat of ruby magnetic gel. Hold the magnet a little above the nail at an angle until the velvet line forms.
- Cure right away. Do not jostle the nail while the particles settle. Do this on each nail. Shift the magnet angle a touch each time for a moving look.
- Finish with a high-gloss gel top coat. Seal the edge. Cure for the full time in your lamp.
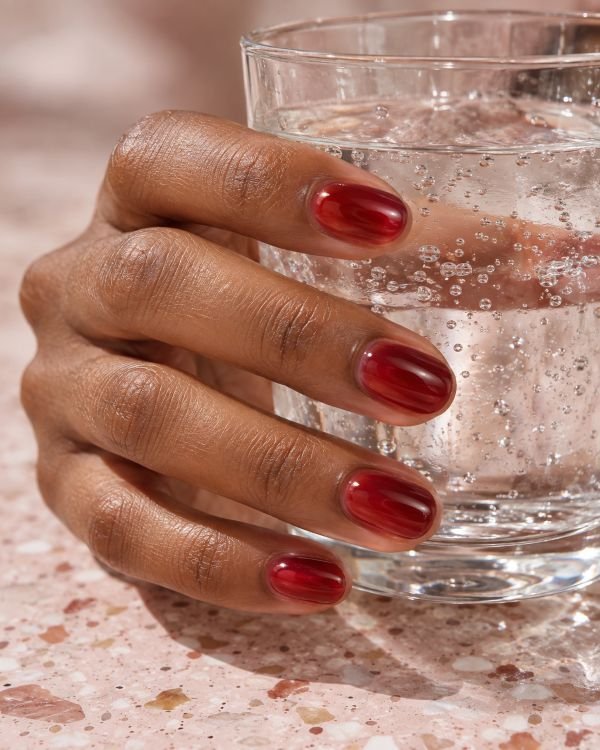
8. Sheer Cherry Jelly
Create a see-through cherry wash in three thin coats. Let the nail line show, so the red looks like it is lit from under the surface. For shape, go with short to medium oval nails. Keep the tip rounded, not flat, so the light goes through the end and the nail still looks neat. Top it with a shiny coat that has a little lift to it, like tinted glass, not a thick solid paint.
Jelly red nails are a simple way to try a bold shade without a heavy full cover. They pair well with denim, white linen, or a bare gold chain. The sheer look also hides small flaws if the color is not perfectly opaque. You can do a short set by diluting red polish with clear polish. Gel jelly color gives the most even depth. If you want more faint ideas, look at jelly nail ideas. Use a base coat first. It helps keep the natural nail tone looking even.
How to Apply
- Shape the nails into a short to medium oval. Put on a clear or soft pink base coat, then let it fully dry or cure.
- Stir a little red polish into clear polish, or use a sheer red gel. Paint on the first coat very thin.
- Add two more thin coats to build the shade. Cure or dry between each coat. Keep the free edge from getting too covered, so it stays translucent.
- Finish with a glassy top coat. Wipe and clean around the cuticles before the last cure or dry-down.
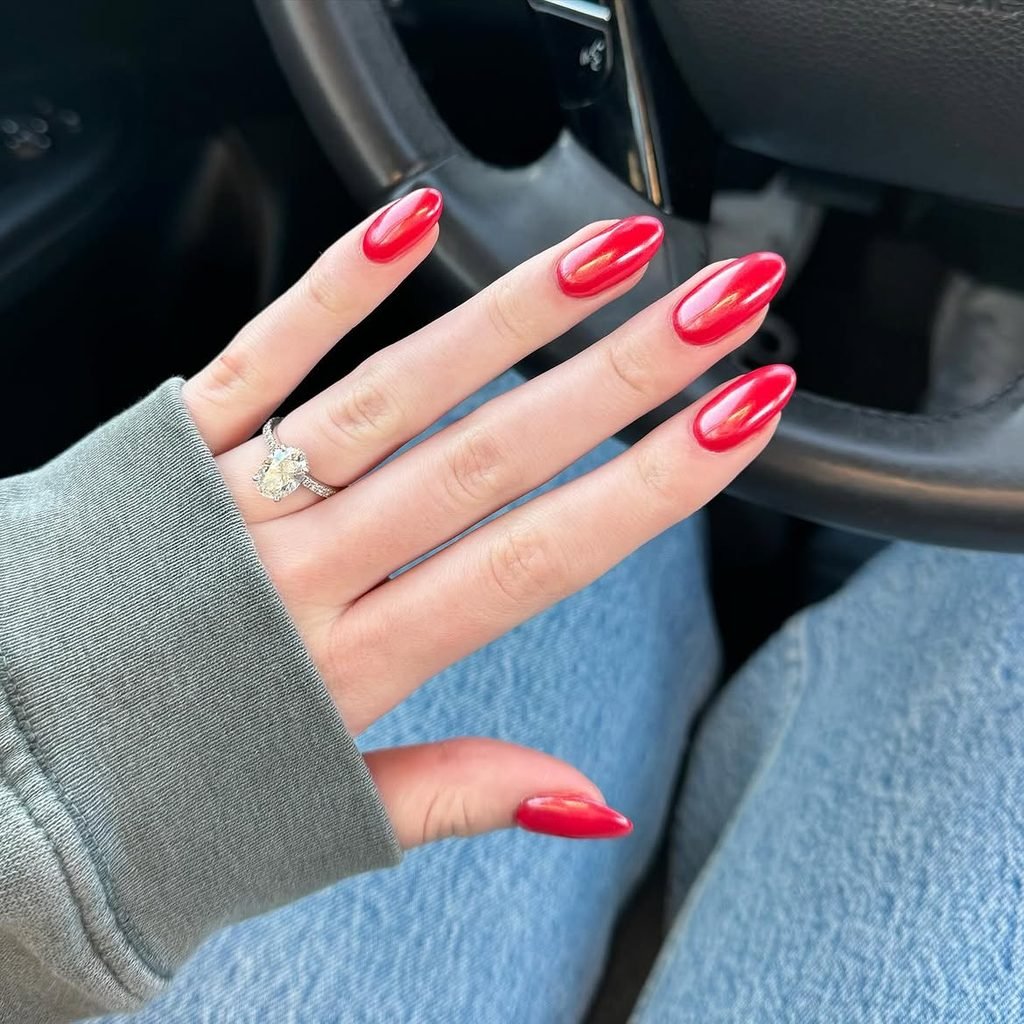
9. Red Chrome Glaze
Begin with a medium almond base in opaque garnet. Once it is fully cured, rub a very fine red-silver chrome powder over the surface. Do this gently until it looks like metal that has been polished. The red should still show clearly through the shine. At the bright spots, you should see a cool cranberry glint. Keep the outline neat and balanced. This helps the mirror look not to highlight tiny filing lines.
Finish with a chrome glaze for a standout look. It adds no gems and no raised texture. It feels smooth under sleeves and it is simple to wear with silver jewelry. In photos it pairs well with satin, glass, or a metallic clutch. For the best results, a salon is often steadier. Chrome works best on a surface that is fully cured and does not need wiping. The sealing step also needs careful control. If you want less shine, the same glazed donut nails look softer. A pearl-like top can stay quiet while still looking clean.
How to Apply
- File the nails into a medium almond shape.
- Apply a garnet gel base in two thin coats. Cure each coat fully.
- Add a no-wipe top layer, then cure for the exact time your gel system lists.
- Wipe on the fine red-silver chrome powder with a sponge applicator. Keep going until the shine looks even from cuticle to tip.
- Clean off any loose powder. Seal the edge with gel top coat, then cure again. Do not flood the side areas.
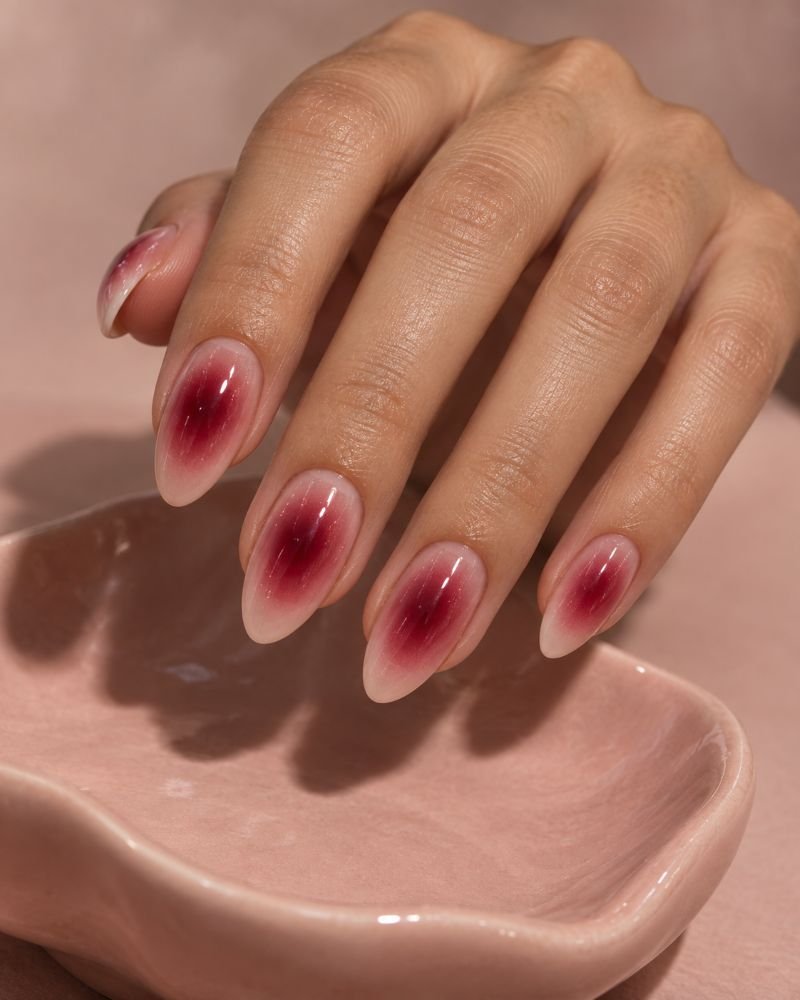
10. Crimson Aura With a Blush Halo
A gentle crimson core fades out into berry, then turns into a milky pink glow. From different angles, the look shifts a bit, like a veil on the nail. Use medium almond nails. Keep the brightest red right in the center. Let the outer fade spread so you do not see a sharp ring. A glossy top makes the blend look wet and smooth, not dull.
This manicure has a creative, magazine feel. It fits birthdays, dinner nights, or photos when a plain red set feels too plain. Simple outfits help a lot, since the color shift does the work. Getting the placement the same on every nail is tricky when you do it by hand. An airbrush or sponge in a salon makes the fade easier to repeat. If you try it at home, a makeup sponge can work, but the center may turn softer and less even. Keep jewelry light and small so the nail color stays the main focus.
How to Apply
- Start with a milky blush gel base on medium almond nails. Cure it until it is set, so you have a smooth pale layer.
- Next, tap a small crimson dot in the middle of each nail. Use an airbrush or a makeup sponge. Blend the edges so the red turns into berry.
- Add a second, lighter blush layer near the outer edge. Blend outward until the halo disappears slowly, not all at once.
- Cure again, then seal with a glossy top coat. This helps the fade stay bright and smooth.
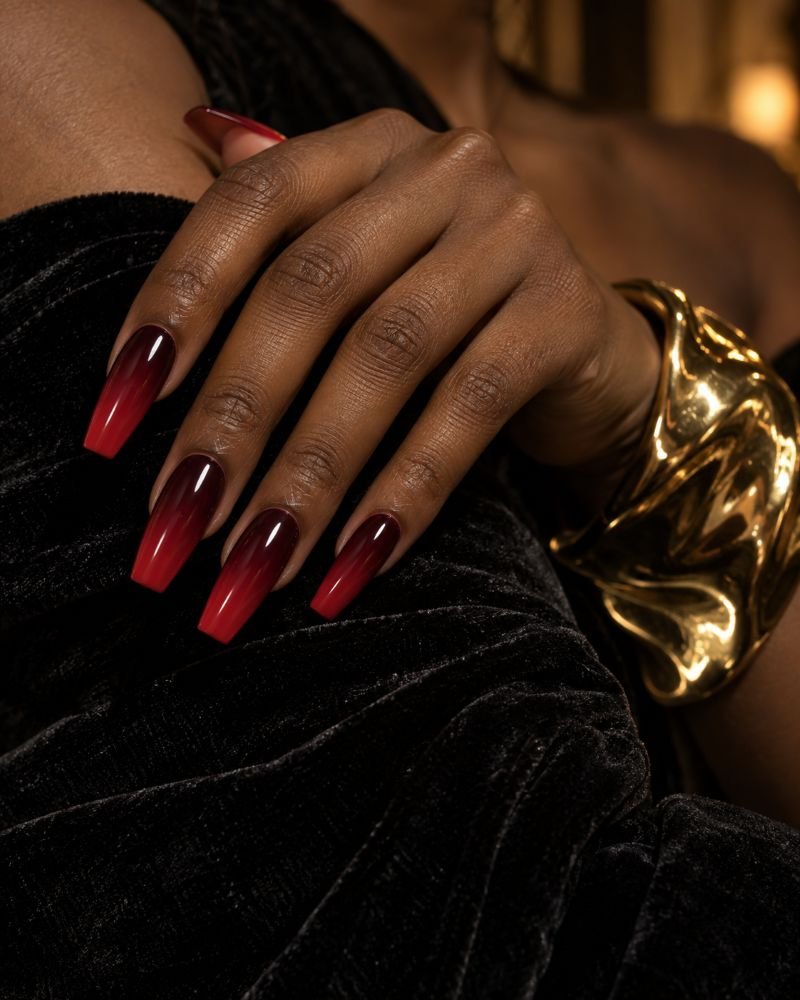
11. Tomato-to-Burgundy Ombré
File these as long coffin nails. Start with a warm tomato red at the tip. Then move into a deep burgundy color closer to the base. Keep the blend smooth from end to cuticle. It should look like the red brightens at the very tips. Finish with a strong shine so the long shape looks crisp and both shades still read clearly.
This red ombré nails bold. It fits a formal night out, a concert, or a standout outfit sleeve. The coffin length helps the fade spread nicely. At the same time, the longer nail takes more care with typing and daily movement. Since the color shifts instead of stopping in one spot, any new growth can show less than with a plain dark shade. For the cleanest blend, go to a nail tech and ask for an airbrush. For a DIY look, use a sponge on two accent nails.
How to Apply
- Ready long coffin extensions. Add a thin sheer nude base coat. Cure or let it dry fully.
- Paint burgundy on the lower part of each nail, then add warm tomato red on the tips. Do this while both areas are still workable.
- Blend the center where the two colors meet. Use a clean sponge or an ombré brush. Add thin layers and avoid one heavy coat.
- Let everything cure or dry all the way. Check the edges and smooth the sidewalls if you need. Seal with a glossy top coat.
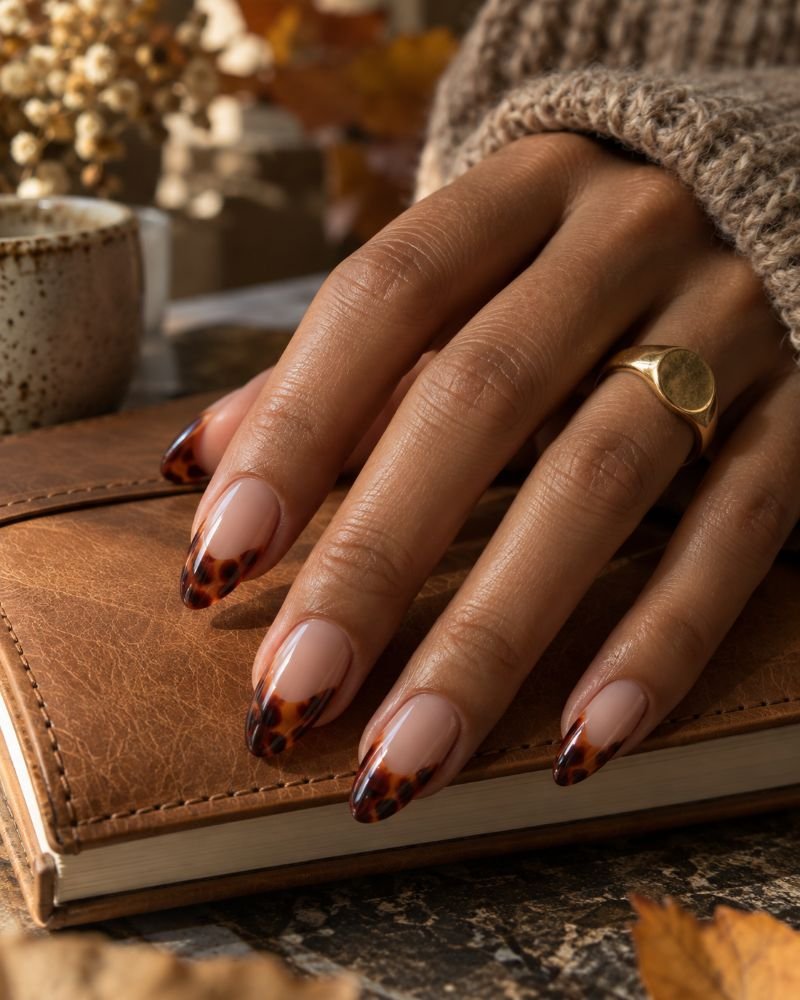
12. Red Tortoiseshell Tips
Start with a sheer warm nude base. Add uneven tortoiseshell shapes only at the very tips. Layer translucent brick red, then caramel, then a touch of espresso. Use medium almond nails so the look stays neat. Put a few deeper, dark spots near the side edges so it does not look flat. Finish with clear gloss, so the colors look like smooth set resin.
This manicure reads like fall. It avoids the usual one tone burgundy style. It pairs well with camel outerwear, brown leather, and warm gold jewelry. Because the base is see through, it can still feel right for daylight. The tortoiseshell is meant to be uneven, so slight differences from nail to nail are fine. The main hard part is keeping the layers light enough to stay translucent. If you want the same look fast, ask for a hand painted watercolor style. Or use printed press on tips to skip a longer salon visit.
How to Apply
- Put on a sheer nude base for medium almond nails. Cure or dry until it feels even.
- At each tip, place small uneven patches of translucent caramel and brick red. Keep some nude showing between patches.
- Add tiny espresso shadows next to a few areas. Blend the edges with a clean detail brush before the polish sets.
- Cover with a thick glossy top coat to flatten the surface and show the layered depth.
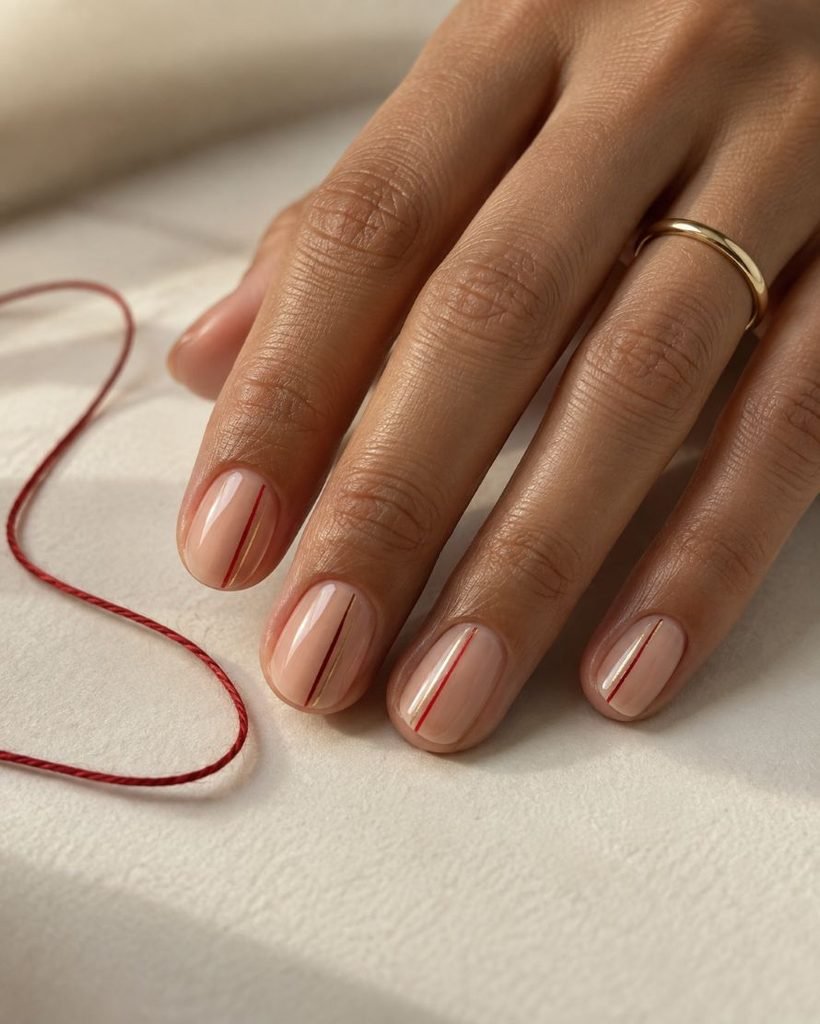
13. Fine Red and Gold Lines
Keep short oval nails mostly bare. Use a sheer peach nude layer as the base. On each nail, paint one thin red stripe. Add one smaller gold stripe next to it. Put the lines going up from the lower part of the nail toward the tip. Or shift them to the side a bit. Change the spot on each nail so it looks drawn by hand, not laid out in a strict row. Finish with a glossy top coat, and make sure the shine covers the metallic paint.
This look stays office friendly, yet it still shows up when you look closer. The up-and-down placement can make short nails look a touch longer. The gold hint matches warm jewelry tones. It does not turn into heavy sparkle. It works with striping tape, but a liner brush can give a softer, smoother stroke. Keep both colors narrow. If the stripes get thick, they take over fast on a small nail.
How to Apply
- Trim and shape short oval nails. Smooth the surface. Paint one coat of sheer peach nude polish.
- Use striping tape as a guide, or use a fine liner brush. Add a thin red line on each nail, slightly off center.
- Next, add a shorter gold line beside the red. Leave the rest of the nail clear. Cure or let the lines dry fully.
- Add a glossy top coat over the stripes. Watch the metallic edges and seal them well before the final cure.
14. Ruby Rhinestone Cuticles
Gloss on long almond nails with a dark ruby red. Leave two nails as accents. On each accent nail, lay a narrow crescent of clear stones with red tones. This crescent should sit along the cuticle line. Keep the other eight nails plain and solid. That way, the shine looks like small jewelry pieces, not a full glitter look. Put a shiny top coat under the stones. Place the biggest crystal near the middle of each crescent.
You can wear this at a wedding reception, a gala, or on New Year’s Eve. It also pairs well with a simple black outfit, navy, or champagne colors. The long almond shape gives space for the accent stones. Still, the raised stones call for care. Be mindful of hair and knit fabrics. A nail tech can match the curve and set each stone so it sits flat. Custom press ons can work too if you want the look for just one night. If you want more ideas, look up rhinestone nail designs with similar shapes.
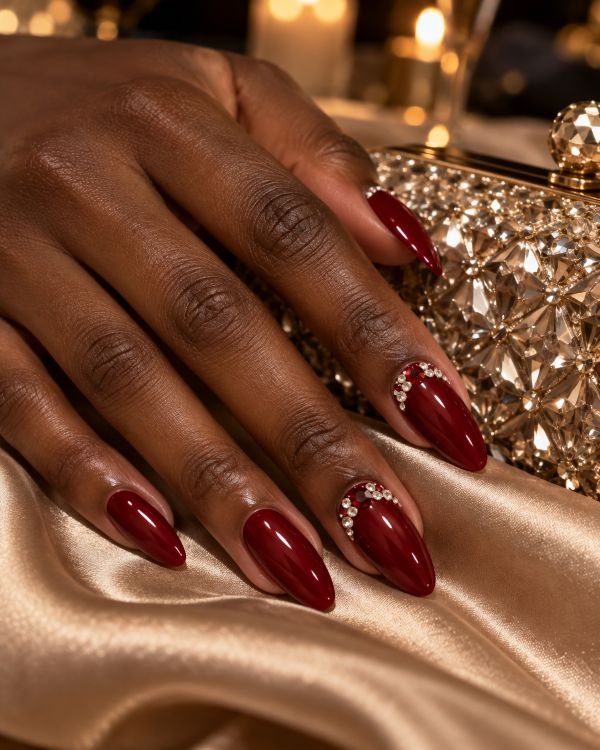
How to Apply
- Shape long almond extensions. Paint on deep ruby gel using two thin coats. Cure each coat before you add the next one.
- Cure a glossy top coat on every nail. Then add a small amount of gel adhesive to the two accent cuticles.
- Use a wax pencil or tweezers to set the curved stones. Use clear stones with red tones in a tight row. Keep the largest stone in the center of each crescent.
- Cure the adhesive fully. Then brush a little top coat around the stones for extra grip. Do not flood the stones.
15. Poppy Petals on Sheer Nude
Short almond nails can feel like a tiny spring scene. Start with a sheer beige base. On two or three nails, add loose red poppy petals near the side edge. Keep the petals a little messy, not perfect. Add a very small charcoal dot in the middle of each flower. Then add just one thin green line only if the nail needs it. Leave the other nails nude, or put a single red micro dot on them. Finish with a glossy top coat so the design looks smooth and fresh.
This works for a spring lunch, a garden get together, or as a guest look for a wedding. It does not read as a full theme on every nail. The red petals look bright on nude. Because the artwork is placed in only a few spots, short nails still feel light and open. A tech could paint this by hand without too much trouble, and it is also possible at home with a thin detail brush. If your non-dominant hand gives you trouble on curved areas, using decals is an easier option. Use the green lines to match a bag or a scarf. Do not add extra colors to the nails.
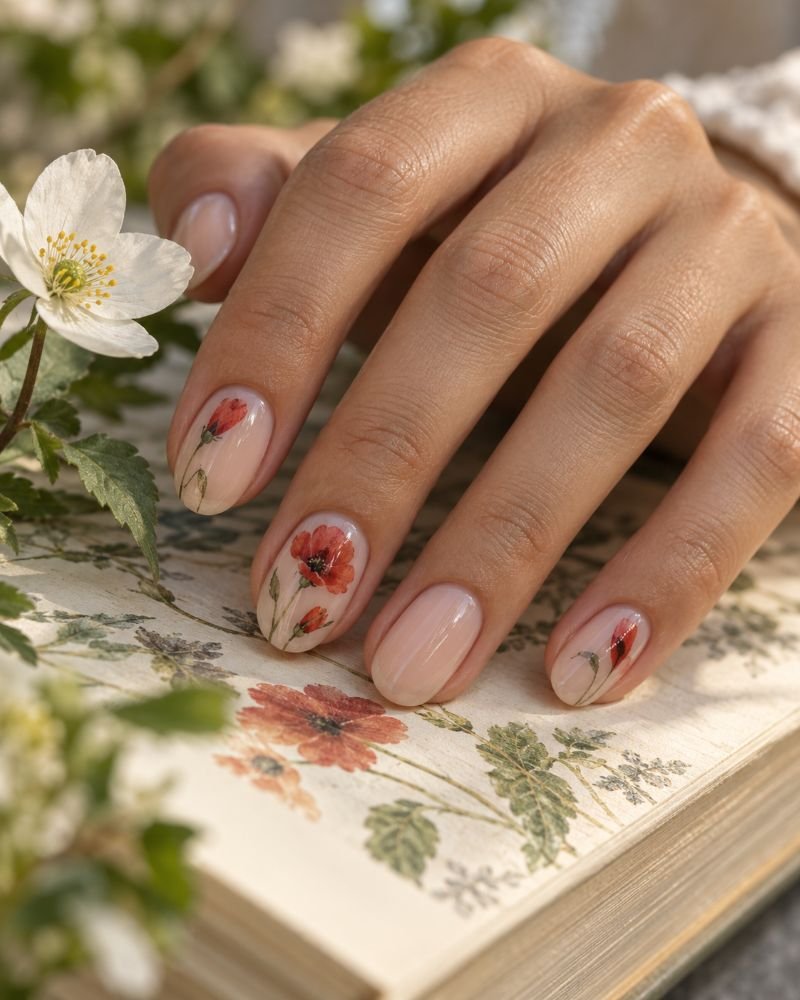
How to Apply
- Paint two thin coats of sheer beige on short almond nails. Let each coat dry fully, or cure it as your polish needs.
- Choose two or three accent nails. With a small detail brush, paint four to five loose red petals near the side edge.
- Place a tiny charcoal dot cluster in each flower center. Add one thin muted green stem only where the spacing looks right.
- Seal everything with a glossy top coat. Apply gently so the petals stay flat and do not smear.
16. Cherry Pair Accent Nails
Paint most medium oval nails in a warm cherry red. Leave the two accent nails in a sheer nude. On those accents, add small cherries with matching green stems. Place each cherry close to the lower corner or along the sidewall, and leave open space around it. This keeps the design soft and not too childish. Add a glossy top coat to every nail. The shine should match on the red base and the painted fruit.
This look feels fun for summer, a trip, or a casual birthday. It also fits well with a red lip or a white sundress. The medium oval shape is comfy. It gives enough space so the cherries look clear, not squished. Custom press-ons can help because you can paint the accent artwork first, then put the set on. If you are making it yourself, use a dotting tool for the fruit. Use a small liner brush for the stems. Skip trying to draw every tiny edge around each cherry.
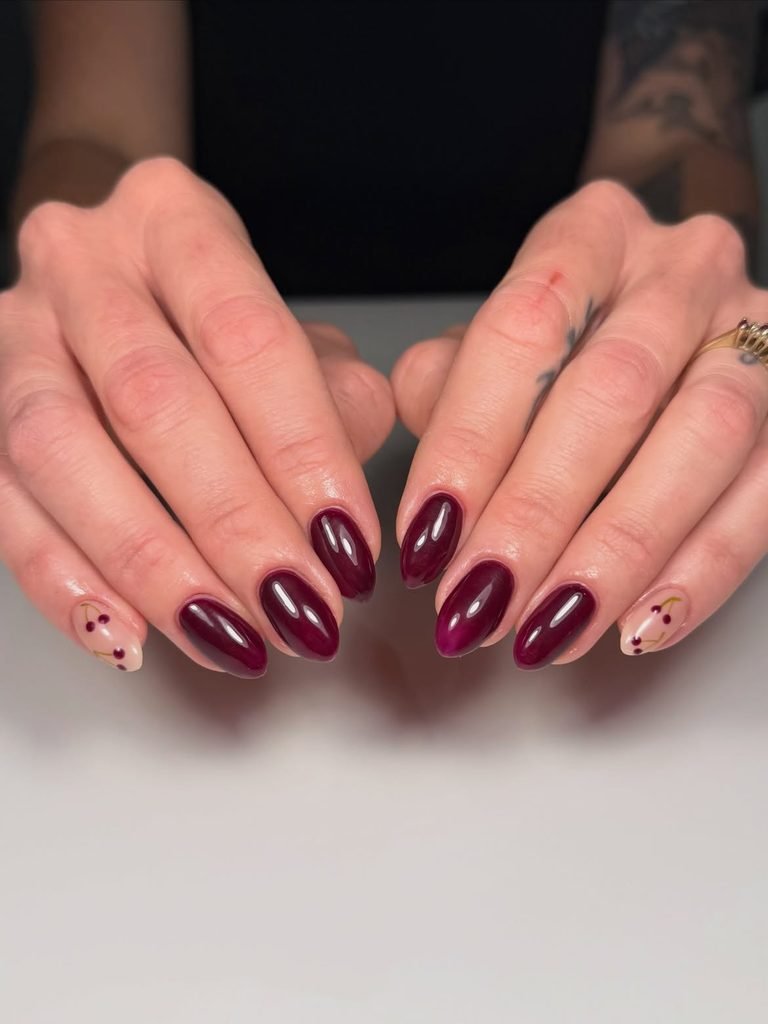
How to Apply
- Make the nails medium oval. Paint eight nails warm cherry red. Keep two nails sheer nude.
- On each accent nail, use the dotting tool to place two small red circles near the lower sidewall. Let the dots set in between.
- Use the liner brush to add thin green stems. If you need extra separation from the nude base, add a small light dot.
- Finish by sealing all ten nails with a glossy top coat. Cover the tips and edges. Check that the stems stay neat and sharp.
17. Red Hearts in Negative Space
Begin with a sheer blush jelly layer on medum almond nails. Let it look smooth and light. Add small red hearts near the tips and along the outer side of each nail. Mix two styles to keep it neat. Use one filled red heart, then follow it with a heart that is only an outline. Leave the rest of the nail clear so the hearts stand out.
This look fits Valentine’s Day, but it also suits a date night or a bridesmaid weekend. It works anytime you want a gentle red manicure. Because the nails are short, the hearts stay practical. Decals can look cleaner than trying to paint matching shapes with your less used hand. If you want a more mature vibe, try a brick red filled heart on two nails. Use a softer rose red outline on the rest. Keep the hearts away from the cuticle, since new growth can warp the design.
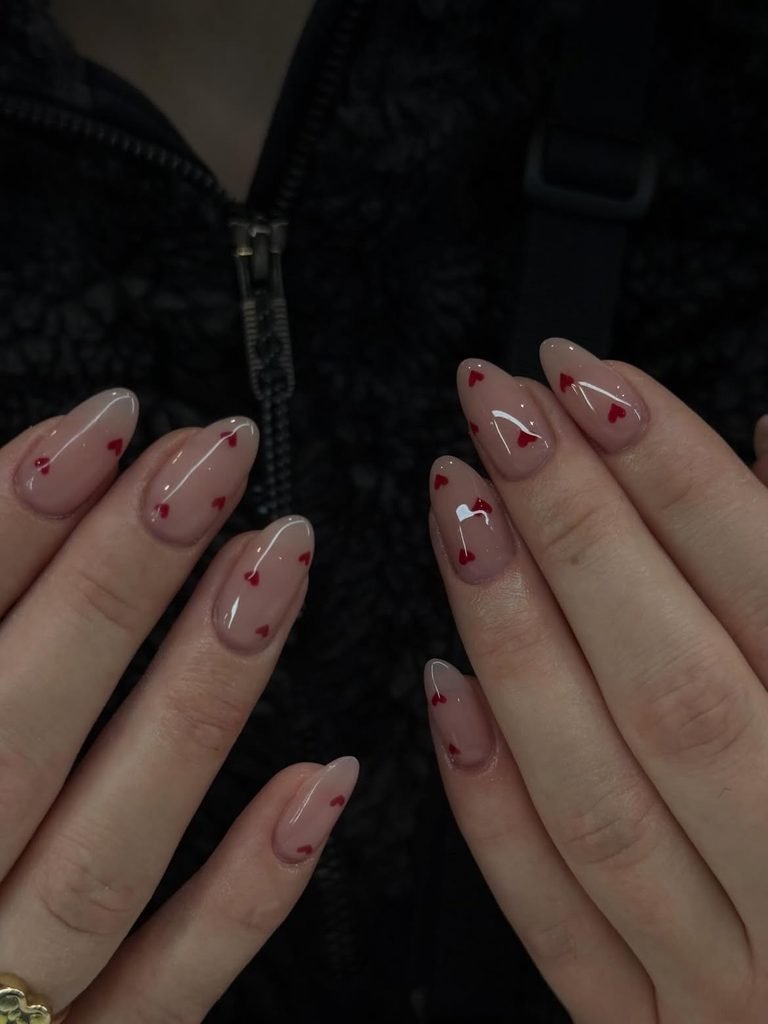
How to Apply
- Shape nails into a medium almond form. Add one or two coats of translucent blush jelly. Cure or dry between coats.
- Set tiny red heart decals where you want them, or paint filled hearts in the same spots. Place them at alternating tips and sidewalls. Then add thin outline hearts on the remaining spots.
- Press decals flat with a silicone tool. If you painted, touch up edges with a fine detail brush before you seal.
- Apply a glossy top coat. Focus on the edges around each heart so nothing lifts.
18. Brick-Red Gingham
Make a small gingham look on short squoval nails. Use a creamy white coat first. Then add thin brick red lines, both left to right and top to bottom. At the crossing points, touch a slightly deeper red so the intersections look set into the grid. Keep the grid a bit messy, like real cloth. Do not make each square too perfect. Finish with a shiny top coat. It levels the surface and helps the warm red blend into the white base.
This nail idea works well for a picnic, a trip to the market, or a laid back weekend. The brick red stays earthy, so it feels easier to wear than a bright holiday red. Short squoval nails give each square enough space, without needing extensions. If you want a clean grid, use a stamping plate. For a quicker look, use striping tape to guide the lines. To keep the set balanced, leave the other nails plain. Paint some nails solid brick red, and others solid creamy white. Cover every nail with the dense pattern only if you truly want full gingham.
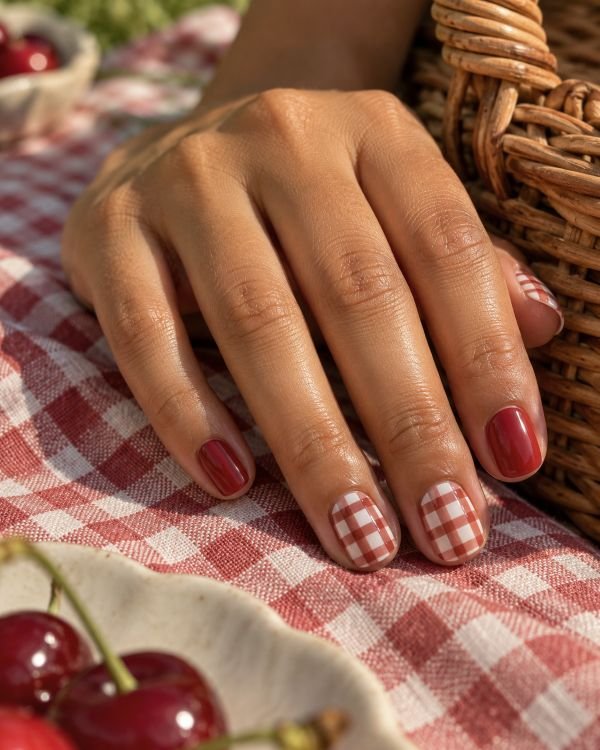
How to Apply
- Paint two coats of creamy white on short squoval nails. Let them dry fully.
- Draw thin horizontal brick red lines on each accent nail.
- Add vertical brick red lines to make small gingham squares.
- Add a deeper red dot at a few intersections.
- Fix any uneven lines with a fine brush and nail polish remover.
- When the design is dry, add a glossy top coat. Use gentle strokes so you do not smear the lines.
19. Red Celestial Star Accents
Use a rich dark red base on medium coffin nails. Add narrow silver star shapes on just three nails. Also place tiny dot points so it looks like a small sky cluster. Put the art near the top area of each nail, not down low. Let the dark red stay as the main color.
This design fits events at night, like a show, a dinner on a rooftop, or a New Year get together. The coffin shape looks fresh. It also gives the stars clean space to sit. Because the stars are only on three nails, the look can still work after the date. If you wear black or navy, the red will stand out. If you want a brighter pop, wear a silver slip dress. For more ideas, check out these New Year nail looks.
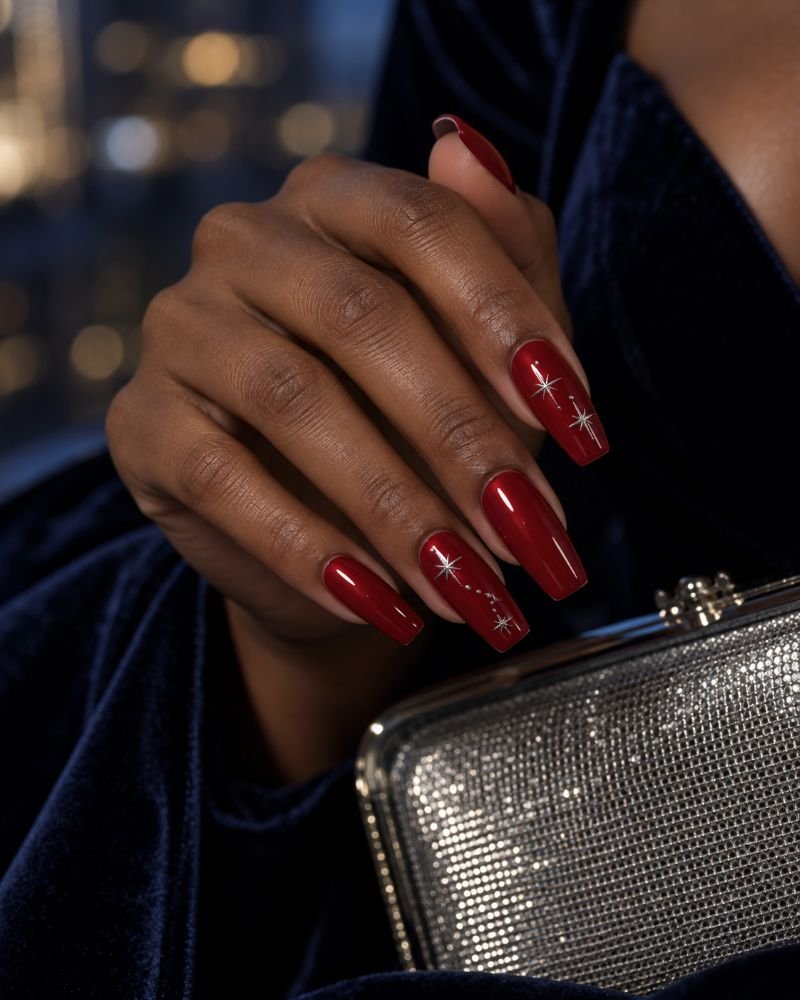
How to Apply
- File the nails into a medium coffin shape.
- Apply two thin coats of deep scarlet gel or lacquer. Cure or dry each layer fully.
- Add silver star decals or paint small five-point stars on the upper third of three accent nails.
- Add silver dots with a fine tool. Keep the dot groups uneven and keep them away from the cuticle.
- Finish with a glossy top coat. Press over decal edges and cap the free edge.
20. Peppermint Red Swirls
A milky pink base holds curved red and light rose lines on medium almond nails. The design spirals like softened candy, not like tight rope. Keep the swirls relaxed. Use one or two accent nails for a fuller loop. The other nails should show only one curved stripe. The top layer should look shiny. Leave the pale pink showing between the red so it does not turn into one flat patch.
This style fits winter get togethers and holiday pictures. It also works for a warm manicure that still looks new after December. The almond shape matches the motion of the curves. The pale pink and white rose tones pair well with silver, pearl, or red details. A thin liner brush helps you stay steady. If you want quick results, peppermint decals or press on nails can make both hands match. Don’t cram the art right up to the edges. Leave a bit of space at the sidewalls so the pattern stays neat.
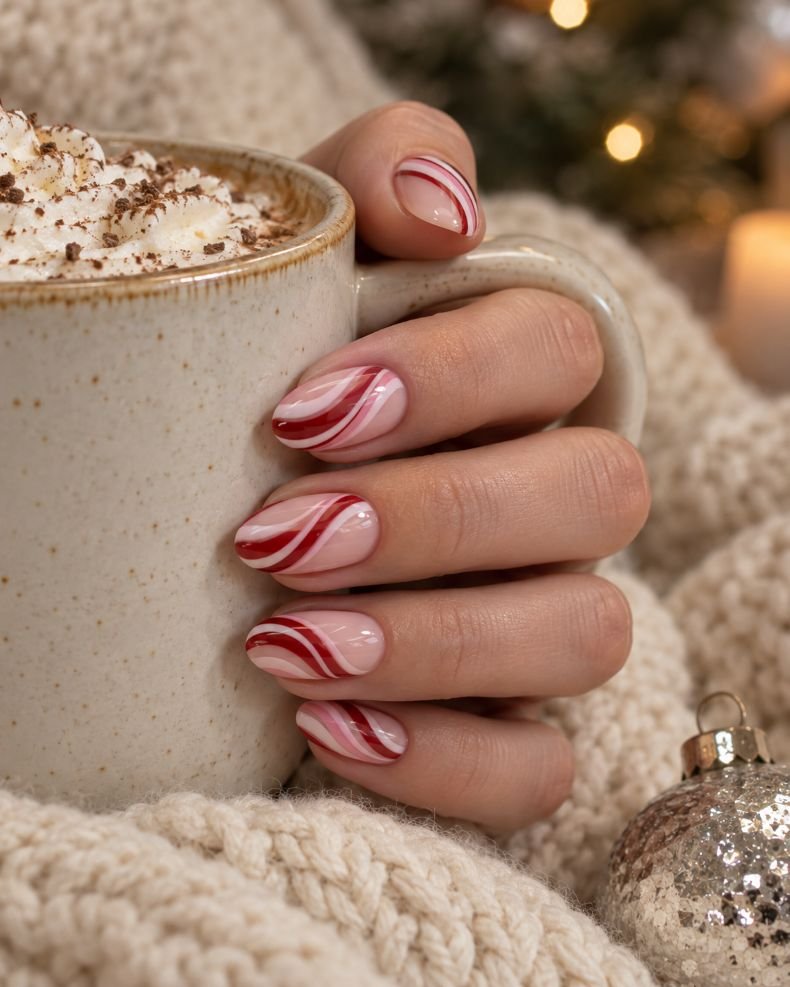
How to Apply
- Get your medium almond nails ready. Add two thin coats of milky pink polish. Let each coat dry or cure fully.
- Draw a curved crimson line from one sidewall to the tip. Then add a thinner pale rose line that follows the same bend.
- Change how thick the swirl looks. Put one full spiral on two accent nails. Use single arcs on the rest.
- When the lines are set, add a glossy top coat. Paint over the design with a light touch so the curves still look crisp.
21. Red and Navy Double French
Put two thin tip stripes on top of a sheer beige base. Use a bright red French line as the outer stripe. Place a darker navy line right under it. Keep the nails short to medium with a coffin shape so the edges stay sharp. Add a shiny top layer so the red and navy look joined but still distinct. Leave a slim nude gap between the stripes so the colors do not smear into one dark band.
This set looks neat for work. It also holds up for dinner, trips, or a clean weekend outfit. The navy shade goes well with navy clothes, denim, cream, and silver details. The key is spacing. A salon liner brush or a simple guide helps a lot. On shorter nails, make the navy and red lines very thin. If you like thedark blue nail ideas , you can swap in other navy nail looks with colors that match the same vibe.
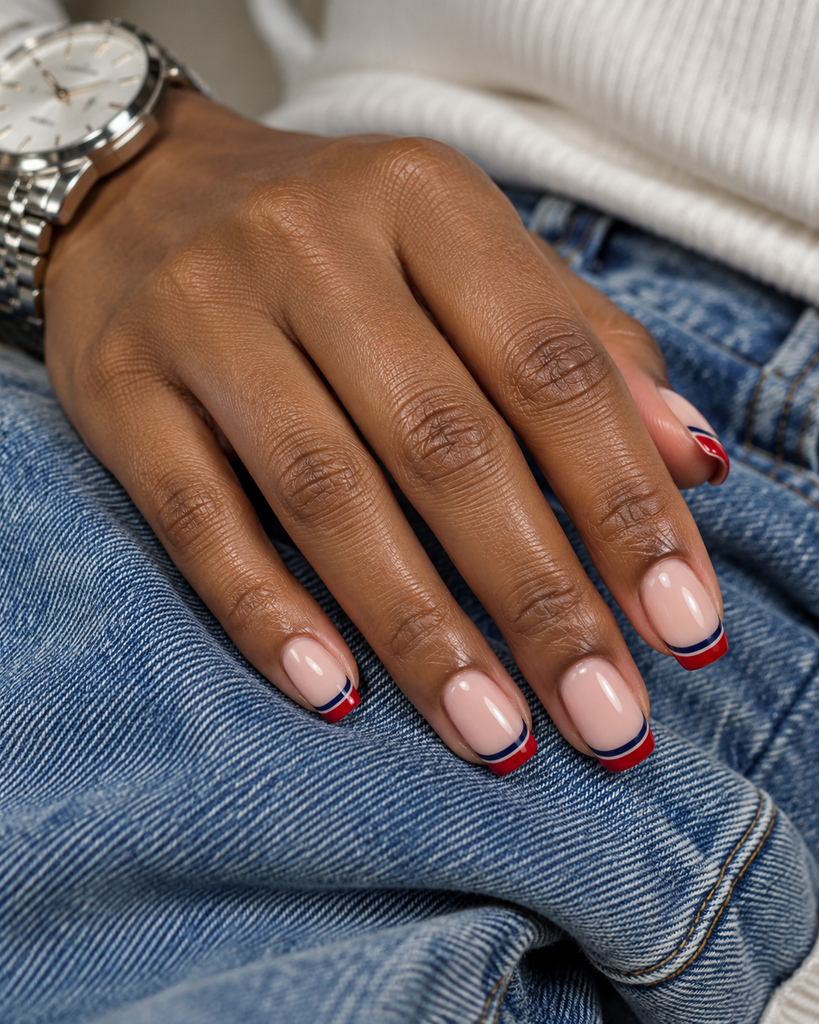
How to Apply
- Shape short to medium coffin nails. Apply a sheer beige base. Cure or dry it until it feels smooth.
- Paint a thin navy curve across each tip. Keep a narrow nude gap above the free edge.
- Add a slightly brighter red curve outside the navy stripe. Match the curve and keep the lines even across each nail.
- Seal with a glossy top coat. Use a light, gentle stroke so the two bands stay separate.
Which Red Nail Polish Shade Suits My Skin Tone?
Start by deciding whether your skin reads warm, cool, or neutral in daylight. Warm complexions often harmonize with tomato, poppy, coral-red, and brick; cooler complexions can enjoy blue-red, ruby, raspberry, and wine; neutral skin can move between both families. Treat that as a starting point rather than a rule—hand contrast, a seasonal tan, and your jewelry can change the balance. A professional undertone guide also suggests comparing the veins at your wrist and testing a swatch beside silver and yellow-gold jewelry, which you can use as a quick at-home check Mavala’s red polish guide .
Depth matters just as much as undertone. Bright cherry feels lively, true red looks clean, oxblood feels tailored, and sheer jelly lets your natural nail soften the color. If you are ordering online, hold the swatch beside bare skin in daylight rather than judging it under a yellow bathroom bulb. When in doubt, choose a medium ruby: it has enough blue to look crisp but enough warmth to avoid turning harsh.
Are Red French Tips Suitable for Short Nails?
Red French tips can look very clean on short natural nails. It helps to size the line to match the nail bed. If you ask for a micro or slim rounded tip, the look stays tidy. Try to keep the base sheer in pink, beige, or clear. That way your eye can track the curve instead of fighting a solid color. For the shape, go with a soft squoval, oval, or short almond. Those forms guide the bend in a natural way. If the corners are too square, a thicker tip can end up looking heavy or boxy.Placement matters too.
Start just inside each sidewall. Then follow the natural curve toward the fingertip. Keep the middle only a little higher than the sides. If your nails are super short, use red on two accent tips and keep the other nails sheer. Another option is a reverse crescent near the cuticle. A liner brush can help a technician keep the width even. French tips can also work at home with the right guide. Finish with a smooth top coat. Thin tips show ridges and uneven edges more easily than wider ones.
What Red Nail Design Works Best for Short Nails?
Short nails look best with clean designs that do not swallow the whole nail. Give the pattern a bit of space so the edges still look sharp. If you want a bold color with very little going on, a shiny solid red is the simple pick. A sheer cherry jelly can also work well since it gives some depth but still shows the natural nail line.For art ideas, keep them small and near the edge. Try micro French tips, reverse crescent shapes, thin vertical lines, tiny hearts, or floral details on just one or two nails. These styles usually feel neat on short lengths because they do not cover the full surface.
When comfort and wear matter, go for a short squoval or a soft oval shape. Keep the free edge even across both hands. Styles like dense checkerboards, big charms, or long flowing ombrés often need extra space. On shorter nails, they can start to look tight and busy.If you like a design with lots of detail, custom short press-ons can help. The art can be painted flat first, then added in place. This also makes it easier to match what you have on each hand. For a salon visit, bring a photo that shows the exact length and the art. The same red design can read soft on a short oval, but it can look louder on a longer almond.
How Do I Choose Between Glossy, Jelly, Chrome, and Cat-Eye Red Nails?
Choose the finish by deciding how much light and texture you want. Glossy red nails show the truest color and are easiest to maintain, so they suit work, everyday wear, and a clean outfit. Jelly red is translucent and layered; it gives a stained-glass effect and looks lighter on short nails. Chrome red reflects light like metal and photographs well for parties, but it needs a smooth, sealed surface so powder does not catch at the edges. Cat-eye red contains magnetic particles that gather into a moving beam, giving depth without raised decoration.
Your clothing can settle the choice. Gloss works with prints, jelly suits linen and denim, chrome echoes silver or satin, and cat-eye looks strongest beside dark evening fabrics. Also consider upkeep: solid gloss is easiest to touch up, while chrome and magnetic gel are better handled by a technician if you do not already use gel products. Pick one finish for the full hand, then add art only where it supports the light rather than hiding it.
Final Thoughts
The best red nail polish ideas start with the way you will wear them. Short squoval or oval nails make a glossy solid, micro French, jelly wash, or tiny motif easy to live with. Medium almond gives room for cherry red, cat-eye, aura, florals, and swirls, while long coffin or almond lets chrome, ombré, and crystal placement become the main event. Color matters just as much: tomato and poppy feel warm and lively, ruby and blue-red look crisp, and oxblood or burgundy bring a quieter depth.
Before your appointment, save one design image and note the shape, length, finish, and any accent nails you want kept. That information helps a technician reproduce the balance instead of guessing from color alone. For DIY work, simplify the artwork before adding more polish: two strong accent nails usually look more intentional than ten crowded ones. Whichever direction you choose, a well-prepped base, sealed edge, and realistic maintenance plan will keep your red manicure looking considered from the first day to the last.
Wondering which red suits your next manicure? Try a red nail reference on your own hand before choosing the shade and nail shape.
Try It On Virtually