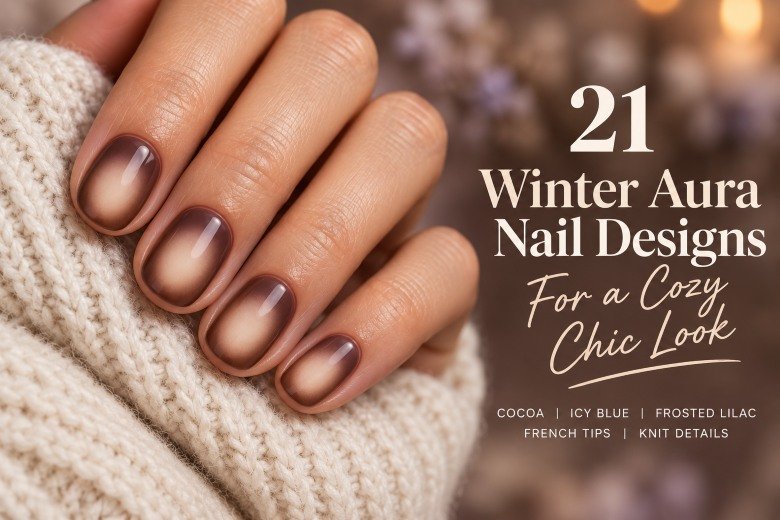
21 Winter Aura Nail Designs for a Cozy Chic Look
A little cream in the middle of cocoa polish changes the whole manicure. The brown stays rich around the edges, while the softly faded center gives it depth. Put icy white inside slate blue and the same technique feels crisp and wintry. That blurred color contrast is the appeal of winter aura nails: you can choose a familiar seasonal shade and give it a completely different character.
These 21 designs range from short, understated neutrals to frosted lilac, cranberry French tips, and detailed winter nail art. Some suit a regular-polish manicure at home; others involve nail pigments, layered gel work, or small embellishments worth taking to a technician. Look at the size and placement of the aura as closely as the colors. A compact glow leaves room for a short nail’s outline, while a longer shape can carry overlapping halos or carefully placed artwork.
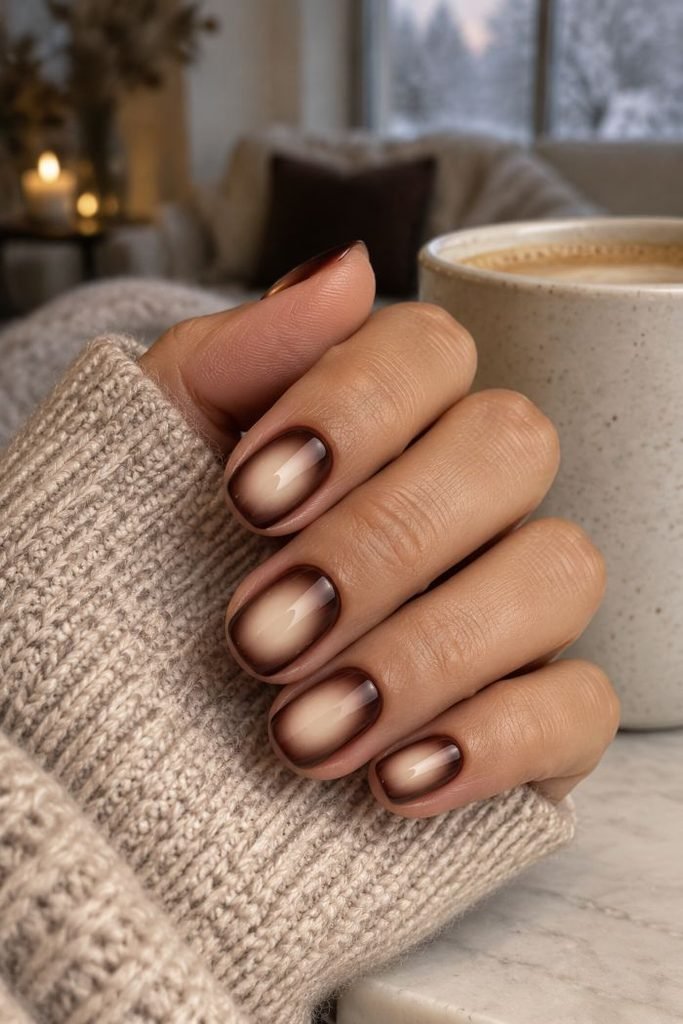
1. Short Cocoa and Cream Aura Nails
Soft cream centers fade into cocoa brown on short round nails, leaving a visible brown margin all the way around. The cream spreads broadly enough to soften the color but stops before the cuticle and free edge. A satin top coat reduces the sharp surface reflection, letting the painted gradient do the work. There are no metallic details or accent nails; the small differences in each faded center keep the set interesting.
These brown aura nails have an easy place beside camel coats, oatmeal knits, and worn leather bags. If you usually save quiet luxury nail ideas, the restrained finish will feel familiar. Choose a warm cream for the center; bright white would produce a stronger contrast. A small makeup sponge can create this version with regular lacquer, provided the cocoa base has dried before you start tapping on the lighter color.
How to Apply
- Shape short round nails, apply base coat, and paint an even cocoa-brown lacquer base; let it dry.
- Load a small sponge with cream polish and tap off the excess on a palette.
- Dab a soft circle onto each center, using lighter pressure around the edges; let the design set.
- Apply a smooth satin top coat without repeatedly brushing over the gradient.
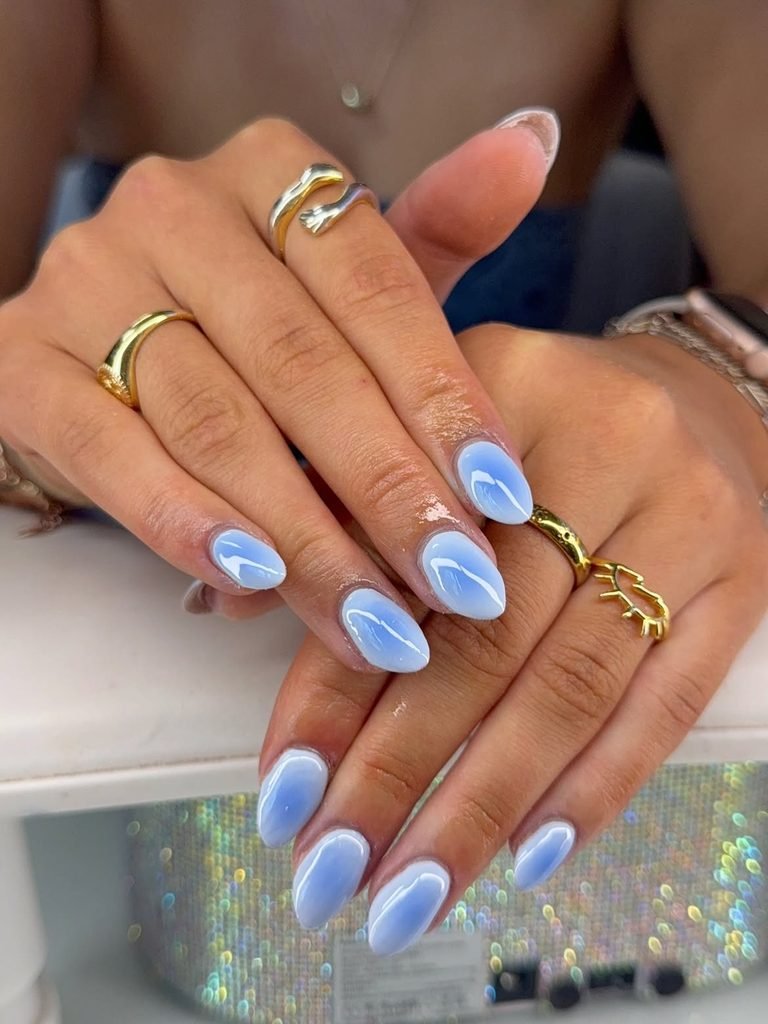
2. Icy Blue Snowlight Aura Nails
An elongated white center runs through each medium almond nail, fading through powder blue into a deeper slate-blue border. The pointed oval of pale color follows the nail’s taper without reaching its edges. Two tips carry a few tiny white frost specks, scattered far enough apart to leave the blue visible. Gloss brings out the difference between the milky center and the cooler surrounding color.
The length gives these icy blue aura nails a graceful shape even before the specks are added. Keep the brightest area slightly narrower on the pinkie so the set looks balanced across the hand. This palette sits comfortably with gray wool, dark denim, and silver jewelry; it can stay in rotation well after the holiday decorations come down. For a shorter adaptation, round off the white center and leave the frost detail on a single nail.
How to Apply
- Apply slate-blue gel to prepared medium almond nails, cure, then create the cured matte surface required by your nail-pigment system.
- Blend white and pale-blue nail pigments into elongated centers, softening their edges with a clean pigment brush.
- Remove loose pigment, seal with the compatible clear layer, and cure as directed.
- Add tiny white gel specks to two tips, cure the artwork, then finish with glossy top coat and cure.
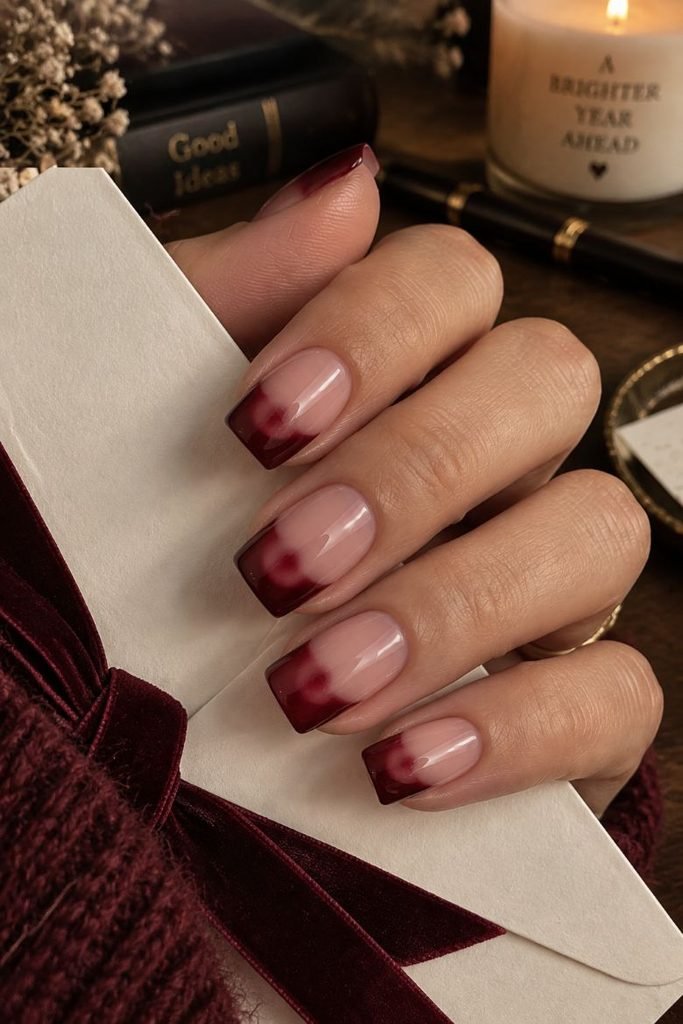
3. Cranberry Aura French Tips
The color is concentrated inside the French tips: a small cranberry glow sits within each deep wine-red tip, while the nail bed remains sheer rosy pink. On short-to-medium square nails, the straight free edge gives the darker outline a clean shape. The aura fades before it reaches the smile line, preserving a narrow wine border. A glossy finish connects the transparent base and saturated tips.
These winter aura French tips reward a little extra room at the free edge. If your nails finish flush with the fingertips, choose a shallower solid French instead of squeezing in a gradient that cannot be seen. For this version, our short square nail ideas offer useful references for length and proportion. A berry-toned center keeps the contrast subtle enough for everyday wear, while a brighter cranberry makes the tips more noticeable beside black or cream clothing.
How to Apply
- Apply a sheer rosy lacquer base to prepared square nails and let it dry.
- Paint wine-red French tips with even smile lines; allow the tips to dry.
- Use a tiny sponge to dab cranberry polish into the center of each tip, preserving the darker border.
- Let the aura set, then seal the full nail with a glossy top coat.
4. Smoke Gray Cuticle Aura Nails
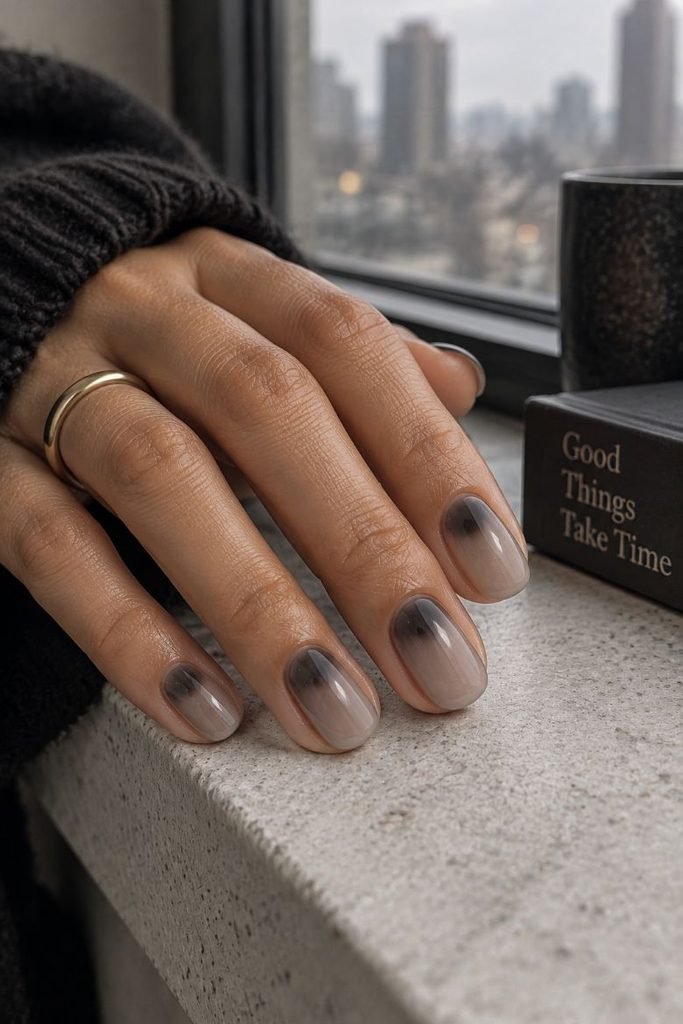
A charcoal haze sits low on each short oval nail, fading upward into translucent smoke gray. The color stays strongest just above the cuticle, with a narrow clean margin between polish and skin. Most of the upper nail remains light enough to reveal the natural free edge. Gloss gives the sheer areas a watery quality, while the dark, softly rounded patches anchor the design near the base.
This placement makes gray aura nails feel different from the usual pale central glow. It is particularly useful when you like darker polish but want some transparency left in the manicure. Among other oval nail ideas, the rounded outline suits this low, curved placement. Keep the charcoal patch small and diffuse its upper boundary carefully. A hard semicircle would turn the look into a half-moon manicure, changing the soft effect that makes it appealing.
How to Apply
- Apply a translucent smoke-gray lacquer base to prepared short oval nails and let it dry.
- Pick up a small amount of charcoal polish on the rounded corner of a makeup sponge.
- Tap the color above each cuticle, fading it upward while keeping polish off the surrounding skin.
- Allow the haze to set, then apply a glossy top coat.
5. Frosted Lilac Pearl Aura Nails
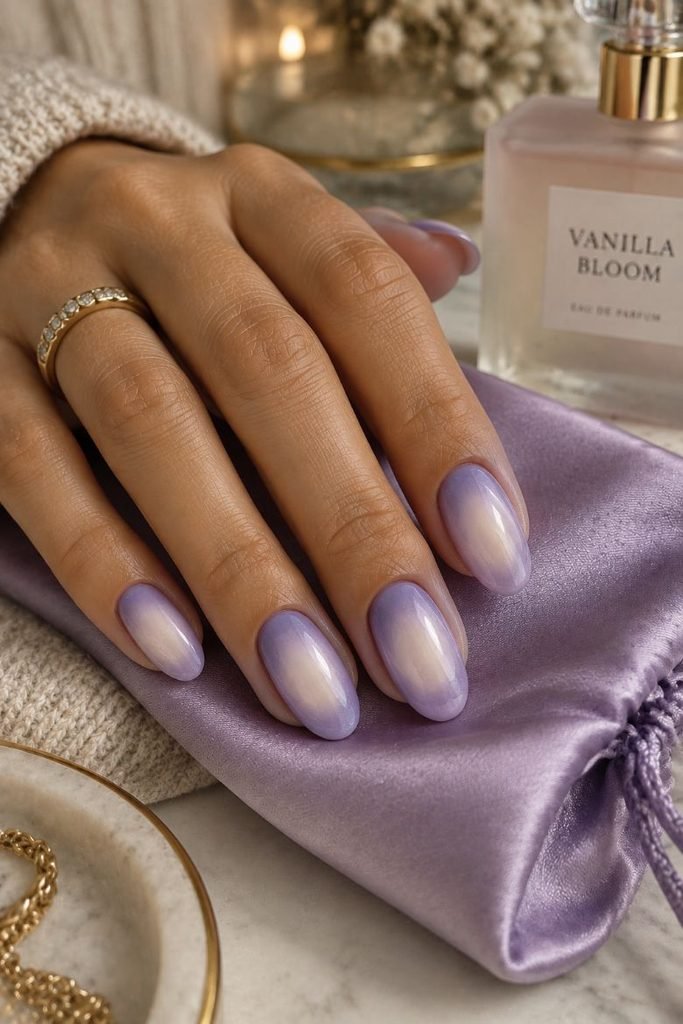
Milky centers soften the middle of each lilac oval, with the purple remaining clearer around the perimeter. A very light pearl-chrome layer adds a cool reflection without concealing the painted fade underneath. The nails are medium length and glossy, and the pearl finish looks strongest along the curve of the surface. No crystals or foil are needed; the contrast between cloudy color and fine reflection supplies enough detail.
These frosted aura nails work well when you want a winter shade with some softness left in it. Lilac brings color to charcoal or navy outfits, while the milky center keeps the purple from feeling dense. If you enjoy the finish, our pearl nail ideas include other ways to use pearlescence. At the salon, check the aura before and after the chrome layer. Heavy pigment coverage can obscure the gradient you came for.
How to Apply
- Apply lilac gel to prepared medium oval nails and finish with the cured matte layer required by your nail-pigment system.
- Blend milky-white nail pigment into each center, leaving a visible lilac border; brush away loose excess.
- Seal the pigment, then apply a fine pearl-chrome layer using the bonding surface and cure sequence specified by the compatible chrome system.
- Remove loose chrome, seal with the recommended glossy top coat, and cure.
6. Espresso and Blush Aura With Knit Lines
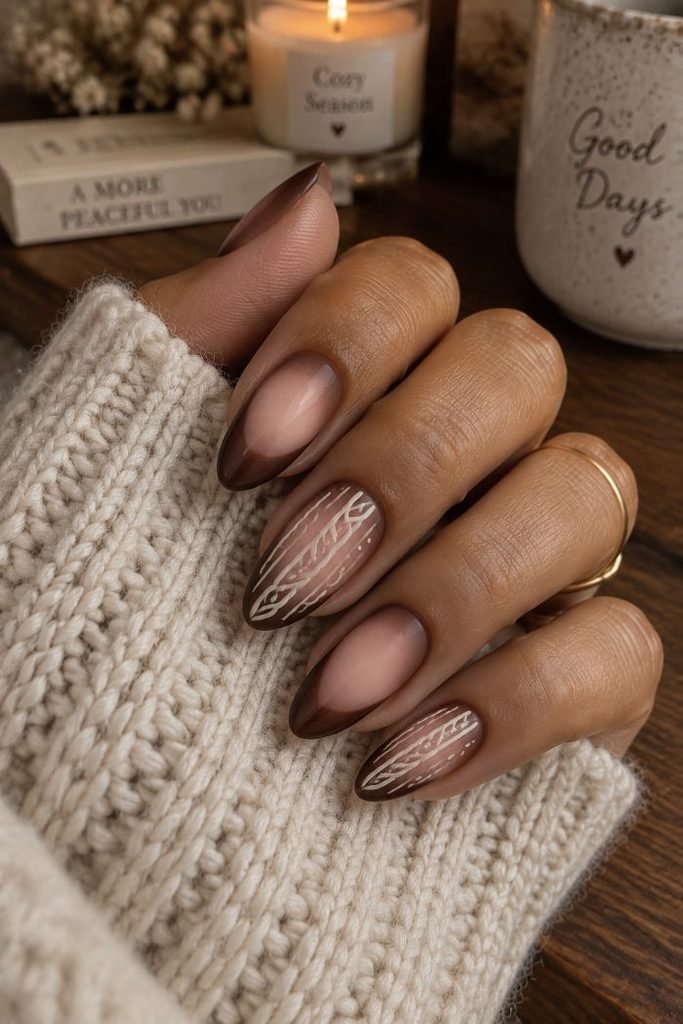
Espresso brown frames a soft blush center on each medium almond nail. Two accents carry fine ivory lines arranged like a cable-knit pattern, with small interlocking curves running lengthwise over the gradient. The lines are painted flat, and a satin finish gives the whole set a fabric-like softness. On the unpatterned nails, the blush spreads broadly through the middle while leaving a clear brown edge.
This is a convincing way to bring sweater detail into neutral winter aura nails without covering every finger in a pattern. The blush keeps the espresso from feeling too severe, and the ivory lines repeat colors found in cream cuffs or scarves. Keep the cable pattern narrow enough to leave some aura visible on either side. For a simpler home version, place a fine knit-pattern decal over one finished aura nail and leave the rest plain.
How to Apply
- Apply espresso gel to prepared medium almond nails and create the cured matte surface required for your nail pigments.
- Blend blush pigment into the centers, keeping the brown perimeter visible; remove loose excess.
- Seal the aura and cure, then paint fine ivory cable-knit lines on two accents and cure the artwork.
- Finish with a compatible satin top coat and cure as directed..
7. Midnight Blue Double-Aura Nails
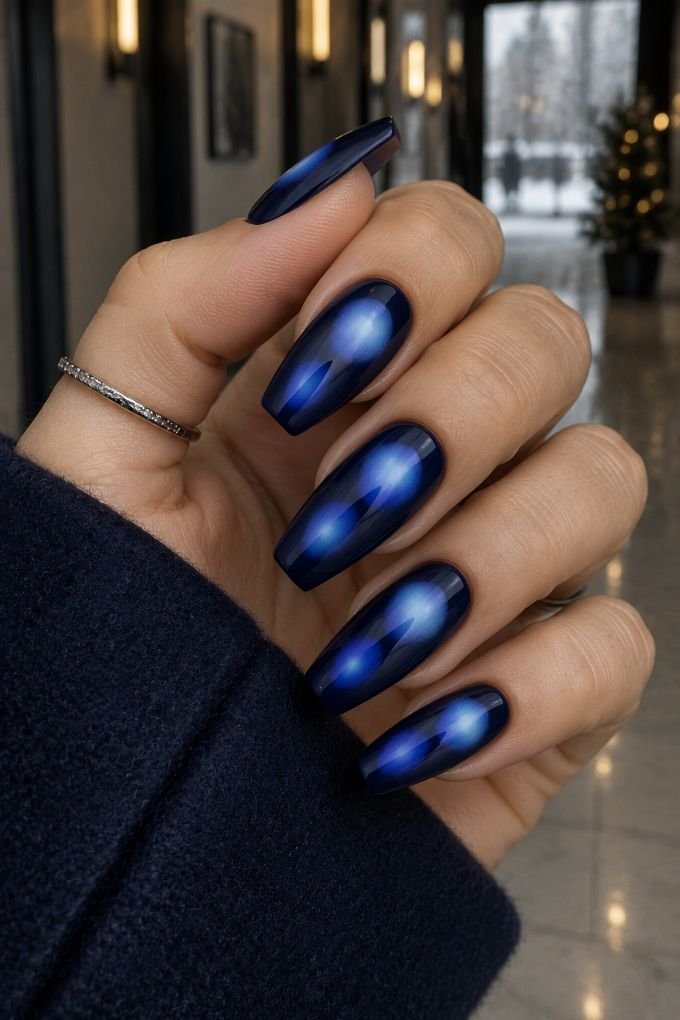
Two soft patches of blue sit at different heights inside each midnight-blue coffin nail. The lower patch is muted cobalt; the upper one is pale powder blue, with a narrow stretch of navy separating their faded edges. Both shapes are rounded and slightly off-center. A glossy finish brings depth to the dark base, but the two color spots remain distinct even where the surface reflection falls elsewhere.
The extra space on medium coffin nails gives this double-aura design room to make sense. On a shorter nail, the patches can merge into one uneven gradient, so reduce the design to a single blue center if needed. This set looks particularly strong beside a navy coat or dark denim because the lighter spots provide clear contrast. Ask to see the placement on a sample nail first; the distance between the two auras is the detail that makes the composition work.
How to Apply
- Apply midnight-blue gel to prepared medium coffin nails, then add and cure the matte surface specified by your pigment system.
- Blend a muted cobalt pigment spot low on each nail and a separate powder-blue spot nearer the tip.
- Intensify the centers lightly, preserve the navy gap, and brush away loose pigment.
- Seal with the compatible clear finishing system and cure according to its directions.
8. Black Cherry Eclipse Aura Nails
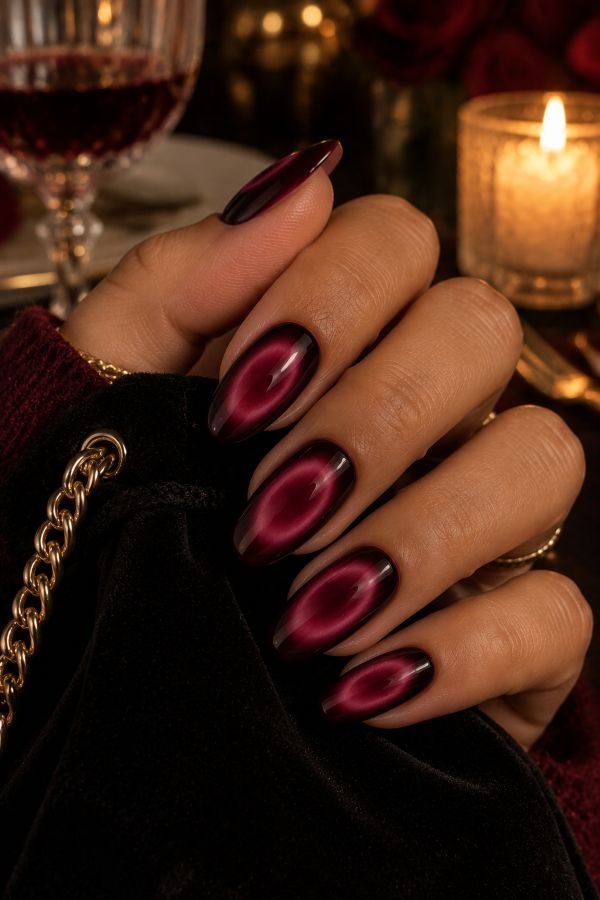
A hazy berry ring surrounds a darker center on these medium almond nails. The same black-cherry shade returns around the outer nail, so the pink-red glow appears suspended between two areas of depth. Every boundary is softly blended, including the inside of the ring. The glossy surface stays completely smooth, and the oval halo follows the length of the nail without becoming a sharply drawn outline.
If classic burgundy aura nails feel too familiar, reversing the center gives the color a different structure. This version needs enough contrast for the ring to remain visible, especially in dim indoor light. It suits a simple evening outfit because the painted depth is already the main detail. Skip additional rings or stars on the nail itself; they would compete with the eclipse shape. A technician can build the effect gradually with nail pigments and check the symmetry before sealing.
How to Apply
- Apply black-cherry gel to prepared medium almond nails and finish with the cured matte surface required by the pigment system.
- Blend a broad berry-pink aura into the middle of each nail.
- Place a smaller dark cherry pigment patch inside the pink area, feathering its edge to leave a soft oval ring.
- Remove loose pigment, seal with compatible glossy finishing products, and cure as directed.
9. Oat Milk Aura Micro-French Nails
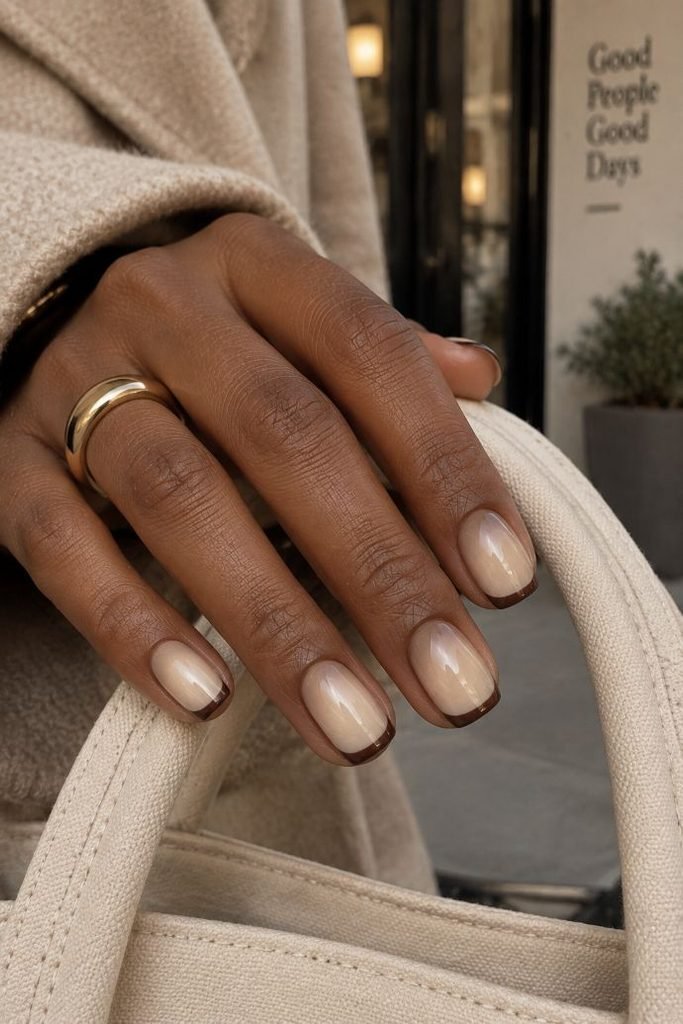
Warm oatmeal polish carries a small cream aura at the center of each short square nail. The two shades sit close together, with just enough difference to show the fade. A fine espresso line traces the free edge, giving the otherwise soft manicure a precise finish. Gloss adds a clean reflection across the surface, while the corners remain gently softened rather than sharply squared off.
These subtle winter aura nails are a good choice when your clothes already supply plenty of pattern or texture. The dark tip gives your eye a clear edge to follow, and the cream center adds detail that becomes more apparent up close. Take care with the temperature of the colors: a cool gray-white center can look disconnected from a warm oatmeal base. For regular polish, let the sponged center set before painting the French line so the brush does not disturb the fade.
How to Apply
- Apply base coat and an oatmeal-colored lacquer to short soft-square nails; let the color dry.
- Sponge a small cream aura into each center and allow it to set.
- Draw a fine espresso-brown line along each free edge with a liner brush.
- Once the linework has set, finish with a glossy top coat.
10. Forest Green Aura With Frosted Ferns
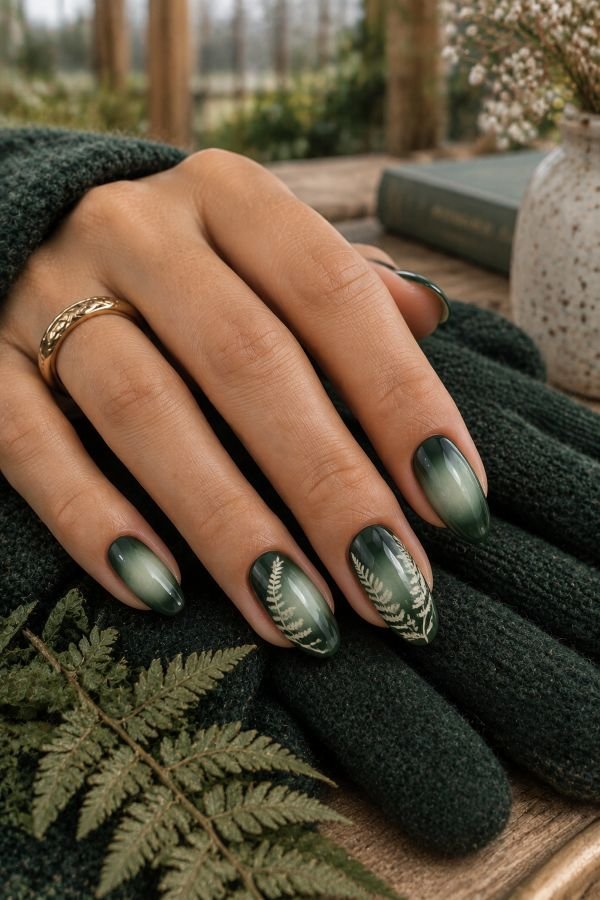
Pale mist-green centers fade outward into forest green on medium oval nails. Two accents add a fine ivory fern along one sidewall, with the smallest leaflets pointing toward the brighter center. The remaining nails keep their gradients clear. Under a glossy top coat, the botanical lines stay crisp while the color behind them remains soft, giving the set a sense of depth without a raised surface.
The fern placement gives dark green aura nails a winter woodland feel that can carry through the season. It works especially well when the foliage follows the oval edge instead of cutting straight across the glow. A muted ivory line is gentler against green than an opaque white block, and a fine brush keeps the leaflets separate. Choose one botanical accent per hand if your nails are narrow. Keeping the remaining gradients open helps the fine fern stand out.
How to Apply
- Apply forest-green gel to prepared medium oval nails and create the cured matte surface required for the pigments.
- Blend mist-green nail pigment into the centers, then remove loose excess, seal, and cure.
- Paint a fine ivory fern along the sidewall of two accent nails and cure the linework.
- Apply a compatible glossy top coat and cure.
11. Mauve Aura Negative-Space Panels
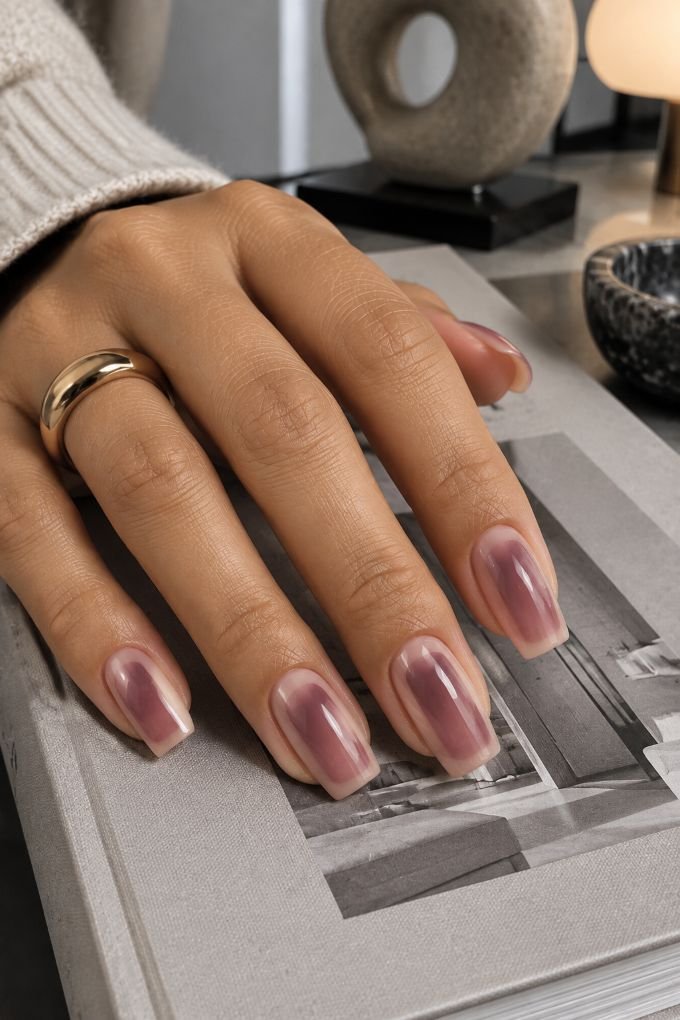
A vertical mauve panel sits inside each medium square nail, surrounded by a narrow frame of sheer nude. Within the panel, pale pink blooms through the center and fades before reaching its straight boundaries. The panel corners are softly rounded, echoing the shape of the finished nail. Clear gloss runs over both areas, making the sharp outer shape and blurred inner color easy to distinguish.
This is a more graphic interpretation of mauve aura nails, useful if your taste leans toward simple shapes and clean lines. The transparent frame lightens the overall coverage and gives the aura a defined place to sit. Leave enough width for both the frame and gradient; on a very narrow nail, a single unframed oval of color will read more clearly. A technician can adjust each panel to the nail bed while keeping the surrounding margins visually consistent across the hand.
How to Apply
- Apply a sheer nude gel base to prepared medium square nails and cure.
- Paint one rounded mauve panel on each nail, cure, then apply and cure the compatible matte layer within the panel.
- Blend pale-pink nail pigment into each panel’s center, keeping the color within its boundaries.
- Remove loose excess, seal the full nail using the pigment system’s recommended clear finish, and cure.
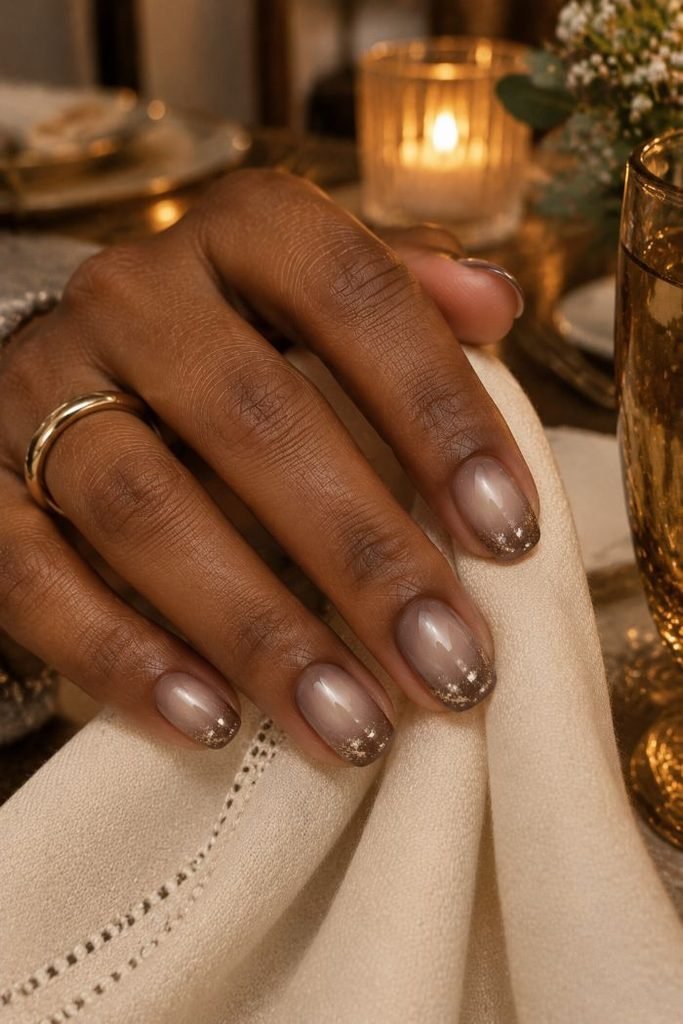
12. Champagne Taupe Aura With Glitter Tips
Pale champagne centers brighten a muted taupe base on short oval nails. The gradient stays soft and compact, with taupe still visible at the sides and cuticle. Fine champagne glitter gathers in a narrow scatter along the tips, thinning out before it reaches the aura. A smooth glossy finish connects the two details, so the manicure has both a painted glow and a small amount of reflective sparkle.
This is an easy way to make neutral aura nails feel dressed for dinner without changing the whole palette. The glitter should sit where the light naturally catches the free edge, leaving the central fade unobstructed. Choose small particles for a smoother result on this length; large flakes can dominate a compact nail. Regular lacquer works for the color, sponge fade, and glitter, so this is an approachable option when you want to do your nails before an event.
How to Apply
- Apply base coat and taupe lacquer to short oval nails, then let the color dry.
- Dab a pale champagne aura into each center with a small sponge; allow it to set.
- Brush a sparse line of fine champagne glitter along the tips, fading the scatter slightly upward.
- Let the glitter layer set and finish with a smooth glossy top coat.
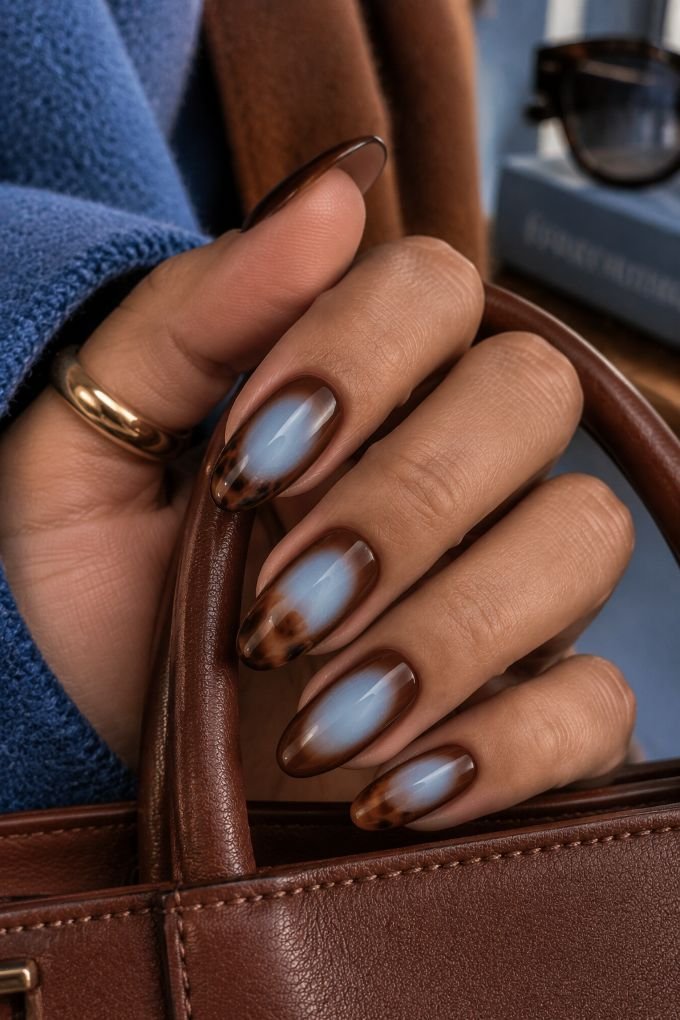
13. Icy Blue Aura With Tortoiseshell Corners
An icy-blue oval fades into cocoa brown at the center of each medium almond nail. On two accents, small tortoiseshell patches occupy the outer corners near the tip, combining translucent caramel with irregular dark-brown markings. The blue aura remains visible between those patches and the opposite sidewall. A glossy finish makes the caramel appear deeper while preserving the soft boundary around the cool central color.
The warm and cool combination gives blue and brown aura nails their character. Cocoa relates to winter leather and knitwear, while the icy center adds a clear interruption to the brown. Keep the tortoiseshell confined to small corners; a full patterned border would leave too little room to appreciate the fade. This is best treated as a salon reference because the pale center needs controlled color buildup over a dark base, followed by separate layers for the translucent pattern.
How to Apply
- Apply cocoa-brown gel to prepared medium almond nails and create the cured matte surface needed for your nail pigments.
- Blend icy-blue pigment into each center, then remove excess, seal, and cure.
- On two tip corners, layer translucent caramel gel with sparse dark-brown markings, curing each layer as directed.
- Finish the complete design with a compatible glossy top coat and cure.
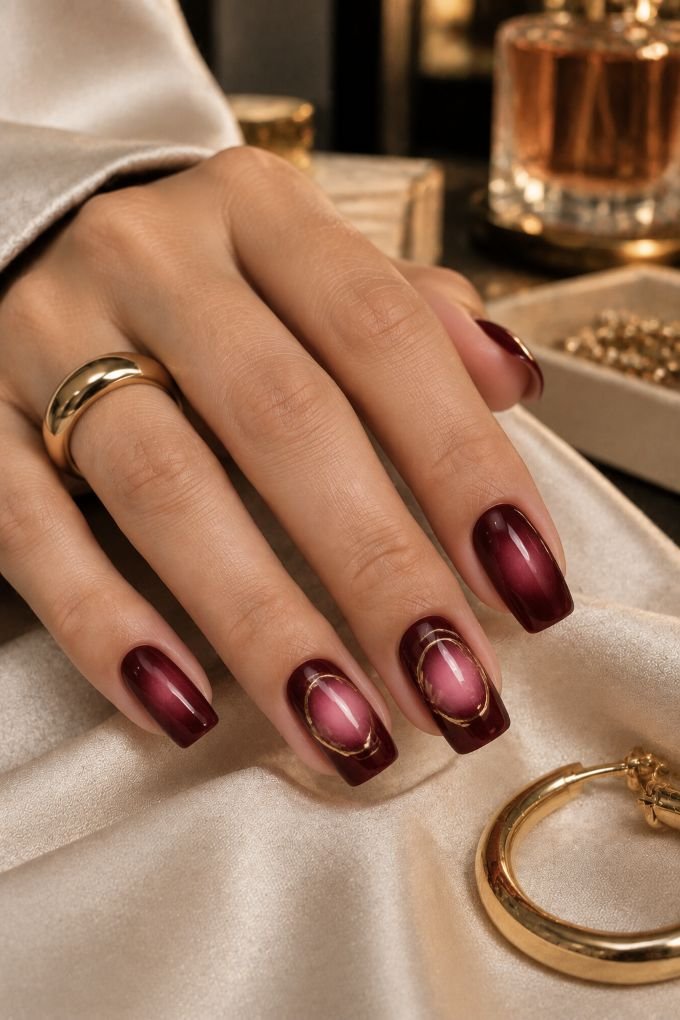
14. Burgundy Aura With Fine Gold Orbits
Rosy centers soften a deep burgundy base on medium square nails. Two accents carry a single fine gold arc that circles part of the aura, leaving a small gap rather than closing into a full ring. The arcs are slightly larger than the brightest areas, so the pink fade remains visible inside them. The other nails stay plain beneath the same clear, glossy finish.
The painted gold line gives burgundy and pink aura nails a sharper detail without taking away their softness. It is a good choice when you want to coordinate a manicure with simple gold jewelry but find glitter too scattered. Watch the width of the line: the thin arc should be easy to follow, while the aura still occupies most of the nail. A liner brush and metallic nail-art lacquer can create a home version once the underlying gradient has fully set.
How to Apply
- Apply base coat and burgundy lacquer to prepared medium square nails; let it dry.
- Sponge a soft rosy-pink center onto each nail and allow the gradients to set.
- Paint one thin, incomplete gold orbit around the aura on two accent nails.
- Let the metallic linework set, then seal with a glossy top coat.
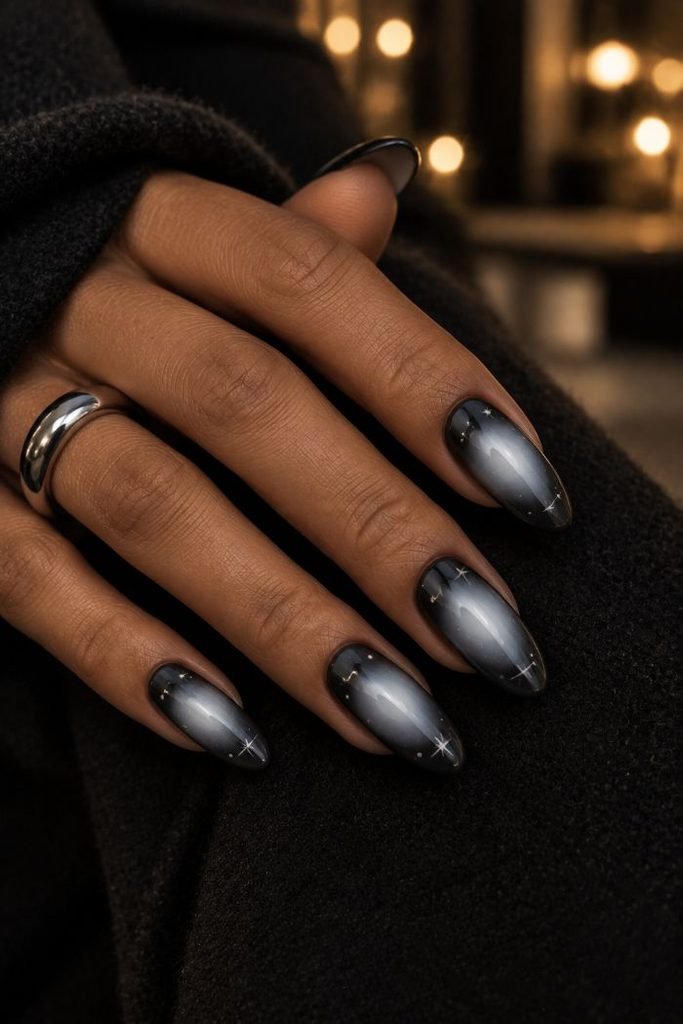
15. Silver Gray Starfield Aura Nails
Soft white halos sit slightly off-center against charcoal on long almond nails, passing through pale gray before reaching the darker base. Small silver stars occupy selected dark areas around the halos, with only a few pinpoint dots between them. The color gradient stays visible beneath a glossy finish. Because the stars are scattered rather than arranged in rows, the set feels open even with the extra detail.
These winter aura nails with silver accents suit an evening outfit when you want more contrast than a sheer neutral provides. They also fit among classy holiday nail ideas for New Year’s Eve without needing dates or lettering. Place the stars outside the white centers so their shapes stay legible. On shorter nails, keep one halo and one small star per accent; the dark space between the details is what prevents the design from becoming crowded.
How to Apply
- Apply charcoal lacquer over base coat on prepared long almond nails or fitted press-ons; let it dry.
- Sponge an off-center pale-gray halo onto each nail, then add a smaller white center and let the fade set.
- Place a few small silver star decals on the darker areas and add sparse silver dots.
- Seal the artwork and decal edges with a glossy top coat.
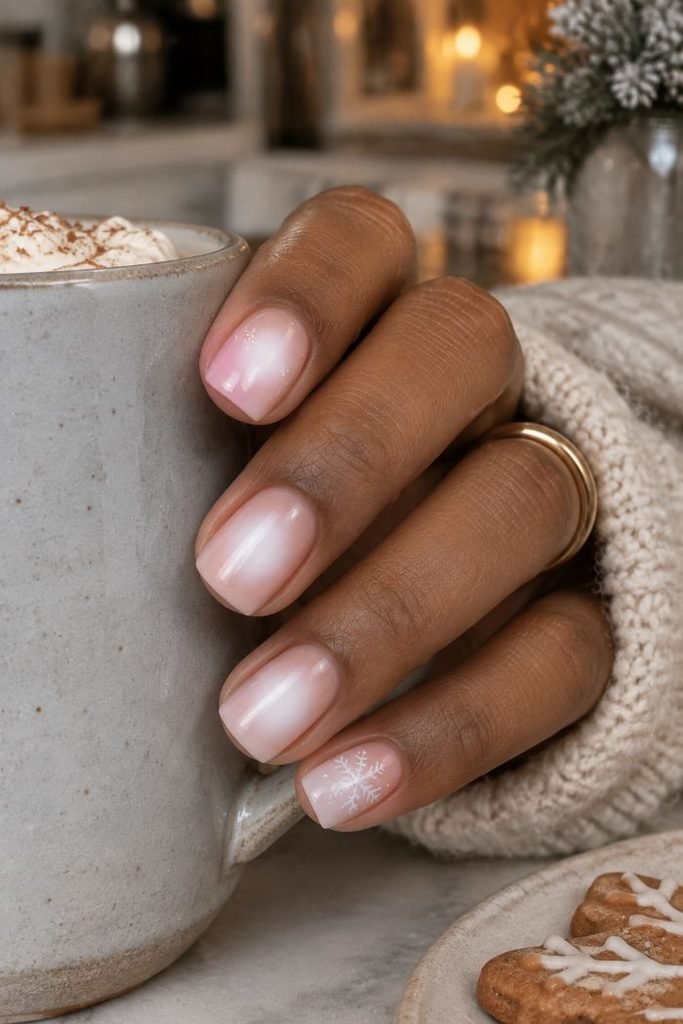
16. Soft Pink Snowflake Aura Nails
Milky-white centers fade into pale pink on short squoval nails, giving the manicure a soft, cloudy appearance. Two tiny white snowflakes sit at the outer corners of accent nails, where enough pink remains behind the linework to show their shape. The flakes are fine and flat, with no glitter filling their branches. Gloss adds a clean reflection over the pale colors and keeps the artwork looking delicate.
For winter aura nails with snowflakes, placement saves the design from becoming a blur of white details. Keep the snowflakes outside the lightest part of the aura, and scale them to the corner rather than the entire nail. The pink makes this an easy match for cream knitwear or a pale-gray coat. A decal is a reasonable choice if painting six fine branches with your non-dominant hand sounds more frustrating than enjoyable; the finished placement matters more than the method.
How to Apply
- Paint prepared short squoval nails pale pink over base coat and let the lacquer dry.
- Sponge a soft milky-white center onto each nail, preserving a pink perimeter; allow it to set.
- Paint or apply one tiny white snowflake at an outer pink corner on two accent nails.
- Let painted details set, then seal the gradients and artwork with a glossy top coat.
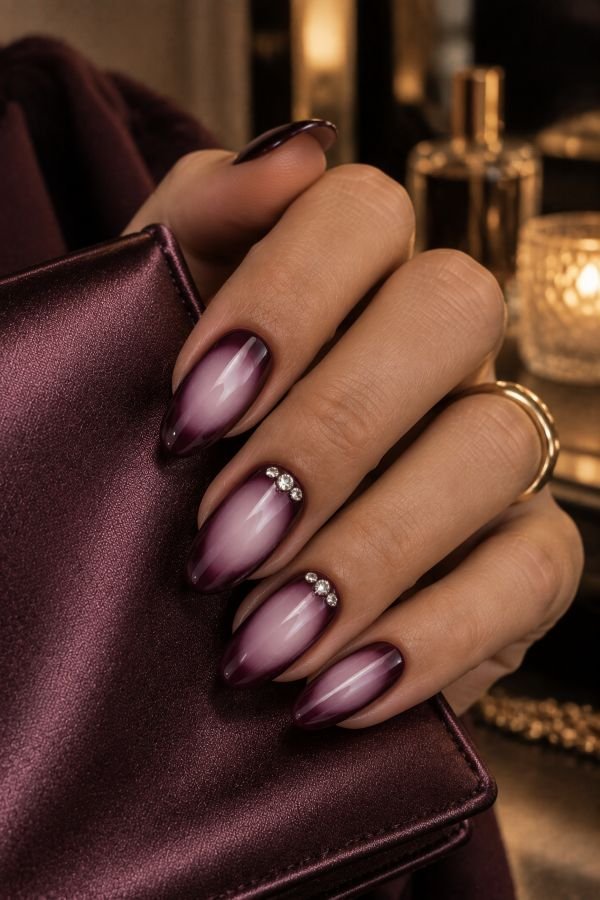
17. Plum Aura With Crystal Cuticles
Pale lilac centers open up a deep plum base on medium almond nails. The fade is elongated, leaving the darkest color along the sidewalls and cuticle. Three tiny clear crystals form a short arc near the base of two accent nails, following the cuticle curve without touching the skin. Gloss surrounds the low embellishments, while the open centers keep the purple gradient visible across the set.
These purple winter aura nails offer a softer approach to evening color than an opaque plum manicure. The crystals add small points of reflection, and their low placement leaves the almond tips clean. Compare other rhinestone nail ideas if you are deciding how much decoration to add. With lace or textured sleeves, keep the stones small and ask the technician to check their edges. One crystal accent per hand is enough if you prefer the gradient to do most of the work.
How to Apply
- Apply plum gel to prepared medium almond nails and create the cured matte surface required by your nail-pigment system.
- Blend lilac pigment into elongated centers, remove loose excess, seal, and cure.
- Secure three small flat-backed crystals near the cuticle on two accents using compatible nail adhesive or gem gel, setting it as directed.
- Finish the surrounding nail with a compatible glossy top coat, keeping the crystal faces clear, and cure if required.
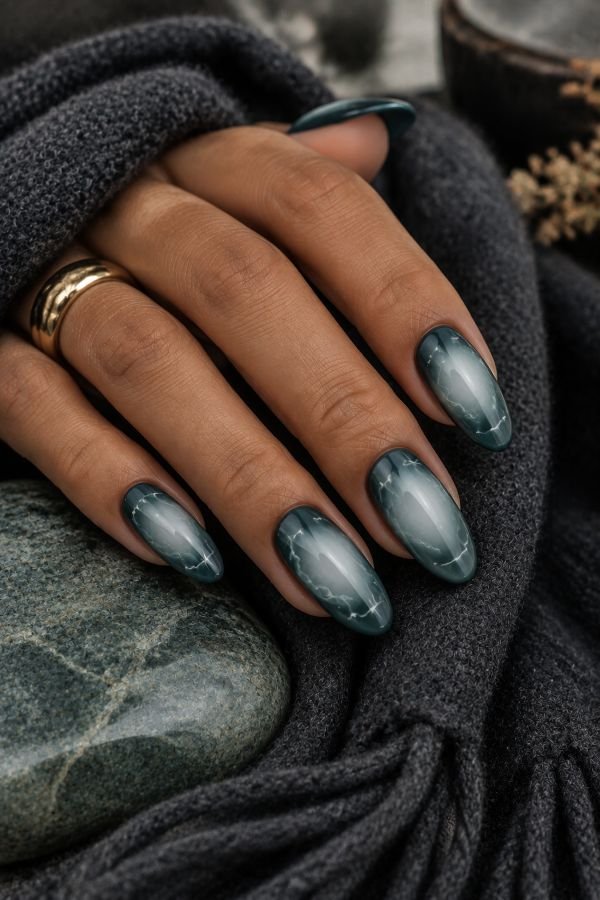
18. Clouded Teal Aura Marble Nails
A pale smoky center spreads through muted teal on medium-to-long oval nails. Around the perimeter, a few translucent white wisps break into fine irregular veins, giving the darker color a clouded-stone appearance. The veins stay away from the lightest center so the aura remains easy to see. A glossy finish gives the layered white details depth, with enough clear teal left between them to keep the pattern airy.
The combination suits someone who likes teal aura nails but wants more detail than a single faded spot. Teal brings a cool note to brown or charcoal winter clothes, while the smoky center keeps it from feeling bright or tropical. Let the veins vary naturally across the hand instead of repeating one branching shape on every nail. This is a salon-friendly design: the artist can seal the aura first, then work on the finer perimeter details without disturbing the blend underneath.
How to Apply
- Apply muted teal gel to prepared oval nails and add the cured matte layer required by your pigment system.
- Blend pale smoky-gray pigment into the centers, remove excess, seal, and cure.
- Paint sparse peripheral wisps with sheer white nail-art gel, refining a few into fine veins; cure each layer as directed.
- Seal the layered design with a clear glossy top coat and cure.
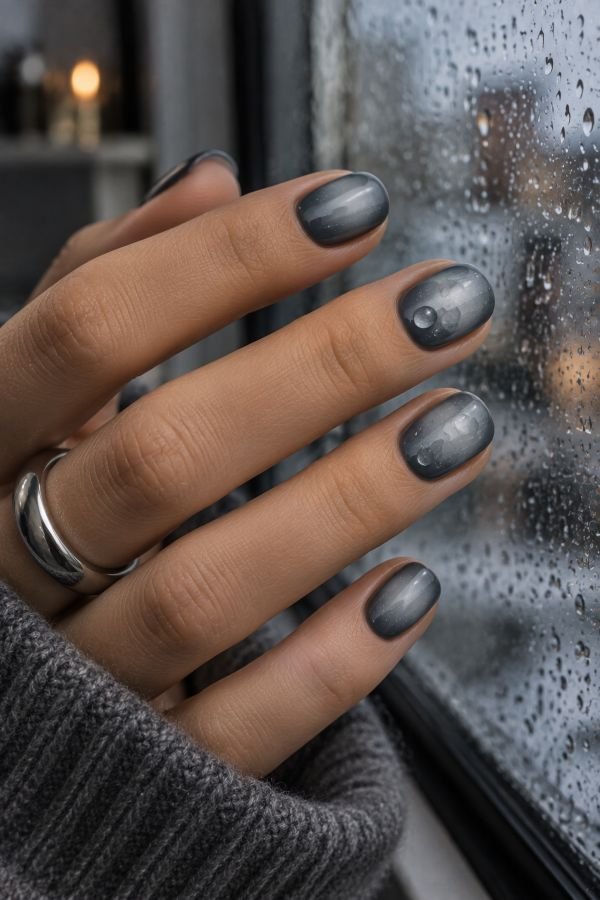
19. Frosted Silver Aura With Clear Droplets
Pale-gray aura centers soften slate-colored short oval nails, with a trace of fine silver shimmer concentrated in the lighter areas. A satin finish keeps the background muted. Two accents carry several low, clear droplets in different sizes, each with a glossy surface that catches a small highlight. The drops sit away from the center of the brightest fade, leaving the painted color visible between them.
The contrast between satin and glossy finishes gives this manicure its frosted-window character. Keep the droplets shallow enough to remain comfortable when your hands move through sleeves or pockets. They need a suitable clear nail-art gel and careful curing, so this version is best handled by a technician. For a flat adaptation, place small glossy dots over the satin finish and accept the simpler result. The slate-to-silver aura will still supply most of the winter mood even with very little added texture.
How to Apply
- Apply slate gel to prepared short oval nails and create the cured matte surface required for the pigments.
- Blend pale-gray aura centers with a little compatible fine silver nail shimmer, then remove loose excess.
- Seal the aura using the recommended system and finish with a cured satin top coat.
- On two accents, form low droplets with a compatible clear nail-art gel, cure according to its thickness and lamp instructions, and add gloss to the droplets if that system requires it.
20. Dusty Rose Aura With Tartan Corners
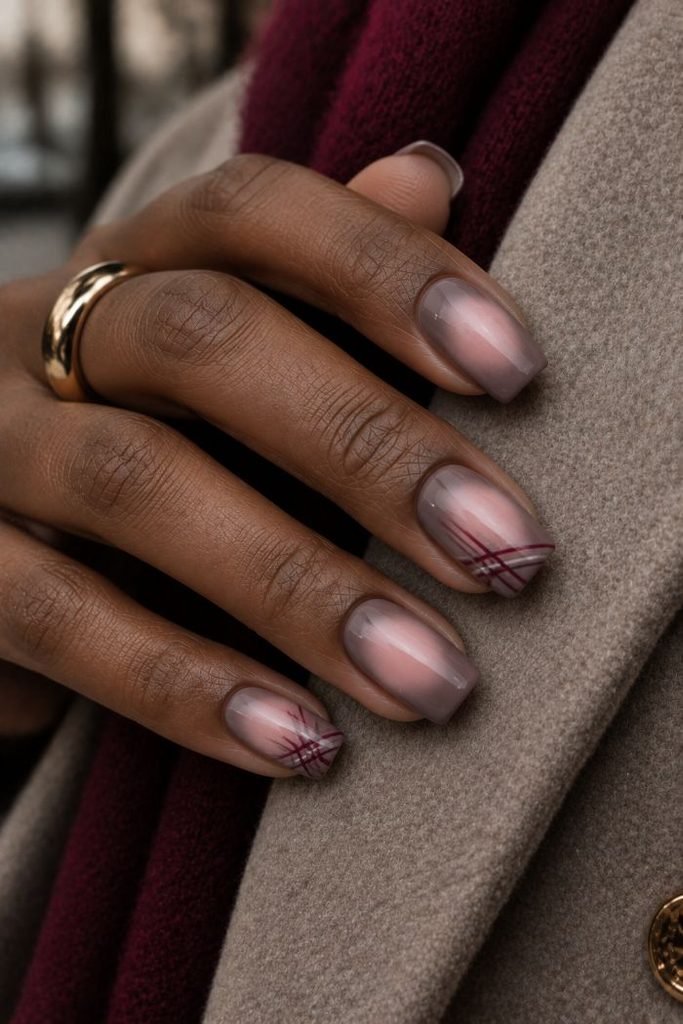
Dusty-pink centers fade into taupe on medium square nails, creating a muted background for fine plaid details. Two accent nails carry intersecting burgundy and gray lines at opposite corners, leaving the central aura open. Small changes in line spacing keep the tartan from looking like a uniform grid. A satin finish ties the colors together and gives the flat artwork the softness of a woven fabric.
This is a useful winter manicure for a wardrobe built around wool coats, scarves, and muted checks. The dusty rose aura adds a softer area inside the more structured pattern, so both details remain readable. Keep the plaid at the corners; carrying every line through the center would hide the fade. Regular nail-art lacquer can create the lines over a fully set aura, though a preprinted decal offers more control if straight strokes on the non-dominant hand tend to wander.
How to Apply
- Apply base coat and taupe lacquer to prepared medium square nails; let the color dry.
- Sponge dusty-pink aura centers onto the nails and allow them to set.
- Add fine intersecting burgundy and gray lines at selected corners on two accents, using a liner brush or trimmed nail decals.
- Let painted details set and finish with a smooth satin top coat.
21. Winter Dawn Aura With an Ivory Wave
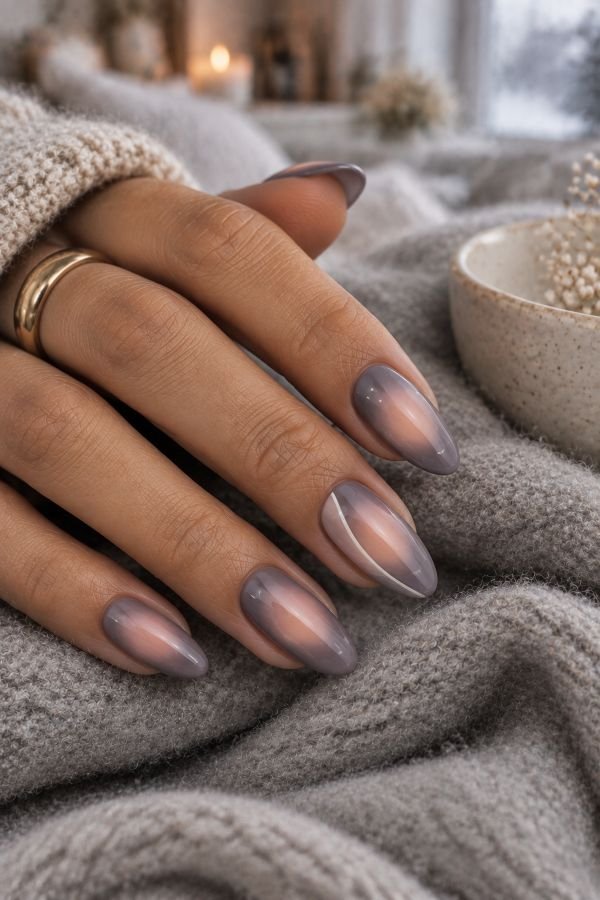
A muted peach glow sits slightly to one side of each smoky-lavender almond nail. Its edges fade gradually into the cooler base, leaving more lavender visible along the opposite sidewall. One accent adds a thin ivory curve that travels from the lower edge toward the tip, passing beside the brightest part of the aura. The glossy finish keeps the pale colors clear without adding metallic reflection.
The peach brings warmth to these winter aura nails, while the gray in the lavender keeps the palette subdued. It works particularly well beside cream, dove gray, or muted mauve clothing. Keep the ivory wave fine and reserve it for one accent; the asymmetrical color placement is already the main feature. A slightly elongated aura will follow the almond shape more naturally than a large, perfectly round center.
How to Apply
- Apply smoky-lavender gel to prepared medium almond nails and create the cured matte surface required by your nail pigments.
- Blend a muted peach aura slightly off-center on each nail, then remove loose excess, seal, and cure.
- Paint one thin ivory curve on an accent nail, keeping the brightest peach area visible; cure the linework.
- Apply clear glossy top coat and cure as directed.
Winter Aura Color Pairings That Keep the Glow Visible
Start with a clear difference between the base and the center. Cocoa and cream, slate and icy white, or plum and pale lilac give the fade enough contrast to remain visible. In Marie Claire’s interview with nail artist Queenie Nguyen, she suggests a beige or white center over a deeper base for a winter aura. The same principle works with softer colors, provided one is noticeably lighter or more concentrated than the other.
Undertone changes the result too. Warm cream keeps brown gentle, while a cooler white makes the contrast crisper. Pink inside burgundy feels different from peach inside brown, even at similar brightness. For winter aura nail colors, choose the pairing before adding shimmer or chrome. Check that the gradient is visible under ordinary indoor light as well as a bright photography lamp. A reflective topper can add interest, but the painted color should still make sense beneath it.
How to Create Aura Nails With Regular Polish or Gel
With regular nail polish, let the base color dry before sponging on the aura. Use a small amount of polish, tap off the excess, and build the center with light dabs that become softer toward the perimeter. BTArtbox’s sponge tutorial follows this dried-base approach. Let the design sit before the top coat, and use a fresh area of the sponge when changing colors so unwanted pigment does not muddy the fade.
For a nail-pigment aura over gel, follow the chosen system’s surface preparation and sealing instructions. Function of Vex’s method applies its pigments over cured matte gel, blends the edges, removes loose excess, and seals the design. This creates the color gradient without a nail magnet. Airbrushed salon work offers another route, while prepared press-ons remove the need to blend the design yourself. Keep complex chrome, layered patterns, and raised gel details within techniques you or your technician can handle comfortably.
Why an Aura Gradient Looks Patchy, Muddy, or Too Sharp
An uneven aura often starts with too much color on the tool. A heavily loaded sponge can leave a solid patch with a visible edge, while repeated rubbing can disturb the layer underneath. Start with less product and build the center gradually. Keep a clean brush or sponge area for the outer fade. On a practice tip, check how little pressure you need before attempting the same movement on your smaller nails.
For patchy aura nails made with pigments, check the surface required by that product rather than adding more powder immediately. A technique designed for cured matte gel may behave differently on a glossy or tacky layer. If the colors look muddy, clean the tool and simplify the pairing; if the center disappears, increase the contrast or leave a wider base-colored margin. The top coat can smooth surface texture, but it will not repair a poorly placed gradient. Adjust the color first, then seal it.
Final Thoughts
Base color is a good starting point: Cocoa if you prefer a neutral tone; slate blue if you require a cool one; and plum, if you desire an intensive manicure. Next, decide what amount of contrast you want in the center and what kind of finish it should have: shiny, matte, or pearl-like.
The best aura winter nails retain that color harmony. It is possible to create some personality in the design by adding a small snowflake, golden line, or crystal, but keep the fade visible. Choose any feature that is important for you and make it big enough. The balanced center of a practical nail length can become equally sophisticated as the fanciest nail salon one.
Pick the winter aura color story you love and preview it on your own hand before committing to the fade and shape.
Try It On Virtually