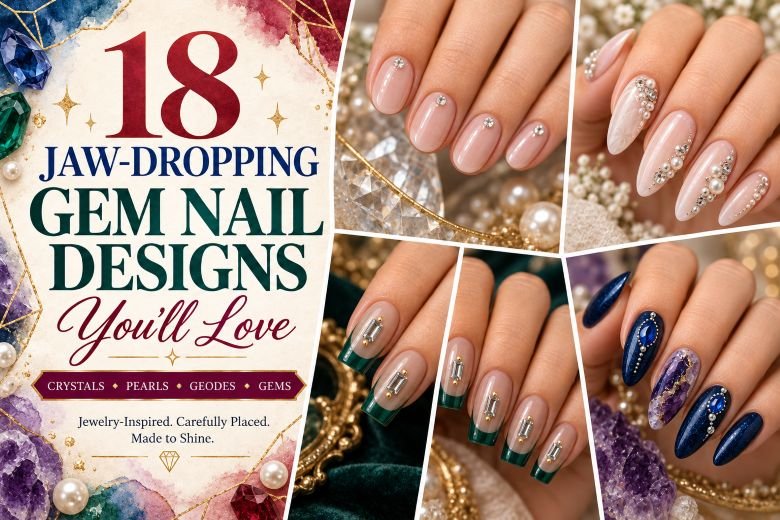
18 Jaw-Dropping Gem Nail Designs You’ll Love
Gem nails need to appear like they were meant to be jewelry rather than random stones stuck onto the nails after the manicure was done. Scale, placement, color, and even base polish are important factors. A crystal placed on the cuticle point of a short manicure may add the edge to an already elegant nude manicure, whereas a more elaborate design, featuring teardrops, cabochons, and metallic beads, will transform long extensions into mini masterpieces.
The ideas for gem nail design range from simple cuticle embellishments and crystal encrusted French tip to bridal designs, black onyx, colored gem accents, geodes and even birthstone-themed manicures. Modern beauty articles show that the trend is moving away from random stones to a more elaborate and thoughtful approach, as seen in Real Simple and Vogue magazines. The following ideas provide realistic alternatives for both short nails, salon manicure and painted looks of gemstones.
1. Minimal Clear-Gem Cuticle Nails
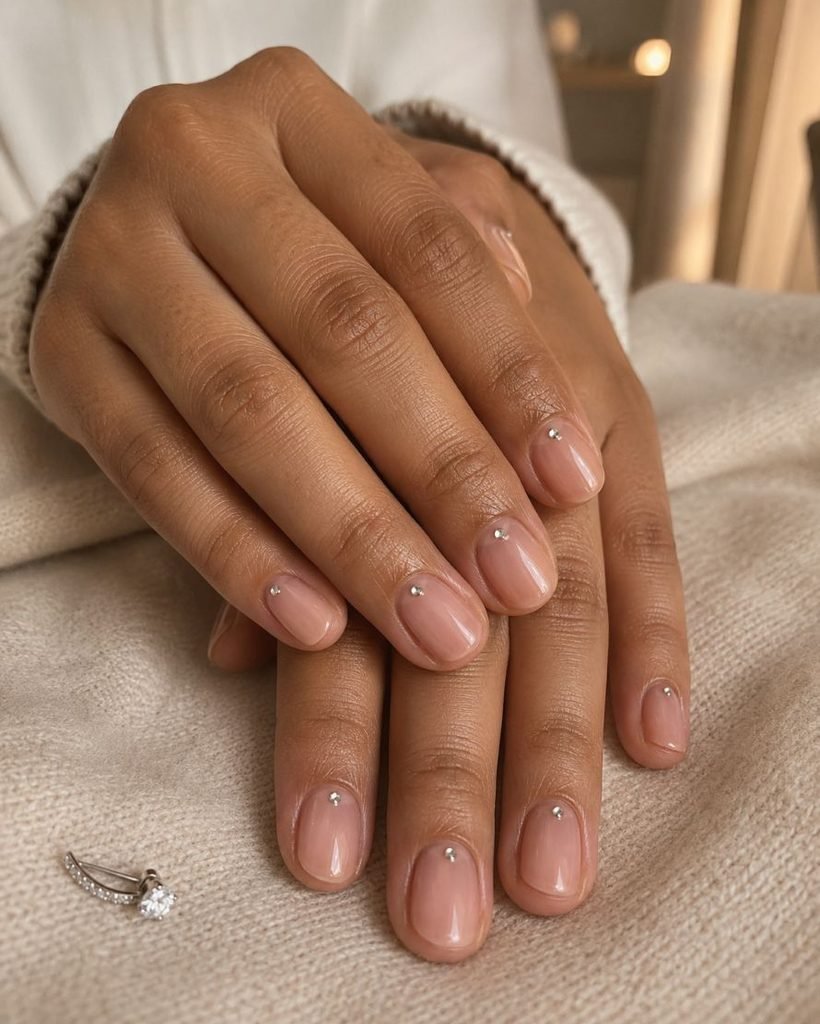
Short oval nails are coated in translucent rosy beige and finished with one tiny clear flat-back crystal centered just above each cuticle. Every stone is the same restrained size, and the rest of the nail remains completely undecorated. The transparent base, neat margins, and wet-look shine make the gems appear like small points of light rather than a full embellishment set.
This is the most practical entry into gem nails for work, weddings, or anyone who usually prefers quiet luxury nails. Placing the crystals low keeps the free edges clear and makes growth less obvious. Small stones are also less likely to interfere with typing than raised clusters. Use dedicated nail adhesive over fully dry lacquer, or compatible gem gel over cured color; ordinary top coat alone is not dependable attachment for daily wear.
How to Apply
- Shape the nails into short ovals and apply one or two coats of translucent rosy-beige polish.
- Place a small amount of compatible nail-gem adhesive at the center of each cuticle line.
- Pick up one tiny clear flat-back crystal with a wax pencil and press it into position.
- Secure around each crystal base without coating the reflective face.
2. Rainbow Polka-Dot Gem Nails
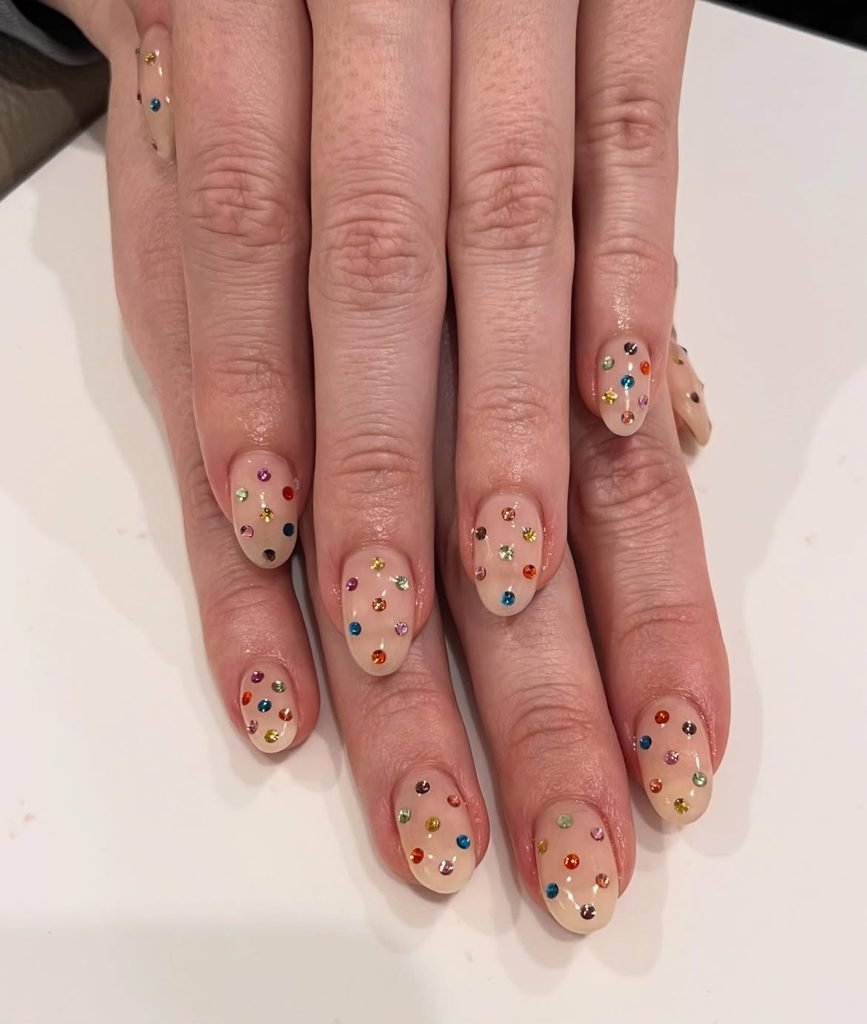
Short squoval nails use a sheer neutral base dotted with small round gems in ruby red, cobalt, emerald, amber, violet, and clear crystal. The stones are scattered irregularly, with only three or four appearing on each nail. Their sizes vary slightly, but every piece remains low and flat-backed, allowing generous negative space to separate the colors.
The playful color scheme succeeds due to the controlled placement technique. Pairing up colors with individual nail polish and adding some sparkle below would be distracting from the stones, whereas an almost blank canvas helps to read them easily. The colorful stone nails will be great for birthdays, celebrations, and light summertime fashion looks but not look too much like costumes thanks to the shorter form. When trying to copy this manicure at home, make sure to work out the entire design on a pack of press-ons first.
How to Apply
- Apply a sheer neutral base to prepared short squoval nails and let it dry or cure completely.
- Plan three or four irregular gem positions on each nail, leaving visible space between them.
- Secure small flat-back stones in ruby, cobalt, emerald, amber, violet, and clear crystal.
- Reinforce around the stone bases with compatible gel or top coat without covering their facets.
3. Crystal-Lined French Tip Nails
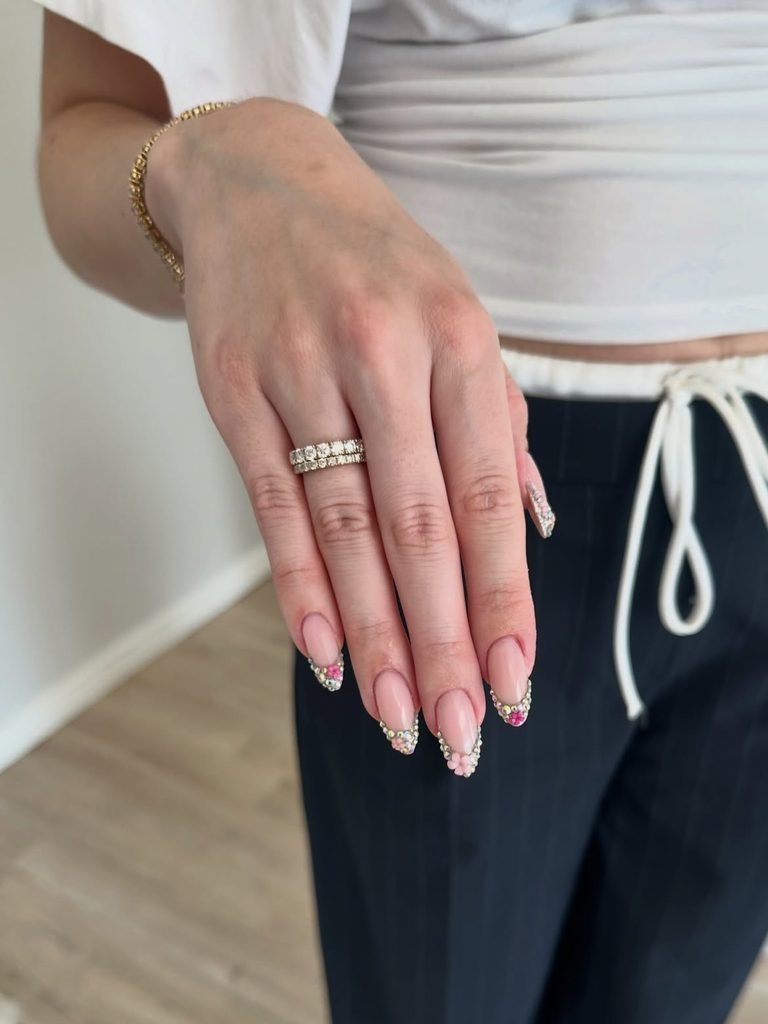
Medium square nails begin with a transparent blush base and narrow milky-white French tips. A line of tiny clear crystals follows the lower edge of each smile line, with one slightly larger stone placed near an outer corner. The straight free edges keep the rows orderly, while small gaps between the gems prevent the border from becoming a solid metallic strip.
This design gives classic French tip nail designs a jewelry-like finish without hiding their recognizable structure. It works especially well for engagement parties, graduations, formal dinners, and bridal events where the manicure needs to look polished from a distance and detailed up close. The alignment is less forgiving than scattered placement, so map the center crystal first and work outward. A professional application is sensible if both hands must look precisely symmetrical.
How to Apply
- Apply a transparent blush base and paint slim milky-white tips on medium square nails.
- Mark the midpoint of every smile line with a tiny amount of gem adhesive.
- Place small clear crystals from the center toward both corners, leaving consistent gaps.
- Add one slightly larger corner stone and seal around every crystal base.
4. Pearl-and-Crystal Bridal Cluster Nails
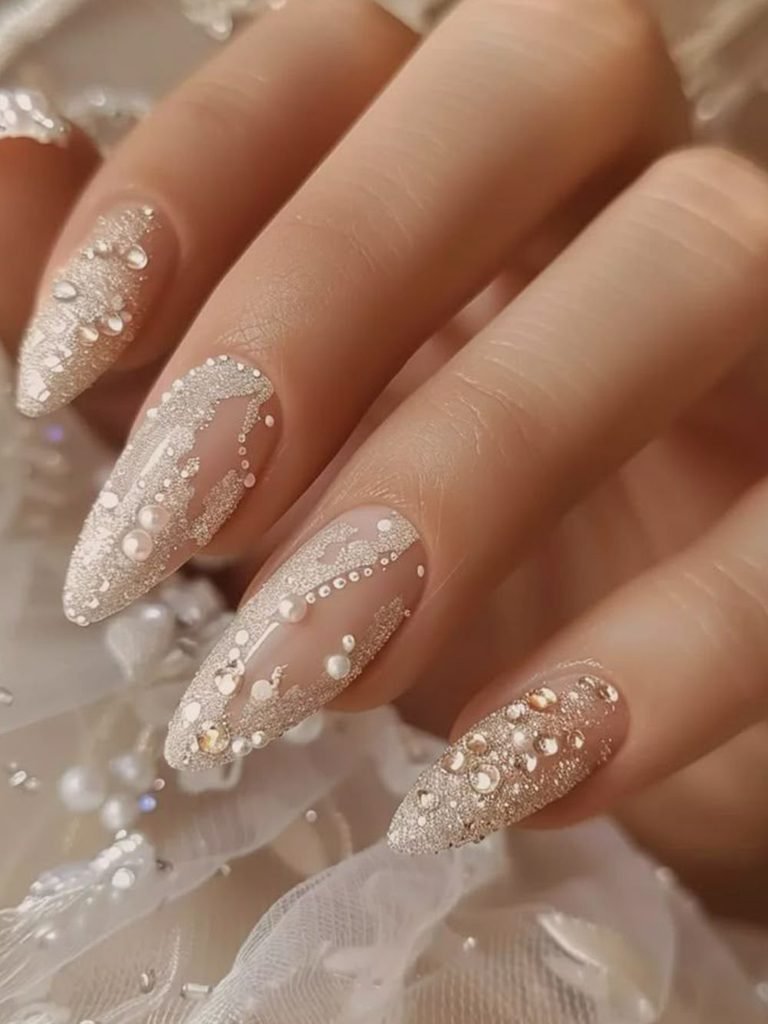
Medium almond nails wear a semi-sheer milky-pink base with small clusters of clear crystals and ivory half-pearls placed along alternating sidewalls. One nail carries a curved cuticle arrangement, while the others use only two or three pieces. Fine silver beads fill selected gaps, giving the clusters a finished jewelry setting without covering the nail surface.
Combining pearls and crystals adds dimension while keeping the palette suitable for brides, bridesmaids, or formal guests. The luminous softness connects naturally with these pearl nail ideas, while the varied placement prevents the set from resembling identical bridal decals. It can also coordinate with neutral bridesmaid nail ideas. Ask for low-profile pieces if the dress contains lace or delicate tulle, because tall clusters can snag even when securely attached.
How to Apply
- Apply two thin coats of semi-sheer milky-pink gel to medium almond nails.
- Map alternating sidewall and cuticle placements with compatible gem adhesive.
- Arrange clear crystals, ivory half-pearls, and a few fine silver beads in restrained clusters.
- Cure as directed and reinforce around the bases while leaving pearl and crystal faces uncovered.
5. Black Onyx Gem Nails
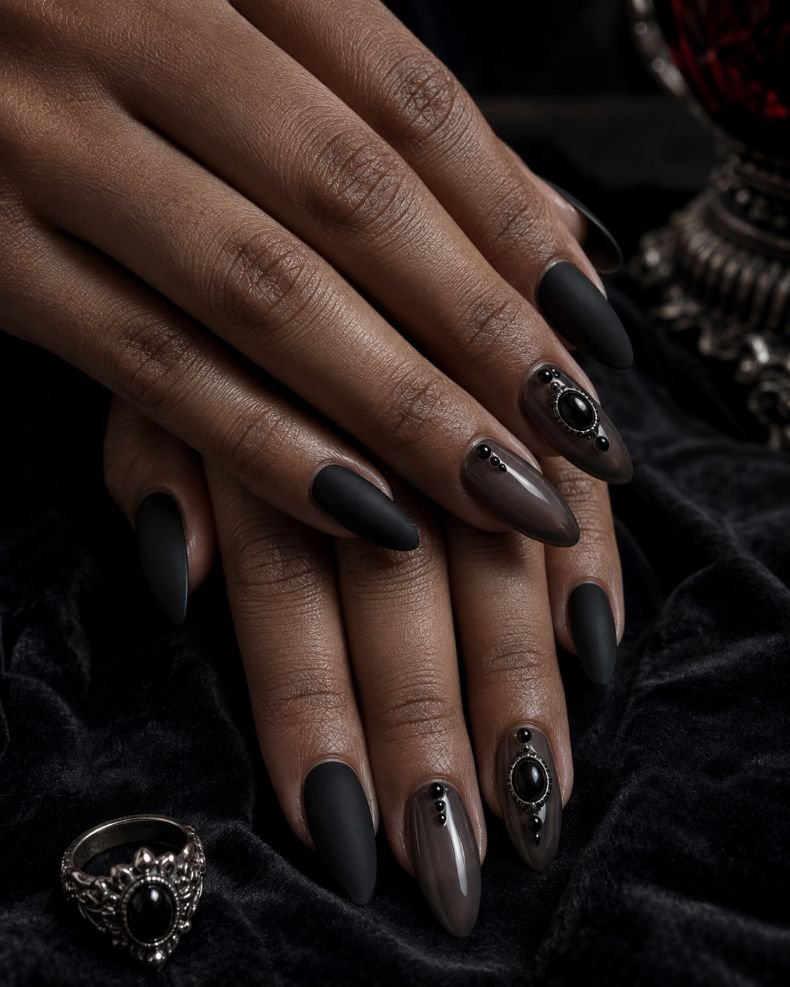
Long almond nails alternate between velvety matte black and deep translucent smoke. Glossy black cabochons sit on three nails, surrounded by tiny jet crystals and narrow antique-silver frames. Because the dark stones reflect only small highlights, their curved profiles and contrasting textures remain more important than obvious sparkle. The other nails stay plain to preserve the sculptural mood.
These black gem nails suit evening fashion and the darker styling explored in gothic nail ideas. Matte polish makes the glossy cabochons appear deeper, while silver frames stop them from disappearing into the base. Large domed pieces create considerable height, so this is better as a salon set or custom press-on design than a casual DIY manicure. Keep the cabochons away from the free edges, where repeated impact makes lifting more likely.
How to Apply
- Paint long almond nails matte black, keeping three selected bases of translucent smoke.
- Apply strong compatible gem gel to the planned central positions.
- Set glossy black cabochons, then surround them with tiny jet crystals and antique-silver frames.
- Cure fully and reinforce all gaps and bases without coating the domed surfaces.
6. Ruby Heart Jewel Nails
Medium oval nails are painted deep cherry-red with a translucent jelly finish. One ruby-colored heart gem sits slightly below the center of each ring finger, framed by four tiny clear crystals. The remaining nails carry a single red crystal near an alternating sidewall, allowing the saturated base and heart-shaped focal pieces to share attention.
The tonal pairing feels more sophisticated than placing bright red gems over a contrasting base. Jelly polish gives the color internal depth, while the clear stones sharpen the heart without making it appear cartoonish. This manicure works for date nights, anniversaries, birthdays, or formal events with black, cream, burgundy, or metallic clothing. Heart gems must sit flat and proportionally within the nail width; if a chosen piece extends toward both sidewalls, use it on a longer accent nail or select a smaller size.
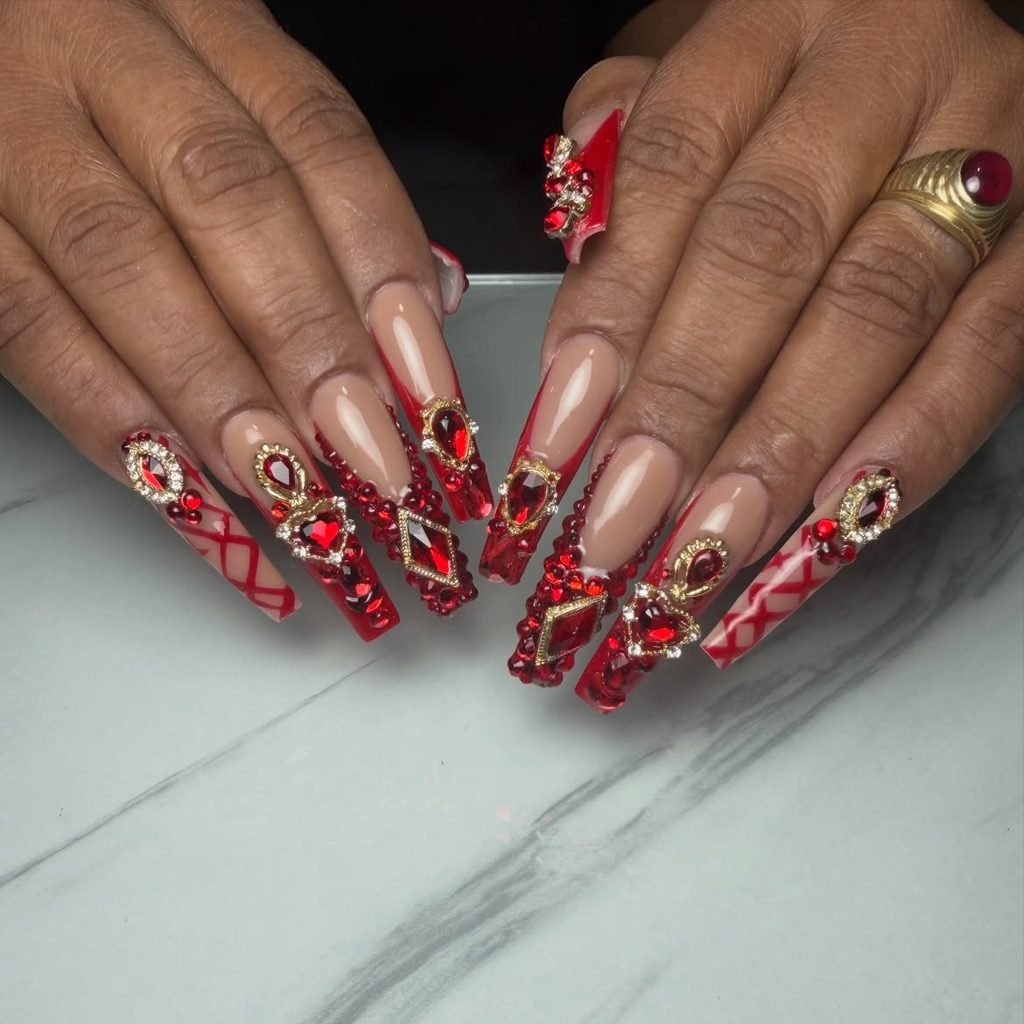
How to Apply
- Apply two thin coats of deep cherry-red jelly polish to long square nails.
- Position ruby-colored heart gems just below the center of both ring-finger nails.
- Frame each heart with four tiny clear crystals and add one red side gem to the remaining nails.
- Secure the bases with compatible adhesive and finish the exposed polish with glossy top coat.
7. Emerald-Cut Statement Gem Nails
Long square nails use a sheer taupe base with deep emerald-green micro-French tips. A rectangular emerald-cut crystal sits vertically on each middle finger, bordered by four tiny gold beads that resemble corner prongs. The remaining nails feature one narrow gold line extending upward from the tip, keeping the manicure connected without repeating the large stone across every finger.
The elongated gem mirrors the straight sidewalls and makes the square shape look especially architectural. Using only two statement stones also leaves room for rings and other jewelry instead of creating competition between every nail. These emerald gem nails work for black-tie dinners, winter celebrations, or outfits built around black, cream, camel, and forest green. Pointed or dimensional stones need structured support, so ask a technician to fill the surrounding gaps with compatible gem gel rather than balancing them on ordinary top coats.
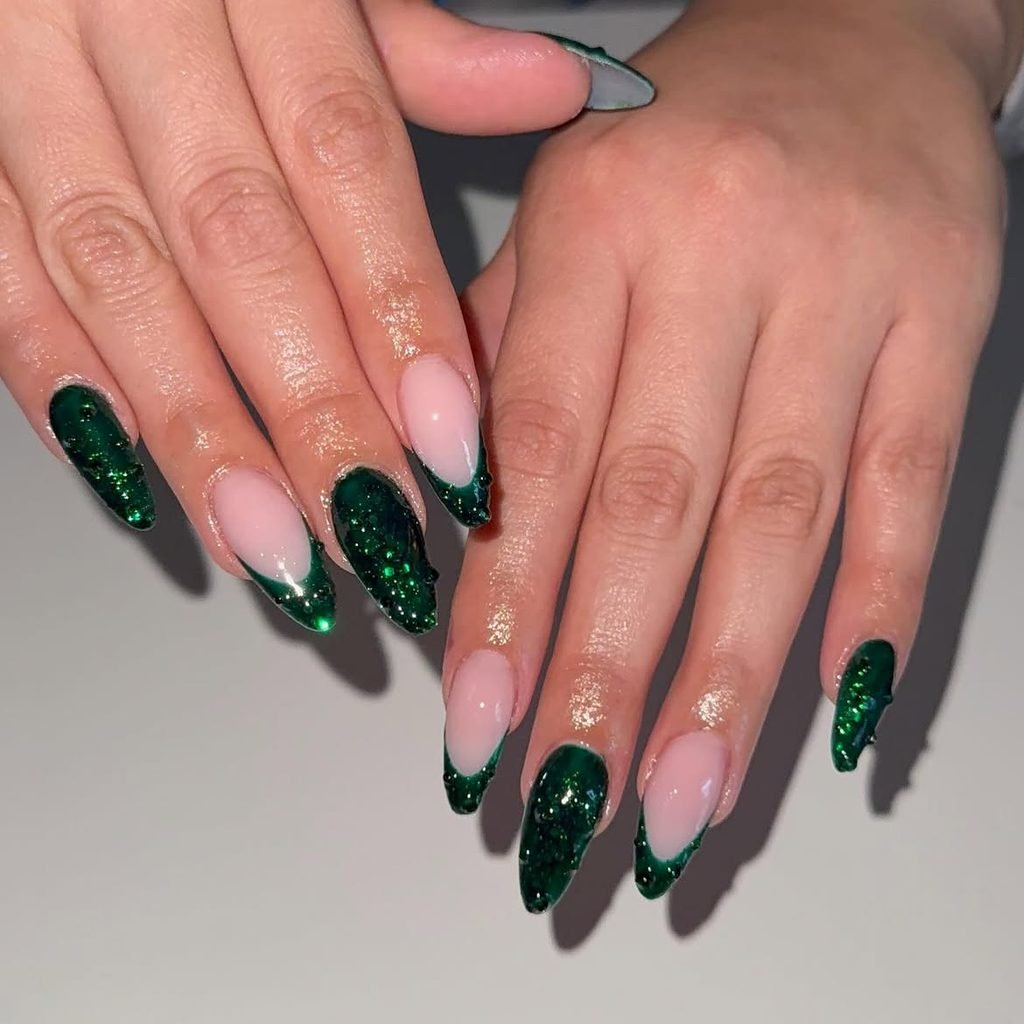
How to Apply
- Apply a sheer taupe base and paint narrow emerald-green tips on long square nails.
- Place compatible gem gel vertically on both middle-finger nails.
- Set one emerald-cut crystal on each accent and position four tiny gold beads like corner prongs.
- Draw fine gold lines on the remaining nails, cure as directed, and reinforce the gem bases.
8. Sapphire Teardrop Chain Nails
Long almond nails have a deep navy magnetic base with a soft diagonal beam of sapphire light. One blue teardrop crystal is placed near the cuticle of three nails, and fine silver caviar beads curve from each stone along one sidewall like a delicate chain. Two nails remain free of raised pieces so the moving magnetic finish stays visible.
The tapered nail shape and pear-shaped stones point in the same direction, creating length without requiring a dense cluster. The navy makes the blue gems look saturated, while the silver beads provide separation between crystal and polish. This is an evening or formal-event design that pairs naturally with silver jewelry, satin, navy tailoring, and cool neutrals. Because tiny beads can roll into the cuticle or sidewall, the complete chain should be mapped before curing and kept away from surrounding skin.
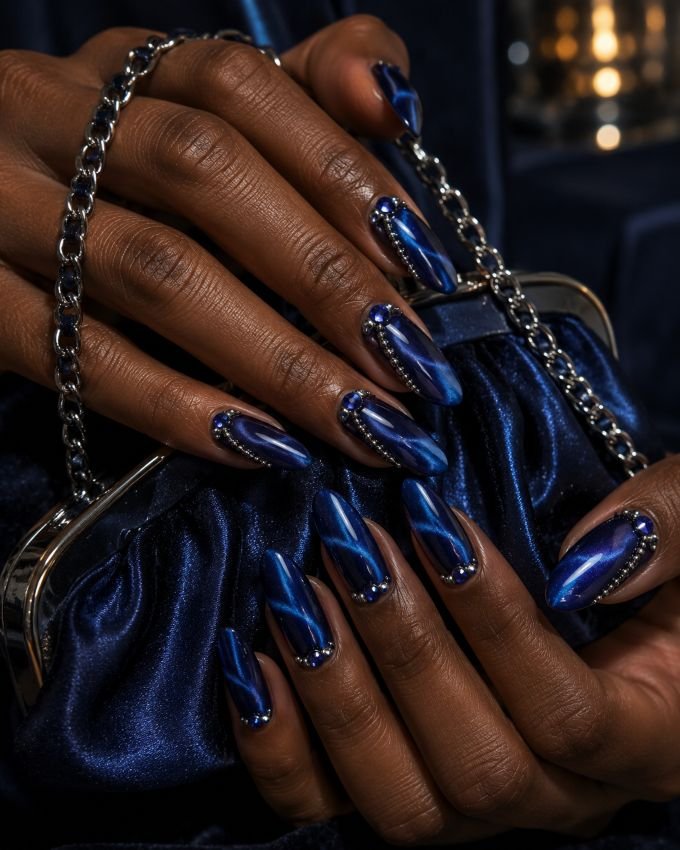
How to Apply
- Apply deep navy magnetic gel to long almond nails and pull the pigment into a diagonal beam.
- Add compatible gem gel near three selected cuticles without touching the skin.
- Place one sapphire-blue teardrop crystal on each accent and curve silver caviar beads along a sidewall.
- Cure according to the product system and reinforce around the crystal and bead bases.
9. Marquise Crystal Flower Nails
Medium almond nails begin with translucent lavender-pink and carry two flowers made from pale iridescent marquise crystals. Five pointed stones form each set of petals around a tiny gold center, while several nails show only a partial flower entering from one sidewall. Fine painted stems in muted sage connect selected blooms without crossing every nail.
Building flowers from gem shapes makes the embellishment structural rather than simply adding a crystal to a painted center. The elongated petals echo the almond silhouette, and partial blooms reduce both visual weight and physical bulk. Readers considering more botanical options can compare the arrangement with these tropical flower nails. This is salon-level work because each petal must sit at the same angle and remain supported around its base. Custom press-ons offer a practical alternative for occasional wear.
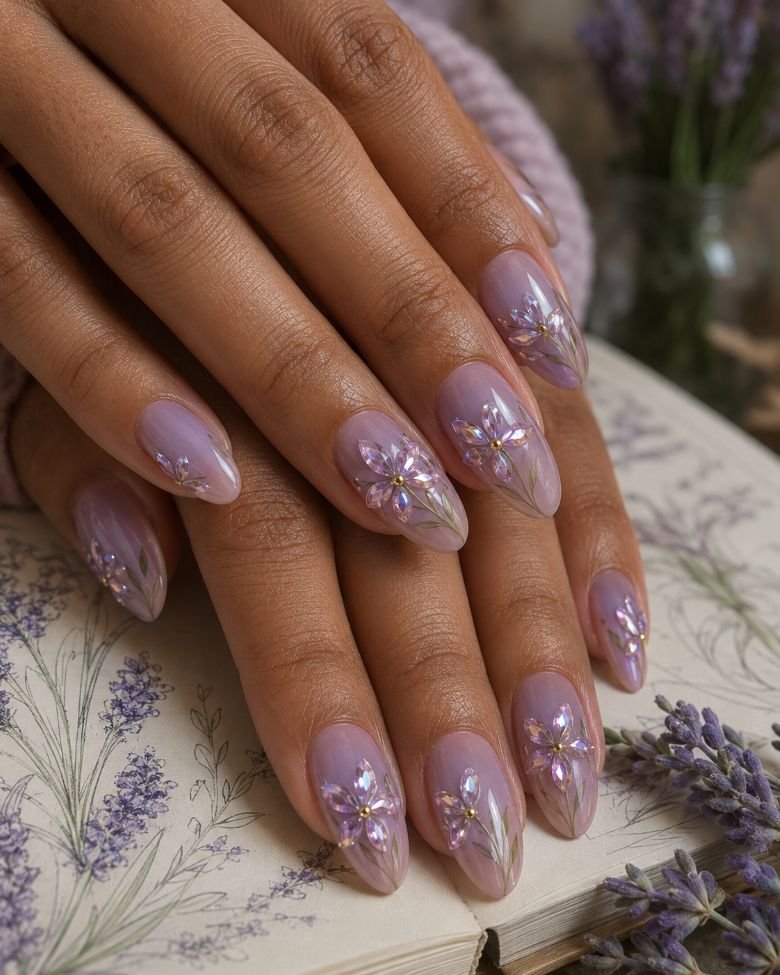
How to Apply
- Apply a translucent lavender-pink base to medium almond nails.
- Paint a few extremely fine sage stems on the selected accent nails.
- Arrange five marquise crystals around each tiny gold center, using partial flowers at the sidewalls.
- Cure or set the dedicated adhesive and reinforce all gaps between the crystal petals.
10. Vintage Gold-Bezel Cabochon Nails
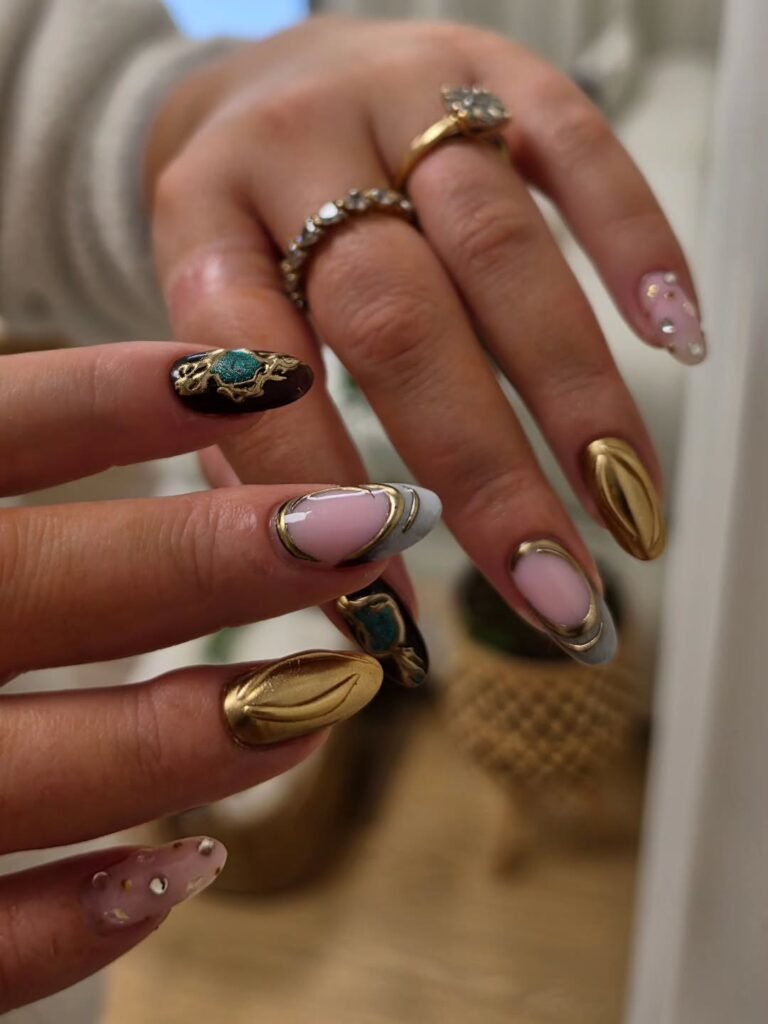
Long oval nails are washed with translucent smoky rose and decorated with amber, garnet, and moss-green cabochons set inside small antique-gold frames. The smooth domed stones vary between oval and round shapes, while tiny gold beads fill selected spaces around two statement clusters. Other nails carry only one framed stone near the cuticle.
Unlike faceted crystals, cabochons reflect broad highlights and introduce color through their curved surfaces. The old-jewelry palette makes the manicure work with velvet, brocade, leather, and warm metallic accessories without relying on glitter. Keep the clusters asymmetrical so they feel collected rather than factory-matched. Domed decorations sit higher than flat-back rhinestones and require substantial support, making professionally constructed press-ons or a salon appointment the sensible choices. Anyone who works constantly with their hands should reduce the design to one framed accent on each hand.
How to Apply
- Apply a translucent smoky-rose base to prepared long oval nails.
- Place structured gem adhesive inside the planned antique-gold frames.
- Set amber, garnet, and moss-green cabochons, then add tiny gold beads around two clusters.
- Cure or set completely and reinforce the frame edges and spaces around every domed stone.
11. Full-Crystal Accent Nails
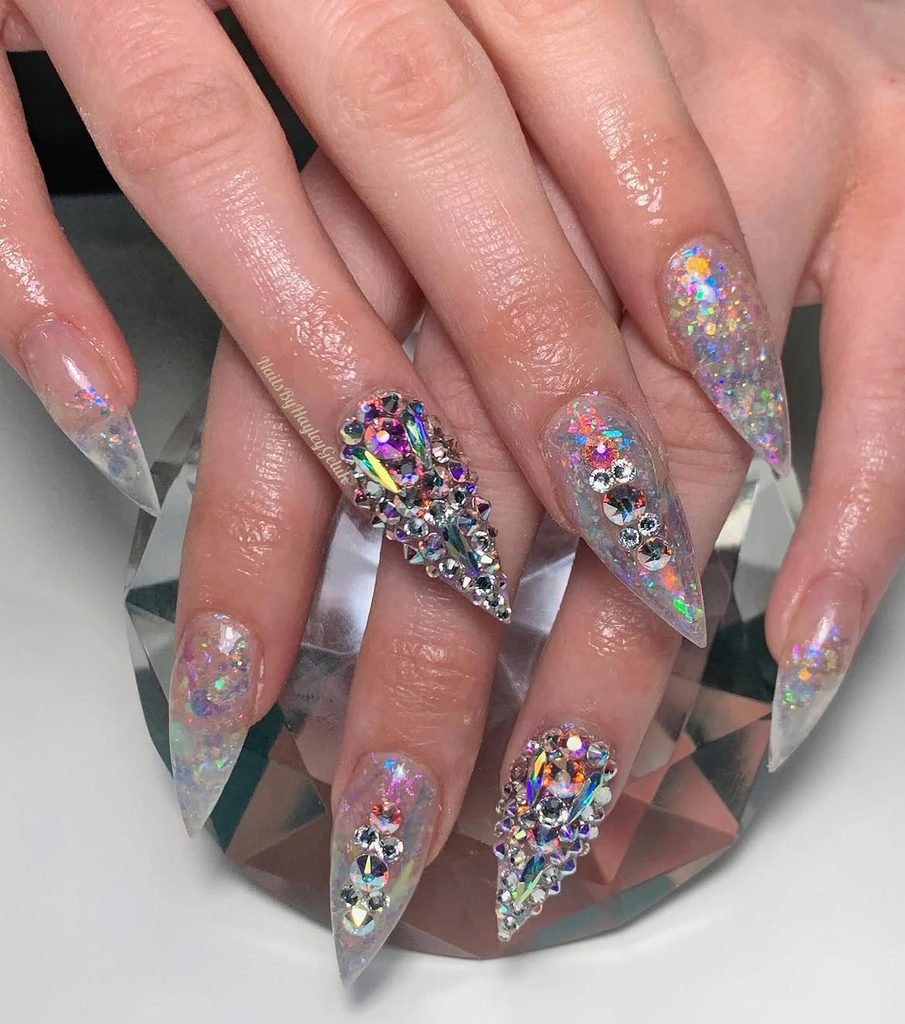
long nails use a clean milky-beige base with one accent nail paved in mixed sizes of clear and Crystal AB stones. The largest pieces sit through the center, while smaller crystals fill the side areas and free edges. Each remaining nail carries a single tiny crystal near a lower corner, creating a visual connection without repeating the full coverage.
Restricting the dense arrangement to one nail gives the manicure strong reflection while keeping the short set usable. Crystal AB adds soft flashes of pink, blue, and gold, but the neutral base stops those colors from turning into a rainbow theme. Full coverage requires careful spacing and enough adhesive between the stones to secure their edges. It is not an ideal first DIY attempt; predesigned press-ons or professional application will produce a flatter profile and more deliberate transition between particle sizes.
How to Apply
- Paint long nails with two thin coats of milky-beige polish.
- Cover one accent nail with compatible gem gel, avoiding the surrounding skin.
- Place larger clear and Crystal AB stones through the center, then fill gaps with smaller pieces.
- Add one tiny corner crystal to each remaining nail and reinforce every exposed base.
12. Floating-Gem Clear-Tip coffin Nails
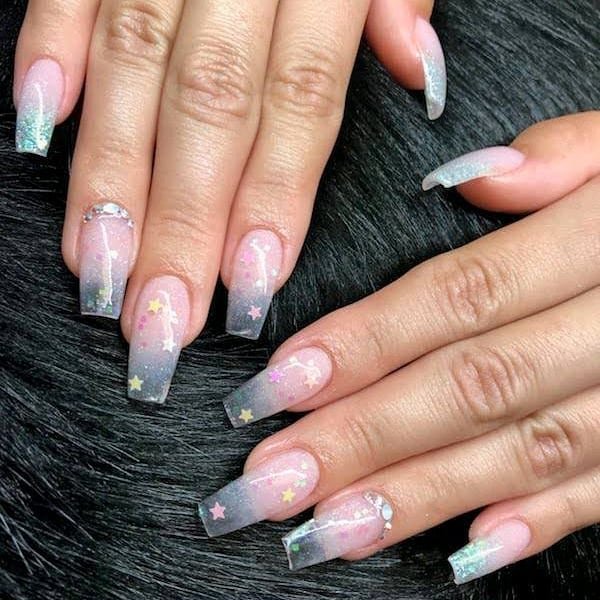
Long coffin nails transition from sheer nude nail beds into completely transparent tips decorated with widely spaced crystals in aqua, lilac, pale pink, and clear. Tiny silver frames and dots sit between selected stones, but the clear structure remains dominant. The gems are secured to the outer surface in staggered positions, creating the illusion that they float inside the extensions.
Transparent coffin nail designs provide enough width and length for different stones to remain separate. Overfilling the tips would remove the floating effect and create unnecessary weight, so no more than a few low-profile crystals should appear on each nail. This is a salon or custom press-on design: the extension architecture must be completed first, and the embellishments attached afterward with dedicated gem gel. Do not trap bulky, metal-backed stones blindly inside uncured builder products.
How to Apply
- Build or fit long clear coffin extensions over softly blended sheer nude nail beds.
- Complete and refine the transparent structure before planning the gem layout.
- Attach spaced aqua, lilac, pale-pink, and clear crystals with compatible gem gel.
- Add sparse silver frames and dots, then reinforce around every base without clouding the clear tips.
13. Amethyst Geode Nails
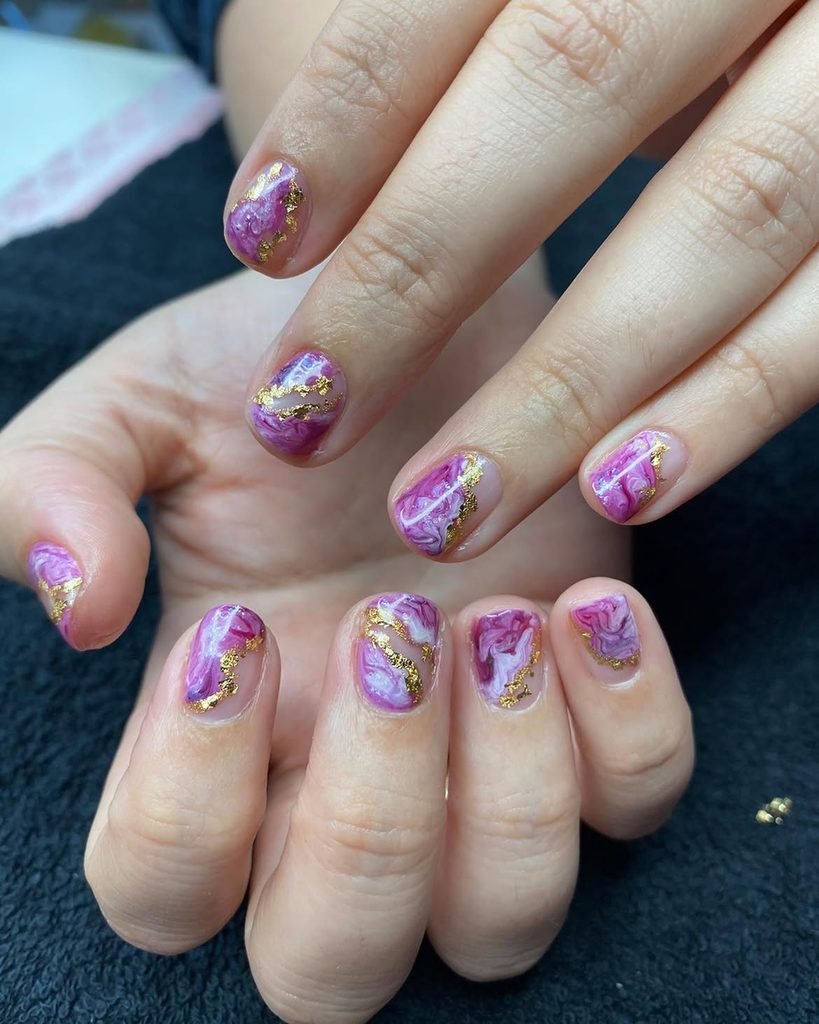
Long almond nails resemble sliced amethyst through layers of translucent lavender, smoky lilac, and concentrated violet. Irregular crystal openings run along alternating sidewalls, filled with fine nail-safe purple fragments and bordered by hairline antique gold. The remaining areas stay glassy and marbled, allowing the geode texture to appear embedded within the stone-inspired surface.
This interpretation combines painted geode nail art with controlled physical texture instead of covering the set in conventional rhinestones. The moody violet palette connects naturally with witch-inspired nails while remaining wearable beyond a themed event. Blooming gel can soften the mineral layers, but the crushed center and structural surface require confident product control. Keep the fragments low and completely secured; sharp, untreated crystal chips are not appropriate nail decorations.
How to Apply
- Layer translucent lavender, smoky lilac, and violet gel across long almond nails in irregular mineral bands.
- Create uneven sidewall openings and outline selected edges with hairline antique gold.
- Press fine nail-safe purple crystal fragments into compatible clear gel within the openings.
- Cure as directed, encapsulate exposed edges, and finish the marbled areas with glossy top coat.
14. Rose Quartz Crystal Nails
Short oval nails are built from translucent blush-pink layers crossed by soft white and pale-grey veins. The lines disappear beneath additional pink glaze in several places, creating the depth of polished rose quartz instead of a flat marble pattern. Two nails carry one tiny clear crystal near an outer cuticle, while the remaining surfaces stay smooth and free of embellishment.
This is a practical gemstone manicure for readers who prefer painted effects over raised jewelry. The pink remains neutral enough for work, weddings, or everyday outfits, and the oval shape supports the stone’s soft irregular veining. It also fits naturally beside the rose-quartz inspiration in these classy nail designs. Use thin transparent layers and vary every vein; dark, identical lines will resemble printed marble rather than cloudy quartz.
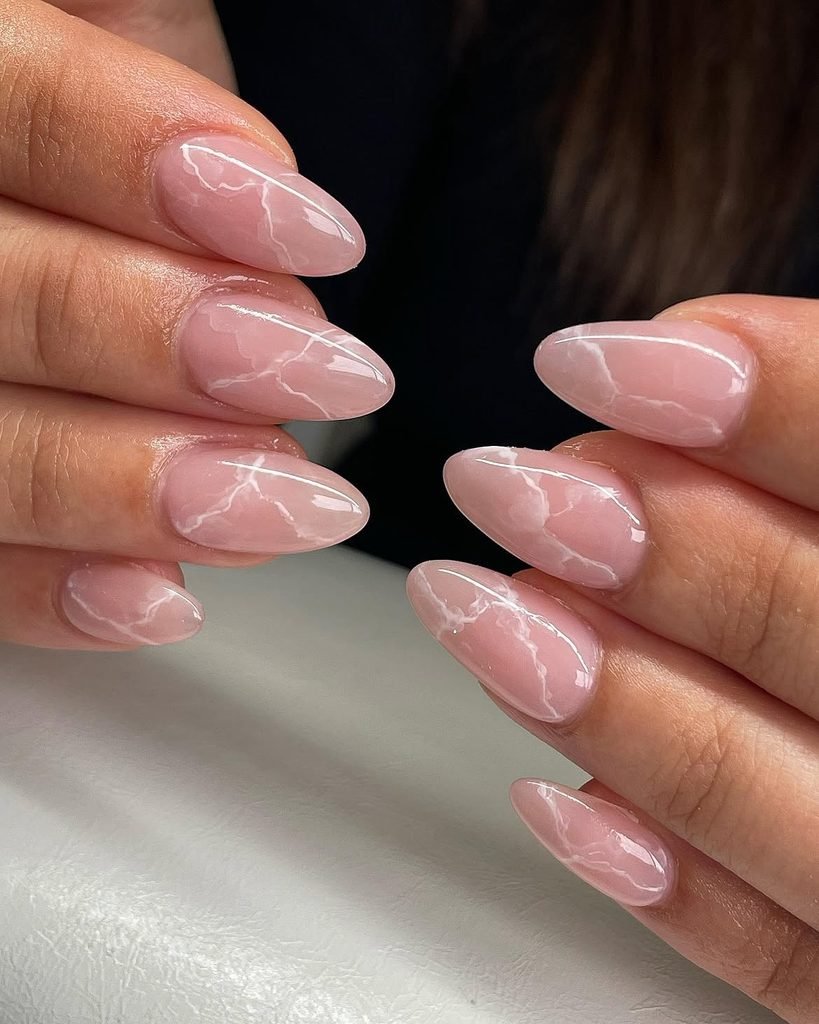
How to Apply
- Apply a sheer blush-pink base to short oval nails.
- Draw irregular, feathered veins in translucent white and pale grey.
- Soften portions beneath another pink glaze and add one tiny clear cuticle crystal to two nails.
- Secure the stones and finish the quartz surface with a deep glossy top coat.
15. Opal Aurora Gem Nails
Medium oval nails begin with a milky neutral base containing translucent flakes that shift between aqua, pink, violet, and pale gold. Two accent nails include a smooth raised clear-gel cabochon over the iridescent layers, magnifying the colors beneath like polished opal. Fine gold outlines frame only part of each domed accent, leaving the composition light and irregular.
The manicure captures opal through changing color rather than simply applying white pearl chrome. Readers who prefer a more uniform luminous surface can explore these pearl nail ideas, but the opal effect depends on distinct flashes suspended at different depths. Domed gel accents must be built and cured in controlled layers with a compatible transparent product. If that technique is unfamiliar, request salon art or choose flat opal-effect decals instead of creating oversized uncured gel droplets.
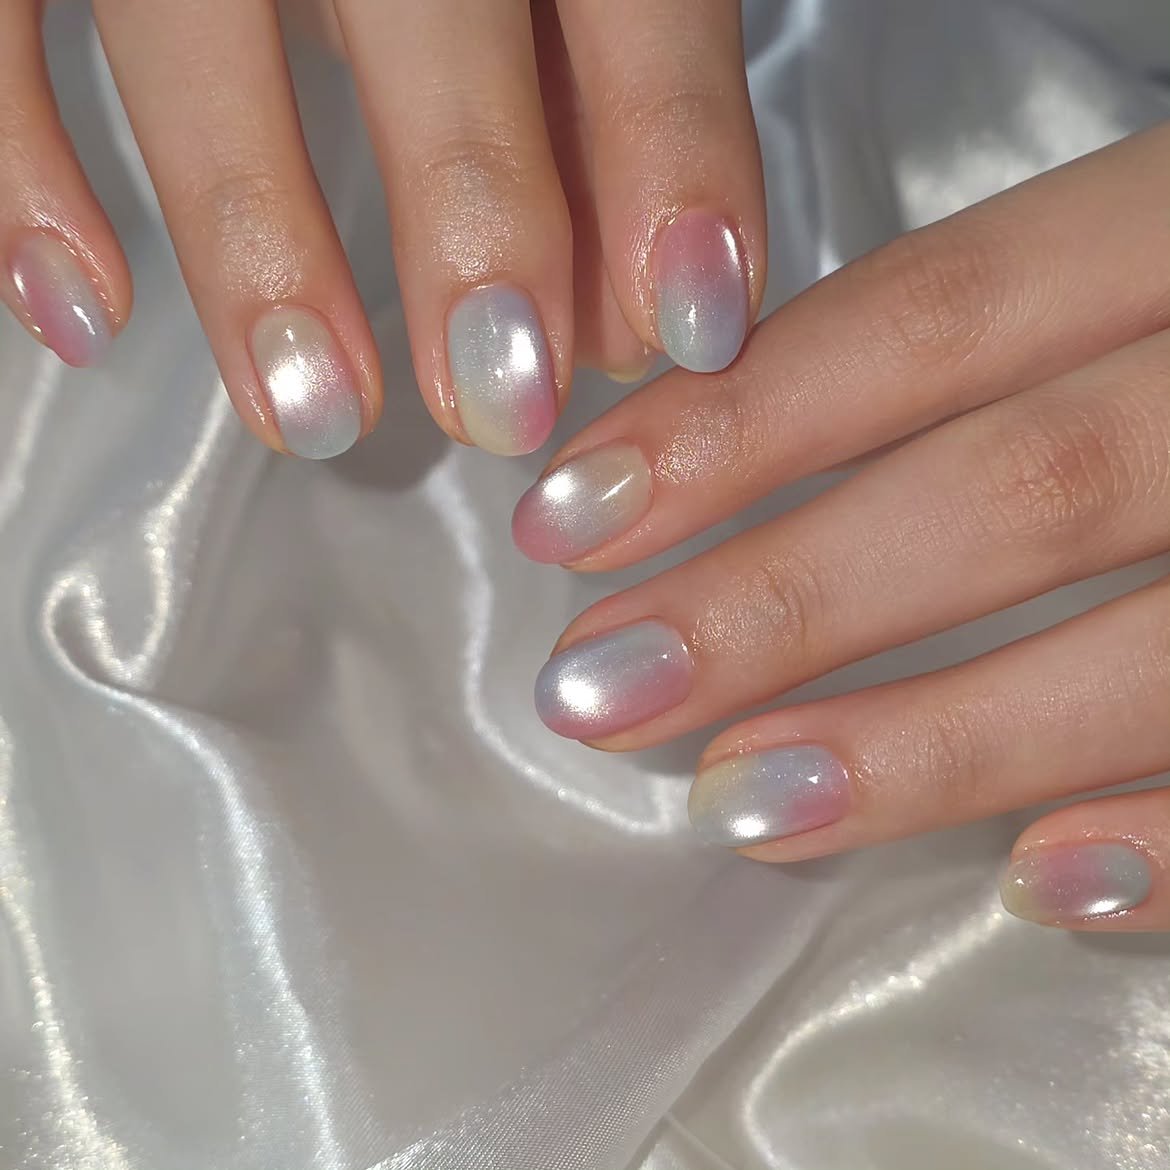
How to Apply
- Apply a milky neutral base to medium oval nails.
- Layer translucent aqua, pink, violet, and pale-gold flakes at varied depths.
- Build one controlled clear-gel cabochon on two accent nails and cure each layer as directed.
- Trace part of each dome with fine gold and seal the surrounding surface with glossy top coat.
16. Jade Marble Gem Nails
Medium square nails layer translucent celadon, milky sage, and deeper forest-green clouds to resemble polished jade. Fine cream veins run through several nails, while two accents contain a narrow broken line of warm gold following a natural-looking fissure. No attached stones appear; the glossy depth and varied green translucency create the gemstone impression.
This design broadens gemstone nails beyond surface embellishment and makes the theme practical for anyone who dislikes raised decoration. Square nails give the organic pattern a useful structural contrast, while the green palette works with cream, camel, brown, black, and gold accessories. The layered mineral effect also complements the dimensional finishes seen in Japanese nail designs. Avoid sharp, repeated marble lines: jade should appear cloudy and internally varied rather than white with obvious green striping.
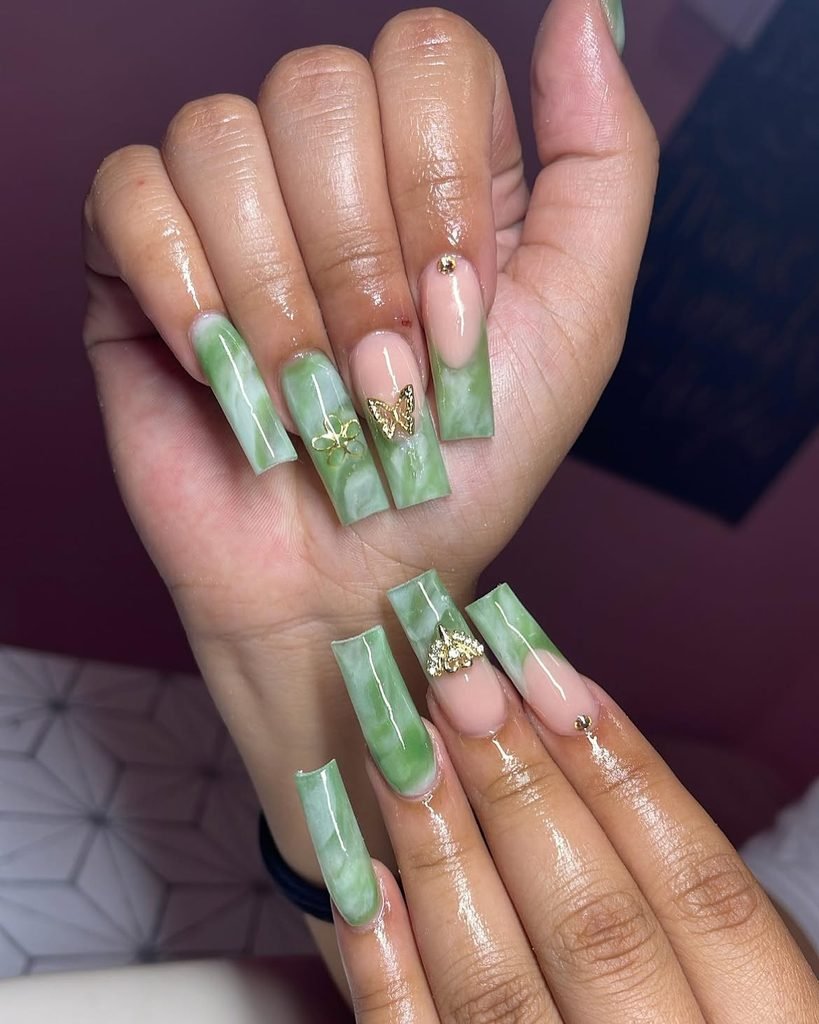
How to Apply
- Cover medium square nails with a translucent celadon base.
- Diffuse milky sage and forest-green patches through selected wet or uncured areas.
- Add irregular cream veins and trace two partial fissures with hairline warm gold.
- Soften selected details beneath another green glaze and finish with deep glossy top coat.
17. Tiger’s-Eye Cat-Eye Nails
Small almond nails have a black-brown color and feature a diagonal golden strip that has a magnetic property. This strip resembles a tiger’s eye, as it changes color from bronze to honey depending on the position of the hand. There is only one accent nail in which there is a little amber stone close to the cuticle surrounded by two tiny gold beads.
It is easier to get such an effect with the help of magnetic pigment instead of drawing a stripe. The compact almond nails make this design easier and more functional. This color combination goes well with jeans, leather, camel, and cream colors as well as with gold jewelry. More examples of magnetic nail designs can be found below. Paint only one nail at a time, as the reflective strip may spread during the curing process.
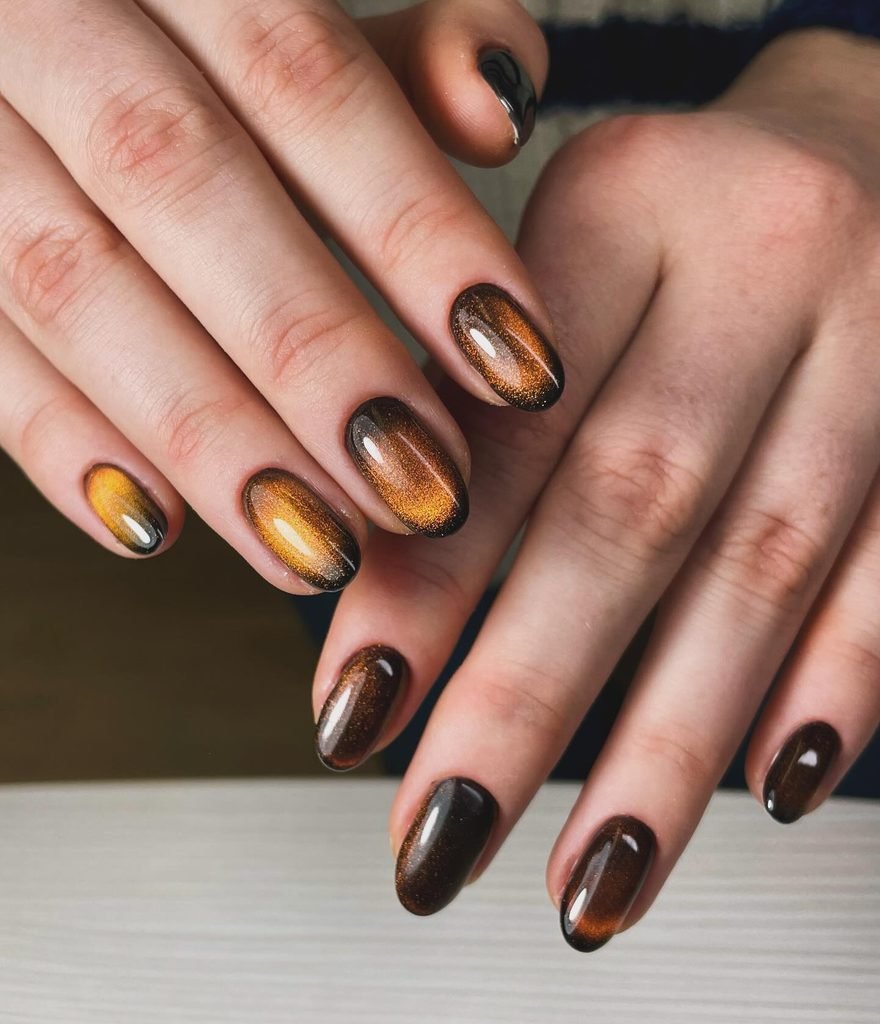
How to Apply
- Apply a black-brown base to short almond nails and cure as directed.
- Add golden-brown magnetic gel and pull the pigment into a narrow diagonal curve.
- Set and cure each highlight separately before moving to the next nail.
- Attach one small amber cabochon with two gold beads on an accent and reinforce their bases.
18. Birthstone Constellation Nails
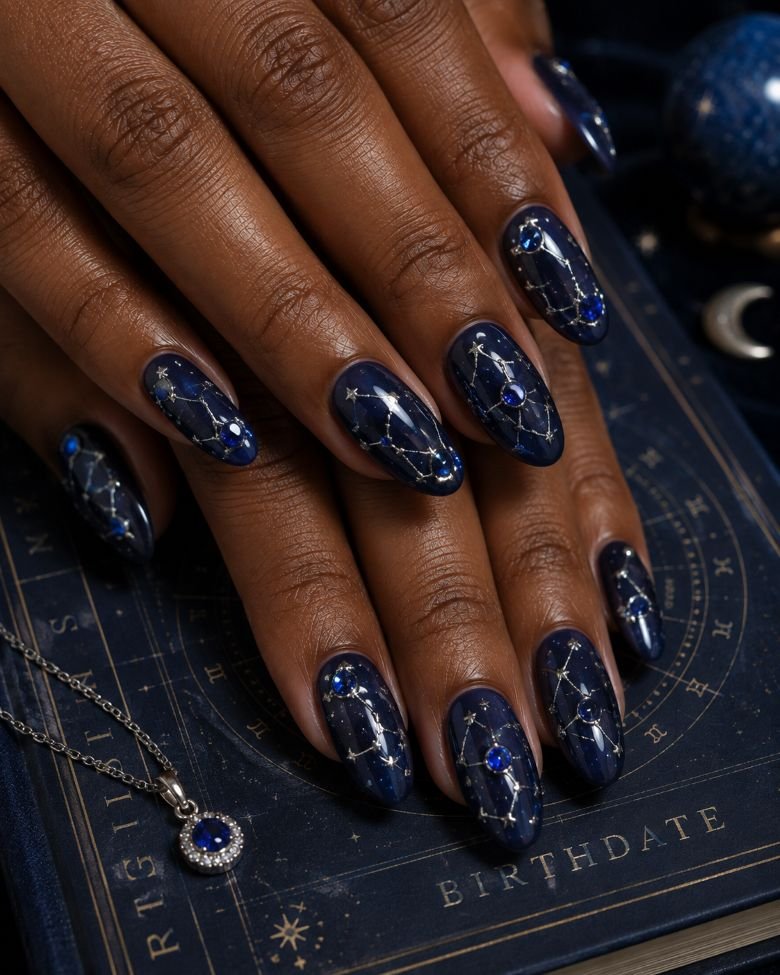
Medium almond nails feature a translucent midnight-blue base crossed by fine silver constellation lines. Small cobalt gems serve as the principal “birthstones,” while tiny clear crystals form surrounding stars and one silver dot marks each connecting point. The layout changes across the hand, but every composition remains sparse enough for the blue base to show between the stones.
This version uses sapphire tones, yet the central color can be changed to garnet, amethyst, emerald, ruby, peridot, opal, or another birth-month reference. The personalization makes these birthstone nails useful for birthdays, gifts, or meaningful event manicures without adding names or dates. Keep the silver lines extremely fine so the gems remain primary. If the chosen birthstone color is pale, select a contrasting base rather than placing nearly invisible crystals over a similar shade.
How to Apply
- Apply a translucent midnight-blue base to medium almond nails.
- Draw different sparse constellation paths with a fine silver liner.
- Attach small cobalt principal gems and tiny clear satellite crystals at selected points.
- Add restrained silver dots, secure every gem base, and gloss the exposed polish.
Gem Nails vs. Rhinestone Nails: What Is the Difference?
Gem nails constitute the larger category. These may consist of rhinestones, crystals, polished cabochon cut gems, pearls, stone settings, charms, smashed minerals or painted looks that simulate gemstones. Rhinestones refer to decorative stones that are always faceted and usually made of either glass, crystal, or resin. They have flat or pointed backs. The present usage in editorials is also quite extensive; the InStyle magazine features crystals, pearls, charms, gemstones, and rhinestones all in one visual category.
Material names still matter. A clear faceted nail crystal should not be described as a real diamond unless its composition is known, and an opal-effect flake is not automatically natural opal. Use “ruby-colored,” “sapphire-like,” or “onyx-inspired” when the decoration merely copies the color or appearance. That wording remains accurate while giving readers the visual information they need. The practical difference is also significant: smooth painted gemstone effects require only the top coat, while attached jewelry needs dedicated adhesion and careful removal.
How to Choose Gem Size, Shape, and Placement?
Start with the usable nail surface, not the stone you like most. Tiny round or oval flat-back crystals suit short natural nails, French borders, cuticle details, and sidewall accents. Marquise and teardrop stones follow the taper of almond nails, while rectangular emerald-cut gems echo square and coffin silhouettes. Domed cabochons and pointed-back crystals create more height and need a stronger setting with support around their bases.
Placement should account for daily movement. Cuticle clusters photograph beautifully but must not touch living skin, and decorations near the free edge receive more impact during normal use. Keep larger pieces closer to the center or lower third of the nail and leave space between them so the design remains readable. Before attachment, arrange the complete composition on a palette or unpainted press-on. This exposes scale problems immediately and prevents the common mistake of filling awkward gaps with extra stones until a balanced design becomes unnecessarily bulky.
Can Gem Nail Designs Work on Short Nails?
Short nails can wear gems convincingly, but the artwork must be reduced rather than compressed. A single cuticle crystal, two-stone side cluster, narrow gem-lined French tip, or one fully decorated accent nail preserves visible base color. Round and oval shapes suit scattered placement, while short square nails provide a straight guide for orderly crystal borders. Low-profile pieces are generally more comfortable than tall cabochons when the free edge is compact.
The base color also controls visual weight. Sheer pink, beige, and milky finishes from this edit of nude nail shades create space around clear or colored gems. Dark polish can support one strong stone but may make a dense short manicure appear even smaller. Avoid placing a large decoration across most of the nail width; it can overwhelm the shape and leave too little room for secure product around the base. When necessary, move the statement piece to a custom press-on accent.
How to Secure and Remove Nail Gems Safely
Complete the color and finish before attaching most surface gems. Apply a dedicated adhesive or compatible gem gel only where the stones will sit, place them with a wax pencil or fine tweezers, and cure or set the product according to its instructions. The official Aprés Diamond Gel guidance similarly directs users to apply gel where the crystals will sit, place the embellishments, and cure them. Reinforce around the bases and gaps without covering reflective facets in a thick top coat.
Never pry, bite, or peel secured gems from the nail. Decorations attached over regular lacquer may release after the appropriate remover has softened the polish and adhesive, but resistance means they need more time rather than more force. Structured gel clusters, extensions, and unfamiliar systems should be removed by a nail professional. Large stones can require surrounding product to be reduced carefully before the remaining manicure is soaked or filed according to its specific system.
Final Thoughts
The strongest gem nail designs have a clear hierarchy. One emerald-cut crystal can lead a structured square set, marquise petals can build a flower, and a handful of colorful stones can energize a sheer short manicure. Problems begin when every nail receives a different large embellishment without shared color, scale, or placement. More stones do not automatically create a more luxurious result.
Choose the design according to both the visual effect and the way your hands are used. Low flat-back crystals and painted quartz, jade, or tiger’s-eye effects are easier to adapt for daily wear. Cabochons, pointed stones, full-crystal accents, and elaborate chains need more height, stronger attachment, and greater tolerance for maintenance. Bring a reference showing the complete hand to your nail technician, not only a close crop of one decorated nail. The balance across all five fingers determines whether the manicure looks like considered jewelry or an assortment of unrelated pieces.