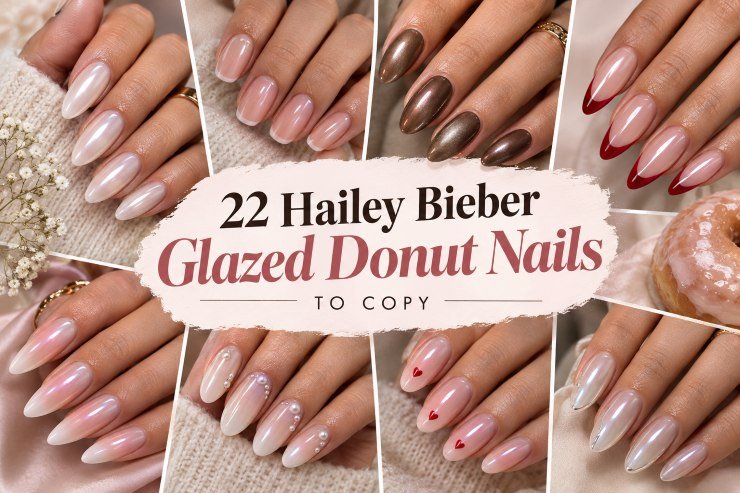
22 Hailey Bieber Glazed Donut Nails to Copy
The glazed manicure becomes apparent with the movement of the hand. With the palm facing forward, the nails appear soft and milky; when tipped at an angle towards the window, a pearly strip of light passes through. It is this harmony that makes Hailey Bieber glazed donut nails popular. This unique look was invented by nail artist Zola Ganzorigt and applied to Bieber’s milky chrome manicure at the 2022 Met Gala, as she shared in her interview with Vogue.
The collection features not only her classic, chocolate, and candy-cane manicures but their artistic derivatives with different shapes, tips, gradients, and accents. You can choose between short natural nails, tapering lengths, wedding manicures, and some other more decorative variations. First, select the desired base color and the degree of coverage because they will have as much effect on the outcome as the glaze. For the gel techniques described below, follow your product system for the process, layers, and light exposure, ensuring no uncured gel is left on the skin.
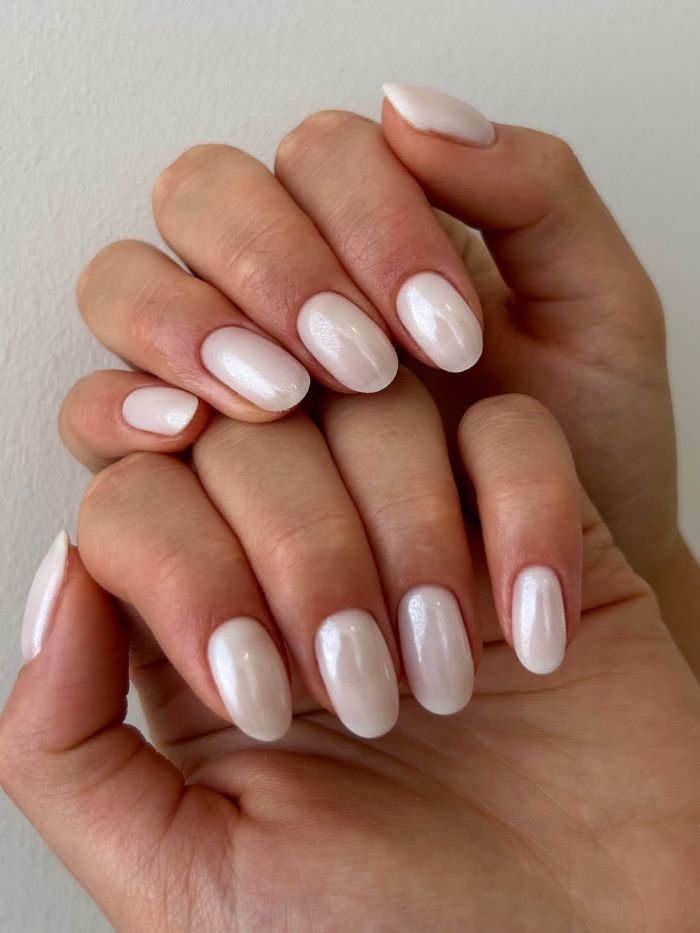
1. Classic Milky Glazed Donut Nails
A translucent off-white base lets the natural pink of the nail show through, while fine pearl chrome creates a smooth, silvery-white reflection. The medium oval shape narrows gently toward the tips without ending in a sharp point. There is no accent nail or added artwork: the interest comes from the changing highlight, which travels along the curve as the hand turns.
For the closest reference to the original, start with OPI GelColor Funny Bunny and the powder originally called Tin Man Can, now Tin Man Can Glaze. OPI confirms that pairing. Keep the base softly translucent when showing this look to your technician; several opaque white coats will produce a brighter, heavier result. A sheer finish preserves the delicate contrast between the nail’s pink center and paler free edge.
How to Apply
- Prepare medium oval nails and apply the gel system’s base coat, curing as directed.
- Apply a thin coat of milky off-white gel and cure, retaining some translucency.
- Prepare the chrome-receiving layer according to its instructions, then burnish fine pearl powder evenly over it.
- Brush away loose pigment and seal the surface and free edges with a compatible gel top coat; complete the required cure.
2. Barely-There Glaze on Short Round Nails
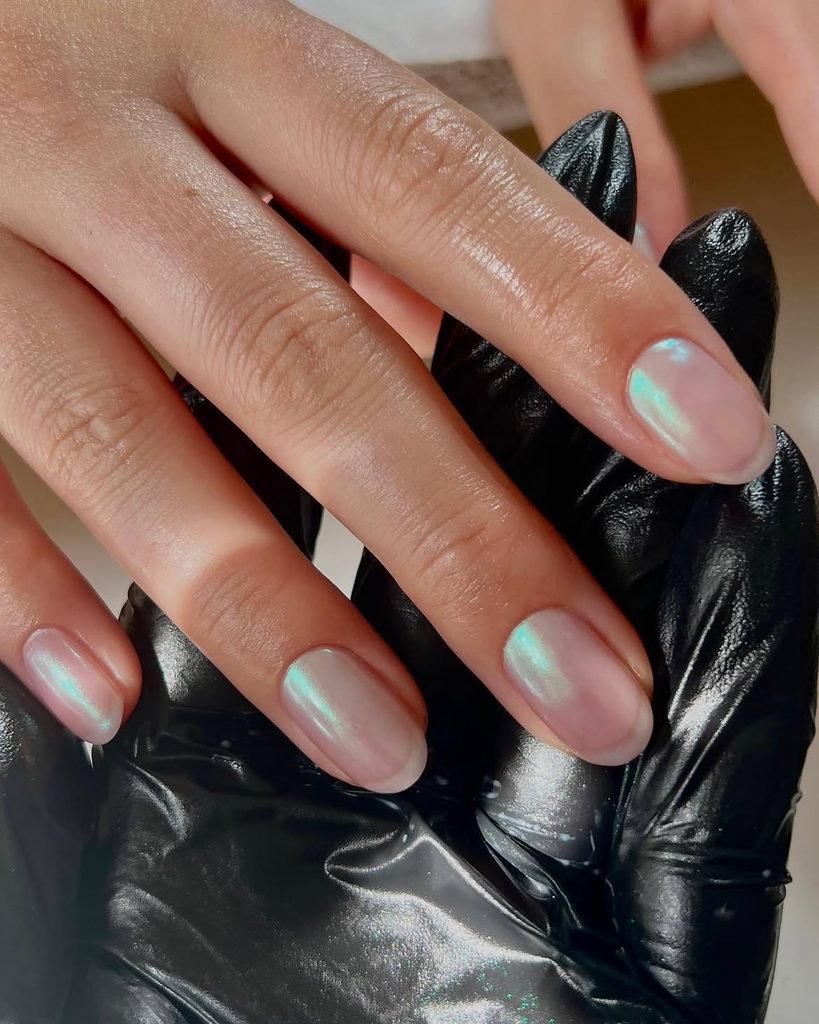
The natural free edge remains visible beneath a transparent beige-pink wash on short round nails. A trace of pearl catches the light along the center, becoming more apparent when you reach for a glass or turn a page. Rounded corners keep the outline gentle and compact.
Choose these short glazed donut nails when you want an everyday set that still feels considered. A translucent base also gives you room to adjust the warmth: rosy beige, peach, and soft brown can each work beneath the same pearl topper. This belongs alongside other quiet luxury nail ideas, with the finish doing most of the decorative work. A lacquer version is especially approachable because there is no linework to balance between hands.
How to Apply
- Shape natural nails into short rounds and apply a regular-polish base coat.
- Brush on one sheer layer of beige-pink lacquer and allow it to dry.
- Add a thin pearl-effect lacquer topper, preserving the visible natural free edge.
- Finish with a compatible glossy top coat and let the manicure dry fully.
3. Strawberry Glaze on Soft-Coffin Nails
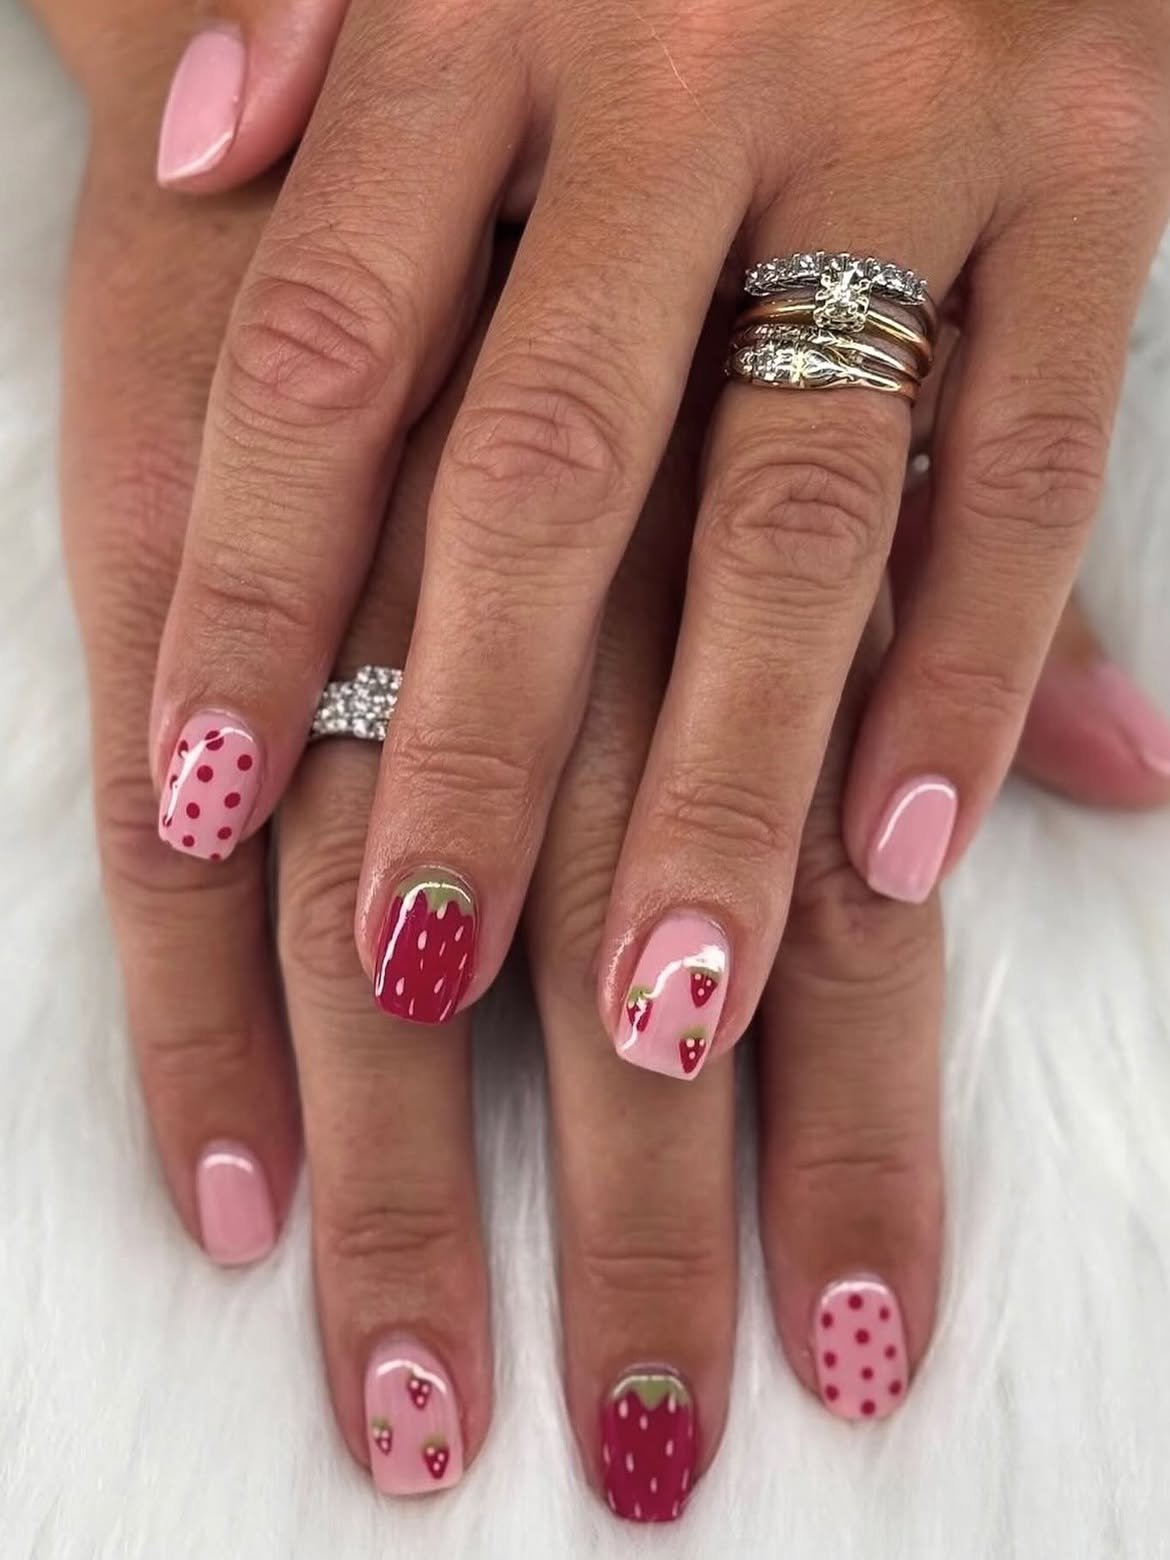
Milk pink gives this glaze a creamy center and a pink-white pearl reflection, with enough translucency to avoid an opaque pastel finish. Short soft-square nails introduce straight free edges and gently rounded corners. Those repeated horizontal lines make the delicate color feel tidy and graphic.
The balance depends on the pink underneath. A cool, heavily whitened shade will read quite differently from a translucent rose, even beneath the same topper. For pink glazed donut nails that still show some natural depth, build color in thin layers and check the coverage before adding more. This shape also makes a useful starting point if you are comparing short square nail ideas and prefer full color coverage to a French tip.
How to Apply
- File short soft-square nails and apply a lacquer base coat.
- Paint thin coats of milky rose-pink polish, allowing each to dry and stopping before the color becomes chalky.
- Apply a fine pink-white pearlescent lacquer topper in an even layer.
- Seal with glossy top coat, keeping the squared free edges neatly defined.
4. Chocolate Glazed Oval Nails
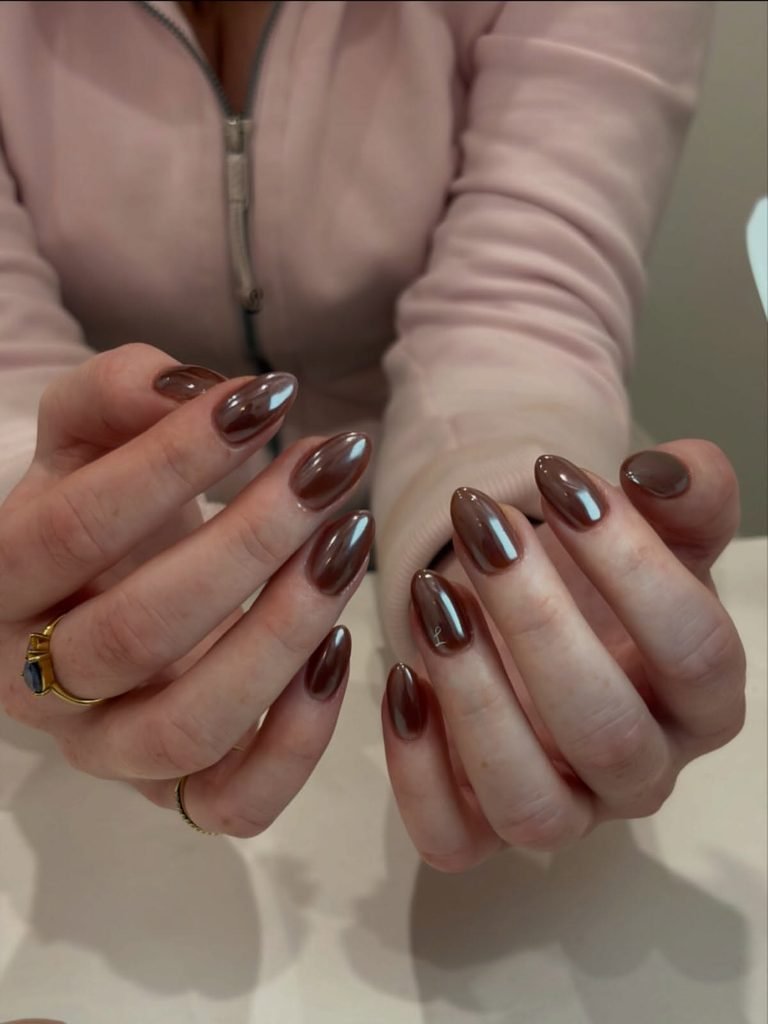
Cocoa brown becomes surprisingly luminous beneath a fine pearl veil. On medium oval nails, the color stays rich at the sidewalls while the center catches a cooler, silvery reflection. The surface is smooth, with no visible glitter grains, metallic streaks, or contrasting accent fingers. A rounded tip gives the uninterrupted brown enough space to show its depth without making the set feel severe.
Hailey’s chocolate glazed donut nails were documented in September 2022, giving the original pale finish a darker counterpart. Byrdie’s report covers that variation. For your own version, test the brown beneath the glaze before committing: a silvery powder can make a warm cocoa appear cooler. Keep the pigment fine enough that the brown remains recognizable. The result sits comfortably beside camel wool, cream cotton, denim, and burgundy leather.
How to Apply
- Prepare medium oval nails with the chosen gel base coat and cure.
- Apply thin cocoa-brown gel layers, curing each according to the system’s directions.
- Add the compatible chrome-receiving layer and burn a small amount of fine pearl powder over the brown.
- Remove excess powder and seal with a glossy gel top coat, completing the specified cure.
5. Candy Cane Glazed French Nails
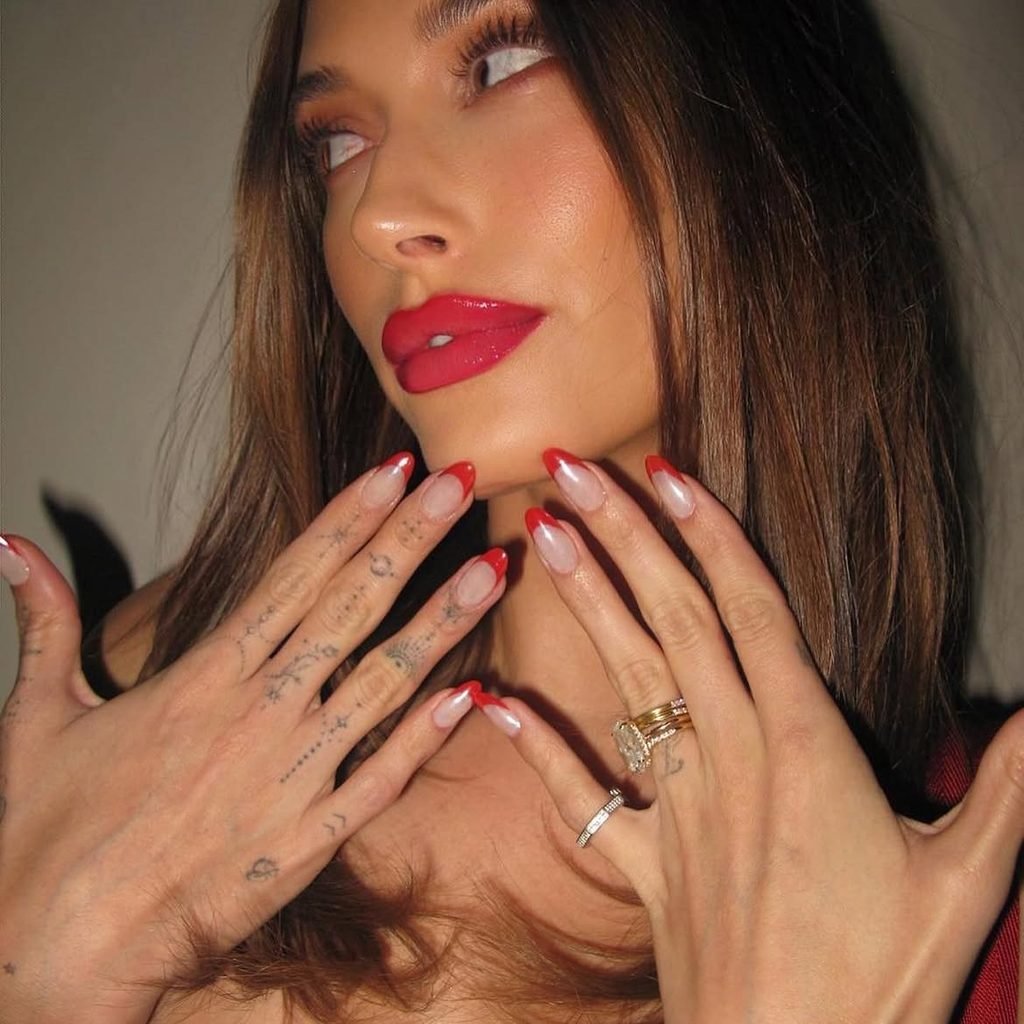
A candy-red smile line cuts across each medium almond tip, sitting above a sheer milky base. Fine pearl glaze passes over both colors, softening the red’s reflection while leaving its outline clear. The tips are substantial enough to be noticed across a table, but the pale nail beds keep the set airy. Every nail repeats the same simple arrangement, with no stripes or extra holiday illustrations.
This references Hailey’s documented candy cane glazed nails, which paired red French tips with the signature pearly finish. Glamour’s coverage identifies the original variation. Although the name suggests December, the red-and-milky combination also works for dinners and romantic occasions. Match the depth of the tips to your available length: extending the red too far down a shorter nail will leave very little of the delicate base visible.
How to Apply
- Prepare medium almond nails and apply a sheer milky gel base color, curing each required layer.
- Paint balanced red French tips with a fine liner brush, then cure the artwork.
- Prepare a compatible chrome layer and apply a fine pearl glaze over the complete manicure.
- Dust away excess pigment, seal the tips and surface with gel top coat, and cure as directed.
6. Vanilla Glazed French Tips
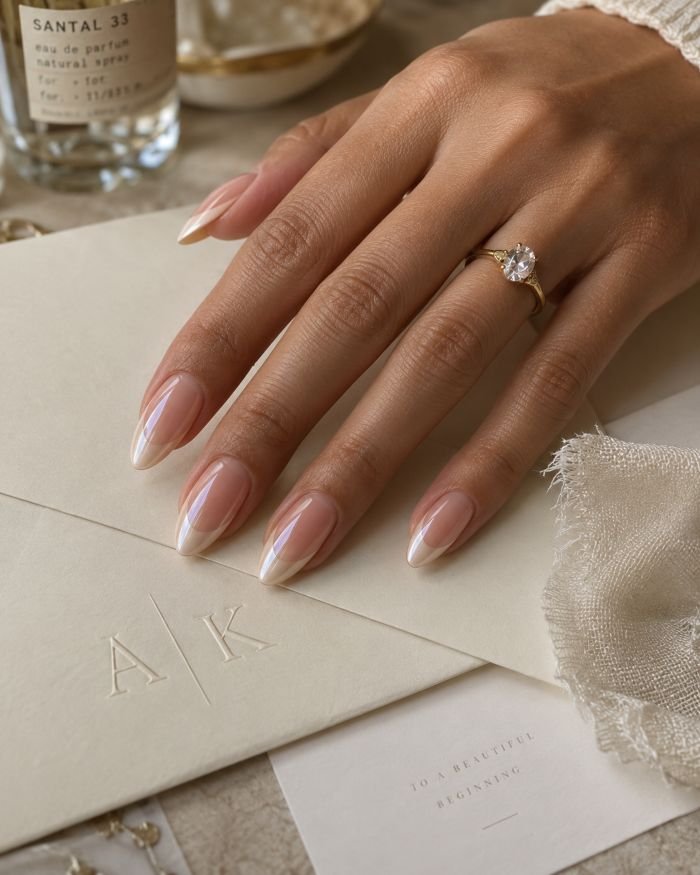
Soft ivory tips meet a translucent peach-nude base in a clearly defined French curve. The medium almond shape gives that curve a gentle upward sweep at each side, while a fine pearl glaze connects the two colors. Unlike a blended French, the border remains visible. The warmth of the ivory keeps the white from appearing stark against the slightly peachy nail bed.
Bring a reference that shows the tip color in daylight if you choose these glazed French tip nails for an event. Cream, ivory, and bright white can look almost identical under warm indoor lighting, then separate noticeably beside a dress or shirt. Ask your technician to preserve the smile line beneath the glaze so the manicure keeps its structure. A regular-polish interpretation is possible, but French guides should only go over a thoroughly dried base.
How to Apply
- Apply the appropriate base coat and translucent peach-nude gel to medium almond nails, curing each layer.
- Paint soft-ivory French tips with consistent curved borders and cure.
- Use the powder’s compatible receiving layer, then apply an even pearl chrome finish.
- Brush away loose powder and complete the manicure with a glossy gel top coat and the required cure.
7. Glazed Micro-French Short Squares
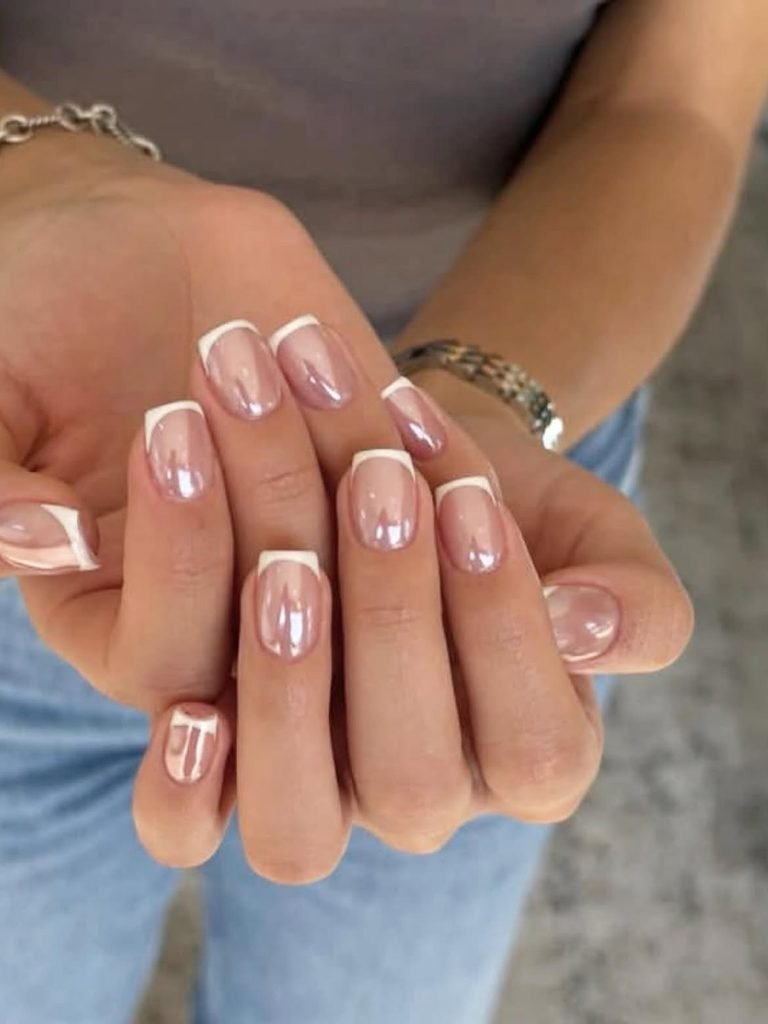
Here, the white tip is barely thicker than a drawn line. It follows the straight edge of very short square nails, turning gently around the corners. A light pearl topper over the sheer rosy base softens the crisp geometry.
Tip width matters more than elaborate brushwork on a nail this short. If the line becomes too deep, it can visually divide the nail into two squat blocks. Keep the white narrow and let the rosy area occupy nearly the entire surface. For a home version, rotate the finger slightly against a steady liner brush instead of attempting one long stroke with your painting hand. A softly rounded square corner is also easier to trace than a sharp point.
How to Apply
- Prepare very short square nails, soften the corners, and apply a regular-polish base coat.
- Add a sheer rosy lacquer layer and let it dry thoroughly.
- Draw a hairline white tip along each free edge; allow it to set before adding a fine pearl lacquer topper.
- Apply a glossy top coat carefully so the tiny white lines remain clean.
8. Pink-to-Milk Glazed Ombré Nails
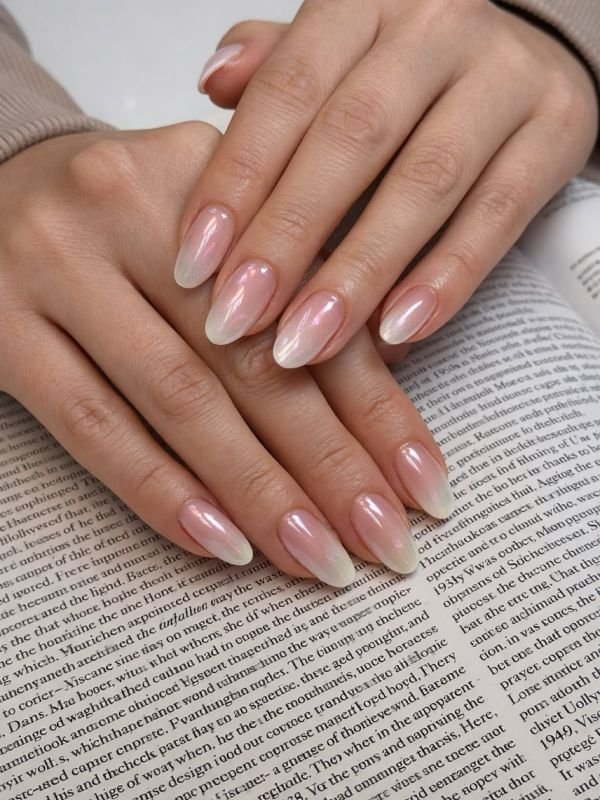
Rosy pink gradually fades into milk white toward the ends of medium ballerina nails. There is no visible line between the colors, and the soft pearl reflection runs continuously from cuticle to squared tip. The tapered sides give the gradient direction while the flatter edge holds the palest color. Seen from above, the white appears to emerge from within the nail rather than sit across it.
These glazed ombré nails suit readers who like a French palette but prefer a blurred finish. Place most of the white near the free edge; bringing it halfway down every nail can overwhelm the pink and flatten the transition. The understated palette also coordinates easily with bridesmaid nail ideas when a wedding party wants related manicures without identical shapes. A technician can adjust the fade separately for shorter nails so the whole hand looks balanced.
How to Apply
- Prepare medium ballerina nails and apply a sheer rosy-pink gel color over the system’s base coat, curing as directed.
- Blend milky-white gel from the tips upward with an ombré brush in thin layers, curing between layers.
- Prepare the compatible chrome layer and burnish a fine pearl glaze across the gradient.
- Remove loose powder and seal the full surface and squared edges with glossy gel top coat; cure completely.
9. Blush Glaze With Clear Half-Moons
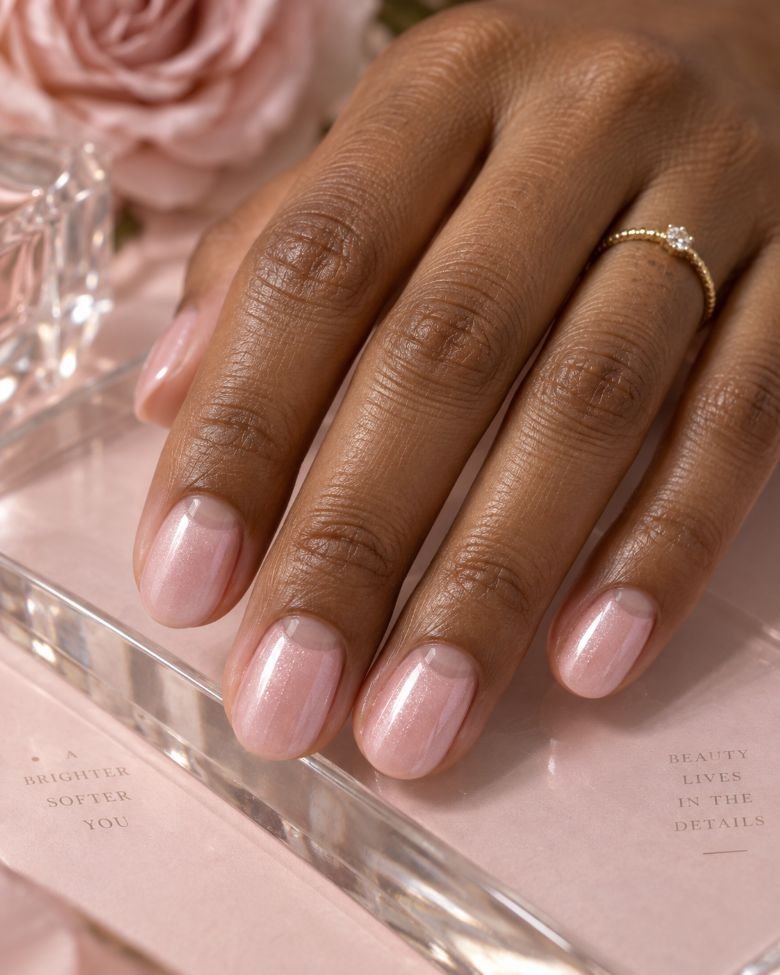
Transparent crescents curve around the cuticles of these short oval nails, leaving small windows beneath the blush-colored body. The pearl finish begins just above each crescent, so the clear areas stay visibly different even under the glossy top coat. There is no outline around the half-moons. Their rounded shape echoes the free edge and gives the manicure a gentle symmetry from top to bottom.
The appeal of negative-space glazed nails is the controlled change in coverage. The clear crescent should be intentional and consistent, with a smooth border rather than an uneven gap in the polish. A lacquer version is manageable with curved guides, provided the underlying clear coat has dried completely. Keep the pearl topper inside the colored area too; brushing it over the whole nail would soften the distinction that makes this design worth choosing.
How to Apply
- Shape short oval nails, apply a clear lacquer base coat, and let it dry completely.
- Position curved guides above the cuticles and paint the exposed nail blush pink; remove the guides carefully.
- Once dry, use a small brush to apply pearl-effect lacquer only over the blush area.
- Seal the entire nail with a clear glossy top coat, preserving the transparent crescents.
10. Pearl-Accent Bridal Glaze
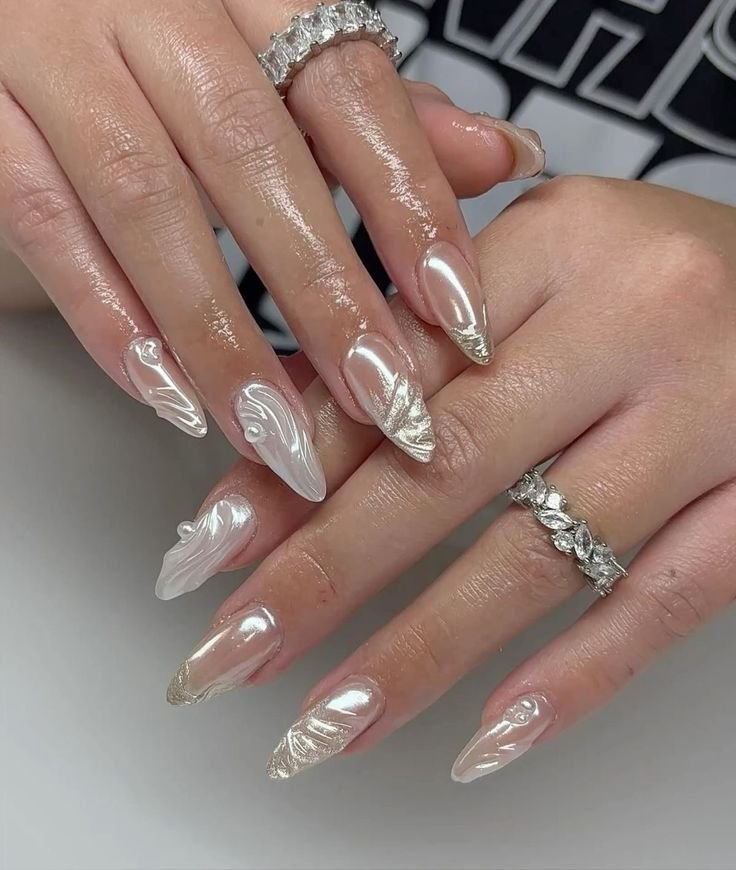
Three tiny pearls follow the lower side of one almond-shaped accent nail, arranged from slightly larger to smaller. The remaining nails carry only a translucent ivory base and a soft pearl glaze. That distinction gives the set two kinds of reflection: a smooth wash across the polish and small rounded highlights on the embellishments. The medium length leaves space around the pearls, keeping the decoration light.
For glazed wedding nails, placement deserves as much thought as color. Keep the pearls away from the free edge, where they are more likely to meet hair or fabric, and choose low, flat-backed pieces. Readers comparing pearl nail ideas can use this as a restrained option for a detailed dress. Ask the technician to secure the bases neatly; a thick puddle of adhesive will be obvious against such a sheer manicure.
How to Apply
- Prepare medium almond nails and complete thin translucent-ivory gel layers, curing as directed.
- Apply fine pearl chrome using its compatible layer, remove excess pigment, and seal the glaze.
- Secure three tiny flat-backed pearls along the lower side of one accent nail with compatible nail embellishment adhesive.
- Set the adhesive fully and finish around the pearl bases as directed, keeping their rounded faces clear.
11. Glazed Nails With Fine Silver Side Lines
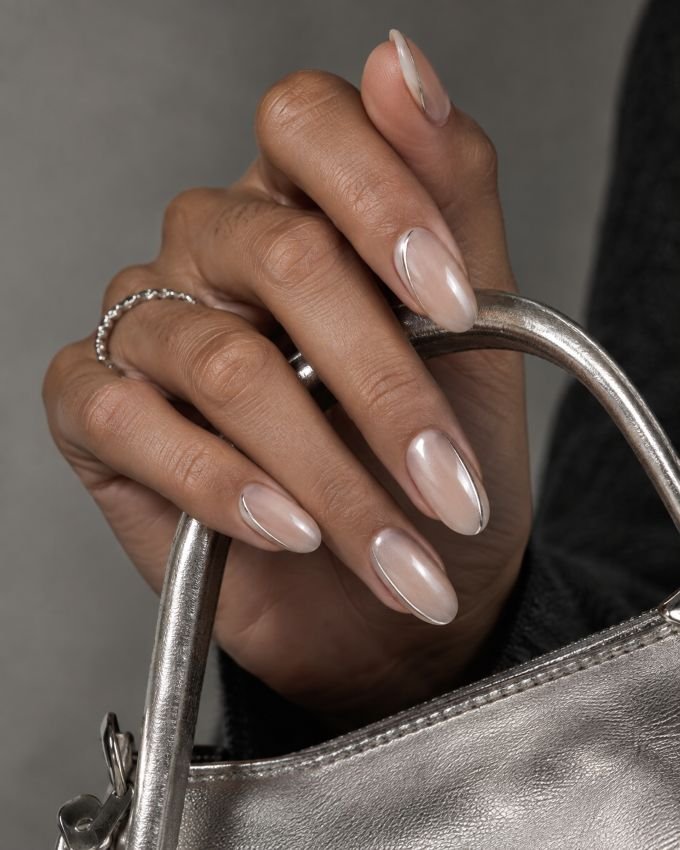
A single silver line follows one sidewall of each long oval nail, stopping before the rounded tip. Sheer beige polish carries a soft white pearl reflection underneath. The lines alternate sides across the hand, leaving most of each nail undecorated so the glaze remains the focus.
This is a useful choice when plain pearls feel too delicate for your usual style. The silver gives the manicure an edge while staying narrow enough to wear with everyday jewelry. Of the different oval nail ideas, longer versions give a side line room to curve naturally. Ask for a painted metallic detail if you dislike the feel of embellishments; the finished surface should remain smooth when you run a fingertip across it.
How to Apply
- Apply a regular-polish base coat and sheer beige lacquer to long oval nails; allow them to dry.
- Add a fine white-pearl lacquer topper and let it set.
- Paint one thin silver line beside alternating sidewalls, stopping short of the tips.
- Once the linework is dry, seal everything with a glossy top coat.
12. Diagonal Glaze With Sheer Windows
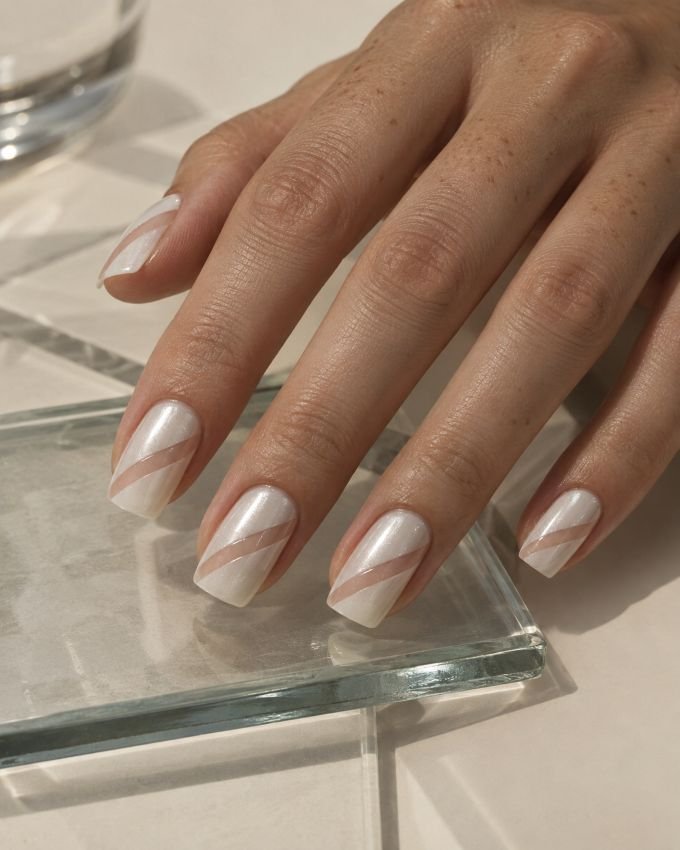
Narrow diagonal windows cut through glazed ivory panels on medium square nails. The windows show a transparent nude base, while the surrounding ivory carries an even pearl sheen. Each diagonal leans in the same direction across the hand, creating a repeated slant against the straight tips. The contrast is subtle until the light hits: pearl flashes on either side of each clear strip.
Precision is the point of this version. Uneven window widths will draw more attention than the glaze, so keep a full-hand reference nearby when planning the layout. A technician can isolate the reflective finish using the product system’s nail-art method; a home interpretation is easier with ivory lacquer and a carefully placed pearl topper. Leave the windows visibly transparent instead of filling them with another pale color, which would turn the design into ordinary color blocking.
How to Apply
- Apply a clear lacquer base coat to medium square nails and let it dry thoroughly.
- Place narrow diagonal striping guides across the nails, then paint the exposed panels soft ivory; remove the guides carefully.
- When the color is dry, use a detail brush to add pearl-effect lacquer only to the ivory panels.
- Seal the entire design with a glossy top coat, keeping the transparent windows free of pigment.
13. Double-Outline Glazed French Nails
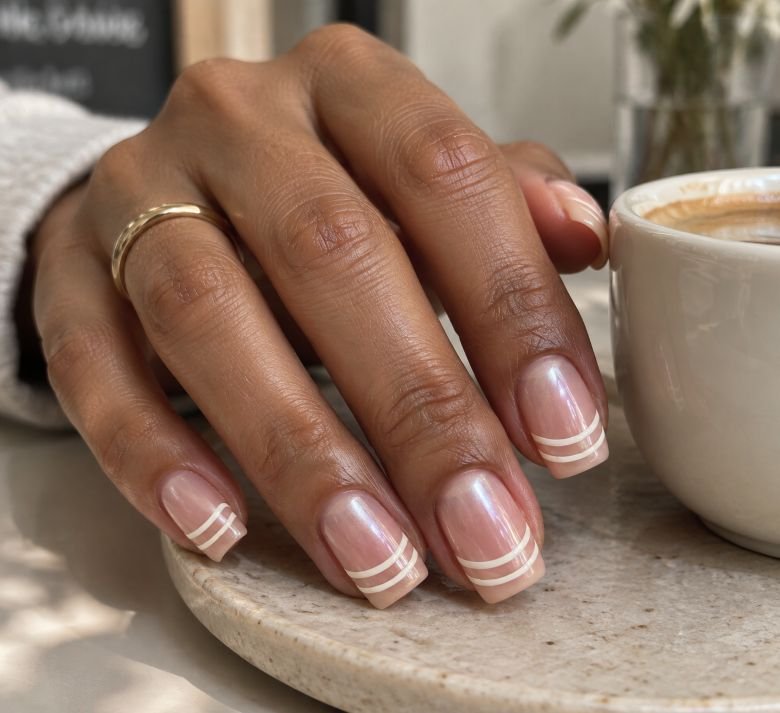
Two thin cream arcs trace the tips of medium squoval nails, leaving a narrow band of sheer rose between them. Neither arc becomes a filled French tip. A delicate pearl topper passes across the whole surface, bringing the lines and base together without erasing their spacing. The gently rounded corners let the paired curves sweep around the nail instead of stopping abruptly at its sides.
The small gap between the arcs is what separates this glazed French manicure from the classic version. Sketch the lower line first, then follow its shape with the second; trying to correct both repeatedly tends to make them thicker. This design needs enough free-edge space to show the gap clearly, so it is less suitable for nails cut flush to the fingertip. Choose a slightly warmer cream if bright white makes the fine lines look too prominent.
How to Apply
- Apply a lacquer base coat and translucent rose polish to medium squoval nails; let the layers dry.
- Draw one fine cream curve below the free edge, then a second parallel curve nearer the tip.
- Allow the linework to set before applying a thin pearl-effect lacquer topper.
- Finish with a glossy top coat, preserving the visible space between both arcs.
14. Peach Aura Under Pearl Glaze
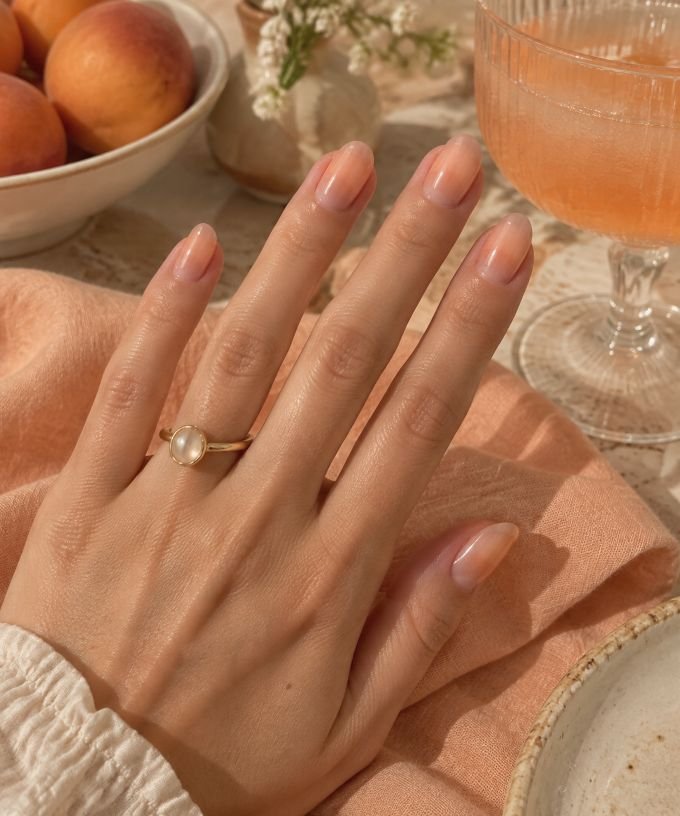
A small peach-colored haze sits in the center of each short almond nail, fading outward into a sheer pink-nude border. The peach stays diffused, with no circular outline or sharply defined edge. Fine pearl glaze lies over the whole nail, lending the warm center a soft glow as the surrounding nude catches a paler reflection. The result has more depth than a single peach coat.
Keep the aura effect contained so the fade remains visible on a shorter nail. If the peach reaches every sidewall, the manicure loses its central glow and reads as uniform color. A salon airbrush can create a very smooth transition, while a tiny cosmetic sponge gives regular polish a softer home interpretation. Work with little product and build gradually; one saturated stamp is much harder to soften than several faint layers placed in the same area.
How to Apply
- Prepare short almond nails with a lacquer base coat and sheer pink-nude color; let them dry.
- Use a small cosmetic sponge to dab thin layers of peach lacquer into each center, fading the edges and allowing layers to set.
- Once dry, apply a fine pearl-effect lacquer topper across the whole nail.
- Smooth the finish with a glossy top coat without adding more opaque color.
15. Ivory Lace Over a Glazed Base
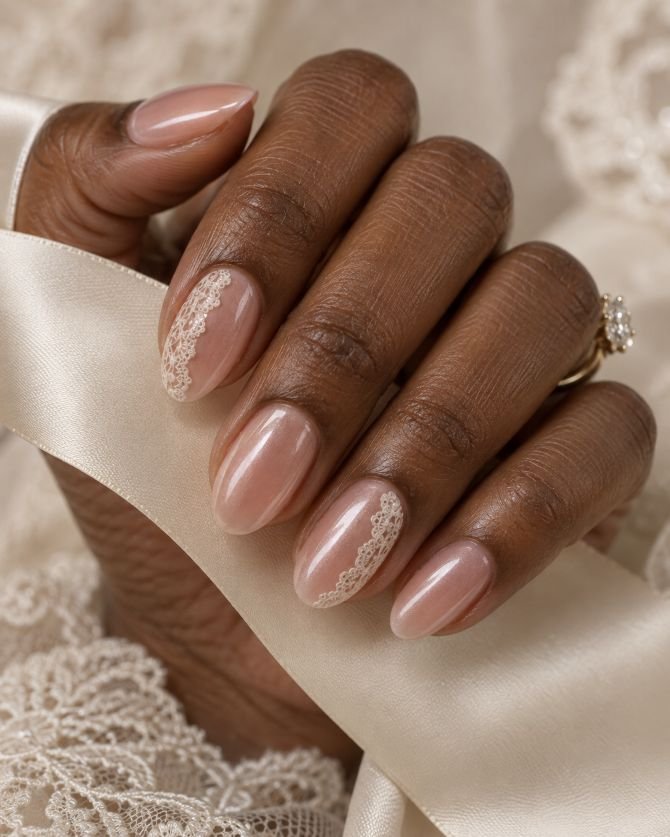
Fine ivory loops form small lace panels along the sides of two medium oval nails. Beneath the pattern, translucent rosy-beige polish reflects a delicate pearl sheen; the other nails wear that glaze alone. The lace is flat and lightly spaced, with tiny open areas between the loops. Its slightly opaque lines remain visible without covering the entire accent nail in a white patch.
A little lace goes a long way against a reflective base. Keep the panels narrow enough that you can still see the glaze on both accent nails, especially if your outfit already contains embroidery. Thin decals or a small stamping pattern make a practical alternative to drawing every loop by hand. Test the pattern size against the nail before applying it; a detailed motif that looks lovely on a sheet can become unreadable when trimmed into a very small space.
How to Apply
- Apply a lacquer base coat and translucent rosy-beige polish to medium oval nails; let them dry.
- Add a fine pearl lacquer topper and allow the finish to set fully.
- Place thin ivory lace decals or stamp small lace panels along the sides of two accent nails.
- Seal the flat artwork with a compatible glossy top coat, covering all decal edges.
16. Opalescent Glaze With Sheer Tips
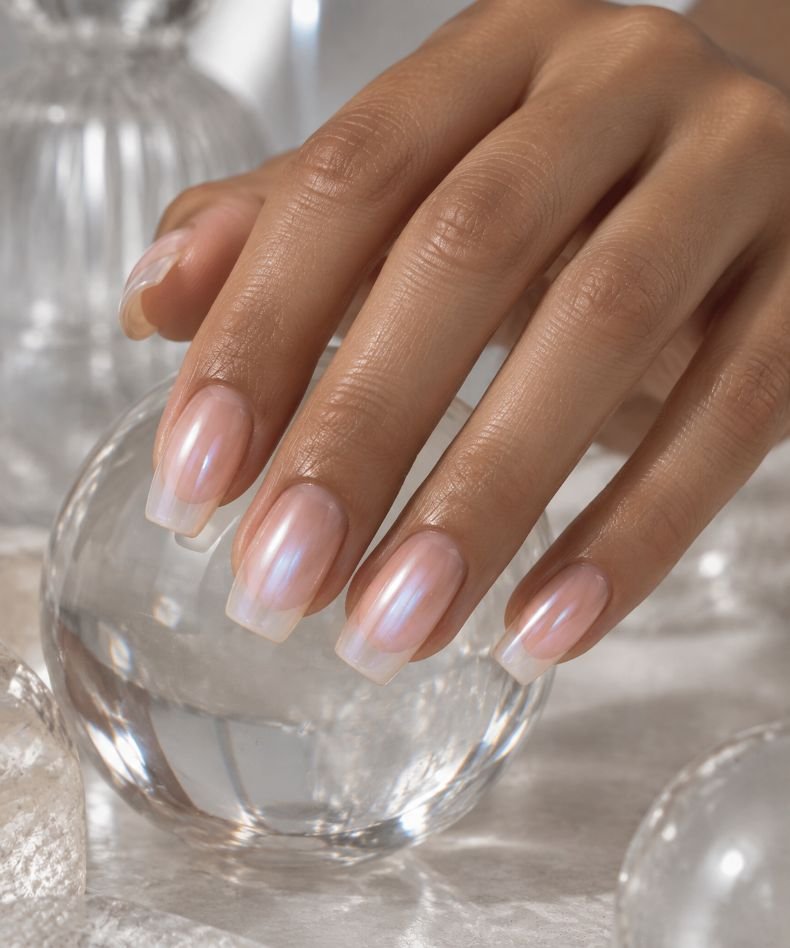
Blue and pink reflections move across a milky center, fading into nearly transparent tips on medium squoval extensions. The underlying rosy tone remains visible near the cuticle, giving the nail a soft transition through three levels of coverage. There are no foil fragments or glitter pieces inside. The opalescent effect comes entirely from a fine color-shifting pearl layer over the smooth surface.
The transparent edge is an important part of this reference. A natural free edge may still show white beneath sheer polish, so clear extensions or suitable clear press-ons are the more predictable route if you want the same glass-like tip. Ask the technician to keep the milky color concentrated through the center rather than painting the extension opaque. The blue-pink reflection should remain subtle enough to reveal that construction; a dense chrome layer would hide the carefully preserved transparency.
How to Apply
- Have medium clear squoval extensions fitted and prepared, then apply a compatible sheer rosy gel base color and cure.
- Blend a thin milky layer through the central area, tapering it away before the transparent tips; cure as directed.
- Prepare the chrome-receiving layer and apply a fine translucent blue-pink pearl powder.
- Remove excess pigment and seal with a clear glossy gel top coat, completing the required cure.
17. Champagne Glaze With Gold Cuticle Arcs
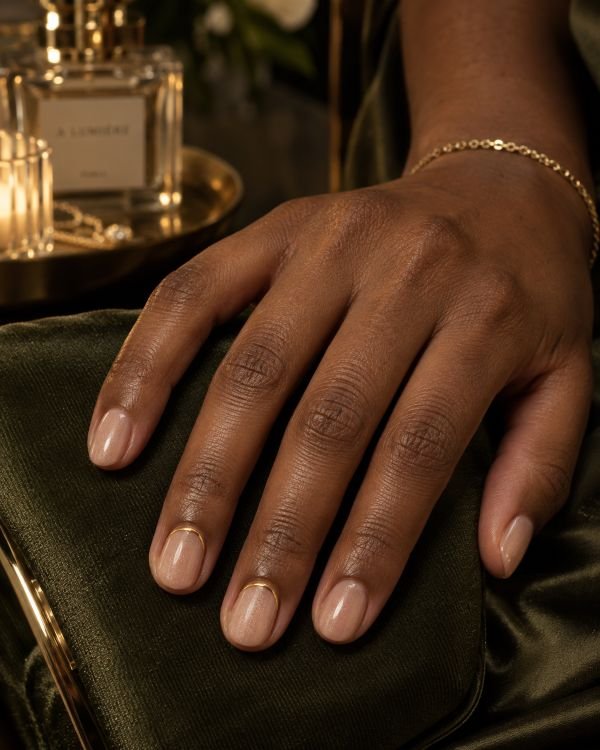
Warm beige polish catches a fine champagne-pearl reflection across short oval nails. Thin gold curves follow the cuticle lines on the middle and ring fingers, with clean margins above the skin. The remaining nails stay plain, their rounded tips picking up the light as the hand turns.
This version makes sense if most of your jewelry is yellow gold and a cool white glaze feels disconnected from it. Keep the champagne pearl finish sheer so the base still has depth. The gold arcs should be narrower than a typical French tip and separated from the skin by a clean margin. For evening plans, it offers a quieter direction among party manicure ideas, particularly with a textured outfit that already catches plenty of light.
How to Apply
- Shape short oval nails, apply a lacquer base coat, and add a sheer warm-beige color.
- Let the color dry, then brush on a fine champagne-pearl lacquer topper.
- Once set, paint thin gold arcs above the cuticles of the middle and ring nails, leaving a clear skin margin.
- Allow the arcs to dry and seal the manicure with a glossy top coat.
18. Pink Glaze With Painted Ribbon Bows
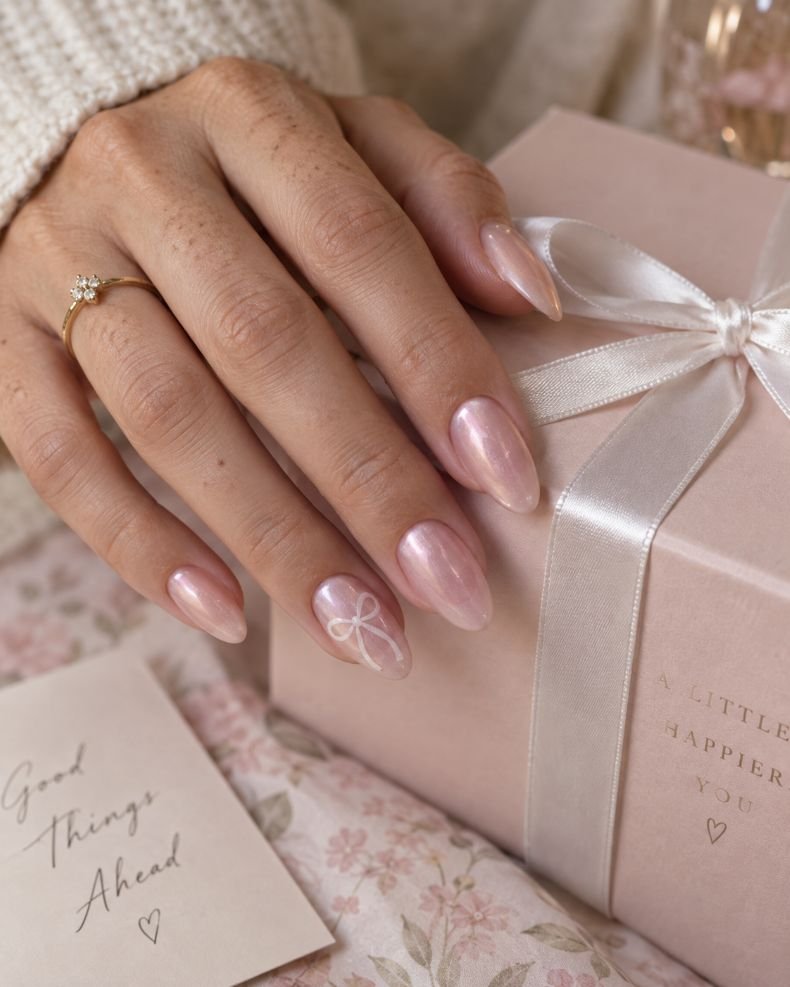
Two small white bows sit slightly off-center on a pale-pink glazed set. Each bow has narrow loops and fine trailing ends, painted flat onto medium almond nails. The rest of the hand remains free of artwork, allowing the pink-white pearl sheen to move uninterrupted. The bows look like a small detail on wrapping ribbon, with delicate lines and clear spaces inside the loops.
Painted ribbon nail art gives you the coquette detail without the extra height of a molded charm. That is helpful when you want the manicure to sit smoothly against knitwear or fine fabric. Keep both bows similar in scale, but avoid placing them in exactly the same spot; a slight difference feels less rigid across the hand. If freehand loops become thick or uneven, use fine-line decals instead and keep their transparent backing as close to the artwork as possible.
How to Apply
- Apply a lacquer base coat and translucent pale-pink color to medium almond nails; let them dry.
- Add a fine pink-white pearl lacquer topper and allow it to set.
- Paint one small white ribbon bow on each of two accent nails, or apply thin bow decals.
- Seal the flat designs beneath glossy top coats once the artwork is dry.
19. Honey Glaze With Tortoiseshell Tips
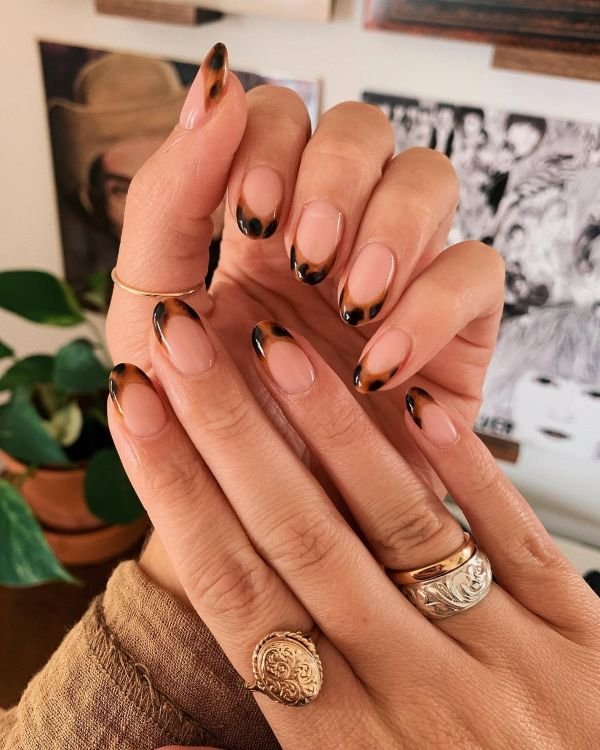
Translucent amber and soft brown patches collect inside narrow French tips, giving them the mottled depth of tortoiseshell. The medium almond nail beds remain sheer honey nude, and a restrained pearl glaze stretches across the complete set. Dark marks vary in size and shape rather than forming identical spots. Clearer amber areas between them allow the curved tip to retain some lightness.
The pattern should still be readable after the glaze goes on. Test the pearl layer over one finished tip first; too much white reflection can flatten the amber and make the brown look muddy. Tortoiseshell French tips already contain several tones, so additional foil or gems are unnecessary here. This is a good salon reference if you want a warmer, patterned interpretation of glazed nails, with enough bare-looking space to keep the manicure close to the original understated mood.
How to Apply
- Prepare medium almond nails and apply sheer honey-nude gel over the system’s base, curing each layer as directed.
- Build narrow tips from translucent amber gel, adding irregular brown patches between thin cured layers.
- Prepare the compatible chrome layer and apply a light pearl glaze, keeping the tortoiseshell pattern visible.
- Remove loose pigment and finish with glossy gel top coat, sealing and curing as directed.
20. Tonal Brown Glazed Skittle Nails
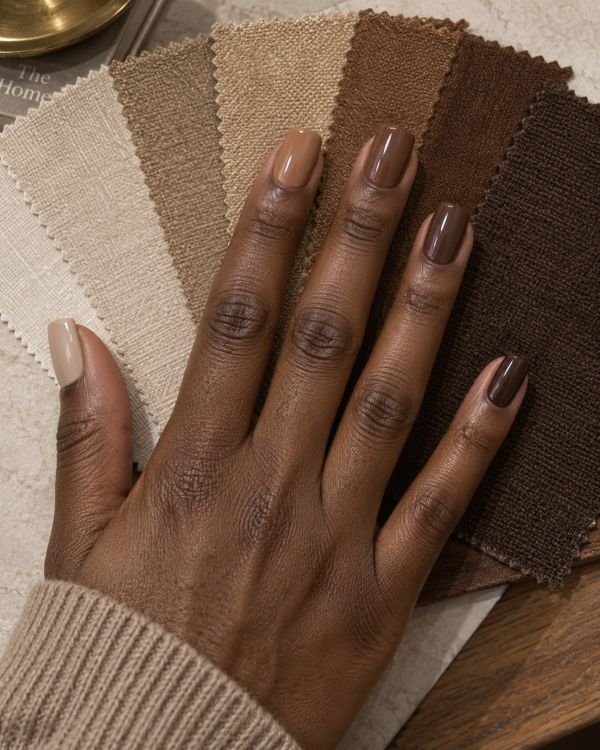
The color deepens across the hand from sandy beige through caramel, toffee, milk chocolate, and mocha. Each medium soft-square nail wears one shade beneath the same fine pearl glaze. There is no gradient within an individual nail: the transition happens from finger to finger. Consistent length, softened corners, and an equally smooth finish keep the five colors looking like one planned manicure.
A successful brown glazed manicure depends on the relationship between shades, especially after the pearl layer changes their reflections. Lay out the colors in order and test the topper before painting the full set. If one brown turns noticeably gray while the others stay warm, replace it with a closer undertone. Keep the difference between neighboring shades visible enough to read; five almost identical beiges may look accidental instead of forming a clear progression across the hand.
How to Apply
- Prepare medium soft-square nails with regular-polish base coat and arrange five warm neutral shades from light to dark.
- Paint one shade per nail in the chosen order, using thin coats and allowing them to dry.
- Apply the same fine pearl lacquer topper to every nail for a consistent reflection.
- Seal with glossy top coat, keeping the free edges even and clean.
21. Mini Heart Glazed Nails
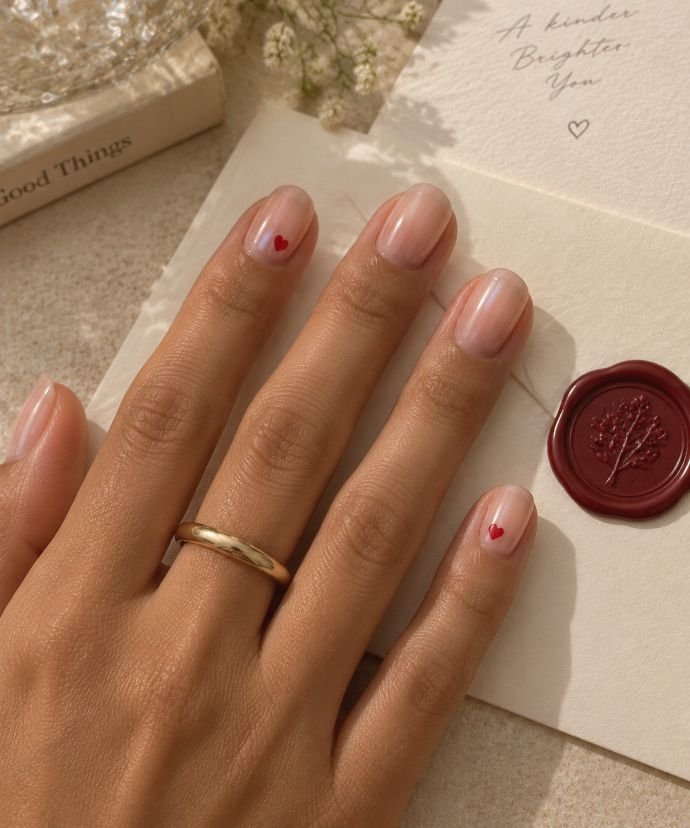
Two tiny red hearts sit near the outer sides of short round nails, surrounded by transparent blush and a delicate white-pearl reflection. They are easy to miss from a distance and clearly defined up close. Opaque red gives each shape enough contrast to stand alone without an outline.
This is an approachable way to try nail art if you usually wear natural glazed nails. Build a heart from two small dots pulled toward one point, practicing the scale on a spare tip first. Place the hearts on different fingers to spread out the color. For a softer version, choose rose pink while keeping the same tiny dimensions; enlarging the motif would change the delicacy of the whole set.
How to Apply
- Apply a lacquer base coat and sheer blush color to short round nails; let them dry.
- Brush on a delicate white-pearl lacquer topper and allow it to set.
- On two accent nails, form tiny red hearts from paired dots drawn down to a single point.
- Let the hearts dry completely, then float a glossy top coat over them without dragging the red.
22. Crystal-Point Glazed Coffin Nails
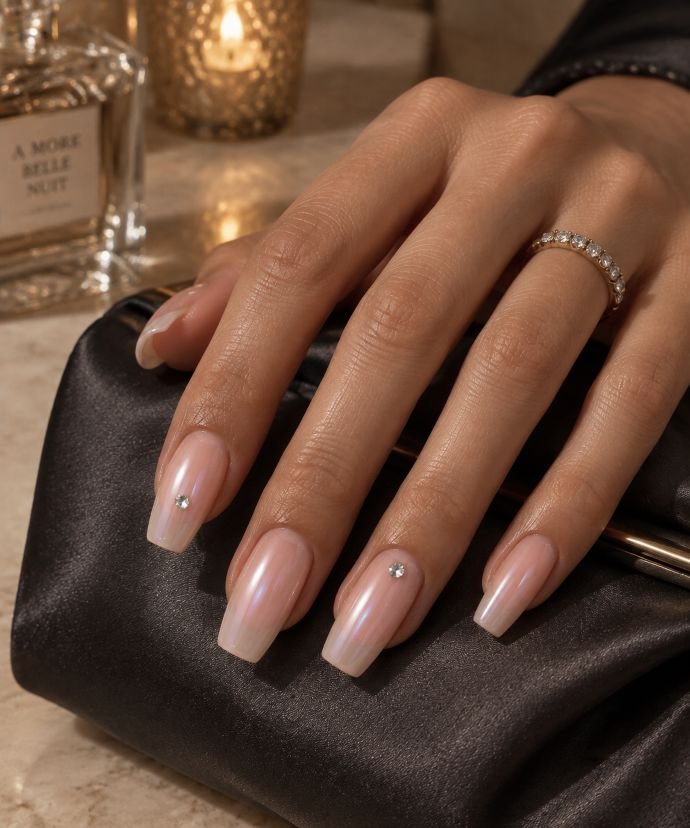
One small clear crystal sits low on the index nail and another higher on the ring nail, creating two separate points of light. The medium coffin set is otherwise covered in milky blush and fine pearl glaze. Its tapered sides end in clean square tips with no decoration along the edge. The crystals are small enough that the smooth pearlescent surface remains the dominant feature.
For a more dressed-up version of the look, placement works harder than stone count. A low crystal leaves room for the glaze and feels less bulky than a cluster. Readers browsing rhinestone nail designs can choose this as a starting point before adding more elaborate arrangements. Ask for neatly secured bases and check that the stones sit away from the sidewalls; a crystal hanging over the edge will catch more readily than one contained within the nail.
How to Apply
- Prepare medium coffin nails and complete thin milky-blush gel layers, curing each as required.
- Apply fine pearl chrome over its compatible layer, remove excess pigment, and seal the glaze.
- Position one low clear crystal on the index nail and one on the ring nail using compatible embellishment adhesive.
- Set the adhesive fully and finish around the stone bases as directed, leaving the facets clear.
What to Ask for at the Salon for Glazed Donut Nails
Ask for a sheer or softly milky base with a fine pearl chrome finish, then specify your preferred shape and length. A useful description is: “I’d like some of my natural nails showing through, with a soft white-pearl reflection.” Show a photograph taken in neutral light, ideally with the whole hand visible. This helps the technician judge both the finish and the proportions.
The familiar glazed donut manicure gets its appearance from the combination of base color and reflected pigment. Clear gloss over white polish creates shine, but it does not add the same pearl effect. Likewise, a dense metallic powder can cover the base more completely than you intended. Ask to see a sample with the glaze already applied, because the powder may cool, brighten, or otherwise shift the color underneath. Decide whether you want the French line, natural free edge, or any negative space to remain visible before the artwork begins.
Choosing the Right Base Color, Shape, and Length
Start by comparing the base against your own hand. Off-white gives the glaze a milky appearance; sheer blush adds a rosy cast; peach-beige and brown bring more warmth or depth. Undertone and opacity matter together. A warm nude can still look pale if it contains enough white, while a darker sheer shade may leave more of the natural nail visible than expected.
Ask for a swatch rather than assuming one named shade will look identical on everyone. If you prefer a pinker interpretation, Bubble Bath is a base to compare with the classic off-white direction, not another name for the original Funny Bunny formula. For shape, short rounds and squares can carry the glaze without extensions. Medium ovals and almonds offer a longer curved surface for the reflection. Choose extra length when a gradient, transparent tip, or detailed French layout needs the space; a simple pearl finish can be completed on a compact nail.
Gel Chrome, Regular Polish, or Glazed Press-Ons?
The route depends on the finish you want and the application you are comfortable managing. A gel chrome manicure uses powder with a compatible gel system and curing lamp. Follow the instructions for the actual products, including which layer receives the powder; an old tutorial may describe a different formula or sequence.
For glazed donut nails with regular polish, a pearlescent lacquer topper offers a simpler interpretation that dries without a lamp. OPI distinguishes its gel-based Chrome Effects powders from its Infinite Shine glaze toppers. Expect a related pearl effect rather than assuming every topper will reproduce burnished powder exactly. A clear glossy top coat alone will not supply the missing iridescence. Prefinished glazed press-ons are another option, especially for trying a shape before committing to extensions. Check their size and side profile as carefully as the color, and use the attachment and removal method specified for that set.
Keeping the Glaze Smooth and Preventing Worn Tips
A pearl finish makes uneven application easier to see. Keep the underlying color layers thin and smooth, and use the receiving layer specified for your chrome product. If powder looks patchy or grainy, check the application directions before adding more. Extra pigment cannot reliably correct an incompatible surface, and it may obscure the base color you chose.
Remove loose powder before applying the final seal, paying attention to the sidewalls and free edge. Keep gel off surrounding skin and use the designated lamp and curing sequence; OPI’s gel application guidance emphasizes thin coats, edge coverage, and compatible curing. With regular polish, allow the colored layers and fine artwork to dry before adding the topper. During wear, protect the manicure from repeated scraping and use gloves for cleaning. If an edge lifts or starts catching, address it with the appropriate repair or removal method instead of peeling it back. No finish is helped by pulling away attached layers.
Final Thoughts
The most convincing Hailey Bieber glazed donut nails keep the relationship between color and light clear. A milky base gives you the familiar soft finish; chocolate adds depth; a French tip introduces a defined border. Small details can personalize the look, provided enough of the glazed surface remains visible.
Choose the version you would enjoy wearing through an ordinary week, then adjust it for the occasion. That might mean a barely-there pearl on short rounds, a carefully blended bridal ombré, or two crystals on a blush coffin set. Bring a reference that shows the entire manicure, and decide how sheer you want it before choosing the powder or topper. Those small decisions will shape the result more than adding another layer of decoration.