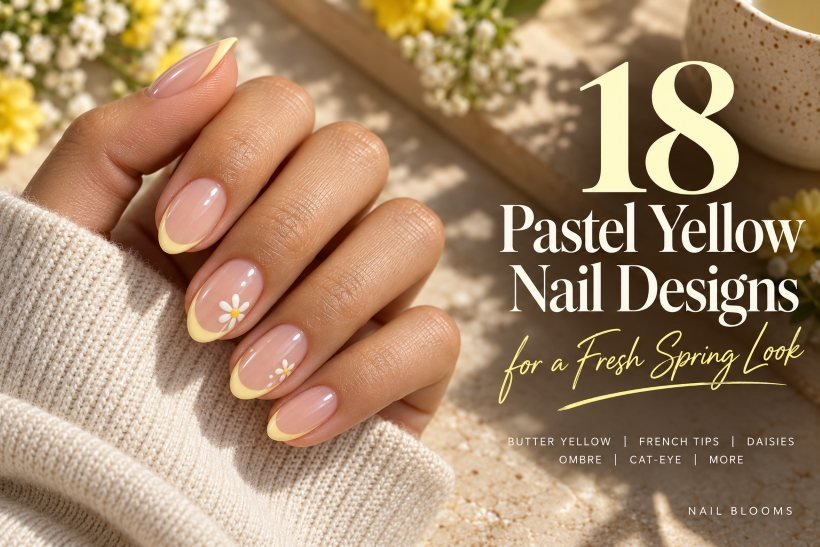
18 Pastel Yellow Nails for a Fresh Spring Look
A pale yellow manicure may be seen as buttery gold, see-through lemon syrup, or a soft primrose tone. The differences are important since this hue comes off as subtle on short, curved nails and is nearly graphic as an angled French tip. Pastel yellow nails allow you to try out colors for spring without resorting to neon shades.
Below, you will find 18 pastel yellow nails that range from a basic cream manicure to flowers, gingham design, negative space design, and magnetic polish. Each concept will show you where the color belongs and what kind of nail length it requires, as well as whether the style should be used for your personal manicure or at a salon.
1. Short Butter Pastel Yellow Nails
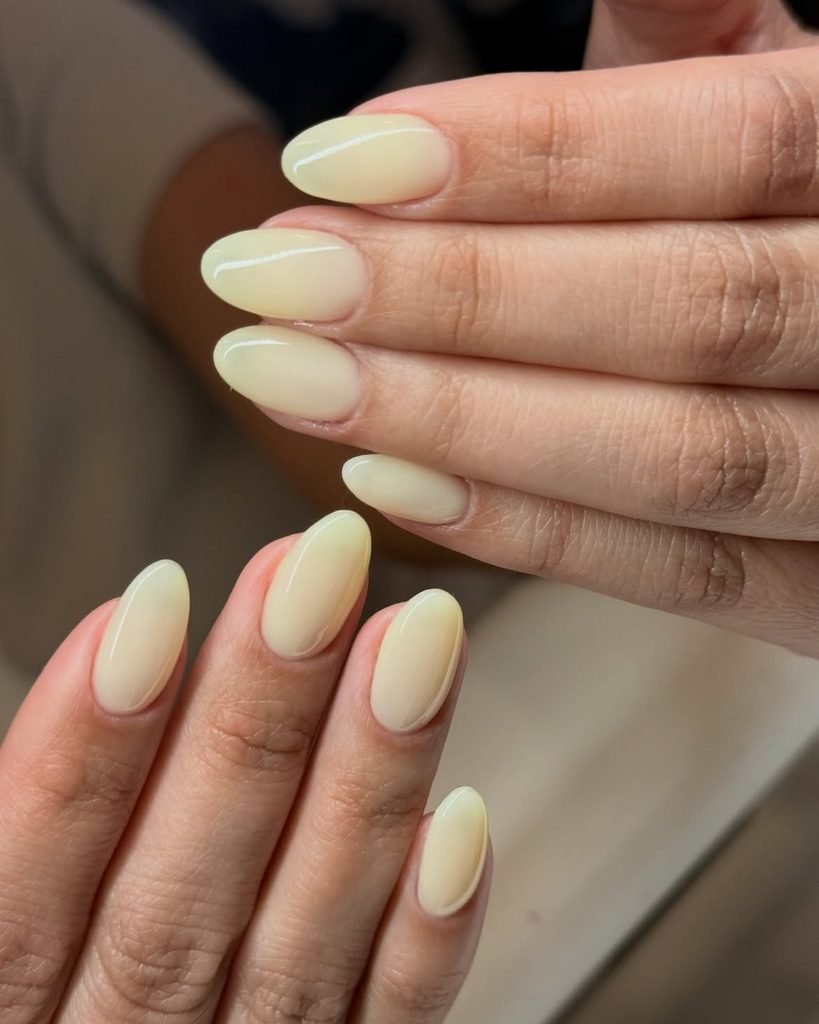
This classic design warrants a nice color. Keep your nails short, ovals with a gently curved free edge in an opaque butter yellow, which is more creamy than green. Use this single color for all your nails, leave a small border around the cuticle, and top it off with gloss. There will be no accent nails in this design.
This is the ideal set if you wear dark-colored clothes or jeans but would like a hint of spring color. For short nails, please examine the nail polish under daylight and apply additional coats to cover any streaks if the formula is too light, or use a thick coat if there is pooling near the cuticles. If you prefer this same uncomplicated shape in other shades, browse Nail Blooms’ This classic design warrants a nice color. Keep your nails short, ovals with a gently curved free edge in an opaque butter yellow, which is more creamy than green. Use this single color for all your nails, leave a small border around the cuticle, and top it off with gloss.
How to Apply
- File each natural nail into a short oval and apply a compatible base coat.
- Brush on two thin coats of opaque butter yellow, letting the first dry as directed.
- Correct the cuticle outline with a small cleanup brush before the color sets.
- Add a glossy top coat, drawing it across each free edge.
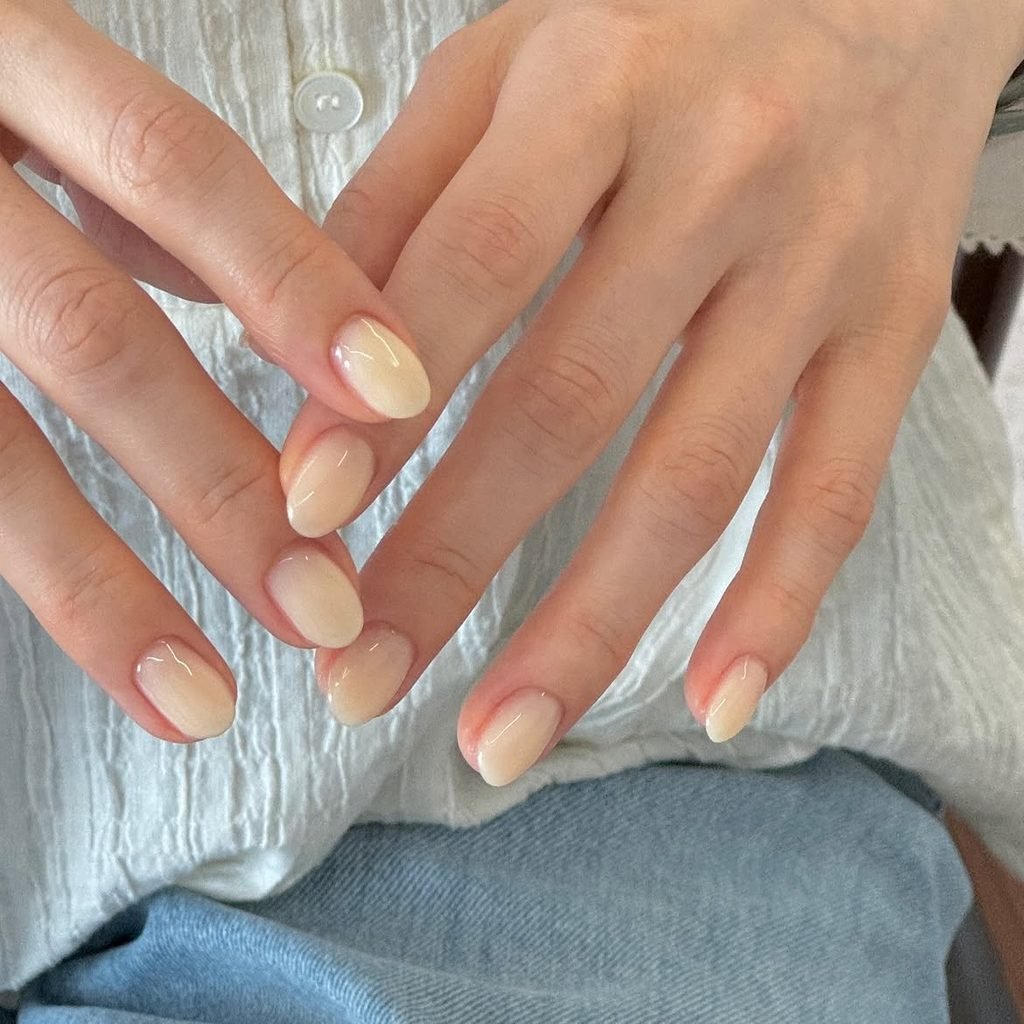
2. Milky Lemon Nails
When it comes to a luminous color effect, go for a milky lemon polish, which would have a sheer finish. In the case of medium round nails, there will be a slight natural free edge visible through the yellow shade, whereas an ivory undercoat may tone down the look of the latter. The result should be that of an even veil covering all the nails, rather than flowers, glitter or a contrasting tip. The glossy finish adds a syrupy effect to the sheer surface.
It differs a lot from opaque butter yellow because you can spot a slight bit of the nail itself; hence, it requires special care regarding the preparation of the base, but not extra decorations. Just hold the bottle next to your fingernail in the daylight to check if the shade is too pale or too vivid. A sheer color will help to use the yellow next to the delicate rings without creating a competition between the manicure and jewelry.
How to Apply
- Shape medium round nails and smooth visible surface ridges with an appropriate base.
- If needed, apply one very thin ivory tint to mute a strong free-edge line.
- Float one or two thin coats of translucent pastel yellow over all five nails, preserving the sheer effect.
- Let the lacquer dry, then finish with a clear high-gloss top coat.
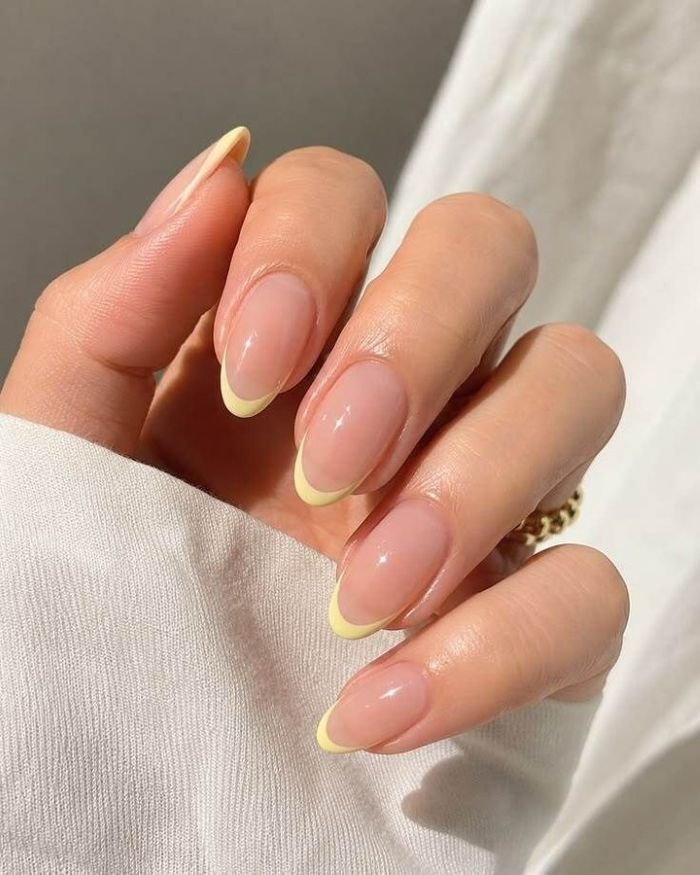
3. Pastel Yellow Micro-French Tips
A very fine line of yellow can add some variation to a traditional French manicure without taking up much of the nail. On oval-shaped nails, apply a translucent pink-beige base coat underneath a pastel yellow micro-French design applied only along the tip of the nail. The line should be equally thin on all five nails; an overly wide line on the thumb will cause the whole manicure to appear unbalanced. Gloss polish provides the finishing touch.
The very fine tip design is great for those who would like a manicure that resembles their natural nails from a distance. Additionally, it provides for less color coverage near the cuticle area as the nails grow. An elongated brush makes it easier to create the line than to try and paint horizontally using the brush attached to the bottle. There are additional French tip nail designs at Nail Blooms.
How to Apply
- File t oval nails and lay down a sheer pink-beige base.
- Load a fine liner brush lightly with opaque pastel yellow.
- Trace a narrow, curved stripe across each free edge, cleaning the corners before it dries.
- Seal the tips with a glossy top coat once the artwork is dry.
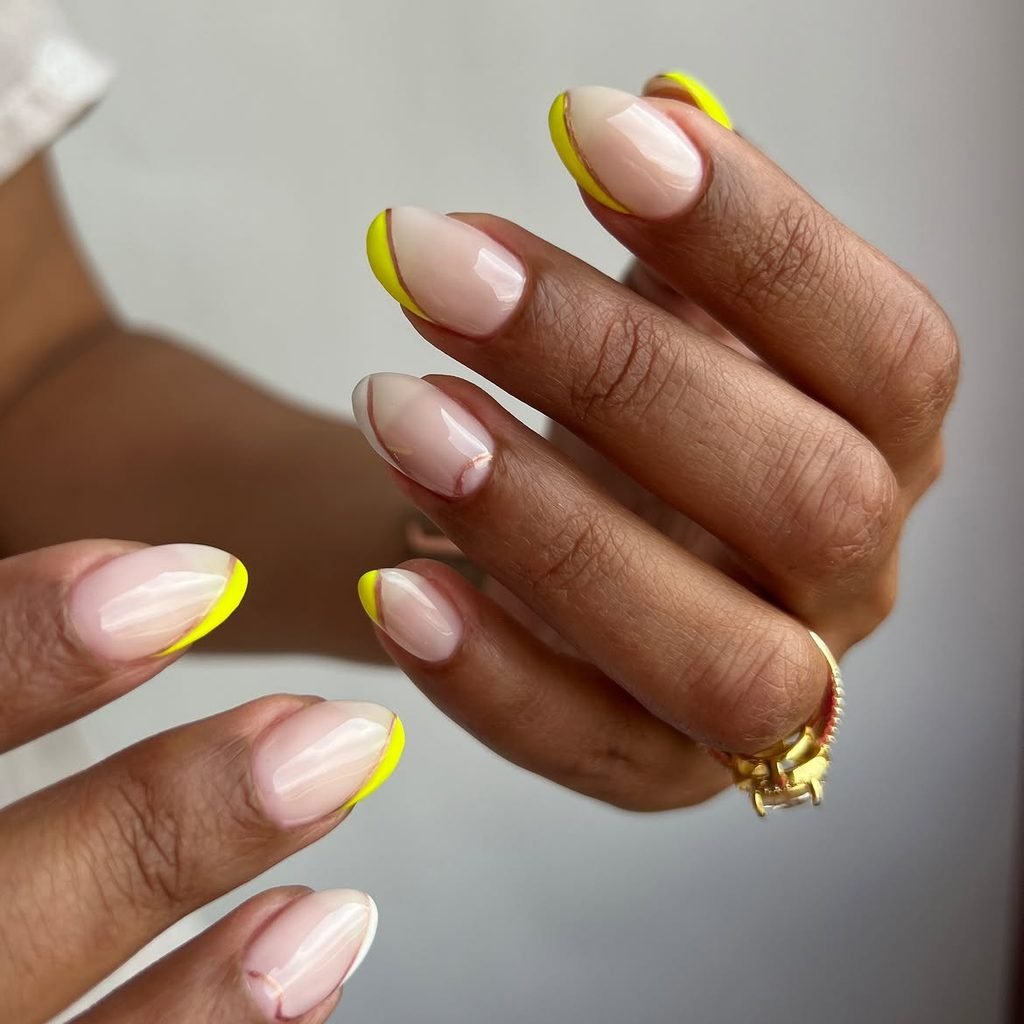
4. Side-Swept Yellow French on Almond Nails
Rather than tracing the entire free edge, this French tip starts diagonally from one sidewall and thins out at the corner opposite. The sheer peach-nude base leaves these medium almond nails light, while the asymmetrical tip is painted in pale primrose yellow in a neat wedge. For the ring finger, reverse the sweeping direction so that the hand appears sophisticated rather than replicated five times. Seal off in gloss to highlight the sharp border.
This diagonal helps elongate the almond point without having to resort to excessive nail extensions. It is also an intelligent option for a wedding guest looking for colorful nails in photos without having flowers painted on them. This kind of border calls for a steady liner brush and, depending on the natural growth pattern of your nails, can be adjusted in angle by the technician. Make sure the yellow remains opaque.
How to Apply
- Prepare medium almond nails with a sheer peach-nude base.
- Sketch the diagonal boundary of each side-swept tip with a fine liner brush.
- Fill toward the free edge with pastel primrose yellow; mirror the angle on the ring finger.
- Refine the border and apply a clear glossy top coat after the art sets.
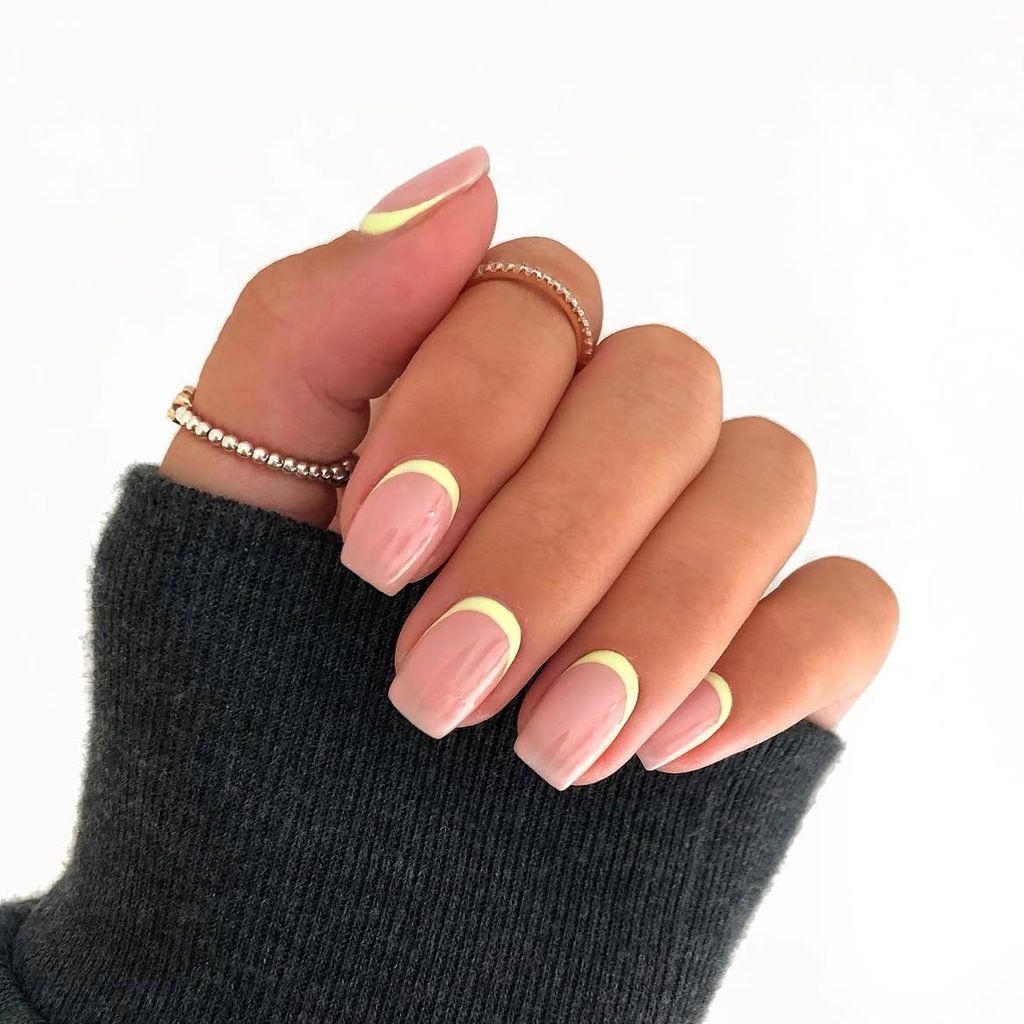
5. Yellow Reverse French with Bare Half-Moons
Now we move to the details on the cuticle. Square-shaped nails have opaque custard yellow on the nail, and the half-moon part at the base remains clear pink. Arcs lie within the cuticle line, not touching the skin, and each arc must be based on the natural size of the nail it’s on. A shiny finish keeps the distinction between the creamy color and nude base sharp.
In contrast to the yellow French tip, this type highlights the base of the nail. The uncovered half-moon makes the growing process less noticeable than painting the entire nail up to the cuticle line with solid colors, but the precision is crucial, for five mismatching arcs are more evident than one flawed tip. Using paper guides may be somewhat inconvenient due to the curve of the cuticle line, so try a thin brush or even press-on nails instead. Don’t add any other ornaments, for there is enough empty space.
How to Apply
- Coat short square nails with a sheer pink base and allow it to dry completely.
- Outline a small half-moon above each cuticle using a fine brush.
- Fill the remaining nail with opaque custard yellow, leaving each outlined arc sheer.
- Tidy the curves, let the paint set, and cover with glossy top coat.
6. Oversized Yellow and White Checkerboard Accents
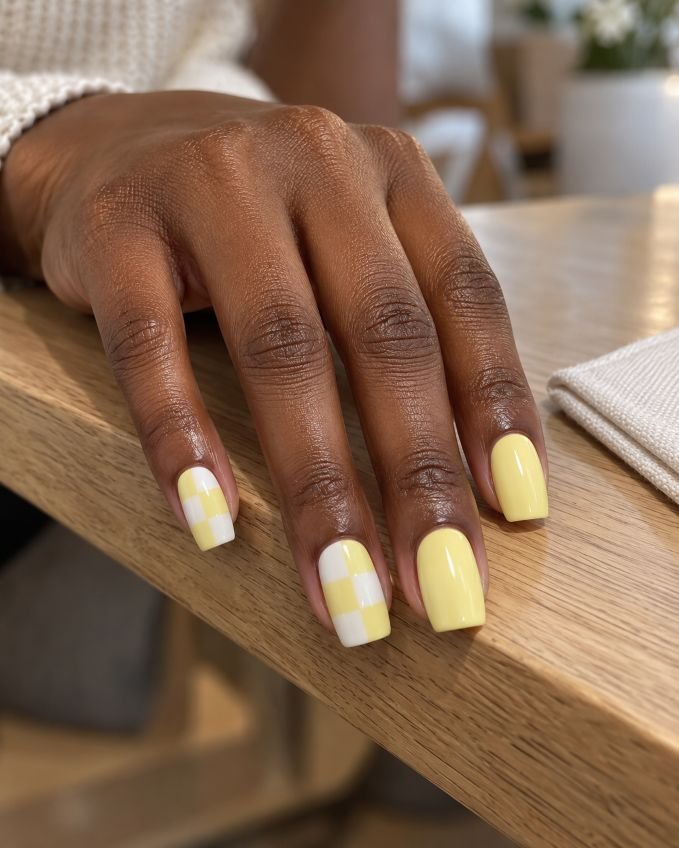
This design will have plenty of breathing room because of the large squares. Paint three medium square nails in pastel yellow and leave the index finger and the ring finger as a two-by-two checkerboard of butter yellow and soft white. Create a slight rounding effect at the corners instead of the razor-sharp ones, and make sure that all nails receive the same gloss treatment. From an arm’s length away, the two patterned nails become punctuation marks among other plain nails.
The checkerboard is easier to notice when the squares are large; otherwise, small squares will be invisible in pictures or will become messy on the side walls. The pattern is appropriate for people who love graphic nail art but would prefer yellow to predominate. It is possible to use a brush to create the dividing lines and prepainted press-ons for those who struggle with their dominant hand. Keep the design separate from the gingham below.
How to Apply
- Paint the thumb, middle, and pinkie nails opaque butter yellow.
- Apply soft white to the index and ring nails and allow it to set.
- Divide each accent nail into four large blocks; fill alternating blocks with yellow.
- Clean the lines and seal all five nails with a smooth glossy top coat.
7. Fine Yellow Gingham Nails
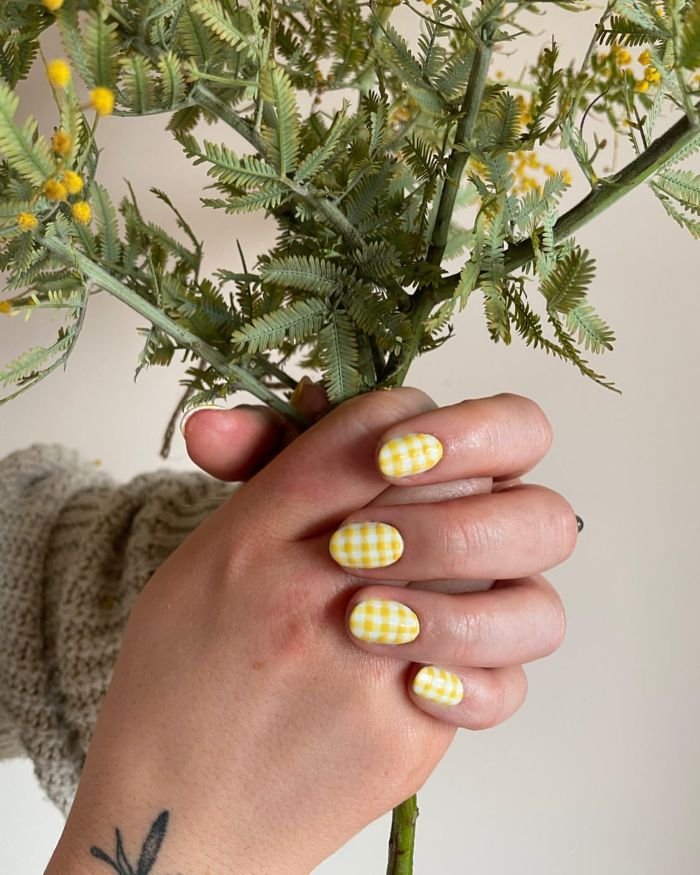
Imagine the yellow gingham as elegant thin lines rather than bold squares of color. For medium oval-shaped nails, two fingers have the creamy base decorated with vertical and horizontal thin stripes in pastel yellow; highlight the intersections with the second yellow, a bit warmer shade. The other three fingers get plain lemon cream.
The small size will remind the fabric pattern and will suit perfectly with the white shirt or picnic-ready dress. It requires a bit more patience than the previous design because of the crossing lines, which have to be aligned on the rounded nail. Consult a professional nail artist about the hand painting or use a pattern decal that fits perfectly or try the print design for one accent nail. Don’t place too many lines close together; the crowded lines may make your pastel yellow appear brownish in the distance.
How to Apply
- Paint three medium oval nails opaque lemon cream and two accent nails warm ivory.
- On the ivory nails, draw evenly spaced fine yellow vertical and horizontal lines.
- Add a tiny deeper-yellow square at selected intersections to suggest overlapping threads.
- Let the linework settle, then apply a satin-gloss top coat without dragging the pattern.
8. White Daisies on a Butter Yellow Base
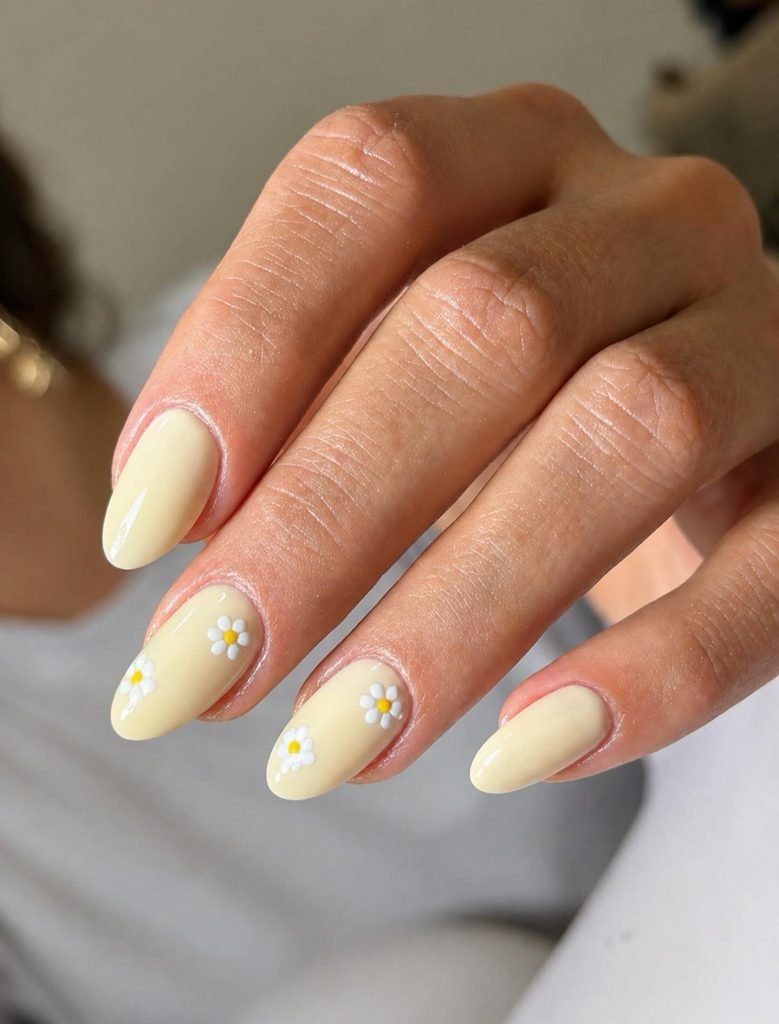
Tiny white daisies feel more intentional when their placement changes from finger to finger. Paint round nails creamy yellow, then tuck one small flower near the sidewall of the index nail and two partial blooms along the ring nail’s outer edge. Leave the thumb, middle, and pinkie plain. Muted golden centers keep the flowers visible against the yellow background, and a clear gloss unifies the set.
The blank nails prevent this spring motif from becoming a full floral print. It is realistic to paint at home with a dotting tool, although five small petals read more clearly than a crowded ring of dots on short nails. For more floral arrangements with different base colors, see Nail Blooms’daisy nail designs. Once you have used your polishing brush and got the yellow streaky mark, complete the base before applying anything to the petals.
How to Apply
- Paint all five round nails with two thin coats of creamy yellow.
- Dot five small white petals beside the index sidewall and two partial flowers on the ring edge.
- Place a muted golden-yellow center in each flower once the petals are set.
- Finish with a floating coat of clear gloss so the dots do not smear.
9. Tiny Yellow Tulips on Sheer Nails
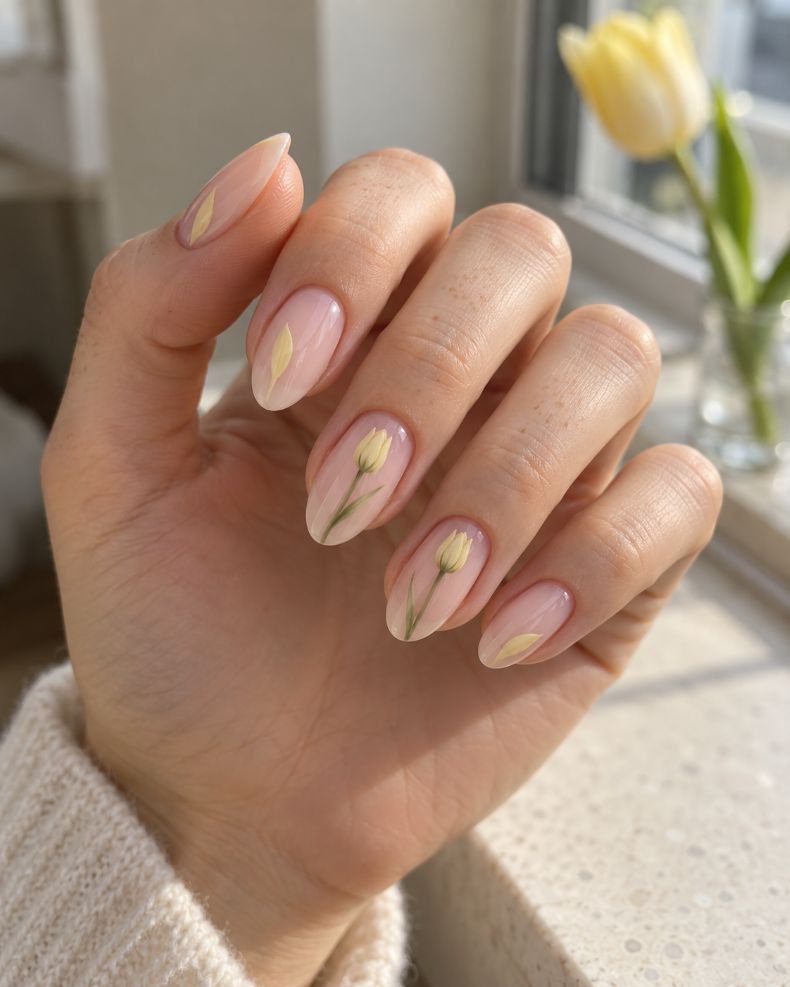
Tulips give the yellow a very different job: it becomes the flower rather than the background. Use medium oval nails with a translucent blush base. On the middle and ring fingers, paint a single slender sage stem rising from one lower corner into a closed, three-point pastel-yellow bud near the tip. The remaining fingers get one small yellow petal shape each, with plenty of sheer space showing. Seal in gloss.
This composition looks delicate because the flowers grow in one direction instead of being scattered across the whole nail. The bud shape is also easier to identify than an elaborate bouquet squeezed onto a short nail. A tech can draw tapered petals with a liner brush; at home, flower decals over a fully dry base are the cleaner option. Bring a close-up reference to your appointment, especially If you want something cooler like a primrose, you should bring a close-up photograph of what you want.
How to Apply
- Apply a translucent blush base to medium oval nails.
- Draw slender sage stems diagonally on the middle and ring nails.
- Paint three narrow yellow petal points at the end of each stem; place a tiny isolated petal on the other nails.
- Let the details dry or cure according to the chosen system, then seal with clear gloss.
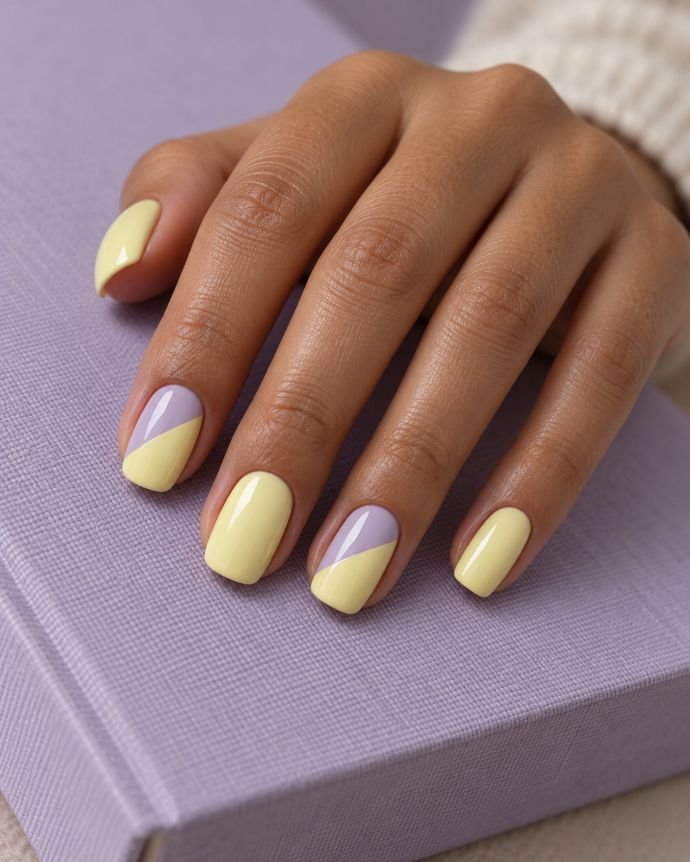
10. Pastel Yellow and Lavender Color-Block Nails
Lavender extracts a cool dimension from pastel yellow. Split the index and ring nails on square-rounded nails diagonally, in two blocks: light yellow towards the base and dark lilac towards the tip. The remaining three nails remain yellow, without outlining either color in white or metallic polish. The hard and clear line provides the necessary contrast for this shiny manicure.
It is an individualized version of a random colorful pastel pattern. The same diagonal angle of the two accent nails adds a certain rhythm to the manicure, although the line does not necessarily need to be placed through the middle of the nail. It will peel off fresh polish, so allow the first color to dry properly when used as a guide. If you get a manicure at a salon, request an even line without thickening of the polish at the junction point..
How to Apply
- Paint three rounded-square nails opaque primrose yellow.
- Apply yellow to the lower diagonal section of the index and ring nails, leaving the upper section bare.
- Once dry, fill the upper section with muted lilac using a liner brush or a carefully placed guide.
- Check that the two diagonals align visually and apply glossy top coat.
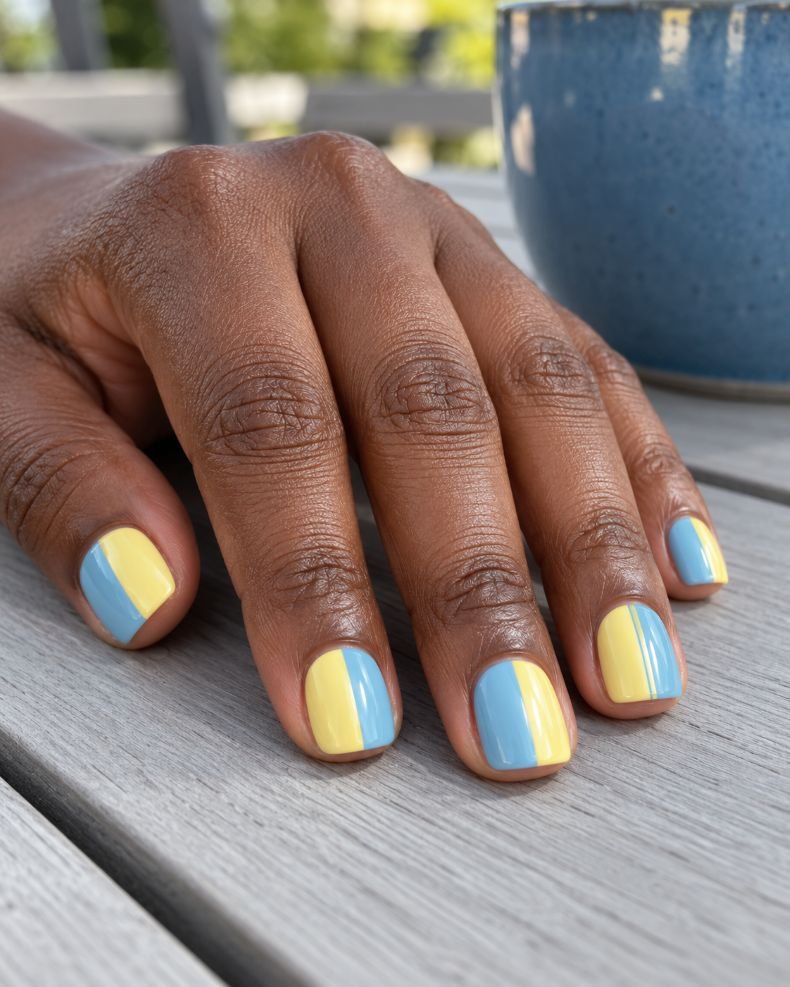
11. Pale Blue and Yellow Split Nails
If you are interested in creating a graphic depiction of the spring colors, cut each small square nail vertically down the middle. One side is opaque duck-egg blue; the other is soft lemon yellow. Reverse the color order on the next nail and add a thin center white line to just the ring finger. The five polished nails create an alternating color pattern, where there is no dominant accent color.
The key feature here is the seam. On one hand, the seam could make the small square nail appear longer. On the other hand, the seam that is inclined toward the sidewall creates an impression of crowding out one of the colors. A striping brush would be helpful in making the center line; for beginners, it would be better to paint the lighter color part first, let it dry, and then apply the dark color to its edge.
How to Apply
- Apply base coat to five short square nails and mark their vertical midlines lightly.
- Paint one half of each nail lemon yellow, alternating its left-right position.
- Once dry, fill the other halves with opaque duck-egg blue; add a hairline white stripe to the ring seam.
- Smooth the completed design with a clear glossy top coat.
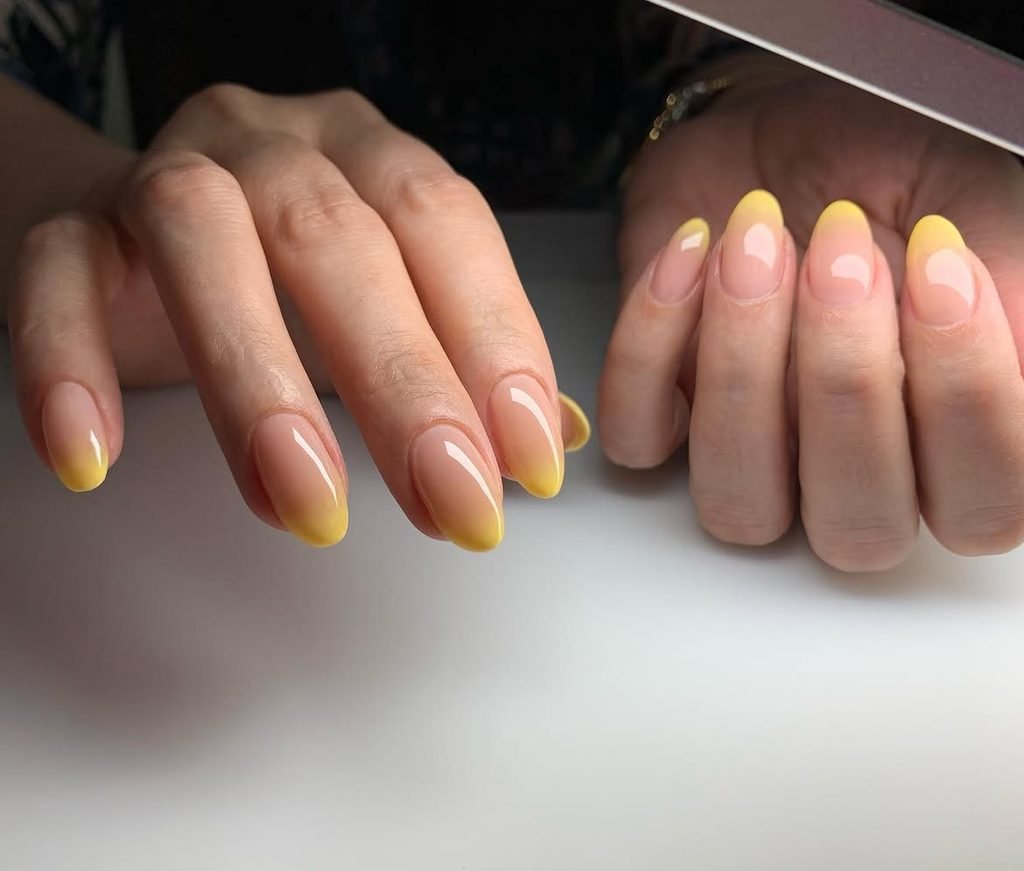
12. Blush-to-Yellow Ombré Nails
The diffused fading process allows for a softer transition of pastel yellow. Starting with medium almond-shaped nails, apply a subtle blush pink around the cuticle and continue the transition to pale yellow near the tip, without any clear dividing point. Try keeping the yellow color on the tips of the nails so that this would be the color seen first. Glossing will create a sharp shape outline but won’t create a striped effect.
Two opaque colors can become chalky when applied with a brush loaded with too much polish. Apply the color in thin layers and wait until each layer dries before applying the next one and keep the rest of your skin from getting additional product. Salon airbrush or a high-quality press-on set may provide a flawless outcome if you desire the magazine-ready nails without a lot of experimenting. For different fading locations and color combinations, check Nail Blooms’ ombré nail ideas.
How to Apply
- Paint medium almond nails with a thin blush base and let it dry.
- Place blush and pale yellow side by side on a small makeup sponge.
- Dab lightly over each nail, keeping yellow toward the tip; repeat sparingly to soften the transition.
- Clean the skin around each nail, then add a glossy top coat after the gradient has set.
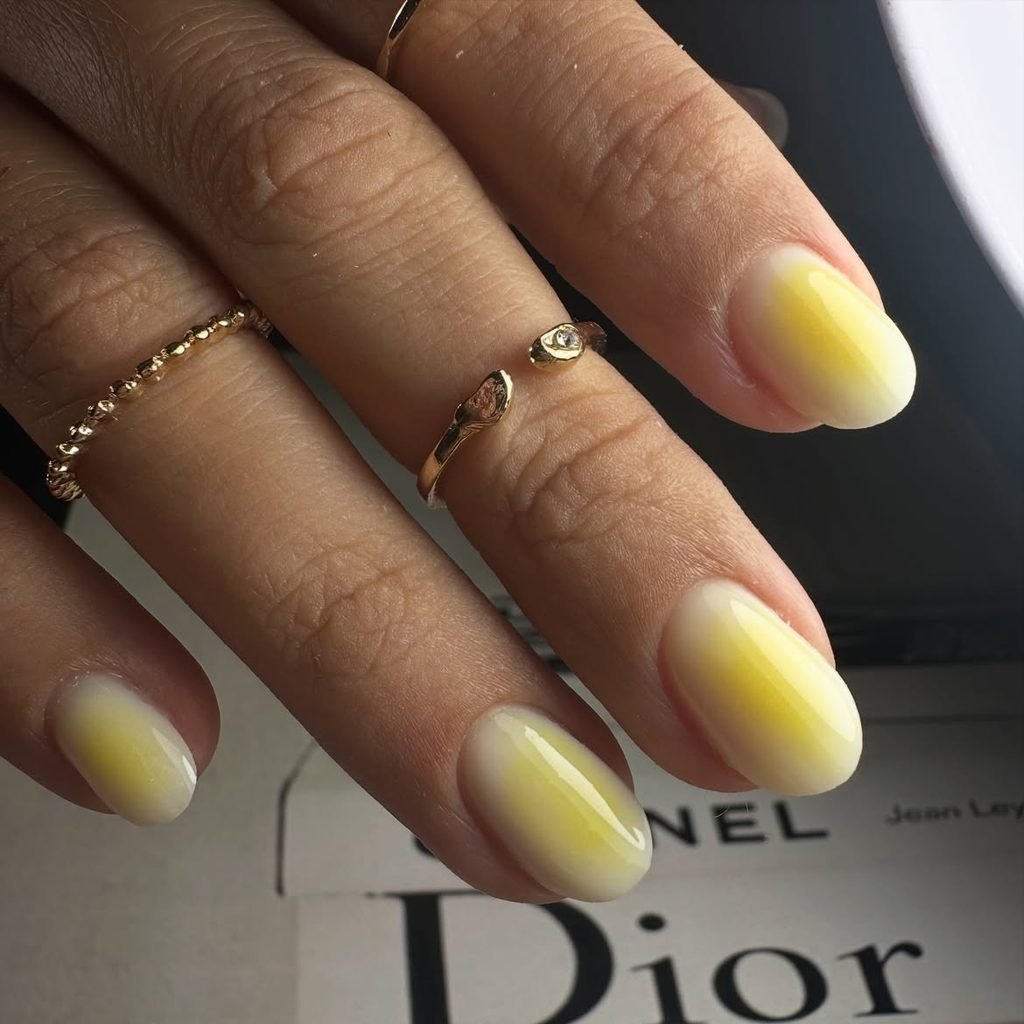
13. Soft Yellow Aura Nails
As compared to the tip-to-base fade technique, this color is glowing from its center. The nails that have a oval shape should be covered in a milky-white base and then a small amount of pastel yellow color should be blurred in the center of each nail, thus creating a pale border that surrounds it. The yellow color needs to glow diffusely.
The halo creates a sense of depth in short nails without the necessity of having any motifs that should match a small surface of nails. Moreover, it is possible to use it for your daily manicure because the yellow color in the center of nails should be bright enough to create contrast with the white background. It is easier to use airbrush in the salon, while at home it will be possible to use a sponge but it should be done gradually. The center of nails should be placed slightly above the midpoint of every nails.
How to Apply
- Apply a translucent milky-white base to oval nails.
- Dab a small amount of pastel yellow onto the middle of each nail with a nearly dry sponge, or ask a tech to airbrush it.
- Soften the perimeter without spreading yellow into the sidewalls or cuticle area.
- Once fully set, seal the aura with a clear glossy top coat.
14. Lemon Slice Accent Nails
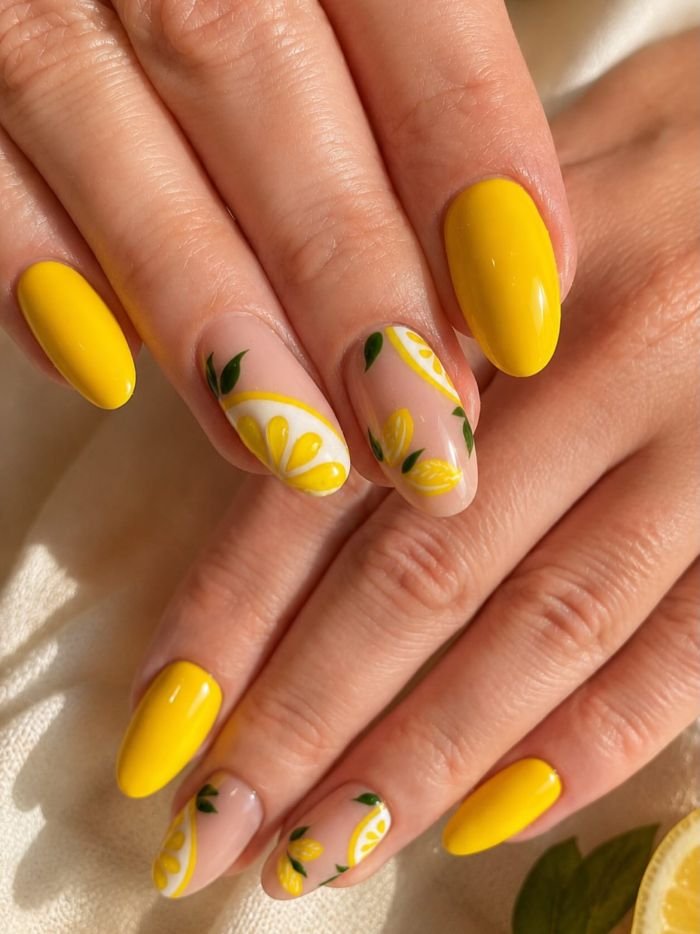
Make sure that the fruit appears as a small illustration and not a decal that covers the whole fingernail. In medium-sized oval nails, apply pale yellow polish to your thumbs, middle, and pinkie nails. Paint the other two fingernails with an ivory base and add one small lemon piece on each of them close to one of the corners – it should have a deep yellow peel, white segments, and a tiny area of bare ivory next to it. A bit of gloss makes the fruit stand out.
These designs are fun but easy to read thanks to the simple background of the nails. They work great for weekends or vacations during the spring time, especially if you prefer a design with a definite theme instead of an abstract one. The tricky part is the white segments; if you find it hard to keep them distinct, use just one big slice per accent nail. Using decals is perfectly acceptable.
How to Apply
- Paint three medium oval nails yellow and the middle and ring nails warm ivory.
- On each ivory nail, draw a small deeper-yellow circle or partial circle near an outer corner.
- Fill the center pale yellow and separate a few segments with fine white lines, keeping ivory visible around the slice.
- Allow the illustration to set fully, then apply a clear glossy top coat.
15. Pearly Yellow Glazed Nails
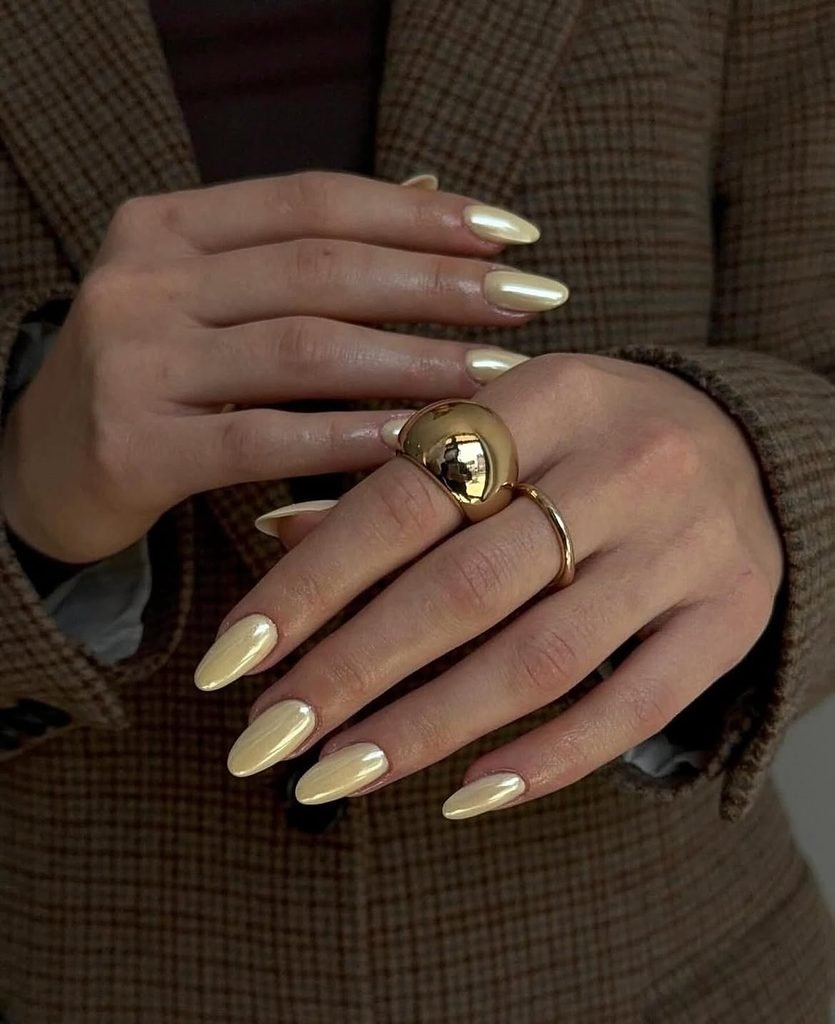
Imagine a transparent, pearlescent ivory finish over a medium almond nail base painted with opaque vanilla yellow polish. The base color is kept visibly pastel yellow, with a clear pearlescent coating on top that reflects light through a cold ivory tint rather than making the nails silvery. The five fingers all look identical, and there are no pearls or gemstones used. It is the changing finish of the polish that makes this design interesting.
This is a simple option when you are not ready for floral designs but the cream shade seems incomplete. Request to try the pearlescent overlay over the real yellow shade first; if you use an opaque white one, you will remove the color you like. A common pearlescent polish overlay is a simpler way to replicate the technique at home. If you want to create a chrome finish by rubbing powder on the nails instead, let your technician know.
How to Apply
- Coat medium almond nails with an opaque vanilla-yellow lacquer and let it dry.
- Test a translucent ivory-pearl topper on one nail to check that the yellow remains visible.
- Apply one thin, even pearlescent layer to all five nails, avoiding heavy brush marks.
- Finish with a compatible clear gloss after the shimmer layer sets.
16. Yellow Velvet Cat-Eye Nails
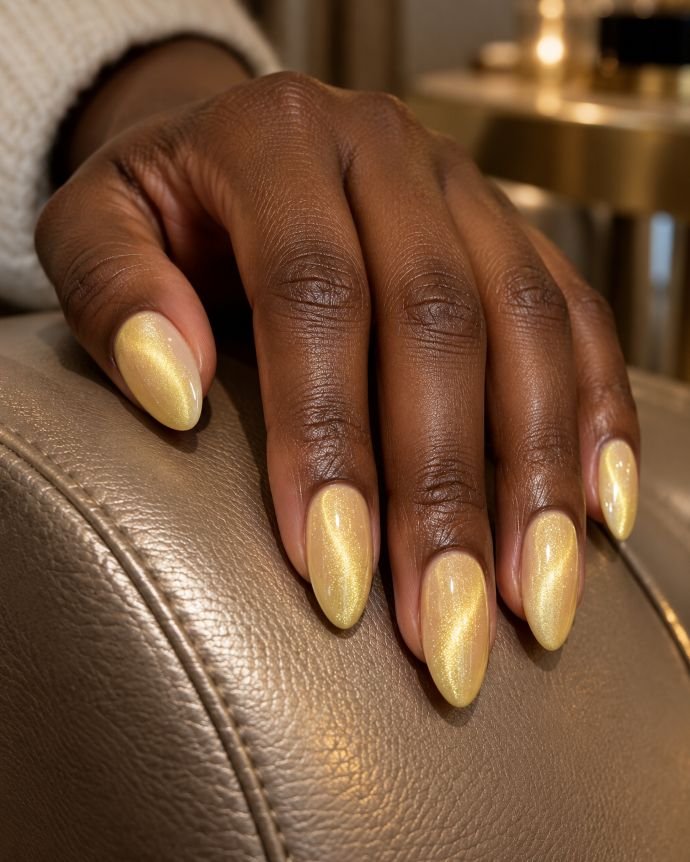
A gentle magnetic shimmer gives pastel yellow a plush, almost fabric-like depth. Almond-shaped nails should be painted using medium-sized nails in a warm butter yellow gel with fine champagne magnets. Instead of pulling a sharp diagonal line, move the glitter towards the middle of each nail to create a wide and blurred effect. The top coat applied on top is shiny and the word ‘velvet’ refers to light.
It is a salon term for a person who desires to have a one-color nail design with some more movement compared to pearl glaze.. The effect depends on magnetic gel and a magnet before the relevant layer is cured, so an ordinary glitter polish cannot reproduce it. The GelBottle’s cat-eye application guidance explains how magnet placement changes the reflection. You can compare narrower beams in Nail Blooms’ cat-eye nail ideas. The GelBottle Inc
How to Apply
- Have a nail professional prepare medium almond nails and apply the appropriate gel base and butter-yellow color layers.
- Apply a compatible champagne magnetic gel over the yellow without curing that layer yet.
- Move the magnet around each nail to gather a broad central velvet glow, then cure according to the product instructions.
- Apply and cure the compatible glossy gel top coat.
17. Matte Yellow Nails with Glossy Raindrops
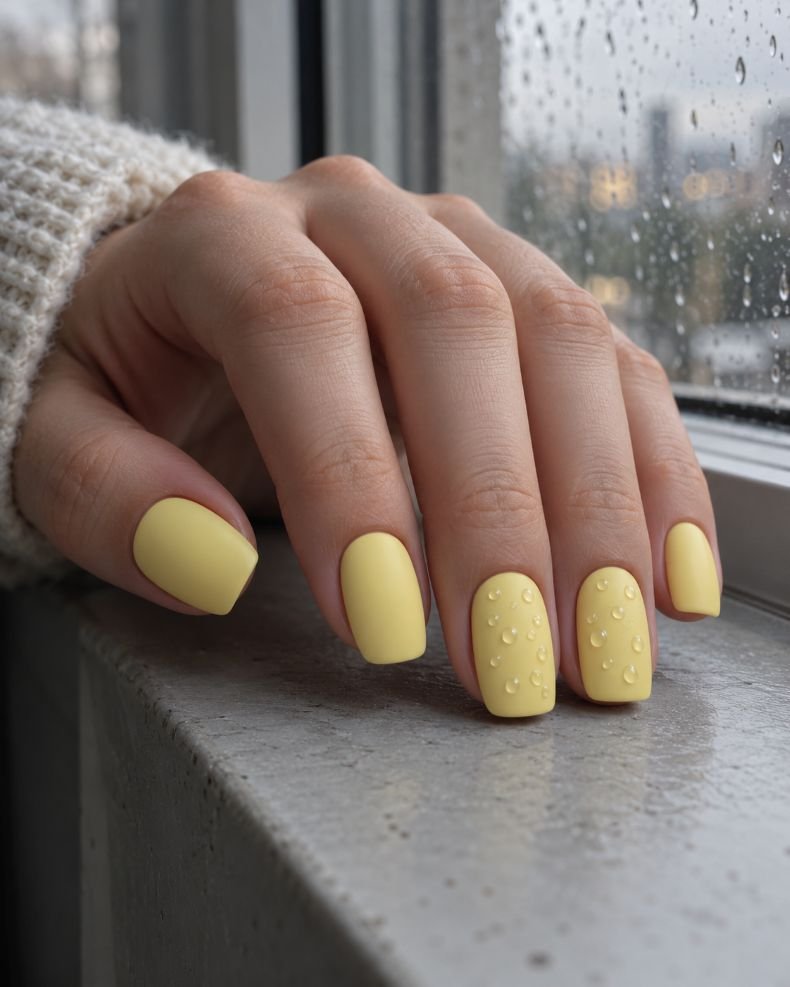
Spring showers become a finish detail on this set.Coat the nails with a solid light daffodil yellow and make the finish matte. For the middle and ring fingers, apply some small transparent dome drops at irregular heights, while the others stay matte. When seen from an angle, the dome drops resemble water drops on the light color.
The two textures make the design interesting without introducing a second paint shade. It works best as a salon gel set because raised droplets need a controlled clear product and proper curing; a clear dot of ordinary top coat usually flattens as it dries. Keep the domes small and away from the free edges, where raised details would be more exposed to everyday contact. Show the technician a reference that makes clear you want separated beads, not a wet-look top coat over the whole nail.
How to Apply
- Have a nail professional coat medium squoval nails with opaque pale daffodil-yellow gel and cure as directed.
- Apply a compatible matte gel top coat and cure according to the product instructions.
- Place a few small dots of suitable clear sculpting gel on the middle and ring nails, spaced irregularly, and cure fully.
- Leave the remaining three nails uniformly matte and avoid glossing over the finished surface.
18. Pastel Yellow Negative-Space Waves
Yellow moves across these medium almond nails in loose ribbons rather than filling the whole plate. Begin with a sheer pink base, then sweep one broad pastel-yellow wave from the lower left side toward the opposite edge on each nail. Leave clear base showing both above and below the ribbon. On the ring finger alone, add a fine ivory curve beside the yellow; gloss keeps the airy spaces looking deliberate.
The wave shape is quite tolerant in contrast to the straight-line pattern, however, the width of the wave is important. In case the wave gets wider, the whole pattern can be considered mostly yellow with some random spaces. Let each ribbon travel across a slightly different point so the hand feels fluid rather than stamped. This is a good final option if you like abstract spring art without flowers or fruit, and it can be simplified to one accent nail over an otherwise sheer set.
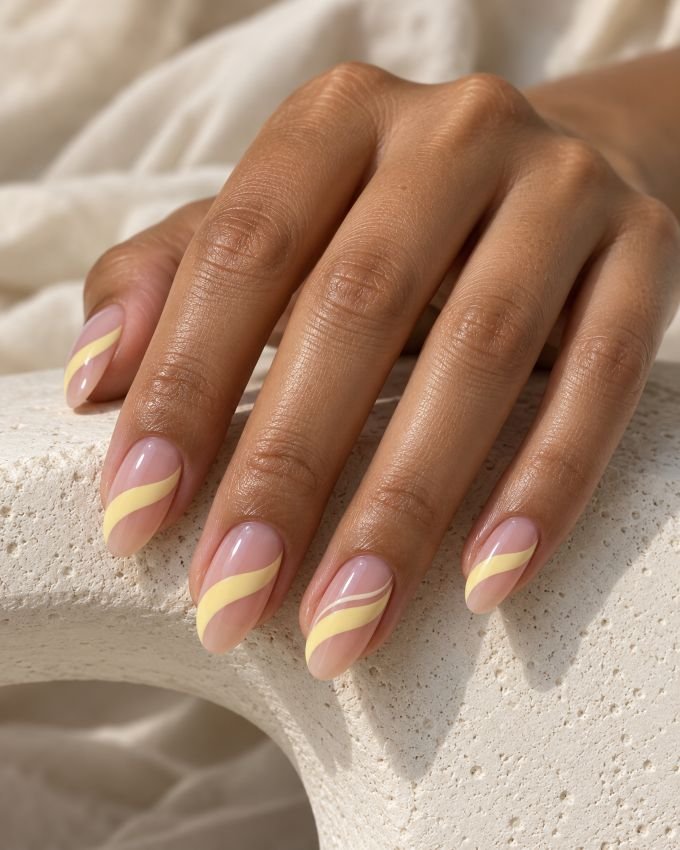
How to Apply
- Apply a translucent pink base to five medium almond nails.
- Use a liner brush to draw one flowing pastel-yellow ribbon diagonally across each nail, keeping negative space on both sides.
- Add a narrow ivory companion curve beside the ring-finger wave only.
- Let the art dry thoroughly and finish with clear glossy top coat.
How to Choose a Pastel Yellow Shade
Try bringing in two or three shades under the light before making a decision. For example, butter yellow is warm and creamy, primrose is a little cooler while vanilla is more subdued. It becomes more noticeable when it is applied to your skin and your wardrobe. In case you have a wardrobe filled with shades of ivory and tan, you can consider wearing a buttery yellow shade along with it. A light blue, some pieces of jewelry made in silver and a cool pink can make the lemon yellow very appealing.
Opacity plays just as important role in choosing the right yellow as an undertone. Sheer yellow will allow your natural nails to be visible, opaque cream will offer a solid color while a milky shade will be in-between. Try applying your shade to one nail instead of deciding whether you like it by looking at it from the bottle. In case a light shade has appeared streaky in one coat, try adding another layer.
Which Nail Shapes and Lengths Suit Pastel Yellow?
The short oval and squoval shape makes the color look well-structured and neat and therefore easy to wear. The shape is best for yellow solid color, micro French tips, and little daisies. The short square gives more room for split color or checkerboard designs, but large paintings must be done carefully. Medium almond nail allows space for side swept tip, blush to yellow gradient, or wave designs following the tapered shape.
You should choose your design alongside with the length of the nail. Gingham grid which looks beautiful on medium nail may look blurred on very short nails; just a single daisy close to the cuticle area is visible. Another option is to ask your nail technician to reduce the number of accent nails instead of making your nails longer to have more room for art. These almond nail ideas help to understand how taper affects color and pattern placements.
DIY or Salon: Choosing the Right Technique
Solid cream, pearly lacquer topper, and dot-tool flowers will do for a reasonable do-it-yourself project. Micro-French requires a steady hand and a thin brush but only polish is used. In case of gradient shades, be ready to practice since sometimes a sponge leaves texture that will only disappear due to a top coat. The instructions of OPI lacquer application directions contain a good approach for these sets, including several thin layers of color and one top coat layer.
Schedule a visit to the beauty salon or order custom press-ons for intricate gingham, sharp color blocks, and tiny painted lemons segments without doing two hands by yourself. Magnetic cat-eye gel requires special gel, magnetic tool, and appropriate curing machine. Raised clear droplets require special sculpting gel. Pearly lacquer topper and chrome have different textures, therefore, take a picture in case you would like to get a glaze for your design. Choose what is important for you and simplify the rest of the set.
How to Keep Pale Yellow Nails Looking Fresh
The paleness of the color makes it easier to see any imperfections in the edges and surface. Start with an even foundation and make sure not to apply yellow on the skin surrounding the nails because too much of it may cause a ridge at the cuticle which will be difficult to conceal after. Make sure to wait for the lacquer layers to dry before applying the top coat. If you chip only one solid nail, it will be easier to paint a new one compared to a mini-painting of a patterned nail.
Choose the finish that you want to do before the process. A glossy finish can be refreshed by using a top coat compatible with it, while a glossy finish will negate the desired matte finish of the raindrops. Be careful not to pick any raised designs and consult the salon where you had your gel nails done about how to maintain and remove the design. Remove your nail paint using the way that it should be done rather than peeling the finish off of your nails.
Final Thoughts
The most vivid pastel yellow nails know how to put the yellow in its place. It could be a buttery yellow manicure, which allows the shade to carry the whole weight; a sheer lemon wash that allows the natural nail to become part of the design; or a tulip/lemon slice that uses the yellow color as an element of decoration. If you would like some more dynamics in your nail art, then consider contrasting a pink to yellow ombré with a centered aura, as the color placement is what makes the difference between the two.
For your first appointment, select the design suitable for your natural nail length and let your nail artist know how you envision your yellow warm and creamy or light and lemony. Talk about the finish, too. Glossy, pearl-like, matte and magnetic velvet finish cannot be exchanged for each other without altering the appearance. Your perfect spring manicure must not only be picture-perfect but also look appropriate on your hands in the real life.
Found a pastel yellow nail design you love? Upload your favorite look and see how soft butter yellow, delicate French tips, or spring florals suit your own hands before your next manicure.
Try It On Virtually