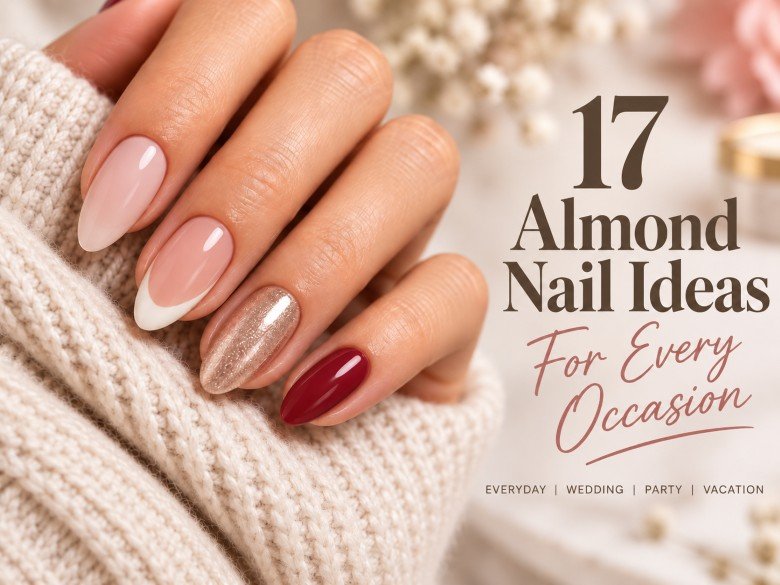
17 Almond Nail Ideas for Every Occasion
Almond-shaped nails offer elegance in tapering but allow flexibility for designs other than ultra-long shapes. The most successful almond nail ideas play off the almond silhouette as part of the design itself, using finishes such as sheer nude tones, fine French tips, gradient cat-eyes, or seasonal illustrations.
These almond nail designs range in length from short to long and are appropriate for everything from daily office wear to wedding-day styles, festive occasions, vacation fun, or evening outings. Each design provides a breakdown of color balance, finishes used, and methods of creation, helping you find a suitable option for your personal needs and save inspiration for your next visit to the nail salon.
1. Milky Nude for Everyday Wear
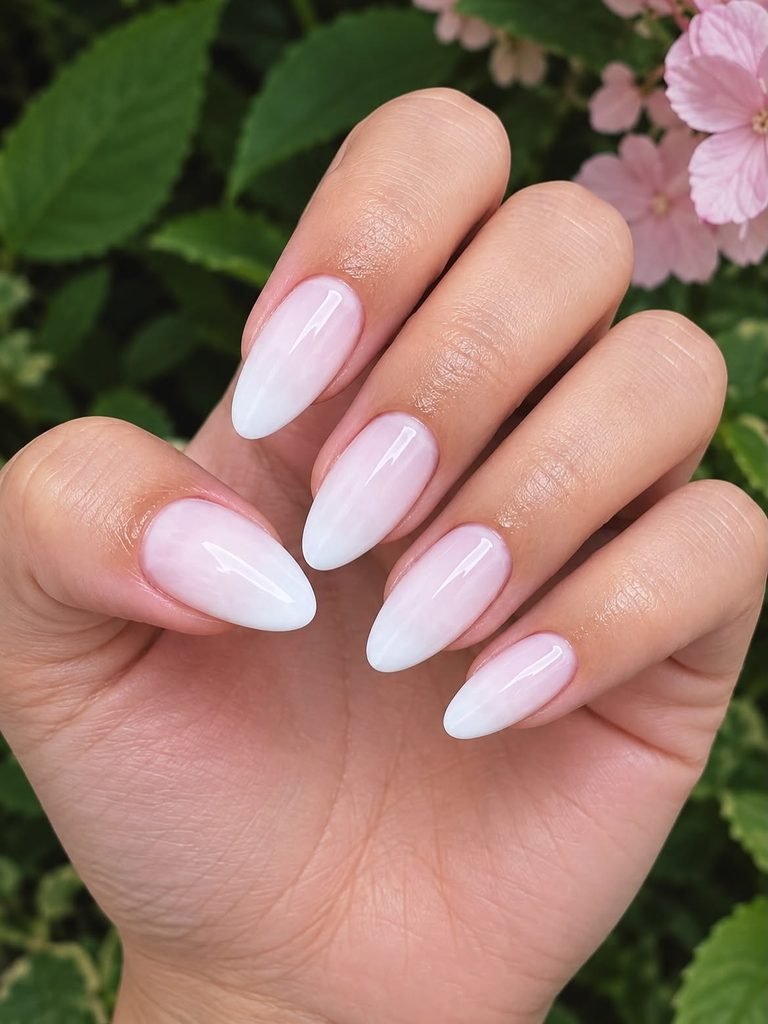
A sheer, creamy nude creates a softly blurred effect for short almond nails while allowing the natural free edges to remain visible. Each nail ends in a gentle taper to a round point, and every nail receives an identical glossy finish. There are no accent nails and no added shine: this mani relies on balance, coverage, and the soft blending of colors.
This shade serves as an ideal base for any almond-shaped nail designs, whether you’ll have office meetings, errands, or dinner dates throughout the week. Try testing a rosy nude, a peachy nude, and a caramel nude against your skin tone before deciding which works best on you. If you would prefer something more pink, check out these bubble bath manis instead. The sheer formula will enhance slight variations in your natural nail color beautifully.
How to Apply
- File nails to form short almond shapes, then remove filing dust from them.
- Apply two thin coats of sheer, milky nude polish where necessary. Add a second coat only if needed for better coverage, but allow the initial coating to dry or cure first.
- Cover nails with glossy clear polish. Seal the free edge, too.
- Allow the nail lacquer to dry completely, or cure gels according to their directions.
2. Ivory Micro French for Polished Plans
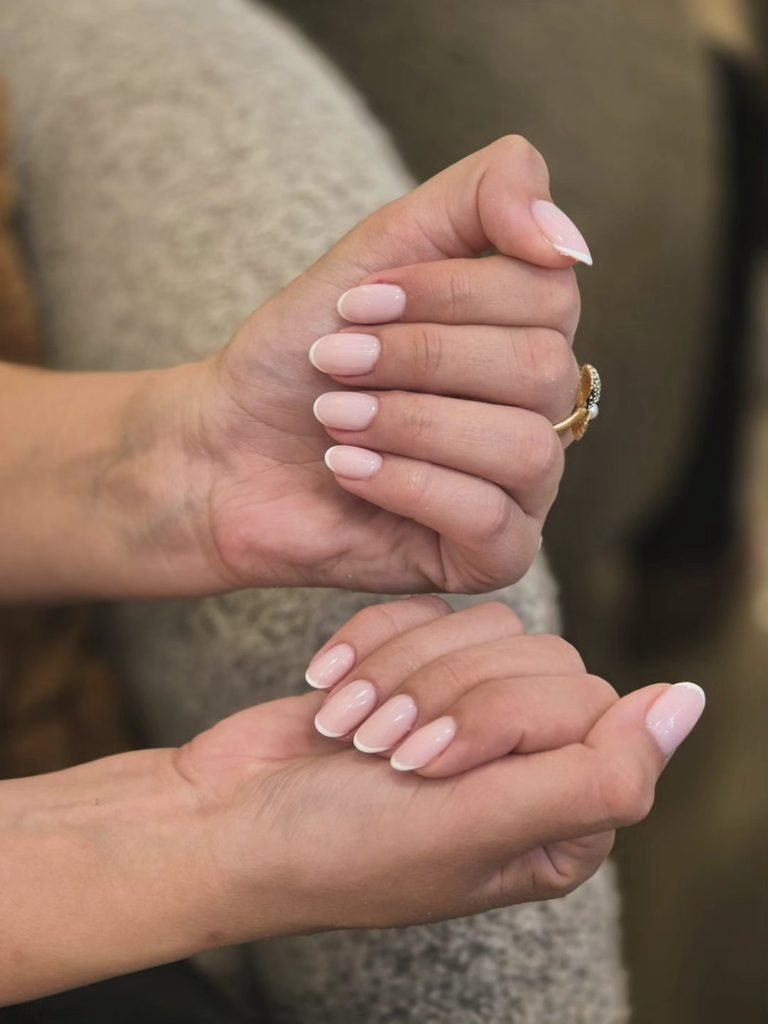
An ivory half-moon hugs the edge of each almond nail that is short to medium. Most of the soft pink, sheer base stays visible. The white line dips a bit more near the side walls, yet it stays thin down the middle. A glossy top helps both colors blend. The rounded nail tip keeps the look neat and light. This is more like a thin outline than a bold white block.
These almond French tip nails work for job interviews, graduation photos, and days when you want your manicure to feel planned. You still want it to matter, but not take over your outfit. Ivory looks gentler than bright white and creates less contrast. If you cannot decide, test both shades with your nail tech first. If your nails are on the shorter side, do not make the tip wider just because it seems easier to paint. A small liner brush or French decals that fit your nail size will help the lines stay balanced.
How to Apply
- First, shape and prep the nails in a short-to-medium almond form. Add a translucent blush-pink base. Let it dry fully or cure it.
- Next, use a fine liner brush or a guide to draw a very narrow ivory curve along the free edge.
- Then, fix the side corners right away before the ivory polish starts to set. If you are using gel, cure at the right step.
- Finish by sealing with a glossy top coat. Keep the brush pressure light, so the tiny tip edge stays sharp.
3. Cherry Red Half-Moons for Date Night
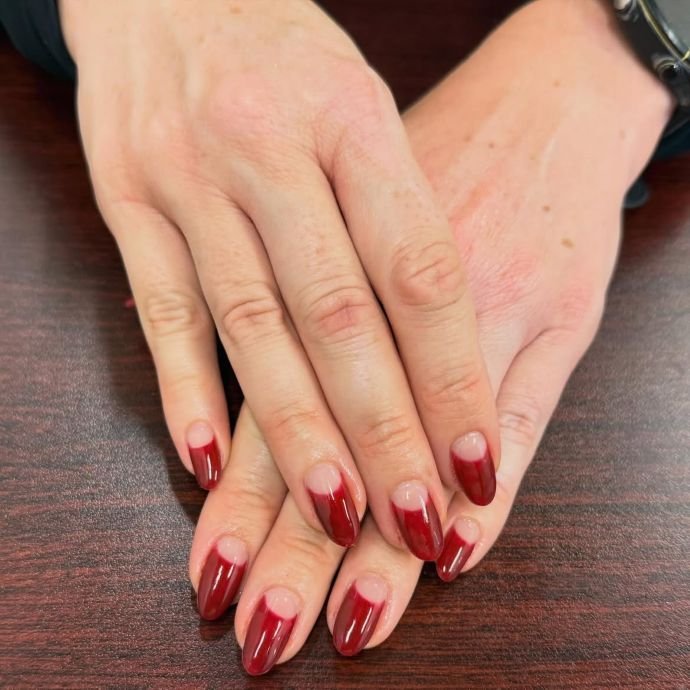
This manicure does not put the accent at the very end. It shows a faint blush crescent at the bottom of each medium almond nail. After that, a rich cherry red fills the rest of the nail, stopping at a neat rounded tip. The red stays well balanced. It does not pull hard toward orange, and it does not go clearly into purple. A shiny top coat makes the little crescents look crisp.
This half-moon style can add a hint of old-school flair to a dinner look. It works well with a plain black neckline. It also pairs nicely with a red lip that has a similar tone. If a full red manicure feels heavy right at the cuticle area, this design is a calmer choice. You do not need busy art. Just keep the crescents looking right for each nail. Match the size to the nail shape instead of using the exact same guide for every finger.
How to Apply
- Put a sheer blush base on cleaned medium almond nails. Let it dry, or cure it.
- Set a half-moon guide at the cuticle on each nail. Leave the crescent area exposed and even.
- Paint two thin coats of cherry red, starting at the guide and going to the tip. Remove the guide before the polish sets. If you use gel, remove the guide before curing, or follow your gel timing.
- Add a glossy top coat. Seal the free edge.
4. Champagne Pearl Chrome for Weddings
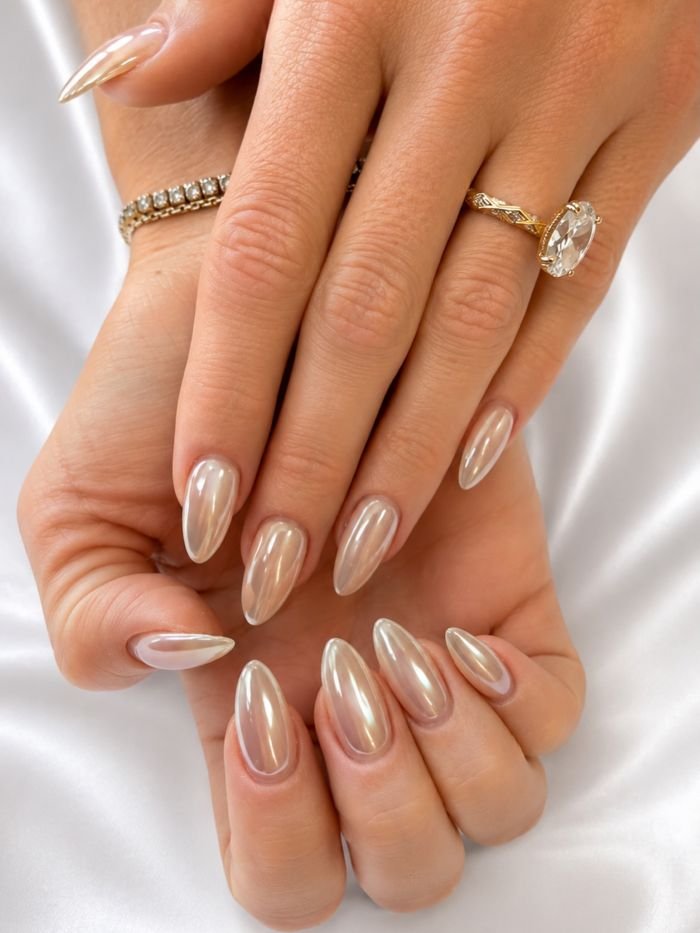
Champagne beige looks soft on medium almond nails. A thin pearly chrome layer sits on top and makes the color glow. When you move your hands, the surface flashes pale gold and light ivory. Each nail gets the same smooth finish. There are no loose glitter bits and no extra accent art. The shine feels like light, not like a hard mirror. Rounded tips keep the whole look bridal and mild.
If you are doing wedding almond nails, think about how the base tone will sit with your dress and jewelry. Warm cream fabric and yellow gold make the champagne shade stand out more. A cooler blush base can shift the vibe toward a softer pink feel. These glazed donut nail looks also give you more ways to play with clear, see-through shine. Ask for a finished swatch before you commit. The undertone matters and changes how the powder shows.
How to Apply
- Get your medium almond nails ready. Apply a thin champagne beige gel base, then cure it with your gel system.
- Use the required top coat with no wipe, and cure it fully for the chrome product you plan to use.
- Lightly buff fine pearl or champagne chrome powder onto the nail. Sweep off any extra powder from the skin and side areas.
- Seal the powder with a glossy top coat that works with your chrome. Cure again, and check that the very ends are sealed.
5. Butter Yellow Daisies for Spring Weekends
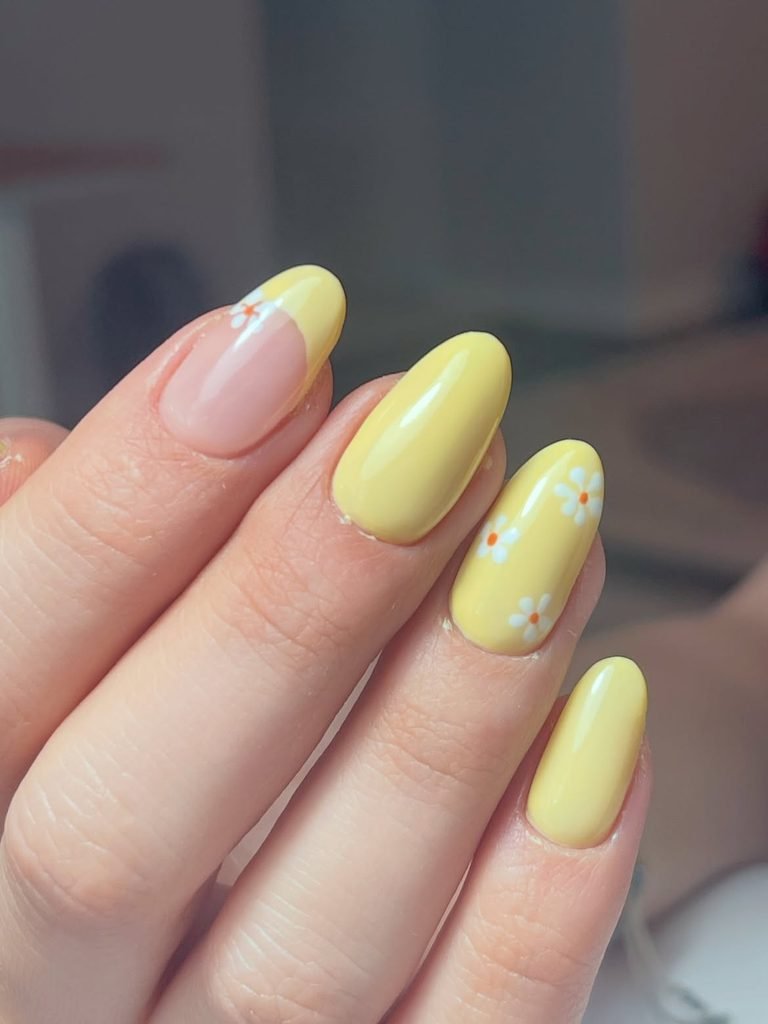
Small white daisies line one side of the middle and ring nails. Each bloom has an ochre center, and the flowers sit on a butter yellow background. The thumb, index, and pinky stay solid yellow so the daisies are easy to see. All five nails are short and almond shaped, with a shiny top. Each petal is painted as a flat dot. There is no puffed up flower detail and no bumpy center.
Yellow can feel soft, not loud, when it is more creamy than bright. This design fits a spring outing, a birthday in the day, or a weekend with a cotton dress. Put the flowers a bit off to the side. That way the nail space does not get packed. If you want more spring looks, there are other ways to mix florals with empty space. Small daisy stickers also help, since you do not need to paint every dot by hand.
How to Apply
- Paint two light, thin coats of warm butter yellow on short almond nails. Let each coat dry or cure before the next.
- On the middle and ring nails, place five ivory dots to form one off-center flower on each nail. Use a dotting tool.
- Add a tiny ochre or caramel dot in the center of each flower. Remove any dots that end up too close to the cuticle.
- Finish with a glossy top coat over the whole nail. Let the manicure fully set.
6. Cobalt Waves for Seaside Days
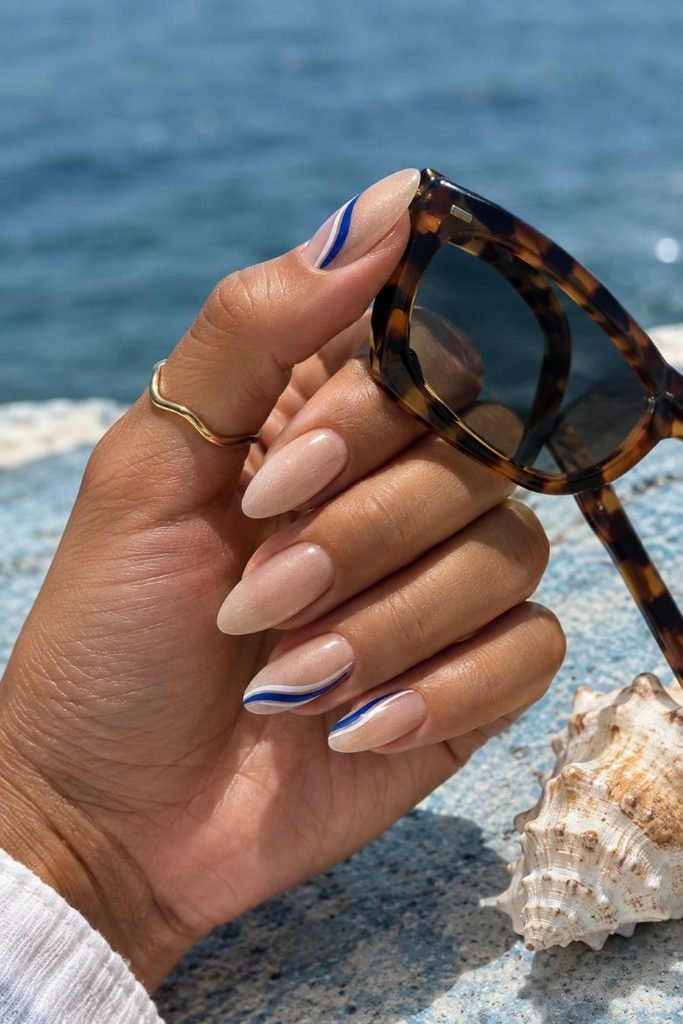
Two narrow cobalt ribbons sweep diagonally across each medium almond nail over a sheer sand-colored base. One ribbon bends through the center; the other sits closer to the tip, leaving a visible strip of negative space between them. A tiny white line follows the lower ribbon on the thumb and ring finger only. The glossy finish suggests water without adding shells, glitter, or raised droplets.
This is a graphic take on a seaside manicure, useful when you want blue nails without literal beach illustrations. The saturated blue looks crisp beside white cotton and silver jewelry, while the sheer base keeps the overall effect light. Ask for curved ribbons rather than straight diagonal stripes: the movement is what makes the design. A technician can vary the wave placement slightly to suit each nail’s width without losing the rhythm across the hand.
How to Apply
- Paint a sheer sand-colored base on prepared medium almond nails and let it dry or cure.
- With a fine detail brush, sweep two narrow cobalt waves diagonally across each nail, leaving a nude gap between them.
- Add a thinner white line along the lower wave on the thumb and ring fingers only.
- Apply glossy top coat, smoothing over the curves without dragging the blue pigmen.
7. Peach-to-Pink Ombré for Summer Trips
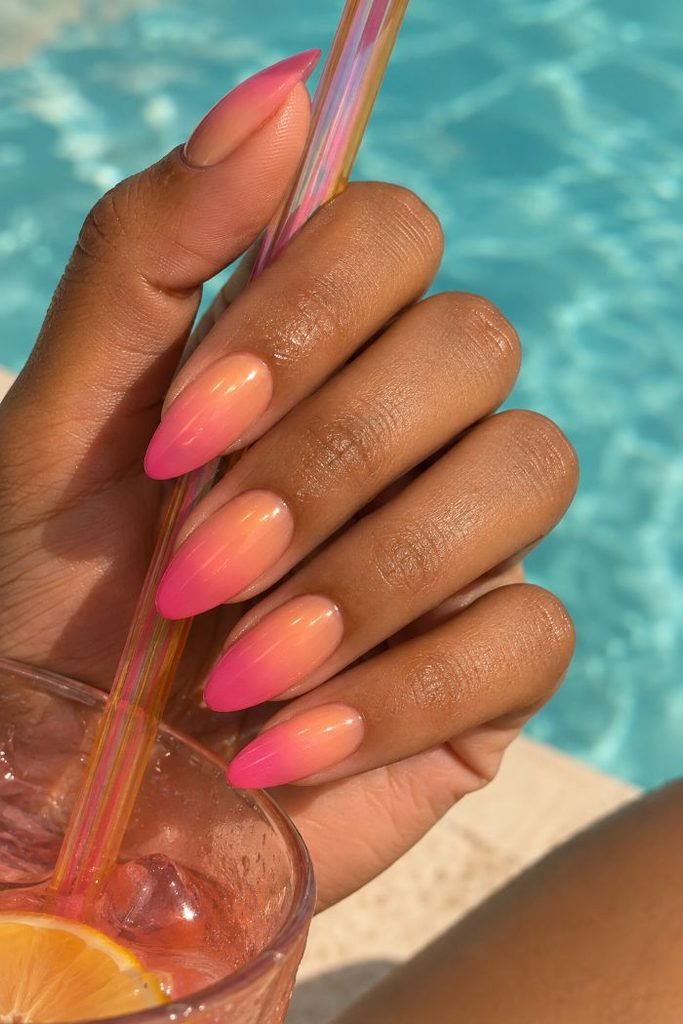
A soft peach starts near the cuticle. It slowly shifts into coral, then ends in a bright pink at the rounded tip. These nails are medium to long and almond shaped. The color change moves straight up and down. There is no sharp edge where the shades meet. There is also no glitter on top. A shiny top layer makes the shift look even and smooth. Matching the same order of colors on every nail keeps the look tied together.
If you want summer almond nail ideas, this one feels light and happy. It fits a beach day or an outdoor event. The extra length helps the gradient show more clearly. A shorter nail can still work with only peach and pink. If you are planning a trip, pair this with other beach themed nail looks. When you do it at home, add the layers step by step. Pressing too much at once often makes the blend look uneven.
How to Apply
- Put peach polish near the cuticle. Let it dry a bit before you continue. Add coral next, then add vivid pink.
- Use a makeup sponge to load the three shades. Place them in vertical stripes. Press the sponge onto one nail from the base toward the tip. Keep the press gentle.
- Do the same on the other nails. Wipe any polish off the skin around the nail. Cure each layer if you use gel, or let each coat dry if you use regular polish.
- Finish with a glossy top coat. This helps hide any sponge texture and seals the edge.
8. Tortoiseshell Tips for Autumn
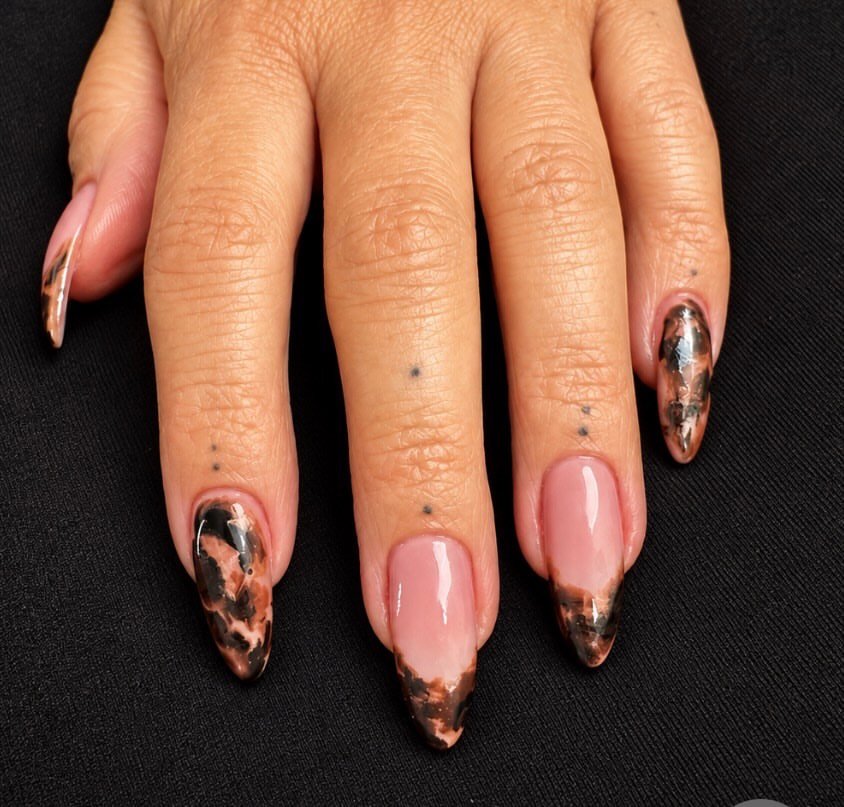
Amber and espresso tones sit on the middle and ring fingers, forming slanted tortoiseshell tips. The thumb, index, and little finger stay plain in a rich chocolate brown. The nails are medium almond. There is space at the edges for see-through honey gaps between the darker patches. The finish looks shiny. The tip pattern is not neat or repeatable. It has soft layers, so it reads more like real tortoiseshell than like evenly spaced spots.
This set also works well for fall. It keeps most fingers solid, and only the tips get the mixed look. The warm brown pairs easily with tan leather, oatmeal knits, and amber jewelry. If you are choosing between cocoa that leans red and a deeper espresso tone, these chocolate brown nail designs can guide you. For a DIY try first. Put the translucent amber polish on an extra nail tip. If you switch to an opaque orange, the result will not match.
How to Apply
- Paint two glossy coats of chocolate brown on the thumb, index, and little finger.
- On the middle and ring nails, brush on a translucent amber or honey base only at the tips.
- When the base is still workable, add irregular espresso and caramel patches with a small brush. Leave clear amber gaps in between the pieces.
- After the design is dry or cured, add a high shine top coat to all five nails.
9. Sage and Cream Color Blocking
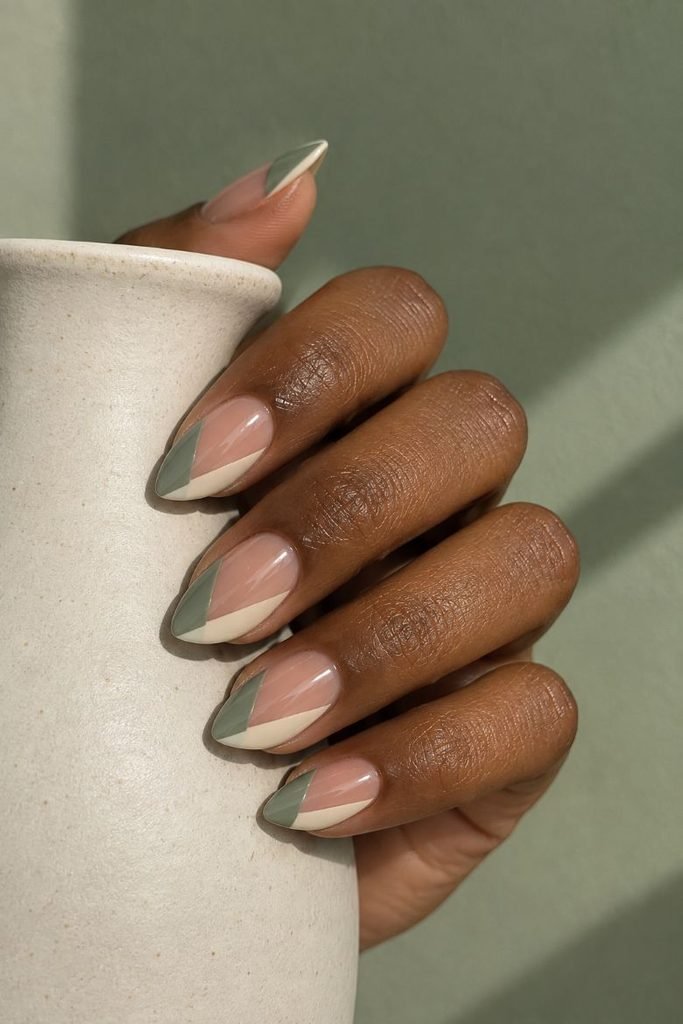
A muted green triangle sits at the edge near the tip on each almond nail. A smaller warm cream triangle fills the corner on the far side. A clear strip of nude runs diagonally between the two shapes, so the center does not fully cover. The triangle direction flips from finger to finger, but the size and spacing stay the same. A glossy top layer smooths the look and keeps the lines neat, with no added sparkle or extra trim.
This style is also for people who want something calm. It brings color and a strong shape, not tiny drawings. It works well for a desk day or a casual visit to a gallery. The green shade matches stone tones, denim, and off-white clothing without a fight. The open nude gap is key. If the green and cream areas grow too much, the design starts to look like a plain two-color split. If your nails are short, nudge the nude strip a bit wider, and keep the cream corner very small.
How to Apply
- Start with a sheer nude base on short-to-medium almond nails and let it dry.
- Place a sage green triangle at the tip-side corner on each nail using striping tape or a flat brush.
- Add a smaller warm cream triangle at the opposite base corner. Switch the diagonal direction across the hand, but keep the nude strip in place.
- Take off the tape slowly, fix any uneven edges, then seal everything with a glossy top coat.
10. Burgundy Cat-Eye for Evening Events
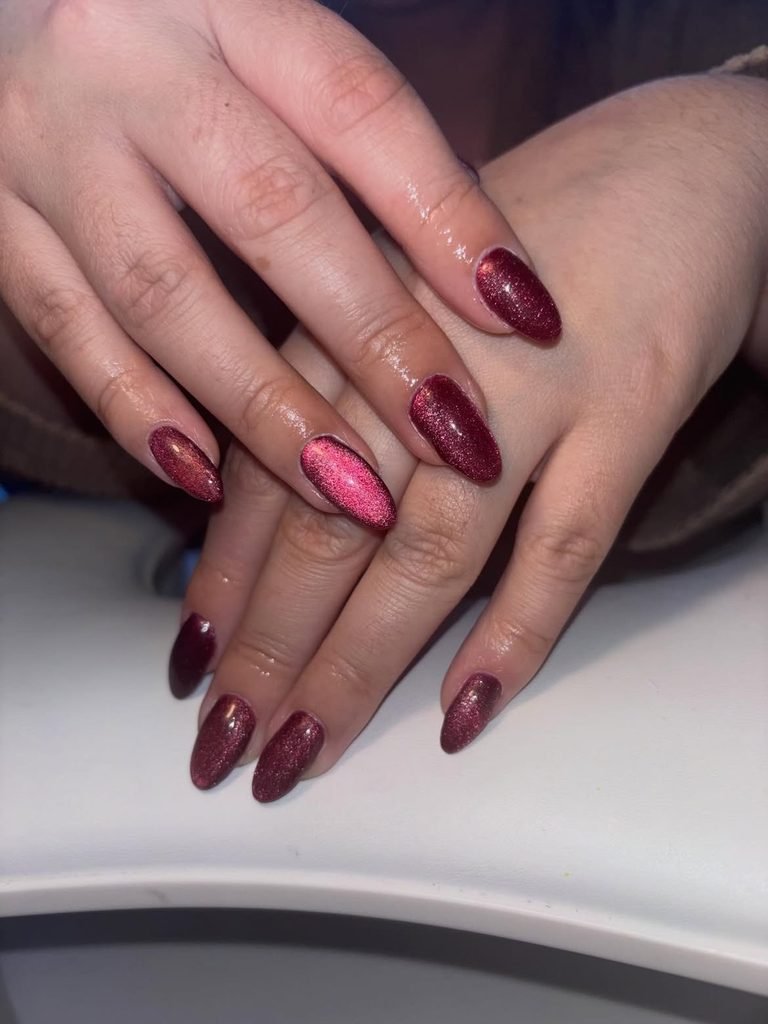
A rose copper stripe runs across each medium almond nail, cutting from the lower corner up to the side. The rest of the nail stays a deep burgundy, so the light band looks heavier and not washed out. After that, a shiny top coat goes on to keep everything flat and smooth to the touch.
This is the cat-eye look made with magnetic polish. The bright line reflects in a way that matches the same diagonal path across the hand. No stray glitter bits show up, and there are no thin painted metallic lines on top.
The way the highlight shifts makes this manicure feel more lively, even if the colors stay quiet. Wear it for an anniversary dinner or a winter party, when plain burgundy can start to feel boring. If you want a gentler take, look for rose gold pink cat-eye nails. At the salon, ask to see the sample under normal indoor light, not only under strong lighting. The movement shows the real effect.
How to Apply
- Start with a deep burgundy magnetic polish, or use a gel base and cure or dry it based on the label.
- Paint a fresh thin magnetic layer on one nail at a time.
- Hold the magnet diagonally over the wet polish until a rose copper stripe appears. Cure or let that nail set before you go to the next one.
- Finish with a glossy top coat that works with the product you used, keeping the diagonal direction as you apply.
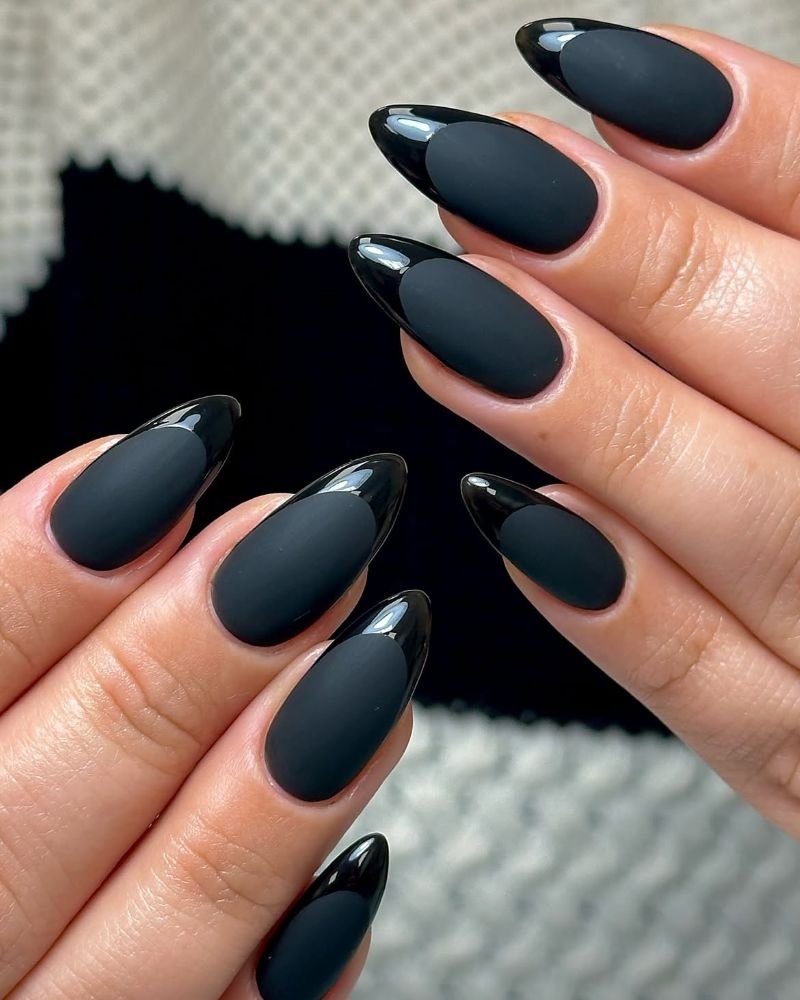
11. Matte Black with Glossy French Tips
Black covers the full length of these long almond nails, from base to edge. Still, two surface looks split the nail. Most of the nail feels soft and matte. The narrow French line near the tip stays shiny. The edge between them shows up when light hits it. There is no second color and no hard shift in hue. All five nails keep the same calm design. The tips are rounded. There are no charms, no studs, and no extra sparkle.
This style fits a concert or a night look, especially with leather, satin, or sharp tailoring. In dim light, the contrast stays gentle. In photos taken up close, it shows more clearly. If you want more dark nail looks, you can check the edgy concert nails set. The hardest part is stopping the glossy layer from creeping onto the matte area. One stray brush mark can ruin the clean finish in the same way as a polish smudge.
How to Apply
- Shape long almond extensions or use natural nails. Add two even coats of black gel color. Cure each coat.
- Add a matte top coat over the whole nail. Cure it. Make sure the surface stays clean and velvety.
- Paint a thin, curved French tip with a separate glossy top coat or clear gloss gel. Stop right at the matte edge.
- Cure the tip. Check the sides. Then fix nothing by coating the matte section again.
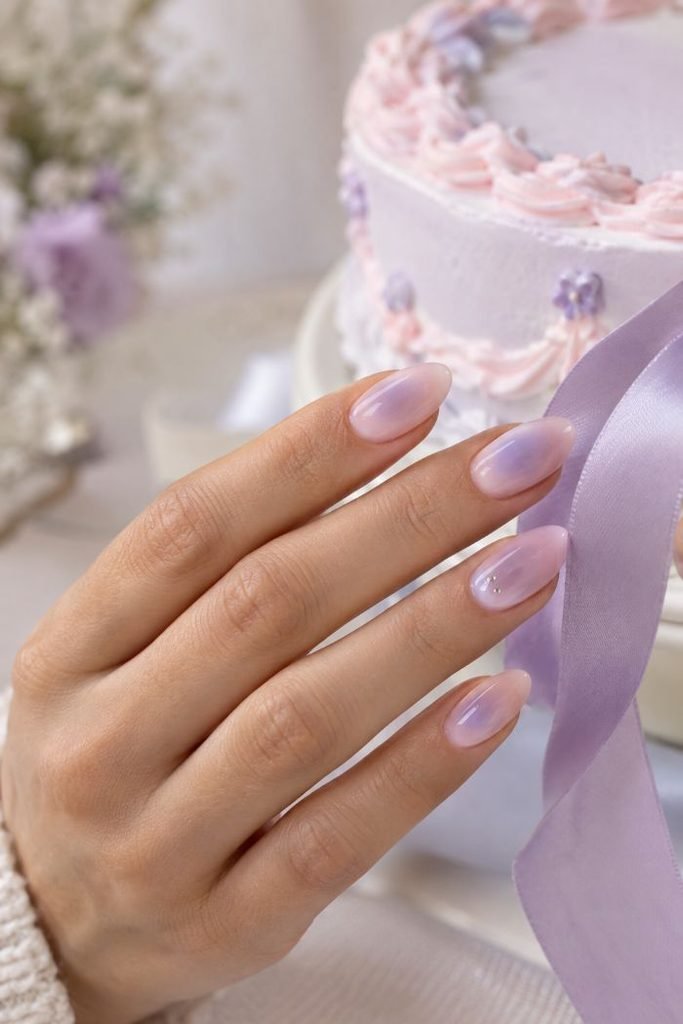
12. Lavender Aura for Birthday Plans
A cloudy oval of lavender hangs in the middle of each medium almond nail. It sinks into a pale rose shade and there is no hard edge line. The center looks the boldest, then a gentle pink rim forms along the sides of every nail. On the ring nail only, place two small flat silver dots close to the base. Use a shiny top so the haze stays deep and calm, not shiny-metal.
These aura nails can make a birthday manicure feel a bit magical. The design stays neat and simple for daily wear, even with a sweater or thin sleeves. It is not ombré in the usual sense. The color spreads outward from the center, not from the cuticle down to the tip. A nail tech can blend it with a very light diffusion. If you are doing it at home, a makeup sponge and regular polish can give a more uneven, more lived in look. Keep the silver spots tiny, so they do not pull focus from the center glow.
How to Apply
- Put on a pale rose base on medium almond nails. Cure or let it dry all the way.
- Dab lavender polish or gel onto the center. Use a small sponge and blend in short taps. Leave the outer pink edge showing.
- Add two tiny flat silver dots on the ring nail only. Use a dotting tool, or pick up the dots with fine tweezers.
- Finish with a glossy top coat. Cure or dry without letting polish flood near the cuticle.
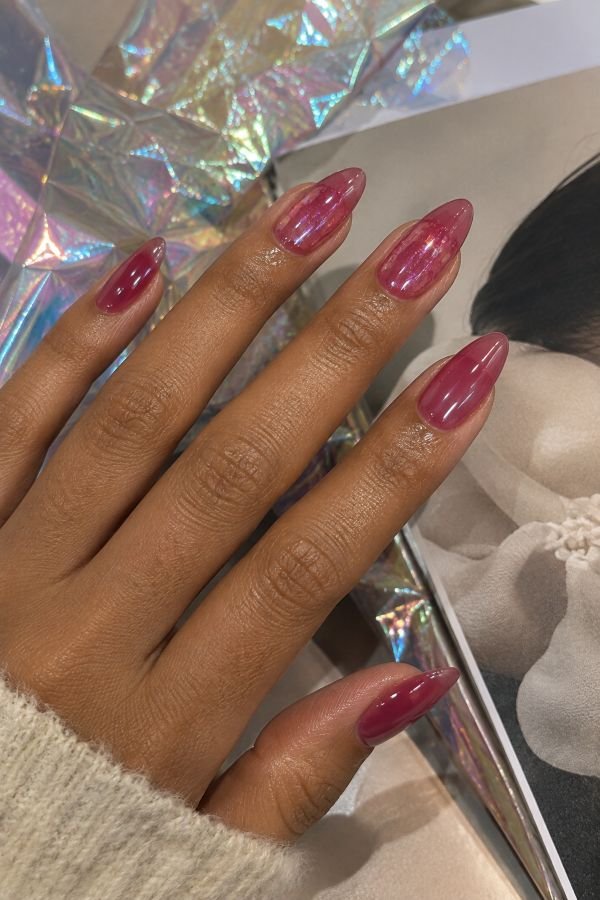
13. Raspberry Jelly with Floating Confetti
A translucent raspberry tone sits on medium almond nails. The natural tip line is still there, just barely showing under the soft pink. Only the index and ring nails get a few flat iridescent flakes. The other nails stay plain. The flakes are scattered and not evenly placed, so they catch pale pink and blue flashes when you move your hand. The top finish is sleek and shiny, so the look reads as tinted glass instead of bumpy glitter.
This style fits a casual birthday or a quick weekend trip. It gives you a pop of color, but the detail stays light and fun. To get the same effect, use jelly nail polish. A thicker raspberry cream can cover the layered look. Jelly nail polish keeps things see through, so the flakes feel more built in. Pick nail-art flakes that lie flat on the nail. Leave empty space around them. If you add too many pieces, the design looks packed and the translucent base gets lost.
How to Apply
- Paint one or two thin coats of translucent raspberry jelly polish on medium almond nails. Keep the color light enough that the nail still shows through.
- On the index and ring nails, put a few flat iridescent flakes on a tacky gel layer or a thin clear coat. Space them in a messy, natural way.
- If you need extra coverage, seal with compatible clear gel. You can also press the flakes down and go over them with a second jelly layer. Cure or dry fully.
- Add a smooth glossy top coat. This helps the surface look like glass.
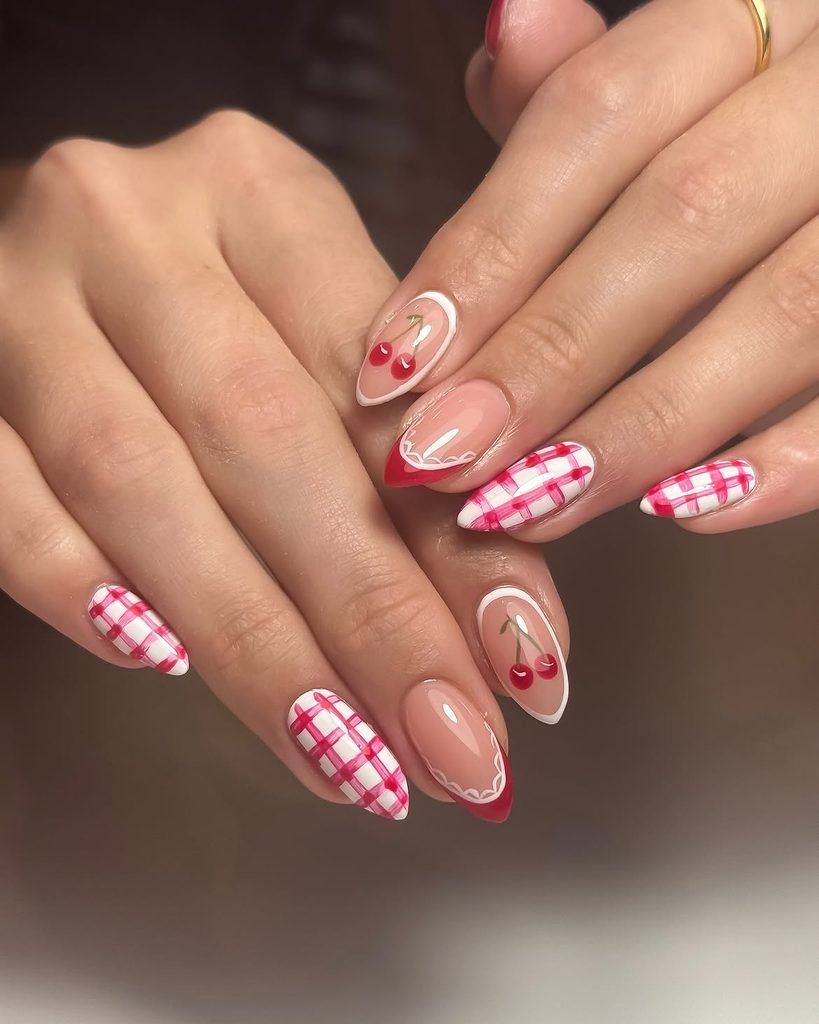
14. Picnic Gingham with Tiny Cherries
Rosy pink gingham is on the index and middle nails. The thumb and ring nails show a small cherry set on a warm ivory base. The pinky stays plain blush.
All five nails are short to medium and shaped into soft almonds. They look shiny, like they have a fresh top layer. The gingham is made with thin see-through pink stripes that stack on each other. Where the lines cross, you get deeper squares. The cherry pair is kept clear with thin green stems.
This design feels right for a picnic or a summer brunch. It also works for an easy weekend look. Even with the fruit, the color plan is simple, so the hand looks neat. More fruit is not needed. One cherry pair per accent nail is enough.
If painting a full grid feels like too much, use gingham nail wraps plus small cherry decals. Cut them to size and press them down so the pattern stays in the middle of the almond nail. Don’t let it drift toward the edges.
How to Apply
- Paint the thumb and ring nails warm ivory. Paint the rest rosy pink. Let it dry.
- On the index and middle nails, layer translucent pink stripes in a small gingham layout. Let each layer dry or cure before the next.
- On the ivory accent nails, add a tiny red cherry pair. Add thin green stems with a fine brush.
- Finish with a glossy top coat over the whole set. Check that no stripe leaks onto the skin near the cuticle.
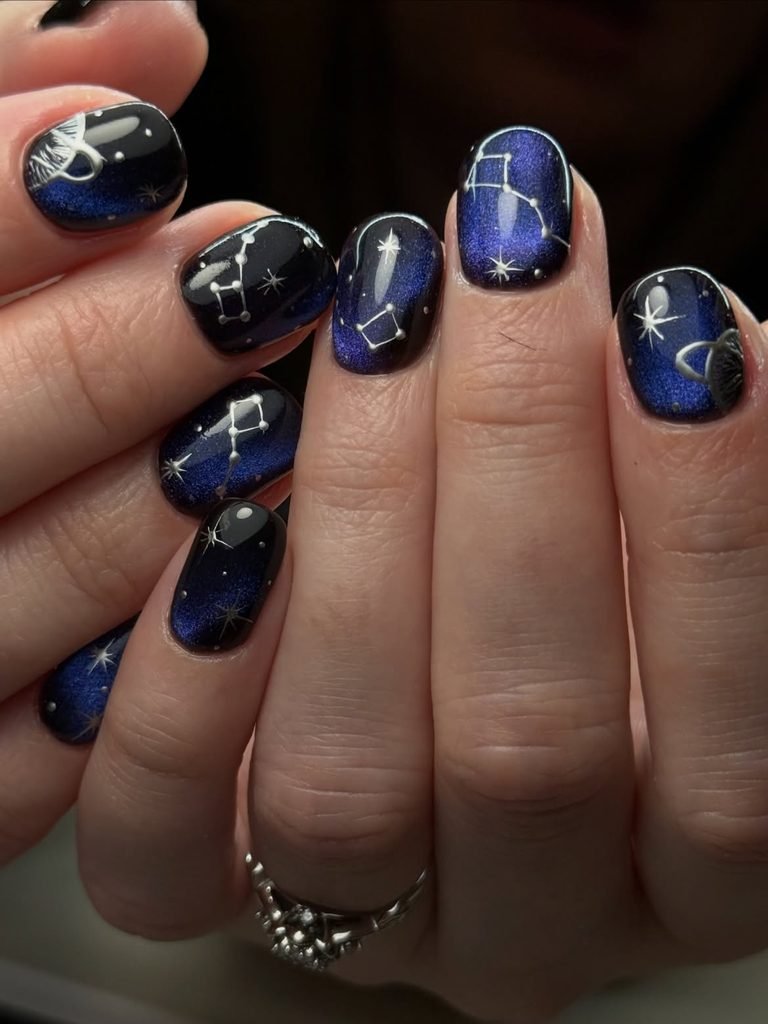
15. Midnight Blue Constellations
A dark navy base, almost black, sets off medium to long almond nails and makes the silver constellation details stand out. On the thumb and ring finger, there are tiny dot clusters. Thin angular lines link some of those dots. On the index, middle, and little finger, each nail shows just one small silver dot close to the tip. The top looks shiny and smooth, so the star shapes stay clear and do not get lost under heavy shimmer.
Pick this look for a winter night or a late celebration, especially when you want more than a generic sparkle nail. The silver matches jewelry and the dark shade also pairs well with deep velvet colors. The New Year nail options have more party style choices too. If you wear shorter nails, use only three dots plus two lines for each nail. Too many marks in a small space can look messy when you glance at it
How to Apply
- Start with two thin coats of inky navy polish or gel on medium to long almond nails. Let each coat dry or cure before you add the next.
- On the thumb and ring nails, set small silver dots, then draw very fine angular lines to connect the selected dots.
- On every other nail, add one lone silver dot near the tip. Keep the empty space around it.
- Seal the design with a glossy top coat. Brush it on in one steady pass so the thin lines stay crisp.
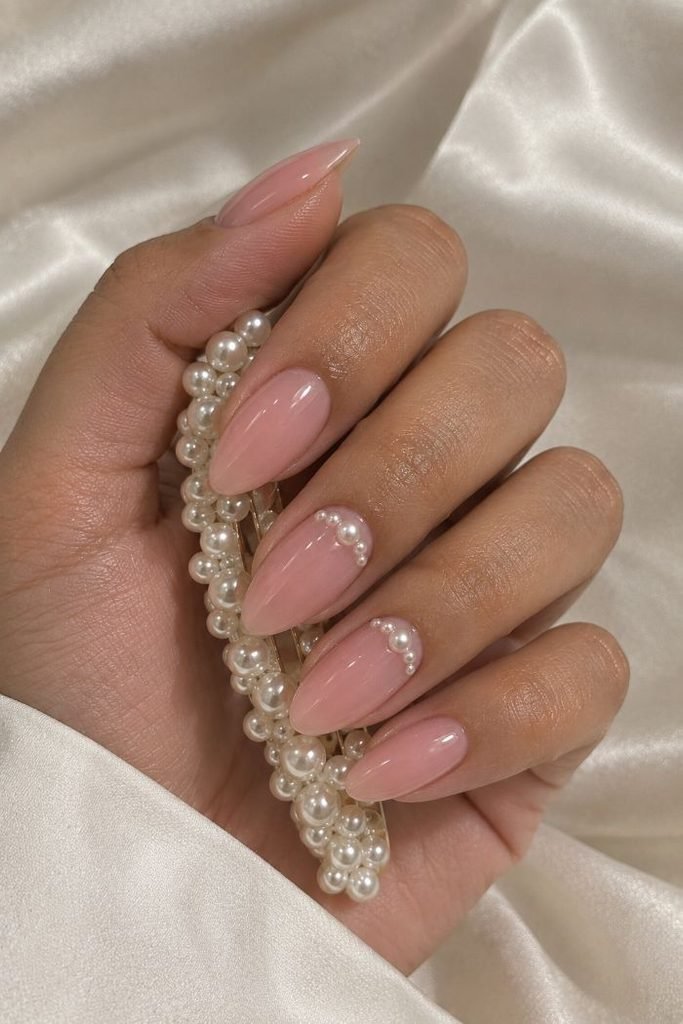
16. Blush Nails with Pearl Cuticle Arcs
Three smooth ivory pearls sit along the curve of the middle and ring nails on a translucent blush pink base. In each nail, the pearl in the middle is a bit bigger. Two smaller pearls sit to the left and right. There is a clear space between the pearl pieces and the skin. The thumb, index, and little finger stay plain. The short to medium almond nails are glossy, even where the raised parts are.
This look works well for an engagement moment, a bridal shower, or matching bridesmaid nails. Keeping the pearls near the cuticle makes the nail tips look lighter. If you plan to work around lace or you will be tugging at tights, this is a set to think through. Look for low-profile pearls and edges that are finished well. You can also choose custom press-ons where the pearl pieces are already fixed in place.
How to Apply
- Add translucent blush pink to short to medium almond nails. Let it cure or dry fully and evenly.
- On the middle and ring nails, put a small line of gel adhesive near the cuticle line. Use nail-safe gel adhesive.
- Place one larger pearl in the center. Add two smaller pearls on each side. Press them down gently. Cure under lamp if your adhesive needs curing.
- Seal with a thin layer around the pearl edges. Do not cover the pearls. Then finish the plain nails with a glossy top coat.
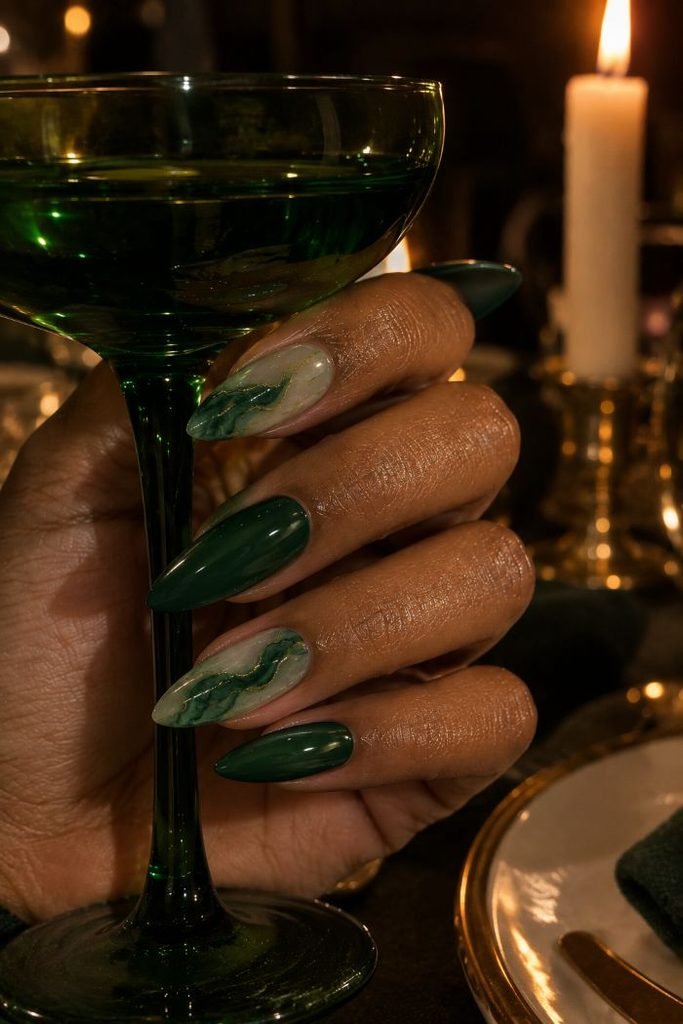
17. Emerald Stone Marble for Holiday Dinners
Deep pine green covers my thumb, middle, and little nail. My index and ring nails use a dark base too, but the veins look like curved sage and emerald threads. The long almond shape gives the painted stone lines extra room to twist and spread. The finish is flat and shiny, not bumpy. I do not see foil, and there are no loose gems. The vein widths are not the same, so the pattern does not read like repeated strips.
This set works for a holiday dinner because it adds depth without obvious holiday images. It also looks good with a cream sleeve and just one gold ring. That way, the stone detail stays easy to spot. When you book, ask for veins that flow and do not match each other. If you want a shorter look, keep one marble nail per hand. A busy design can turn unclear fast when there is less space for the lines.
How to Apply
- Paint two coats of deep pine green on the thumb, middle, and little fingers. Use the same dark pine shade on the index and ring nails as the base.
- When the accent base is still tacky, add curved sage and emerald veins with a small detail brush. Make some lines wider and others thinner, and change the curve as you go.
- Keep dark green gaps between each vein. Let the marble accents cure or dry before you touch the surface again.
- Finish with a smooth glossy top coat on all five long almond nails. Seal the tip on each nail.
Can You Get Almond Nails on Short Natural Nails?
Yes, only if there’s enough space along the free edge to make a soft taper. On short natural nails, keep the almond tip mild and near the end of the finger. If you push for a sharp point, you may take away support from the sidewalls. When you first do this, the nail may look like a simple tapered oval. That is fine. Let the nails grow a bit and it will look more like what you want
Also, size the design so it fits the nail area. A sheer nude base with a tiny French tip can work well. A small floral touch is another safe pick. A centered magnetic shine can also look tidy. These choices tend to leave more empty space than a broad stripe or wide horizontal pattern. If your nail starts right at the fingertip, give it some time. Wait for growth, use a short almond press-on, or talk to a technician about a gentle structured extension.
OPI’s shape guide guide notes that almond nails usually need some visible length to show the shape well. If you want a rounder outline while your own nails are still short, compare these oval nail ideas as they grow.
What French Tip Looks Best on Short Almond Nails?
A small French design often looks best. The thin edge keeps the nail bed easy to see. It also avoids that thick white stripe that cuts the nail in half. Work with the almond shape as it curves. Let the line sink a bit near the side edges. If the stripe is too straight, the nails can seem broader. You can choose ivory, soft white, beige, or pale pink for the tip. Each shade changes how much contrast you get.
A diagonal French tip can also help. It adds some motion to the look. The line pulls the eye from one side across to the point. A deep French can still suit a medium length, since you have enough space on the nail. For very short nails, keep it simple. Skip wide smile lines. Avoid thick glitter rims. Do not use big patterns on every nail. Instead, ask for a sheer base. Request a thin tip. Make sure the spacing stays even. Also, do not force the same stencil onto every uneven nail surface.
What Length Is Best for Almond Nails?
Medium length is a solid place to start for an almond manicure. With this length, the sides have enough room to narrow into a clear rounded tip. You can still try French curves, an ombré look, chrome tones, aura color, and small nail art. It is also simpler for daily life than a very long extension. If your natural nail has a few millimeters of free edge, it can often handle a softer medium almond shape.
Short almond nails work well if you type a lot or want a practical routine. They also look neat with color that is easy to maintain. The taper is less bold, though. Because of that, any artwork has to be smaller. Long almond nails give a bigger, more noticeable shape. They also leave room for detailed marble effects, 3D looks, and stacked layered designs. Pick the length based on how you use your hands, then match the design. A pretty picture can feel annoying if the tip catches on clothes or makes normal tasks harder.
How Do I Choose the Right Almond Nail Idea for My Next Appointment?
Picking the right almond nail idea for your next visit is easier if you sort your options first. Think about where you will wear them and what your days look like. If you work in an office or type a lot, go for milky nude, a sage color block, or a tiny French tip. If you have a wedding or a formal night out, pearls can look classy. Champagne chrome and a soft blush finish also fit that vibe. For a party, a trip, or a concert, you can switch to bolder styles like cobalt waves, raspberry jelly, matte black, or midnight constellations. This step keeps you from getting lost in too many choices.
Then message your nail tech with photos. Send one picture of a full hand and one close-up of the part you care about most. Include the nail length and the shape. Also list the base color and the finish you want. Tell them which fingers should have the artwork. If you plan to use regular polish, gel, extensions, or custom press-ons, say that too. A clear reference is simpler to follow when you point out what should not change and what can be adjusted for your nail bed. Keep a second design in mind with the same feel, just in case the main one needs a simpler version.
Final Thoughts
The best almond nail looks work with the hand and with your day-to-day routine. For short almond nails, sheer shades can look clean and neat. You can also try a thin French edge and a few tiny accents that do not feel heavy.
Medium length gives you more room to play. You can switch between finishes without it looking odd. With long almond nails, there is more space for marble swirls. You can also layer fades and add depth with small raised details.
If you pick a photo to show your nail tech, do not zoom in only on one nail. Look at the whole hand too. Check which nails actually have art. Also see if the surface looks shiny or more flat. Notice how the colors sit next to your rings and even near your sleeves.
Try to match the design to what you can keep up with. Think about how often you want touch-ups and what length feels easy for you. A good almond set can be subtle or bold, sweet or more intense, as long as the almond shape stays soft and tapered.
Found an almond nail design you love? Preview its taper, color, and length on your own hand before choosing your next set.
Try It On Virtually