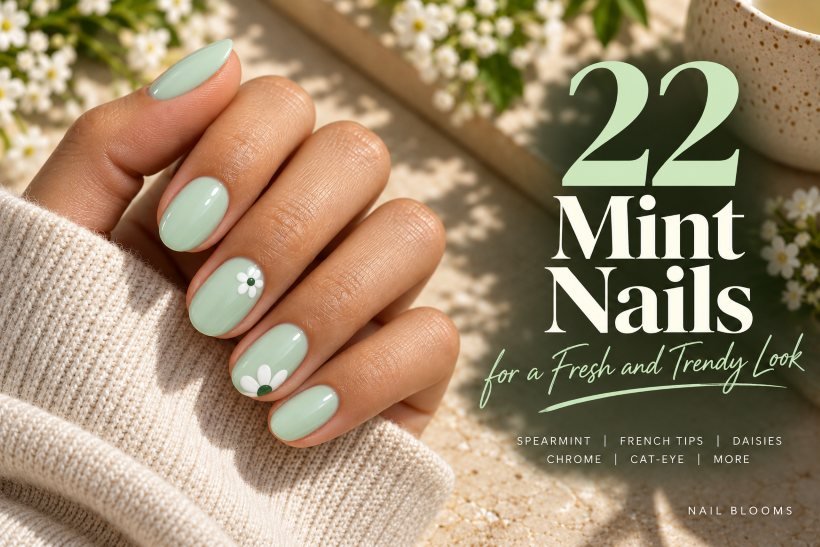
22 Mint Nails for a Fresh and Trendy Look
The mint nail color can surprise you with its versatile nature; a touch more of blue will make it look like sea glass, while adding some warmth will give it spearmint vibes. Sheer finish nail paint will help bring the whole thing down to earth, and that is why the same pale green color can appear classic and short oval and graphic on the almond nail.
Here are 22 different mint nails for you to get inspired. They include the pure color, patterns, floral nails, negative space nail designs, and even nail finishes which reflect the light. While some designs can be easily created using regular nail polish, others require a closer look into how they should be done, such as those with pressed flowers, magnetic nails, and chrome nails.
1. Short Glossy Spearmint Nails
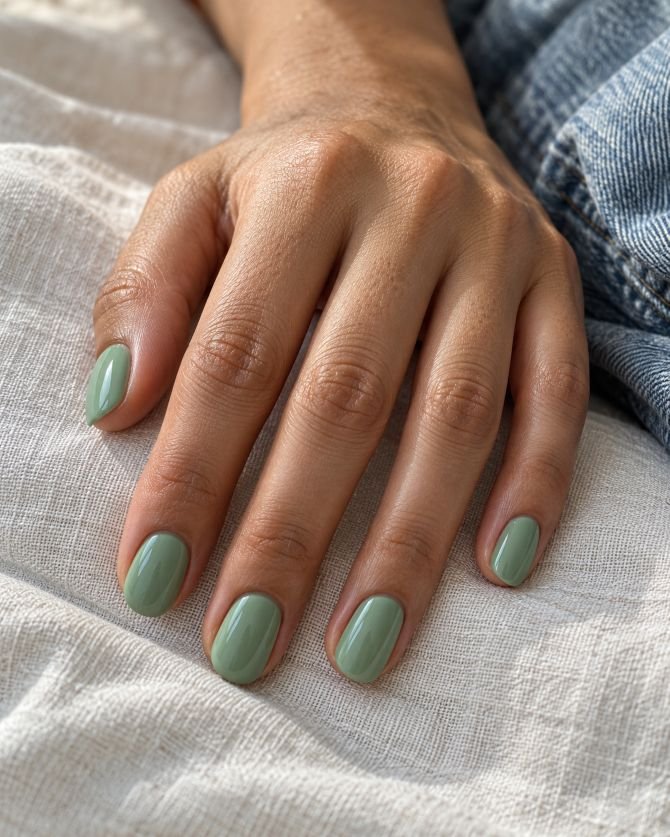
Begin with a spearmint cream with just a hint of yellow undertone, not the icy aqua one. On five small ovals, apply the color right from the cuticle line to the gently rounded tip and keep your fingers naked. For a matte result with an opaque coverage but without any ridge on the side, two layers would be enough. Adding the clear gloss will make it look vibrant and rich, not chalky.
This is an ideal way to start with mint nail polish if you need to know whether this color goes well with your favorite clothing and accessories. The warm white, washed-out denim and gold rings create an atmosphere for this color accent to stand out. Try to make the shape of the nails identical; slight discrepancies become more visible without any decorations. In case your light color formula leaves streaks, wait until the first coat dries up and fix it in the next one.
How to Apply
- File natural nails into even short ovals and apply a smoothing base coat.
- Paint two thin coats of opaque warm spearmint, leaving a small clean cuticle margin.
- Tidy each sidewall with a cleanup brush while the color is still workable.
- Finish with clear glossy top coat, lightly covering the free edges.
2. Sheer Mint Milk Nails
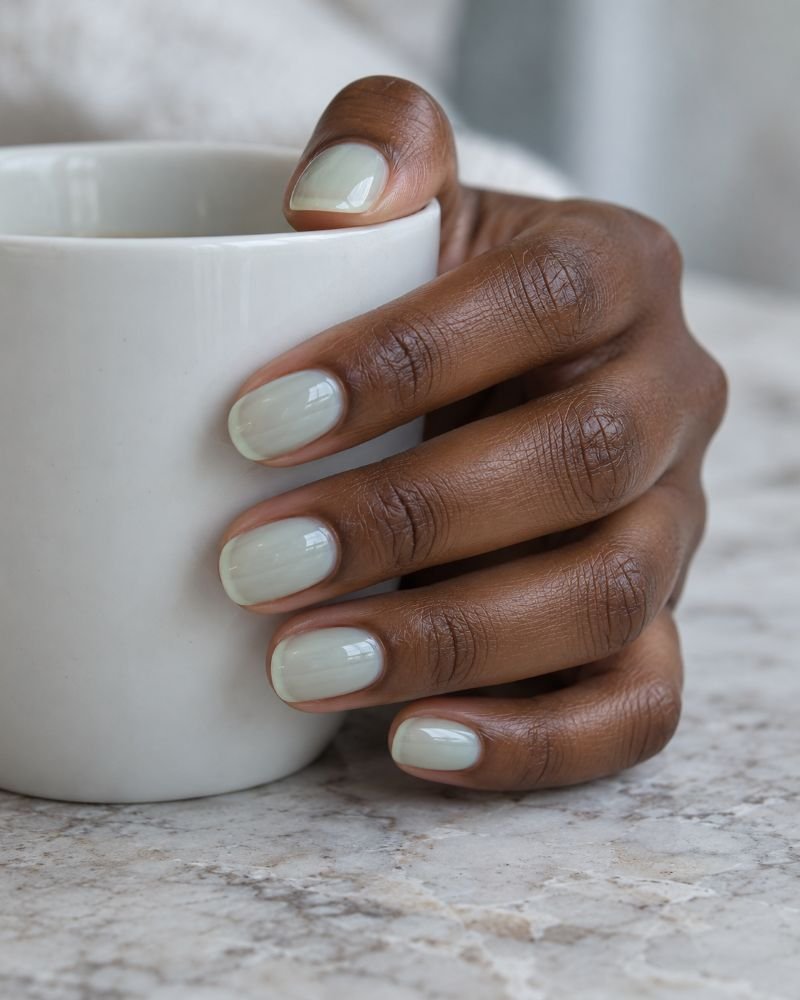
Here is the mint thinned out to where there is still some nail underneath giving color. The medium round nail must be visible through the one or two layers of milky, cool green; the natural free edge should stay faint and not be covered up by a pastel opaque. This manicure uses all five nails, and a glossy top coat adds a liquid finish to the layer of color. No accent colors or glitter are used.
Sheer mint is great for when you don’t want the green to be overpowering, but because it’s sheer, you need to have a good base underneath. You might try one nail: if your base nail is pink, the blue undertones could make it look icy, and if it’s creamy, it will be more like a pale pistachio. If the natural line in the nail bothers your look, you can use a very thin neutralizing base coat rather than applying multiple layers of mint.
How to Apply
- Shape medium round nails and apply a clear or lightly tinted smoothing base.
- Brush on one thin layer of milky mint polish and allow it to settle.
- Add a second sheer layer only if needed, preserving a faint view of the natural nail.
- Cover with clear glossy top coat once the color is dry.
3. Sea Glass Mint Jelly Nails
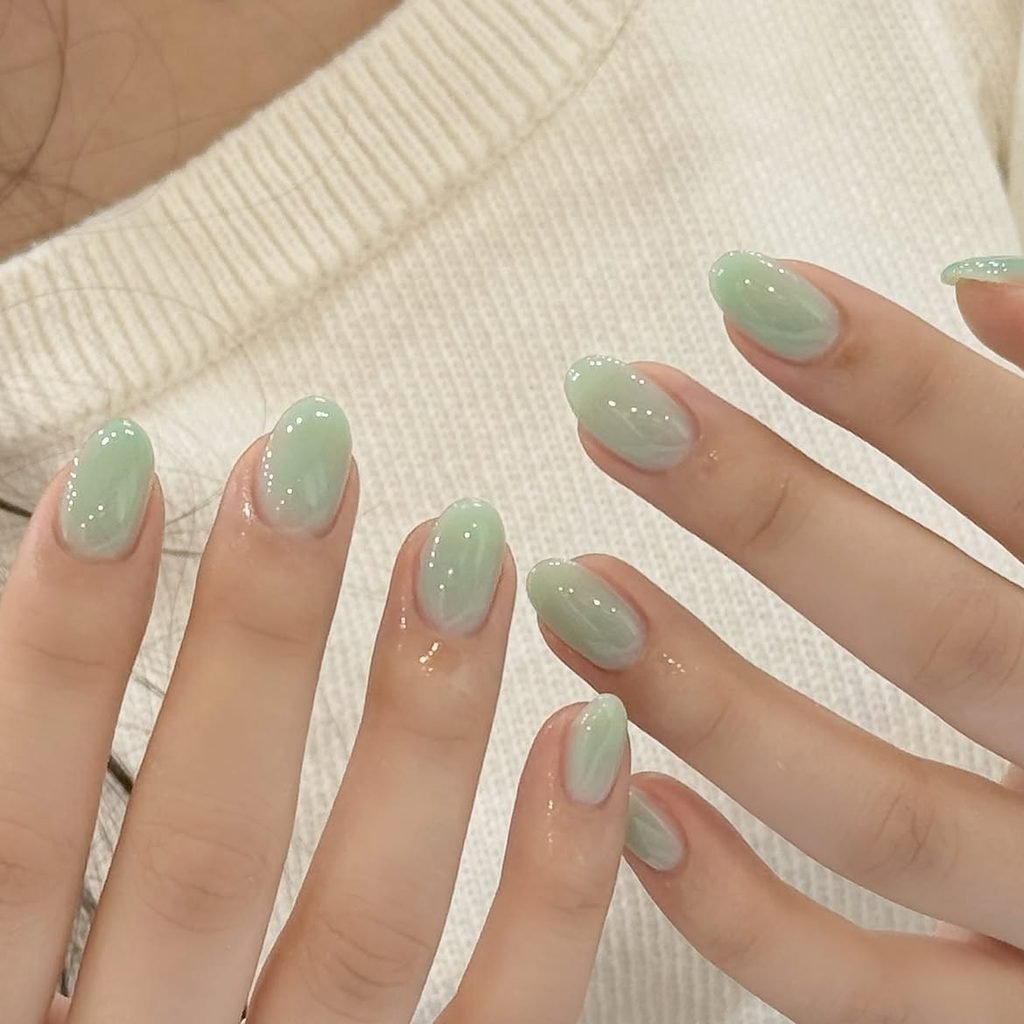
The Sea Glass technique requires a transparent finish with a stronger bluish-green shade compared to Mint Milk. The medium-rounded square nails require two thin coats of mint jelly that allows light to shine through the color along its curves. The finish has to be smooth and shiny with no flakes, sandiness, or waves. Faintly visible free edge is acceptable, although the color has to look uniform between all of the nails.
It is important to make sure that the chosen polish or the salon system has good opacity before trying this technique. While the mint cream finish itself can be gorgeous, three sheer-looking swatches won’t make it jelly. For this look you need a translucent polish or an appropriate salon system. Having a nice levelled base will help you to avoid any darkness underneath the glassy layer of polish. The technique looks especially stunning when exposed to the natural light as the rounded corners add extra depth to this finish.
How to Apply
- File medium rounded-square nails and apply a clear smoothing base.
- Paint one thin coat of translucent blue-green mint jelly.
- Add a second even coat while retaining visible transparency at the edges.
- Seal with a compatible high-gloss top coat.
4. Mint Micro-French Tips
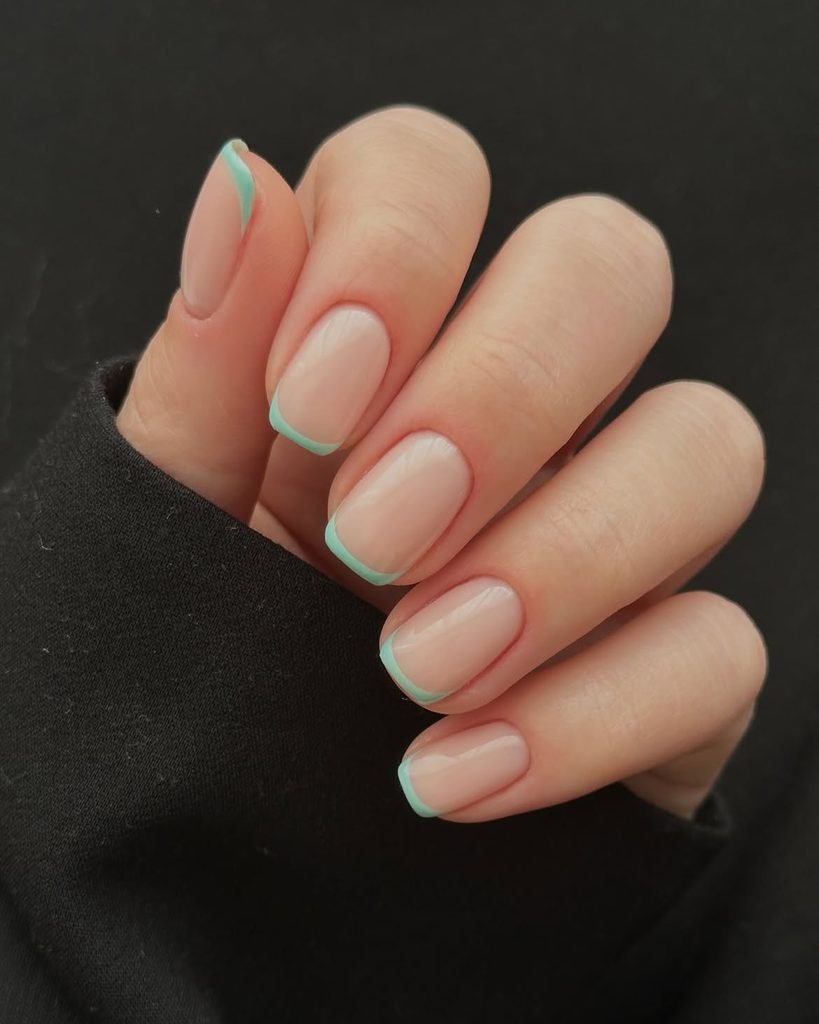
Thin lines of mint on the free edge will be able to create an entire manicure. For short squoval nails, apply a translucent pink-beige base with an even hairline of opaque cool mint along each tip. Ensure that the thickness is uniform, even the one on the thumb nail. It should follow the natural curve of the nail and not just create a bar of mint paint. A glossy clear top coat connects the green lines to the pink-beige base.
This design is helpful when you want some color yet you don’t want the entire natural nail covered by that color. It is also a design that is more favorable for short nails compared to the Nailsbloom French tip nail designs that uses too much of the visible nail surface area. The longer, fine liner brush works better than the brush attached to the nail polish container. Your painting hand should remain on the table surface as you turn your fingers while painting.
How to Apply
- Apply a sheer pink-beige base to short squoval nails.
- Load a fine liner brush with opaque cool mint polish.
- Trace a narrow curved tip on each free edge, turning the finger to keep the line even.
- Let the mint dry and finish with clear glossy top coat.
5. Mint and White Double-French Nails
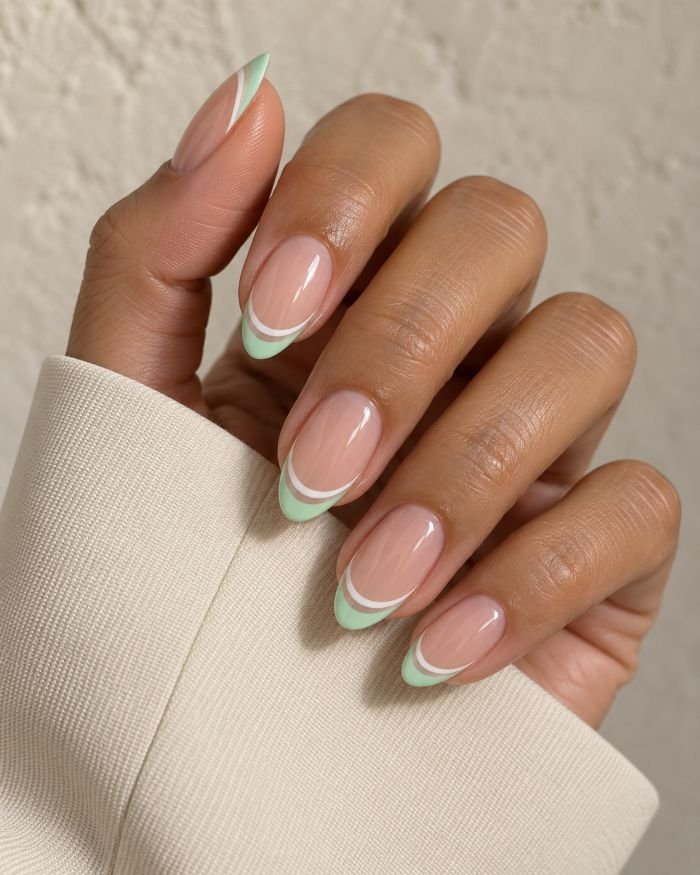
Two thin arcs will make the tip look more finished but not too bulky and filled with color. Medium almond nails start with a sheer peach-nude base. The thin mint French tip comes after a pointed free edge, and the thin white arc comes below the smile line of the French, creating a small nude space between them. Both arcs gradually taper off and are visible under the clear gloss.
The gap is what matters. Without it, the two arcs create a single wide tip and no layered look. Medium nail length allows some room but not too much; the arcs should be thin enough to let the nude shine through. It is a more professional way to apply this nail art than a quick try on both hands: gaps will be noticeable in photos. For a less obvious effect, use the white inner arc only on two accent nails.
How to Apply
- Cover medium almond nails with a sheer peach-nude base.
- Draw a slim mint French tip that follows each tapered free edge.
- With a finer brush, place a separate white arc below the mint, leaving a consistent nude gap.
- Correct the tapered ends and seal with clear gloss after the lines set.
6. Mint Reverse French Half-Moons
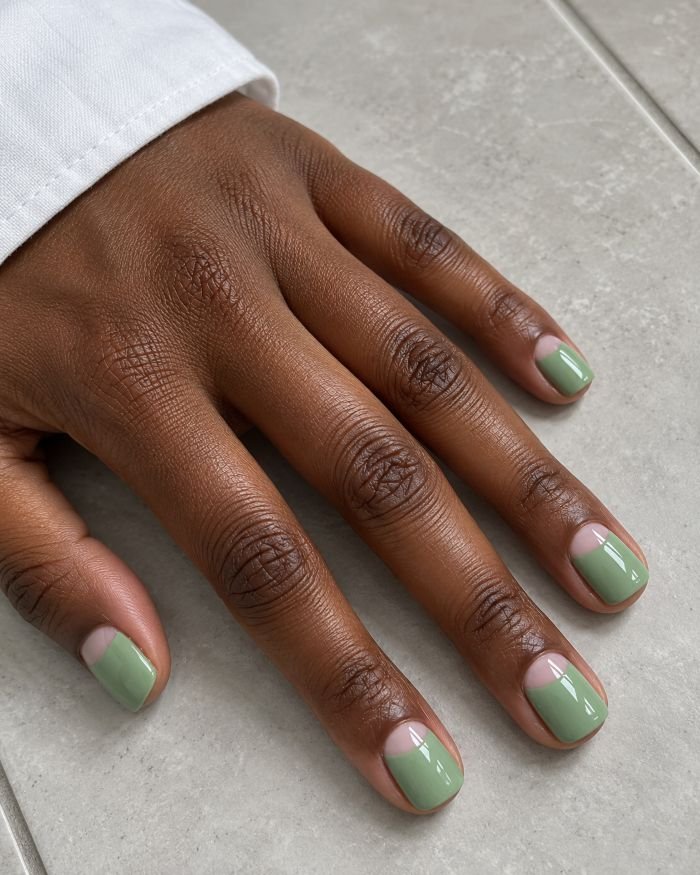
Place the plain looking detail at the base of each nail. Short square nails will have a clear blush base, a tiny curved half moon kept exposed above each cuticle, and a spearmint body that runs till the tip of the nail. The curve must go according to each individual’s nail cuticle instead of having all five identical circles drawn. Glossy top coat will keep the green field clean.
It is an option to go for more mint without overcrowding the cuticle area. With the growth of nails, the intentionally left blank base may help in covering the initial signs of nail growth, given that the curves have been made neatly. Work on the design with a fine detail brush; cut-outs meant for only one nail can affect the rest of the designs. In case the nails are short, the half moons can be small so that the whole nail plate is not covered.
How to Apply
- Apply a sheer blush base to short square nails and let it dry.
- Outline a small curved half-moon just above each cuticle with a fine brush.
- Fill from the arc to the free edge with opaque spearmint, preserving the sheer space.
- Refine the curves and cover the finished nails with clear gloss.
7. Mint and Ivory Color-Block Nails
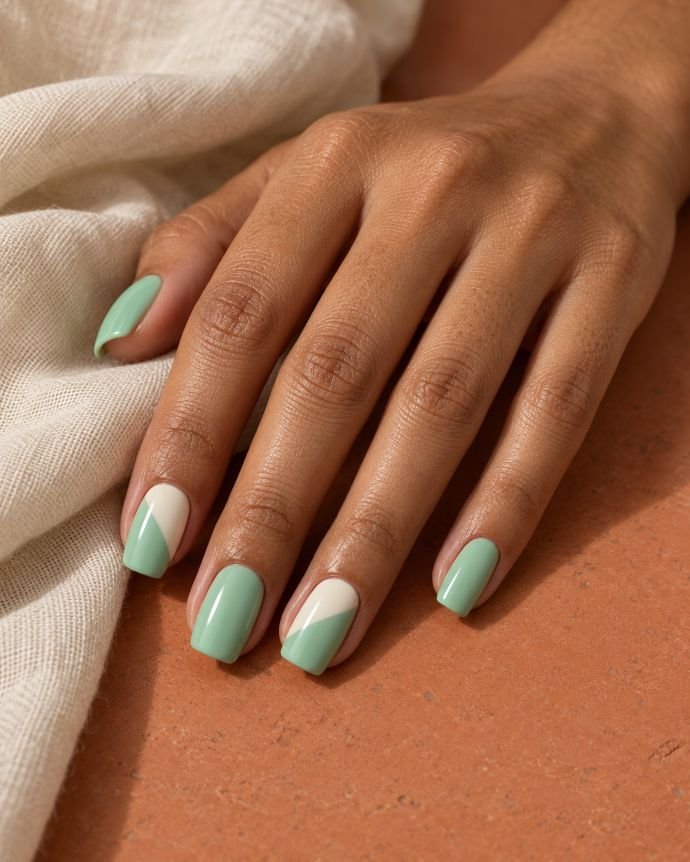
The soft color ivory emphasizes the coolness of mint without introducing another light pastel color. For medium rounded-square nails, use two diagonal stripes of paint on the index and ring fingers: ivory close to the nail beds and opaque mint on the tips of these accent nails. The remaining nails should be painted completely mint. The edges of the stripes should be clean and parallel in angle.
It’s not a French tip design since mint covers much of the accent nails. The nude nails keep the whole hand green and don’t create a colorful mosaic on your hands. A striping brush helps apply the diagonal stripe and not the tape since the first color has to be dry enough not to peel off after removing the tape. The angle has to look the same for all nails visually, not necessarily measure the same distance from the cuticles.
How to Apply
- Paint the thumb, middle, and pinkie nails opaque mint; paint the index and ring warm ivory.
- Mark a matching diagonal across the two ivory nails after they dry.
- Fill the tip side of each boundary with mint, keeping the straight joins clean.
- Apply a clear glossy top coat once both accent blocks are fully set.
8. Mint Negative-Space Waves
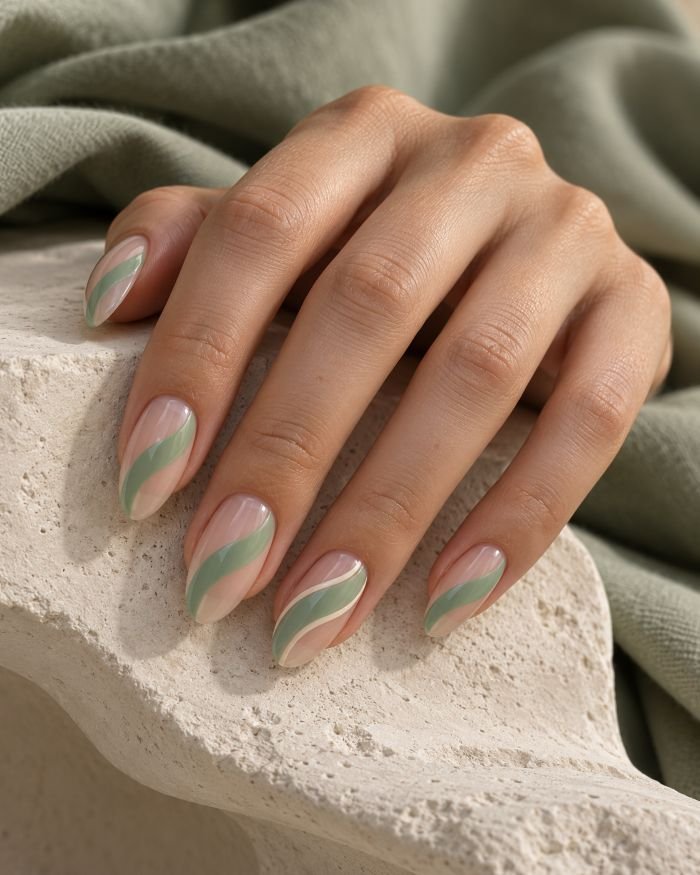
Rather than hiding the nail with the color, mint glides over it in one loose ribbon. Medium almond nails start with a translucent nude polish, followed by one large seafoam-mint wave, which travels diagonally from one of the side walls to the opposing free edge. The thin cream curve accompanies the wave only on the ring finger. Allow for some clear space on each side of every ribbon and seal in glossy top coat at the end.
The size of the wave determines how wide-open or how mostly green your manicure will look. Let enough of the nude show through to be able to see the almond nail shape. Try varying the ribbon placement a bit from nail to nail for more of an artistic touch; that makes this design somewhat forgiving when compared to a more geometrical color block, although liner brush is very helpful here. When doing your non-dominant hand, paint waves on two fingers and keep the others sheer.
How to Apply
- Apply a translucent nude base to medium almond nails.
- Paint one broad curved seafoam-mint ribbon across each nail, preserving space above and below.
- Add a thin cream companion line beside the ring-finger wave only.
- Let the artwork set and seal with clear glossy top coat.
9. Mint-to-Sage Ombré Nails
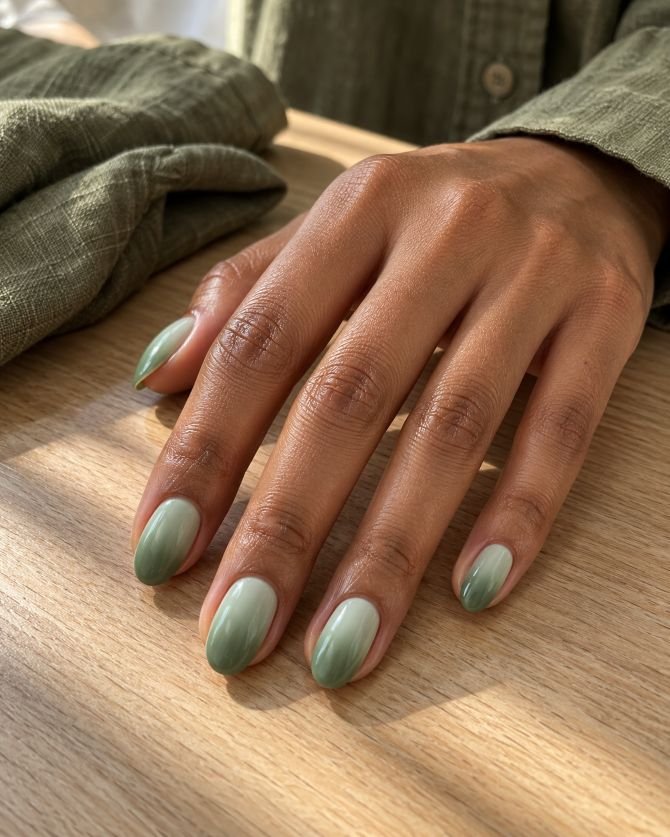
Here the mint develops its earthy tone. On medium oval nails, cool mint color starts near the base and gradually blends into sage green at the tip. The two shades share a similar creamy opaque finish and there’s no visible seam in the middle section. Always maintain the same gradient pattern on all five fingers and end up with clear gloss for the design.
It’s an option if you don’t feel like your straight pastel mint is too sweet for your wardrobe. The added sage green accentuates the look without darkening the manicure. The technique of blending two greens may get muddy if you repeatedly rub a sponge that is thoroughly soaked with the color on the same section; stop once the gradient looks smooth. The Nailblooms ombré nail ideas will help you .The air brush technique used in salons will result in a smoother finish compared to the sponging technique done at home and accepting the slight texture before applying the clear coat..
How to Apply
- Paint medium oval nails with a thin mint base and let it dry.
- Place mint and muted sage beside each other on a small cosmetic sponge.
- Dab the colors gently, keeping mint at the base and sage at the tip; repeat in light passes.
- Clean the surrounding skin and finish the dry blend with clear gloss.
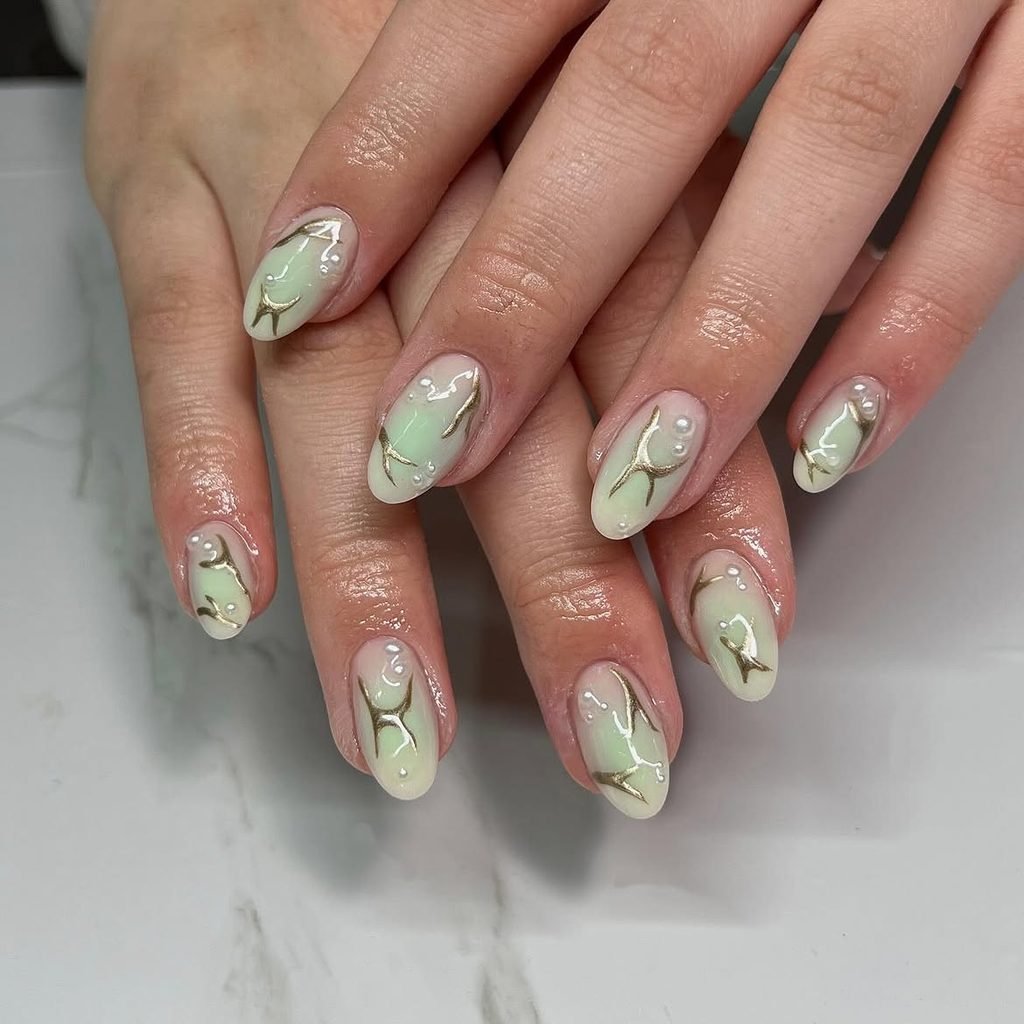
10. Centered Mint Aura Nails
The halo begins at the center, not the point. Round medium nails have a translucent base color in milk-white with a diffuse mint-green center that ends before the sidewalls and cuticles. Make the center slightly richer in saturation at the middle nail, but maintain the same sizes for all halos in the set. The gloss will make the diffused colors shine smoother while the faint border will prevent any of the nails from looking crowded.
The effect will add dimensionality to short nails without making a pattern smaller. Unlike the ombré, white base surrounds the mint color rather than blending smoothly from one end to the other. You may create a soft halo in the salon with the help of airbrushing, while using an almost dry sponge at home will allow you to simulate a halo by tapping the color softly. If the center becomes too spread out, wait until the base is dry and start again instead of erasing one side of it.
How to Apply
- Apply a translucent milky-white base to medium rounded nails.
- Airbrush or lightly sponge mint into the center of each nail, leaving an even pale border.
- Add one extra light pass on the middle-finger center only.
- Let the aura settle and finish with a clear glossy top coat.
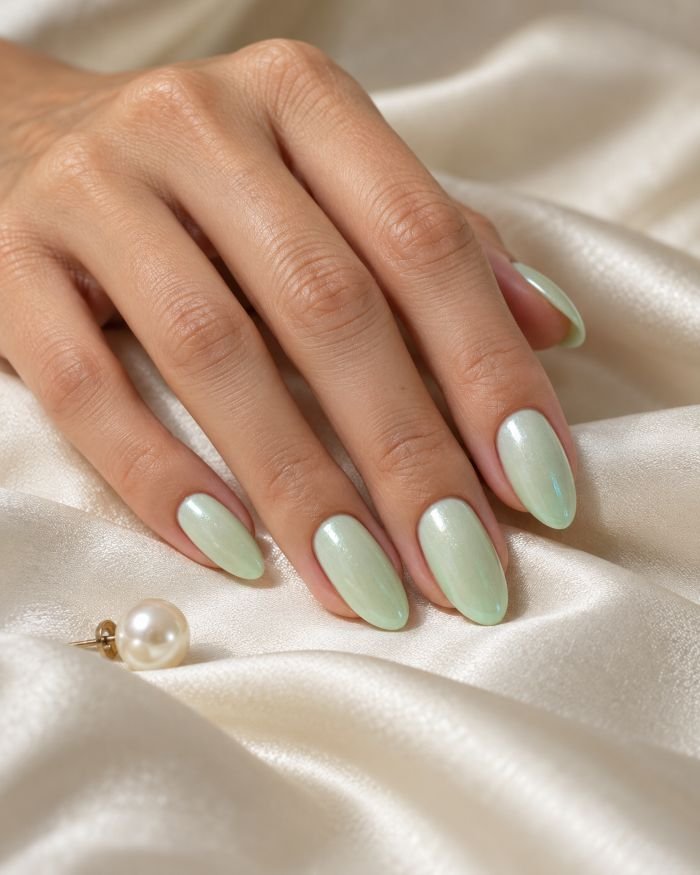
11. Mint Pearl Glaze Nails
When the effect is not striking enough, it may be enhanced with a top coat of fine pearls. Apply medium almond shaped nails a pale shade of spearmint paint, then one layer of translucent ivory-pearls on all five. Green remains the base color when looked at directly, while a white glow emerges when viewing along the sides of the curved nail tips. The finish is shiny but does not contain any attached pearls or glitter.
Try the top coat first on your own shade of mint polish. Too thick a white sheen could turn the base into a chalky green, while the fine top coat will leave the base color visible. This is a simple DIY finish that uses regular polish instead of chrome powder. It seems appropriate for an elegant occasion when you wish for some reflectiveness, but prefer no crystal care routine. For other sheen finishes, see browse Nail Blooms’ pearl nail ideas.
How to Apply
- Paint medium almond nails with two thin coats of opaque pale spearmint.
- Test a translucent ivory-pearl topper on one nail to confirm the mint remains visible.
- Apply one fine, even pearl layer across the whole hand.
- Let it dry, then add compatible clear gloss if the topper needs sealing.
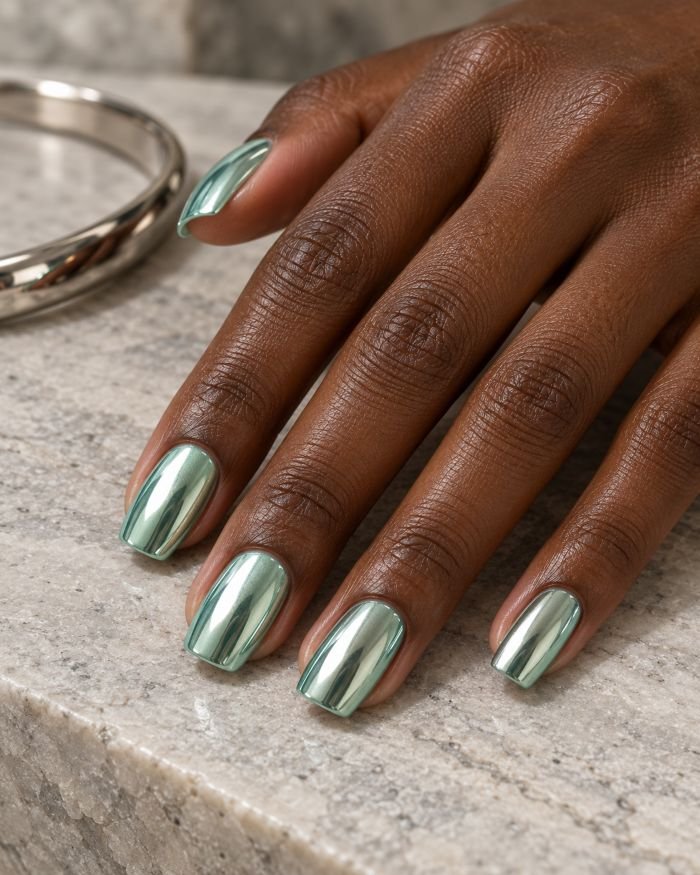
12. Sea Glass Mint Chrome Nails
Chrome is a different kind of reflection from pearl glaze.When it comes to medium squoval nails, apply a cool sea glass mint gel base underneath the silver-green chrome pigment. The final product would still look like mint but have a metallic reflection similar to a mirror. All five nails have to be alike without any additional art, and a perfect seal on their free edges is important for a polished look.
Ask the professional to demonstrate how your selected color base looks with the chrome pigment, because the same powder may appear silver, green, and icy blue. This is a salon finish if you do not already work with compatible gel products. The GelBottle’s chrome application guide describes the base, powder, and sealing process. If you want a gentler sheen with regular lacquer, the pearl glaze above is the more direct route.
How to Apply
- Have a nail professional prepare medium squoval nails and apply a compatible gel base and cool mint color.
- Create the chrome-receptive layer according to the chosen product system.
- Rub fine silver-green chrome pigment evenly across each nail, keeping the cuticle margin neat.
- Brush away loose pigment and seal with the appropriate gel top coat, curing as directed.
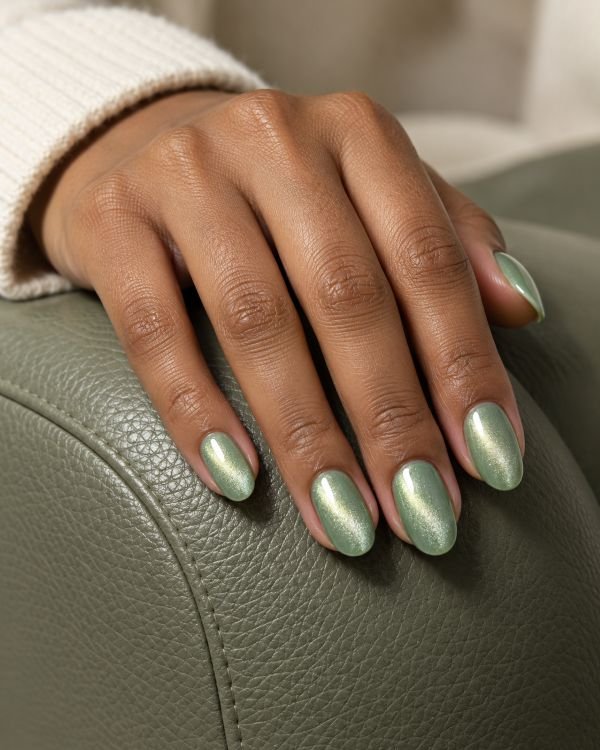
13. Mint Velvet Cat-Eye Nails
Fine magnetic shimmer gives this mint manicure a soft, plush-looking glow. Medium oval nails start with an opaque mint gel and receive a compatible pale champagne-green magnetic layer. Bring the reflective particles toward a wide central area on every nail, avoiding a sharp diagonal beam. A clear glossy top coat sits above the effect; the word velvet refers to the light, not a textured surface.
This is worth bringing to a salon when you want dimension but no painted motif. Ask for a broad reflection rather than a narrow cat-eye stripe, and check a sample nail under both bright and dimmer light. Magnet placement happens before the relevant gel layer is cured, as The GelBottle’s cat-eye guidance explains. Nail Blooms’ cat-eye nail ideas offer other reflection placements if you decide you want a more defined beam.
How to Apply
- Have a nail professional apply and cure a compatible gel base and mint color on medium oval nails.
- Apply a suitable pale champagne-green magnetic gel without curing that layer yet.
- Move the magnet around each nail to gather a broad central glow, then cure according to the system.
- Finish with the appropriate glossy gel top coat and cure fully.
14. Matte Mint Nails with Glossy Grid Lines
The texture creates a subtle pattern that appears only with a movement of light. To create such a nail design, you should paint the square medium-sized nails with opaque cool mint. Make the manicure matte and using a thin brush add clear gloss on two vertical and two horizontal lines over the index and ring finger, forming a grid pattern. The thumb, middle and pinkie fingers will remain just matte cool mint.
This nail art looks like just a basic cool mint manicure from afar, while closer it will show the grid design without having two shades of green compete. Keep the lines widely apart because otherwise they may become hardly visible on short nails and merge with the background. This contrast between two finishes can be done with regular nail lacquer provided that matte nail polish is completely dried before applying the gloss. Otherwise, all of the nail polish will become glossy.
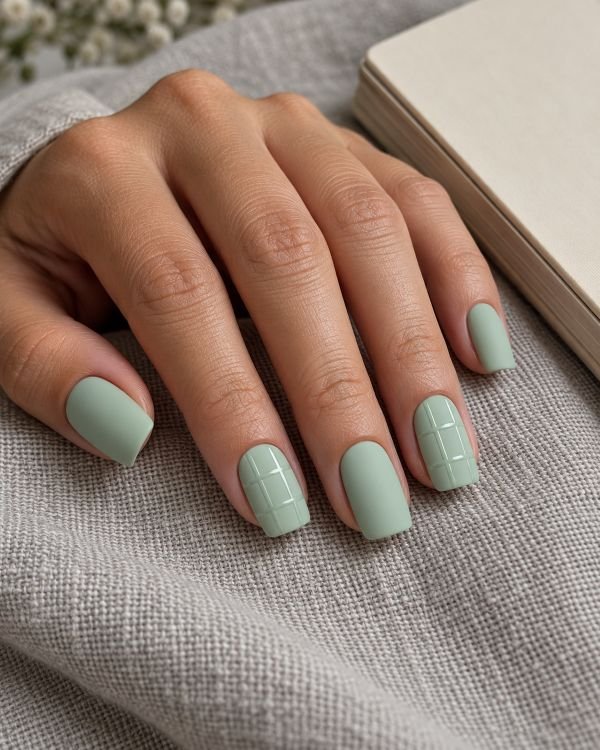
How to Apply
- Cover medium square nails with opaque cool mint polish and let it dry.
- Apply a matte top coat to all five nails.
- With a fine liner, paint two clear-gloss vertical and two horizontal lines on the index and ring nails.
- Allow the lines to dry without coating the matte areas again.
15. Mint and Cocoa Polka Dot Nails
A warm brown dot will create a totally new vibe for the mint accent not commonly seen in white or pastel nail designs. Paint three short square nails in opaque spearmint color. In the index and ring nails use sheer beige base and add five dots on each of them, which should be spaced widely and have cocoa-brown color. Make sure that they are of the same size but placed irregularly; top coat will help you unify all mixed bases.
Such fun design is restrained enough for small nails. Warm brown will match the leather accessories and mint tips will help you link the dots accents with plain nails. Dotting tool is helpful in creating circles at home, but you should wait until the beige base will dry because brown may smear. Do not place dots on all five nails because the combination of plain green and sheer nail pattern creates rhythm of the hand.
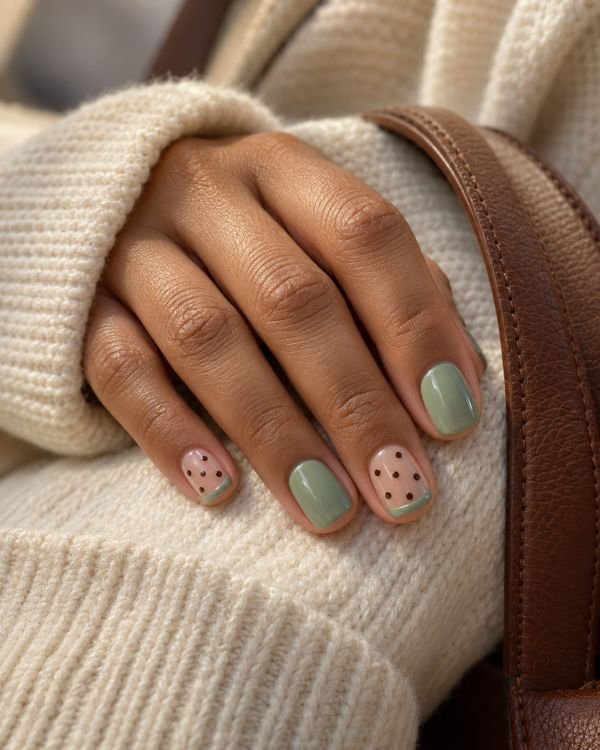
How to Apply
- Paint the thumb, middle, and pinkie opaque spearmint; apply sheer beige to the index and ring.
- Add five spaced cocoa-brown dots to each beige accent with a dotting tool.
- Trace a narrow mint tip along each dotted accent’s free edge.
- Let the dots and tips set, then seal the set with clear gloss.
16. Mint Nails with Pressed Lavender Accents
The accent nails look like miniature plant samples displayed under a glass. For the medium oval nails, apply the cool opaque mint to the thumb, middle, and little fingers. Apply the translucent blush to the nails of the index and ring fingers and then put the small flat pressed lavender sprig on each of them at an angle facing outwards. The dried flowers should be sealed under a clear layer of gel without any stem showing outside. The finished nails will be shiny.
It is a different look compared to flower painting because the texture and the shape of the actual dried sprig make the difference. It requires the proper encapsulation material and also someone experienced in working with the particular type of gel. It is important to use really small nail art samples since the large flowers would make bulky nails and would be hard to encapsulate. It is always better to request a sample placement of the sprig before applying the clear layer.
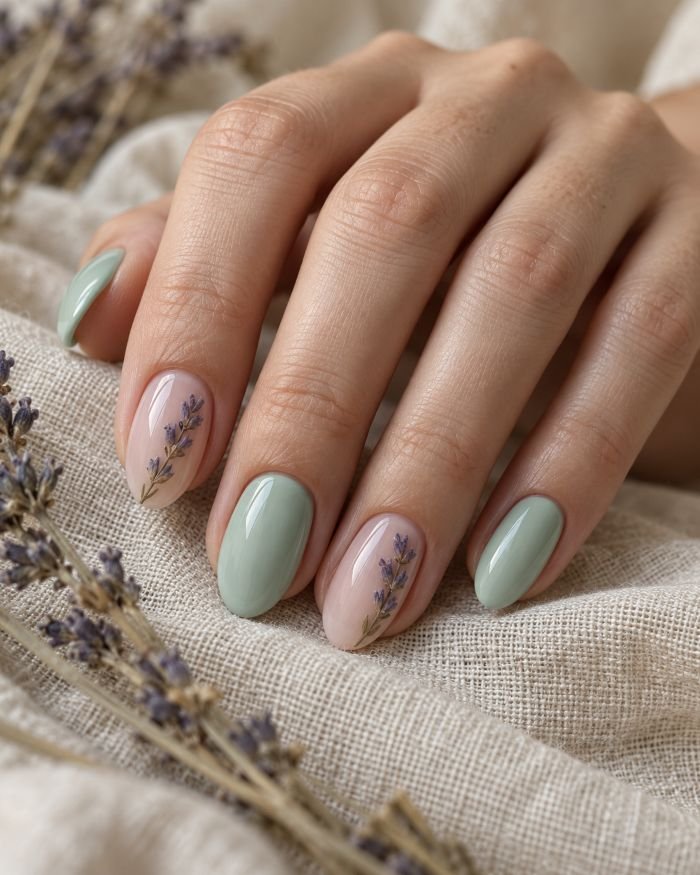
How to Apply
- Have a nail professional prepare medium oval nails, painting three opaque mint and two translucent blush.
- Position one fully dried, thin pressed lavender sprig on each blush accent within a suitable gel layer.
- Encapsulate the flowers completely with compatible clear product and cure according to its instructions.
- Refine any bulk and finish all five nails with smooth glossy top coat.
17. Mint and Butter Yellow Pinstripe Nails
Very subtle yellow stripes add warmth to the mint without making it a complete multicolor design. Medium squoval nails are painted with a cool mint opaque base. The index finger and ring finger should have three parallel yellow stripes painted down the side of the nails leaving green in between them and also all around the rest of the plate. The remaining nails stay mint color and a clear glossy top coat will help define those stripes.
Painting them vertically will help keep them noticeable without having to take a photograph with your hands straight out in front of you. The pale yellow might blend in with the mint color if both colors are too close in value so you can paint one stripe and see if a creamy yellow is best for the stripes. Using a striping brush is easier than using tape to do the thin yellow stripes.
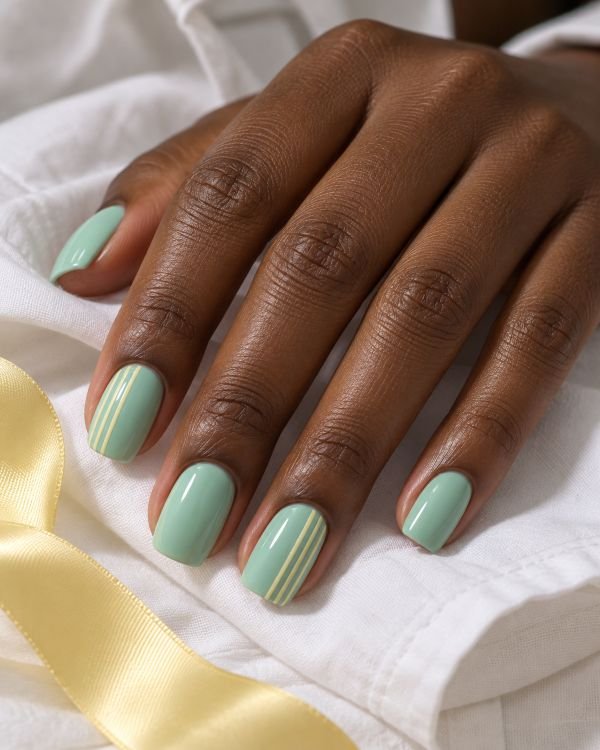
How to Apply
- Cover medium squoval nails with two thin layers of opaque cool mint.
- On the index and ring, draw three slender butter-yellow vertical lines along one sidewall.
- Space the lines so strips of mint remain visible between them, cleaning any uneven ends.
- Let the stripes dry and finish with clear glossy top coat.
18. White Daisy Accents on Mint Nails
Two little flowers can transform a cream manicure. The nails have opaque pastel mint color. One little flower has five petals and is located next to the middle finger wall. Another is a partial flower that comes out from the ring finger corner. Add little green spots in the middle of the flowers. You can use yellow for the flowers instead of white but the palette will get warmer if you do that. Other nails will remain empty under the same clear gloss coating.
The design requires the use of dotting tools. It will be easier to create if you allow the mint background to dry first and keep some distance between the petals. The partially cropped flower can be used on a short nail because there is no necessity to fit it into the nail plate completely. Do not add any outline if the petals start joining together. There are some other daisy nail designs from Nail Blooms’ daisy nail designs that can be used.
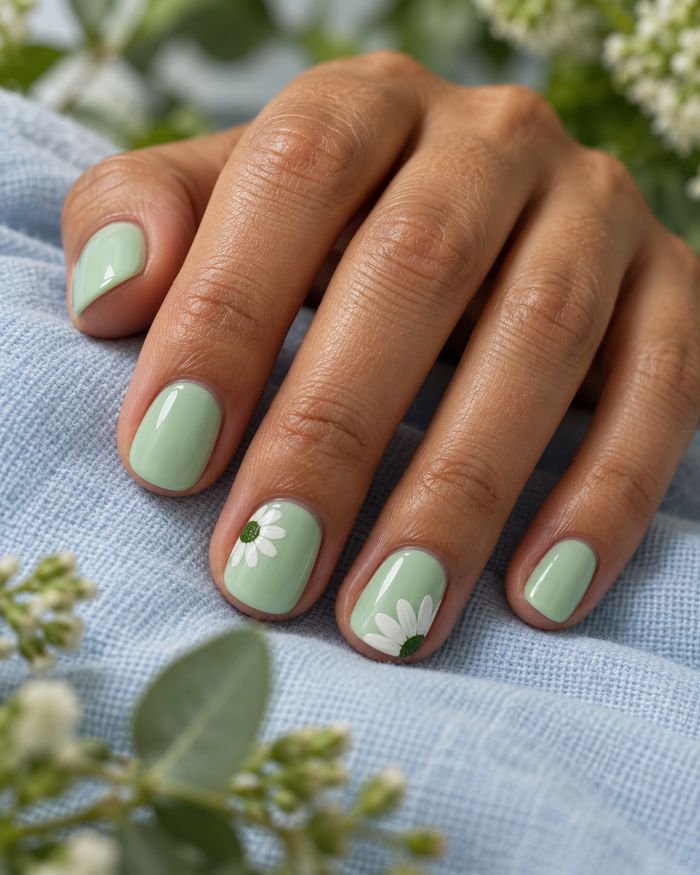
How to Apply
- Paint five short round nails with opaque pale mint and let the color set.
- Dot five white petals near the middle-finger sidewall and a partial flower across the ring tip.
- Add a small deeper-green center to each bloom after the white dries.
- Float a clear glossy top coat over all five nails without smearing the dots.
19. White Botanical Stems on Mint Nails
The flowers in this botanical design have turned into lines. Medium almond nails feature a satin mint background nail color and thin white stems coming out of the lower edge of the index and ring fingernails. Three pairs of narrow leaves sit on each stem and the stem ends at its point. Three nails do not have any other colors apart from the mint background, allowing the white drawings to be noticeable.
The long stems flow along with the shape of the almond nails rather than against it. In contrast with the daisies that adorn the tips above, there are no round petals or centers nor are there any scattered flowers. Narrow leaves may be created by means of a fine liner brush although a botanical decal would be a good option if you desire the same delicacy on both your hands. Do not forget to ask for the satin top coat along with the base.
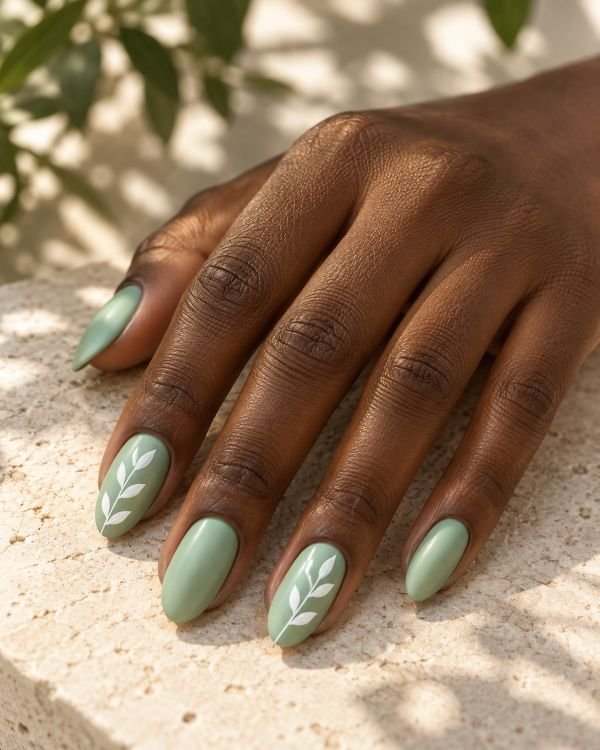
How to Apply
- Cover medium almond nails in an opaque mint base and let it dry.
- Draw one thin white stem from the lower outer corner of each index and ring nail.
- Add three pairs of tapered white leaves along each stem, leaving the tips clear of artwork.
- Seal all five nails with a compatible satin-finish top coat.
20. Fine Mint Gingham Nails
These little squares should be similar to fabric, and not to a checkerboard of large squares. The medium oval nails should have a warm-ivory background on index and ring nails, decorated with thin mint lines vertically and horizontally. Slightly enhance the small intersection squares with another green color. Paint your thumb, middle and pinkie nails solid mint and cover all nails with the same glossy finish.
It is for a reason that you need to confine yourself only to two nails with a pattern: five different designs may overwhelm pale mint nail polish, especially in a picture taken from close proximity. It is much better to space out evenly, rather than have precisely even microscopic lines. You will need a long striping brush, a properly-sized transfer decal, or a nail tech who likes to create fine lines. Make sure there is enough ivory in-between the lines of the thin nails, since if they intersect, then your gingham will lose its brightness.
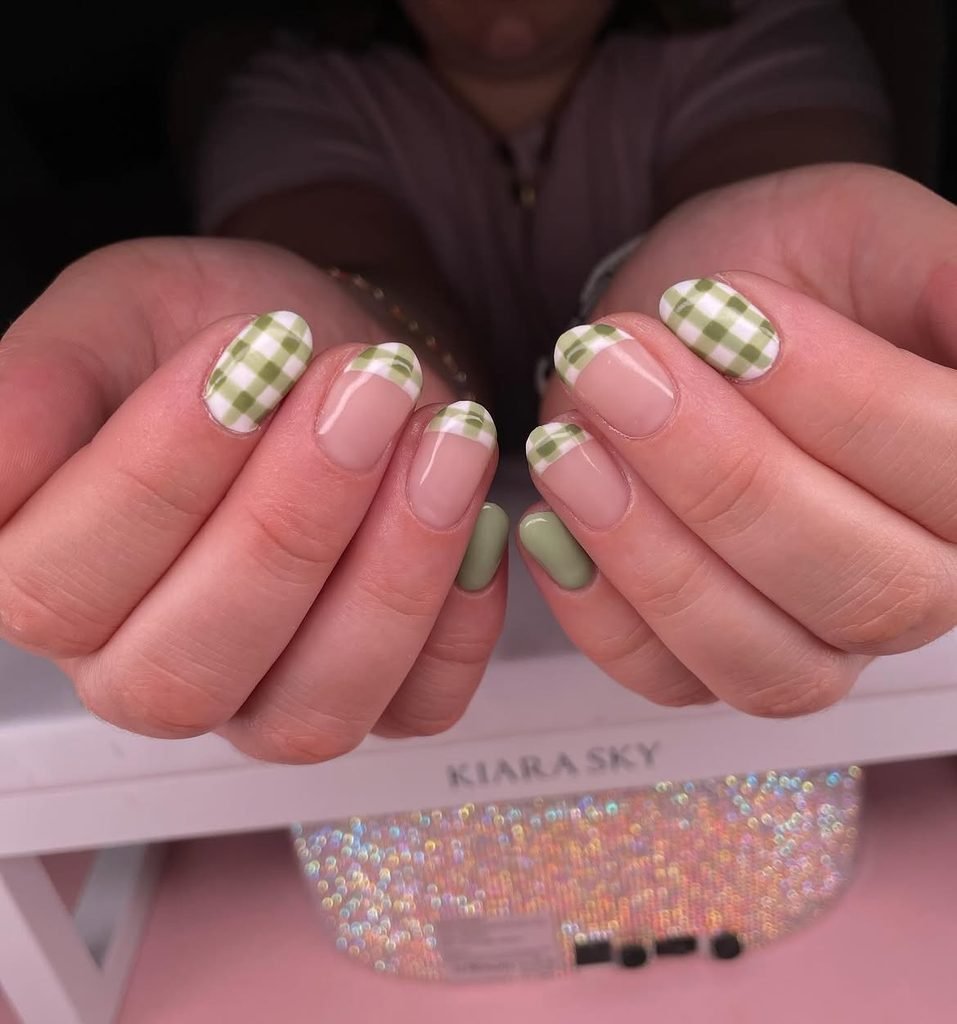
How to Apply
- Paint three medium oval nails opaque mint and the index and ring warm ivory.
- Draw evenly spaced fine mint vertical and horizontal lines on both ivory nails.
- Add tiny deeper-green squares where selected lines cross to suggest woven overlap.
- Let the grid dry and seal all five nails with soft gloss.
21. Speckled Mint Terrazzo Nails
Instead of dots, imagine tiny chips of light green floating in pale green. Short nails start out as an opaque mint nail polish. Add random, uneven speckles in dusty white, warm peach, and sage, all of different sizes and angles, to the index, middle, and ring fingers. The thumb and pinky nails remain a solid mint color. Applying a shiny top coat gives the flat, even-looking chips the appearance that they are encased in the base color.
The shapes being uneven sets terrazzo apart from polka dot nails, and having just three colors prevents the look from appearing like confetti. This nail art can be created at home using a small brush; however, only apply a handful of chips at once and observe your hand from afar to make sure they are distributed properly. If you have short nails, having a large peach chip surrounded by smaller chips of white and sage is more easily visible than having tiny specks covering the surface.
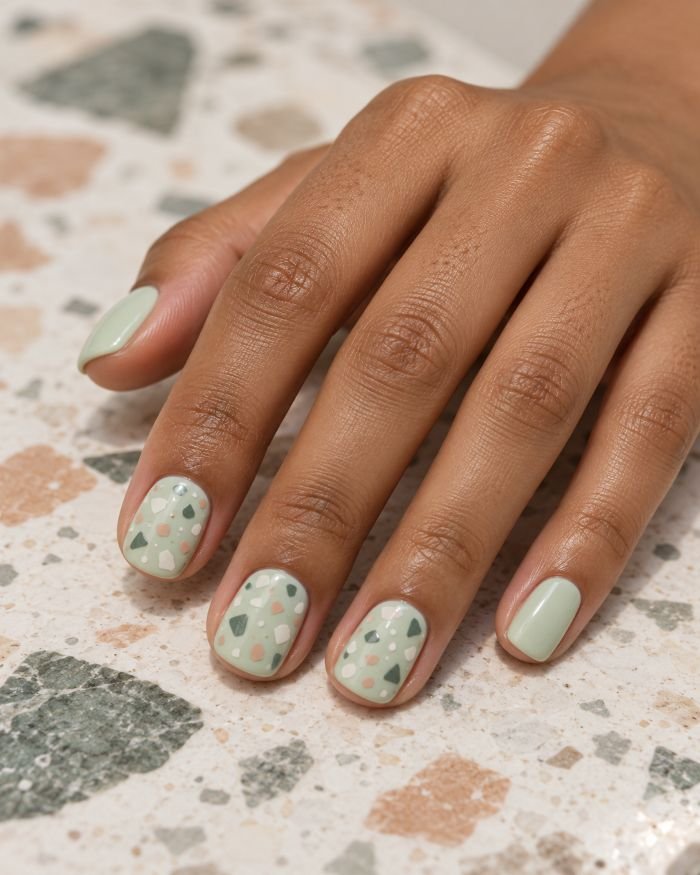
How to Apply
- Paint short squoval nails opaque pale mint and let the base dry.
- On the index, middle, and ring, add a few irregular warm-white and dusty-peach chips with a fine brush.
- Fill selected gaps with smaller sage flecks, keeping plenty of mint visible.
- Cover with a smoothing clear glossy top coat after the flat art sets.
22. Mint Nails with Gold Foil Cuticle Arcs
The last set has the mint nails remain opaque while allowing metal accents to border them. The medium oval nails feature cool pastel mint cream polish. Apply small warm gold foil pieces on broken arcs on the sides of the index and ring nails above the cuticles with gaps between the pieces, while the rest of the nails will remain unadorned. Clear gloss will set the accents while allowing green to be the leading color.
This will involve foil pieces scattered about rather than painting the gold in the shape of a line. This broken line will catch the light in contrast to the ring while not having every nail look like metal. Small pieces should be used, pressed flat and then sealed, otherwise one loose corner could snag clothing. In case silver jewelry suits you better, a cool silver foil will give a different direction to the style but still using the same placement and size of foil.
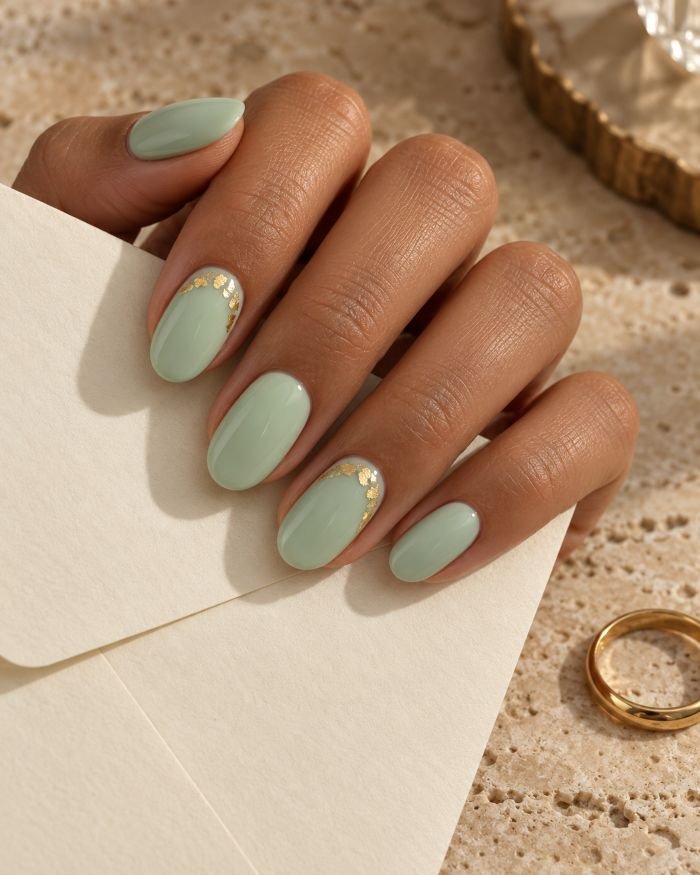
How to Apply
- Apply two thin coats of opaque cool mint to medium oval nails.
- Prepare a suitable tacky layer or foil adhesive near the index and ring cuticles.
- Press tiny warm-gold foil fragments into loose broken arcs, leaving visible mint between them.
- Smooth and seal both accents with compatible clear glossy top coat.
How to Choose Your Shade of Mint
Place two swatches of mint next to each other and you’ll see how different they look compared to their appearance in the bottle. Cooler mint has an undertone that’s more aqua, warmer spearmint has a touch of yellow, and seafoam can be a little bit grayish. Figure out if you need the color to complement what you already wear or if you would like it to be a bit unique.
Transparency of the color is another option that you need to consider. Opaque cream offers you a nice green canvas, a milky mint allows some natural nail to peek through, while jelly is more glassy and clearer. Apply swatch in as many coats as you plan to use. The more you apply to make your sheer color opaque, the thicker it will get.
Which Nail Shapes and Lengths Suit Mint?
Tiny oval and squoval nails accommodate solid mint, milk polishes, miniature daisy motifs, and mini French tips. Square nail shapes will have a slightly more angular line for a gingham, glossy checkerboard grid design, or diagonal blocks of colors. Medium almond nails provide enough space to create double French tips, wave-style negative-space designs, and plant motif stems that complement the nail’s tapering shape. These are merely suggestions about proportion rather than restrictions regarding the shapes of nails.
If there is an extension in the reference, determine which feature you would like to retain and then adjust your nail length. The larger wave could be an accent line on its own, while a complete gingham set of nails could become a pair of patterned nails. Making everything smaller to fit a short nail shape can sometimes render the nail design unrecognizable. On the other hand, a simple Nail Blooms’ oval nail ideas on longer nails may not require any art at all since the design lies in the shape and color.
Which Mint Nail Designs Can You Do at Home?
Opaque spearmint cream, milk finish, basic dots, and daisy accents are fine for regular lacquers and basic techniques. French tips, gingham and pinstripes require more precision; consider testing one accent nail before doing your entire manicure. OPI’s lacquer application guidance suggest thin, even color layers, which will come in handy if your pale mint shows streaks during the first coat. OPI
For more reflective or dimensional sets, a different strategy is required. Rubbed chrome pigments and magnetic cat-eye gels require special techniques and equipment for gels. Real pressed flowers must be dried, thin and encapsulated underneath something appropriate, so it would be wise to consider a technician or custom press-on nail maker if you are not already familiar with this process. Pearly lacquer topcoat will make your mint look shiny without any imitation of chrome. Reference image and indicate finish you would like to have.
How to Keep Pale Mint Polish Looking Even
Mint cream can detect traces of brush lines and irregular cuticle lines better than dark green. Begin with a smooth base and apply light and few strokes rather than pulling the brush against setting polish. Allow each layer to dry according to its product instructions and examine under natural light. Second light coat tends to improve coverage than applying one heavy coat. Keep a distance between the polish and other skin areas for a defined line.
Consider the maintenance while selecting your texture. You can update your shiny lacquer polish using the same type of clear top coat, but applying gloss over matte mint will make the grid design invisible. Look out for any lifted edges on your foil and make sure that flowers are not raised to avoid them from snagging on clothes. In case you have applied gel, chrome, or magnetic polish, adhere to the after-care instructions provided with the system.
Final Thoughts
Mint can be almost nude or very green. Milk nail polish is sheer and allows your natural nail to tone down the hue; spearmint nail polish is solid; negative space and little French tips make the hue limited to a certain area. If you desire reflective effect, pearl, chrome, and magnetic velvet will give distinct effect and require different equipment.
Select the concept which you will still want to see in the after photo. This may include short glossy oval nail polish that you can apply yourself, small daisy nail art that will match the current nail length, or salon manicure with encapsulated lavender. Take a screenshot that will show what you mean by the mint undertones, opaqueness, effect, and position.
Found your favorite mint nail design? Upload the look to preview how glossy spearmint, delicate mint French tips, or white daisy accents could look on your own hands before your next manicure.
Try It On Virtually